Every day, Google identifies thousands of unsafe websites. If your site appears on Google’s blacklist, then it can have a devastating impact on your traffic, conversions, and Search Engine Optimization (SEO). It can also destroy your brand’s reputation, as loyal visitors may suddenly start to view your website as dangerous.
If Google blacklists your site, then it’s vital you fix this problem as quickly as possible. Thankfully, there are tools that can notify you if this becomes the case. You can then take steps to remove the malware, spam, or any other issues that are causing Google to flag your website.
In this article, we’ll explore what Google’s blacklist is, and the consequences of being blacklisted. We’ll then share a four-step plan to fix the issue, request a review, and get your website back on track. Let’s jump in!
An introduction to Google’s blacklist (and why it’s important)
As one of the most used search engines in the world, Google has invested significant resources into keeping its users safe. This includes identifying malicious websites and adding them to a blacklist.
This blacklist includes many legitimate websites that have been compromised by hackers. Malicious parties frequently target sites and modify them to include unauthorized redirects or malware.
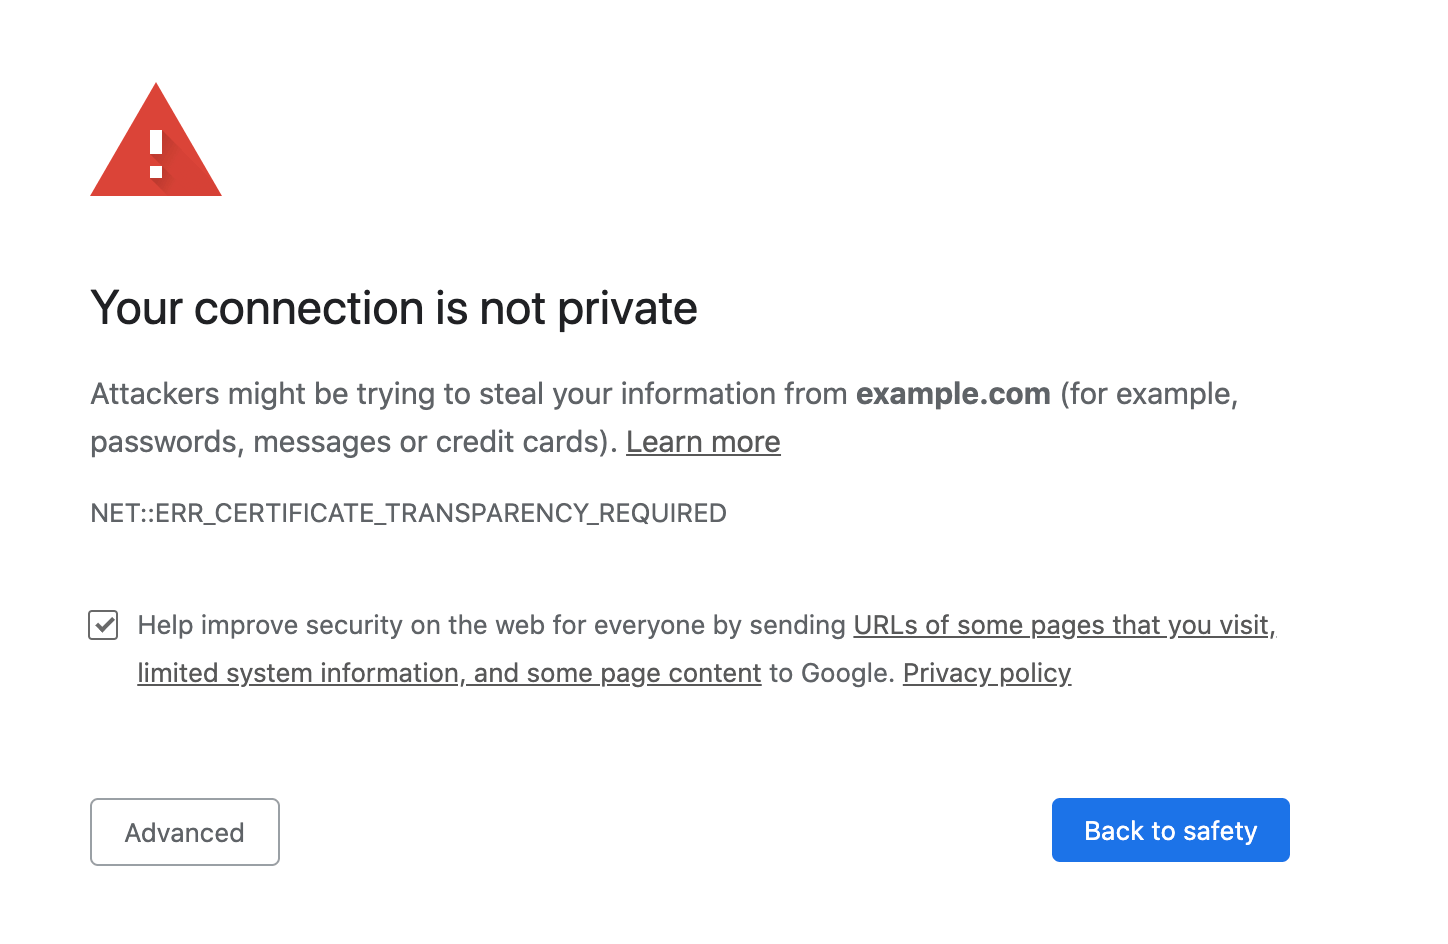
If Google blacklists your website, it will be removed from the search engine’s index. Furthermore, users may be advised by their browsers to avoid your pages, especially if they use Google Chrome:
This helps Google keep its users safe, but it can have a devastating impact on your website. In particular, you should expect a dramatic drop in your website traffic and conversion rate.
Signs that your website might on Google’s blacklist
There are a number of common indicators that your website has been blacklisted. When you try to visit a blacklisted website, you’ll typically receive a Google Safe browsing warning like the one shown above.
These warnings can vary depending on your web browser and the issue that’s impacting your website. If you’re a Chrome user, you can preview Google’s various Safe Browsing warnings by entering chrome://interstitials/ into your address bar:
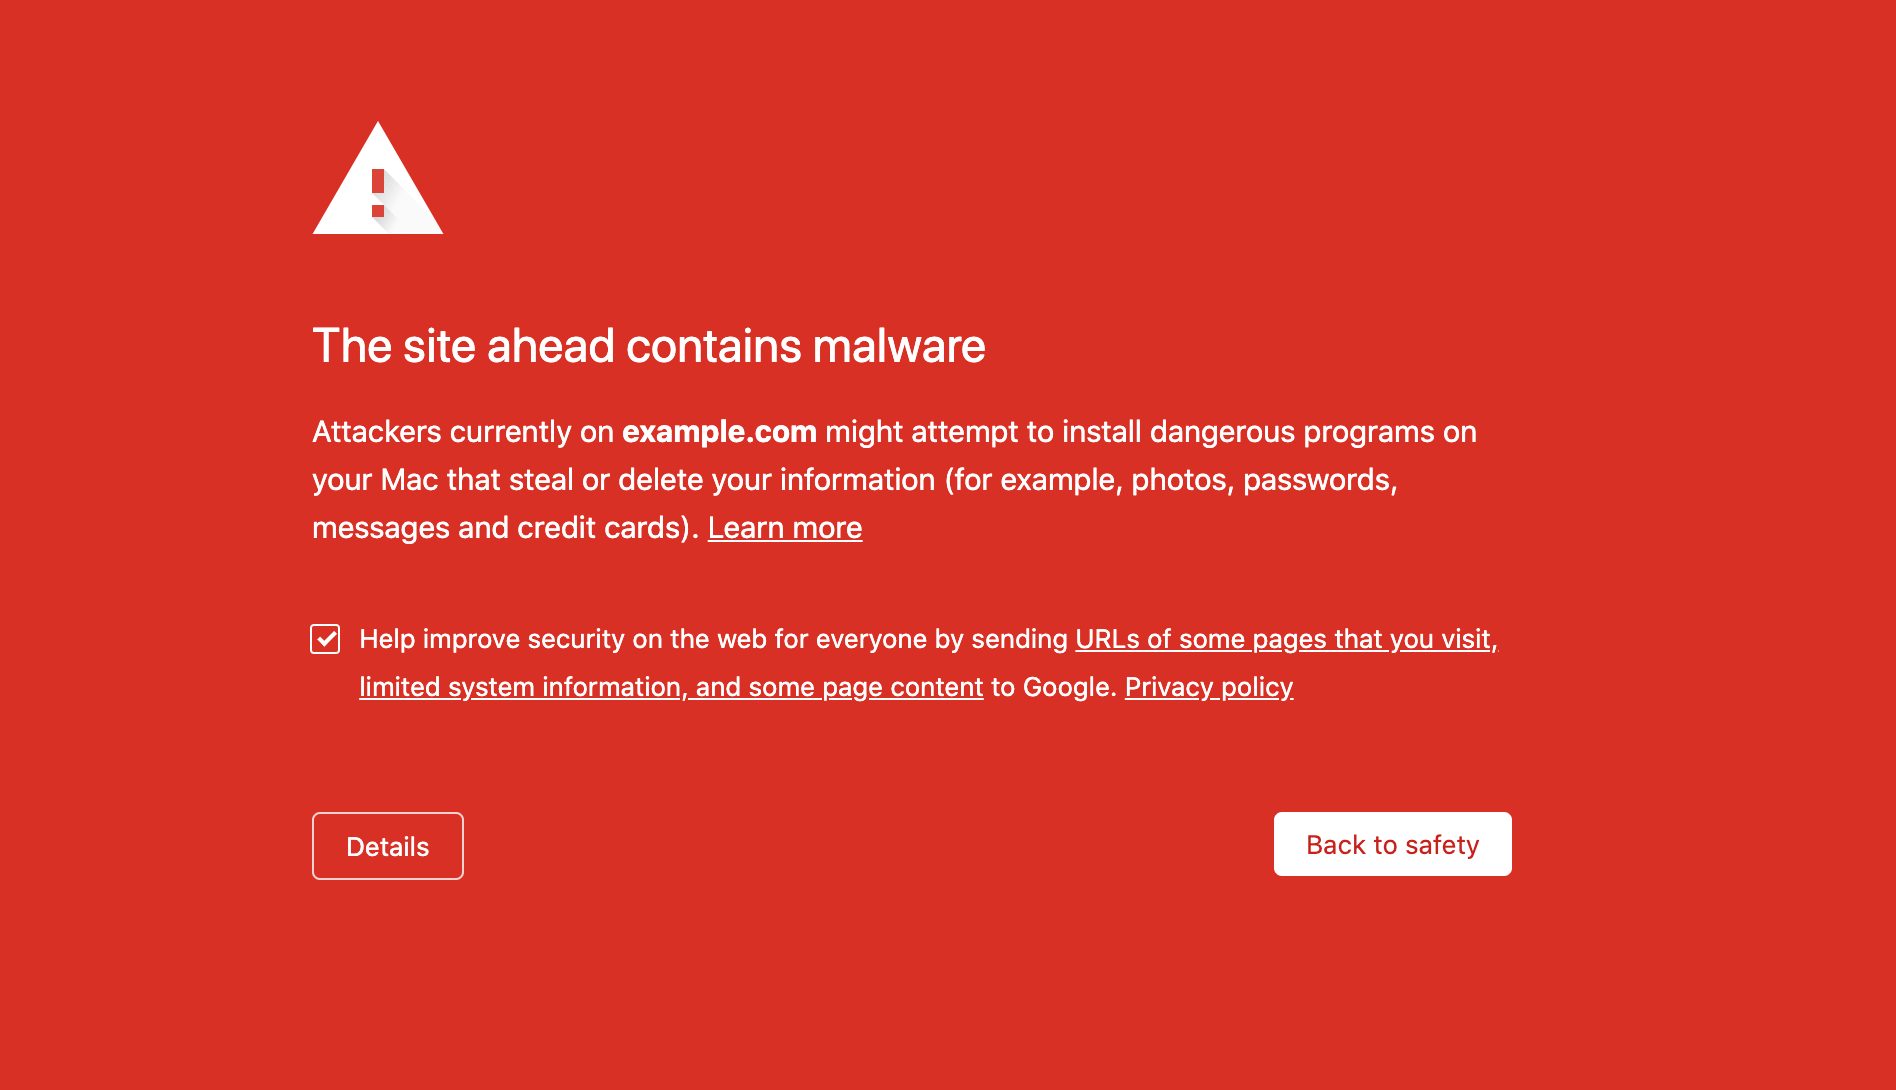
If you encounter any of these warnings, then there’s a chance your site’s been blacklisted.
Malicious websites can sometimes trigger anti-virus or anti-malware software on your computer. If you encounter any security warnings when visiting your own website, then this is another indication that your site has been compromised.
When Safe Browsing identifies a site as potentially harmful, Google displays a warning alongside that website in its search results. If your site ever appears on Search Engine Results Pages (SERPs) with a warning, then this suggests there’s something seriously wrong with your website.
Finally, Google may reach out and tell you that it has blacklisted your site. Every time Google adds an unsafe website to its blacklist, it attempts to notify the webmaster via Google Search Console. Some hosting providers may also monitor popular blacklists, so there’s a chance you may receive a similar heads up from your provider.
How to check whether your site is blacklisted
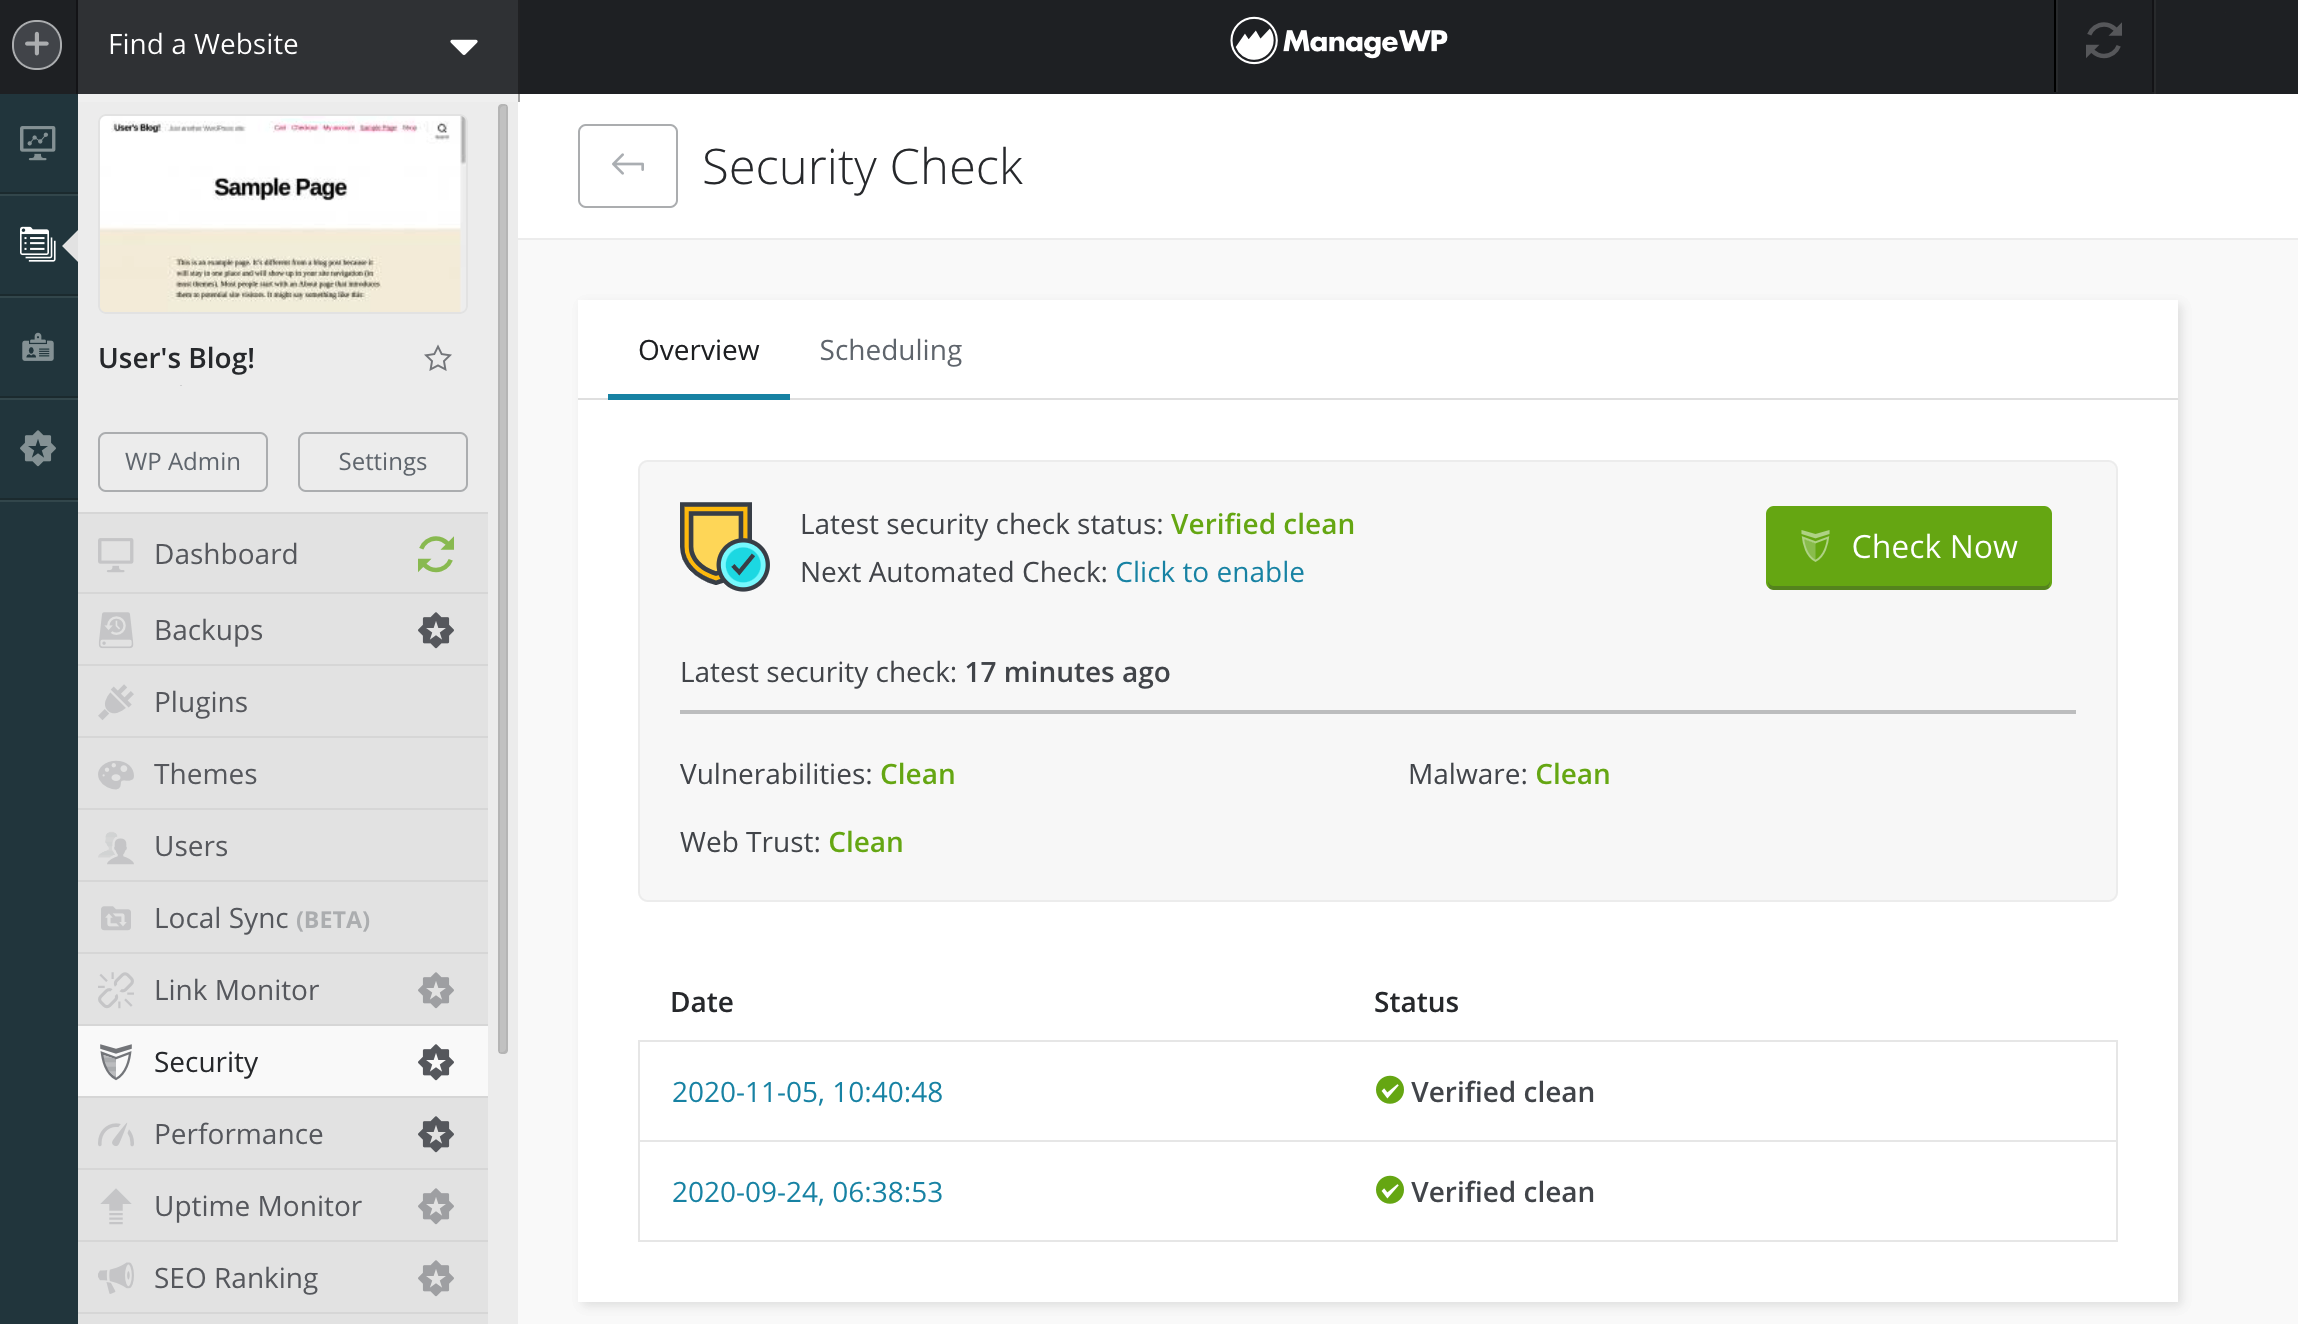
If you want to be certain as to whether your site is blacklisted or not, you can test it using a tool such as ManageWP’s Security Check. In addition to Google, ManageWP checks your site against a number of other security services, including Norton Safe Web and Sucuri Malware Labs.
To perform a scan, log into your ManageWP dashboard. You can then select Security > Check Now. ManageWP will then perform a scan and display the results. You can see whether your site has been blacklisted in the Web Trust tab:
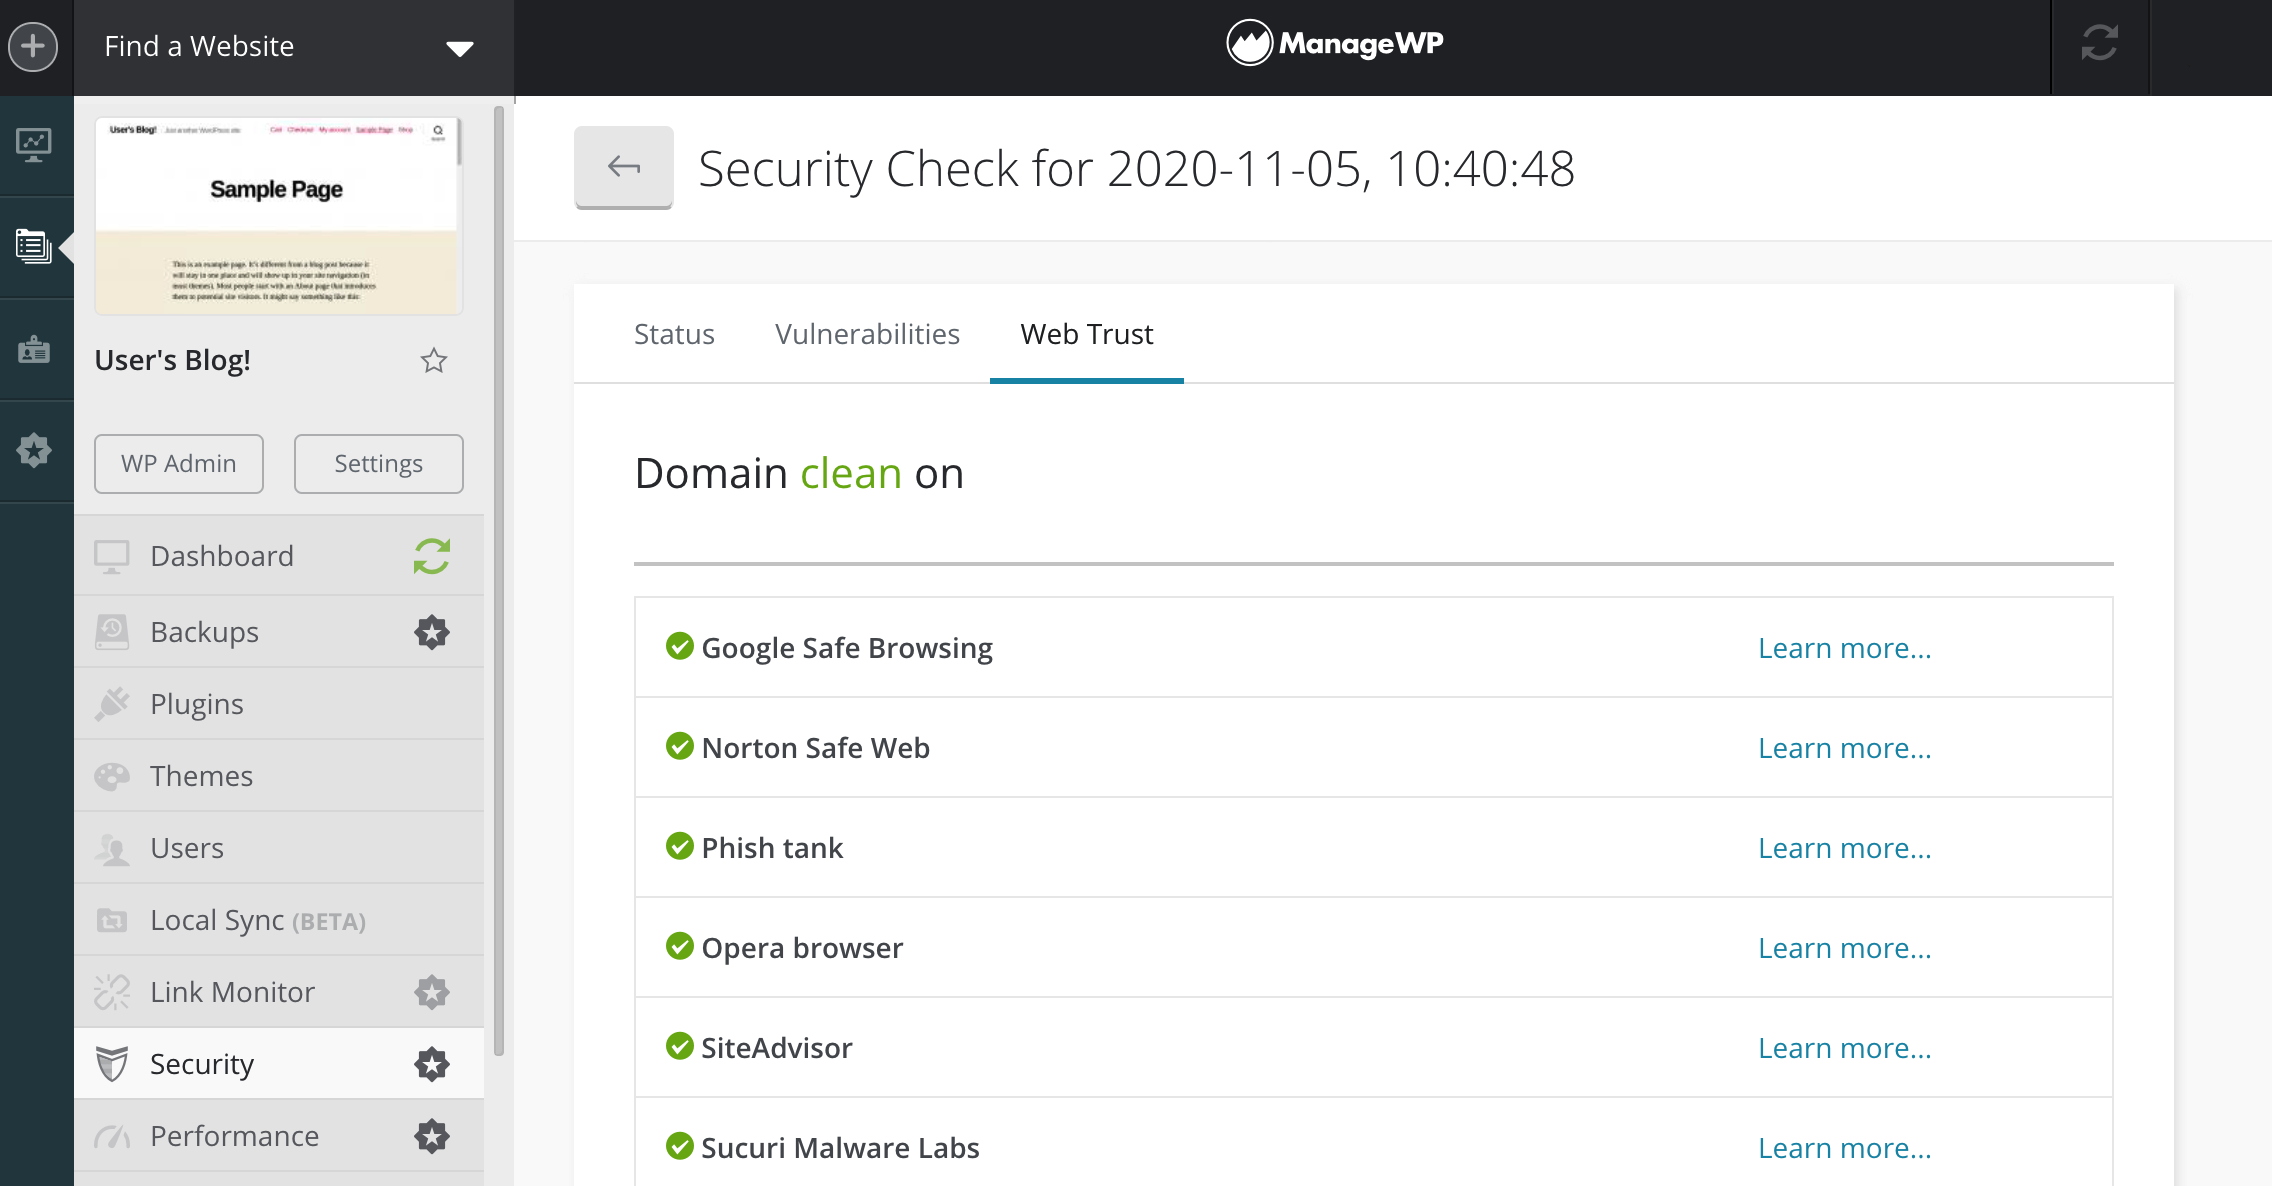
For best results, we’d recommend scheduling ManageWP’s security scans to run automatically on a weekly or daily basis. Once this feature is set up, it will notify you if your website ever appears on any of the major blacklists.
How to remove Google’s blacklist warnings (in 4 steps)
Blacklisting can have a devastating impact on your site’s traffic and conversions. It can also cause even the most loyal customer to question how trustworthy your brand really is. If your website is blacklisted, then it’s important to resolve this problem as quickly as possible.
Fortunately, it takes just a few steps. Note that, when walking through the process below, we’ll assume you already have a Google Search Console account. It takes a while for this tool to start collecting data, so if you don’t already have it set up, you may have to postpone this task.
Step 1: Identify the blacklisted URLs
To start, you need to determine exactly which URL(s) are being blacklisted by Google. This enables you to focus your efforts on specific sections of your website that are experiencing issues.
To check your URLs, log into Google Search Console. Then select Security & Manual Actions > Security Issues. It will display the URLs that are causing problems for your website:
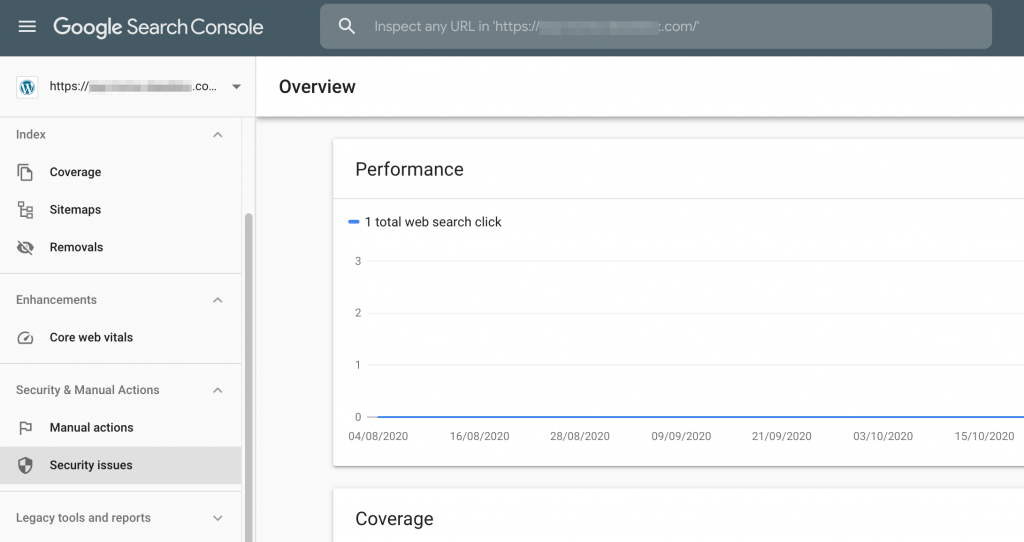
For each URL, Google will display a discovery date, which is when it found this suspicious content. This is useful information, so make a note of the URLs and their discovery dates.
Step 2: Scan your site for malware
There are many forms of malware that can cause your site to become blacklisted. This includes trojan horses, phishing schemes, ransomware, and adware. If your site is blacklisted, then it’s a smart move to scan your site for malware.
If you’ve already used Security Check, then ManageWP will compare your website’s code against its database of known malware. Your security report should already contain a detailed breakdown of any issues discovered.
By running ManageWP’s Security Check, you can verify whether malware is responsible for your blacklisting. However, it’s worth noting that ManageWP also saves all of its past security scans. If you previously scheduled a Security Check, then you’ll have access to a detailed history of your website’s security:
You could potentially cross-reference the discovery dates you identified in the previous step against your archived security scans. This can help you learn more about the origin of the malware, or any other security issues that are impacting your website.
Step 3: Fix the problem
Once you’ve detected a security problem, you’ll need to take steps to resolve it. This process will vary depending on the issue you’ve identified. It might involve restoring a backup that pre-dates the security vulnerability or removing compromised themes and plugins.
If you’re comfortable with editing your website’s files, then you can sometimes remove corrupted files manually. You would then need to rebuild your site using fresh files downloaded from a reputable source. You can also remove malware from your database via phpMyAdmin.
Just be aware that manually removing any malicious code or files can be dangerous. Deleting the wrong file could result in data loss or even break your website beyond repair. You should never edit your website’s code without first performing a full backup. If you’re unsure about how to proceed, then you can always contact your hosting provider or a security service such as Sucuri for support.
Step 4: Request a Google review
Once you’ve resolved the issue, you can request that Google rescans your website. To do so, head over to your Google Search Console account.
Navigate to Security & Manual Actions > Security Issues, and select the Request Review button. Google will then review your website and (hopefully) remove it from the blacklist.
Once you’re back in Google’s good graces, you’ll want to ensure you never get blacklisted again. Make sure to follow security best practices such as updating your themes and plugins, using secure passwords, and continually monitoring your site for malware.
Conclusion
If your website is ever blacklisted, then your traffic will drop dramatically. It can also cause irreparable damage to your reputation, as Google actively warns visitors to stay away from your website.
Fortunately, there are ways to monitor Google’s blacklist, and steps you can take to remove your website from it as quickly as possible:
- Identify the blacklisted URLs using Google Search Console.
- Scan your website for malware with a tool such as Security Check.
- Fix the problem by restoring a backup or otherwise removing malware from your files.
- Request a review via Google Search Console.
Do you have any questions about Google’s blacklist? Ask us in the comments section below!
Image credits: Unsplash.

0 Comments