Email is a powerful way to connect with your ideal target audience. However, before you can wow potential future customers with your marketing content, you need to convince them to subscribe to your mailing list.
By adding a Mailchimp signup form to your WordPress website, you can maximize your chances of converting casual, one-time visitors into potential leads for your business. You can also stay connected to customers over the long run to increase repeat sales.
In this article, we’ll show you how to create a mailing list signup form using the popular Mailchimp platform. We’ll then explore various ways that you can add it to your WordPress website. Let’s get started!
Why you might want to create an email signup form with Mailchimp
The number of email users in the U.S. is estimated to be almost 255 million. In addition, the Email Usage Study suggests that most people spend more than five hours per day checking their work and personal inboxes. Chances are this includes many potential customers, which makes email a prime channel for connecting with them and driving sales.
You might use this opportunity to sell more to your existing customers as well. For example, you can create targeted advertising campaigns based on factors such as geographical location, or the products shoppers have previously purchased.
Email can also be a great way to secure positive customer reviews. According to Bright Local, 76 percent of consumers will provide testimonials if you ask them to. With email, you have a direct but relatively unobtrusive way to communicate with your subscribers, particularly compared to calling them.
You can even use your subscriber list to improve client communications, particularly while working from home. This might take the form of scheduling regular check-ins, or keeping your customers informed about upcoming sales and events.
However, if you’re going to reap the benefits of email marketing, you need a mailing list. One way to encourage visitors to subscribe is to display a signup form prominently across your website.
There are several popular email platforms that integrate with WordPress, but Mailchimp is free for up to 2,000 contacts. It also features drag-and-drop editors that you can use to build engaging campaigns without having to write a single line of code, and has everything you need to create advanced, automated emails.
How to add a Mailchimp signup form to your WordPress website (in 4 steps)
To complete this tutorial, you’ll need a Mailchimp account, so create one if you haven’t already. You can then get to work on building your signup form and adding it to your site by following the steps below.
Step 1: Connect your Mailchimp account to WordPress
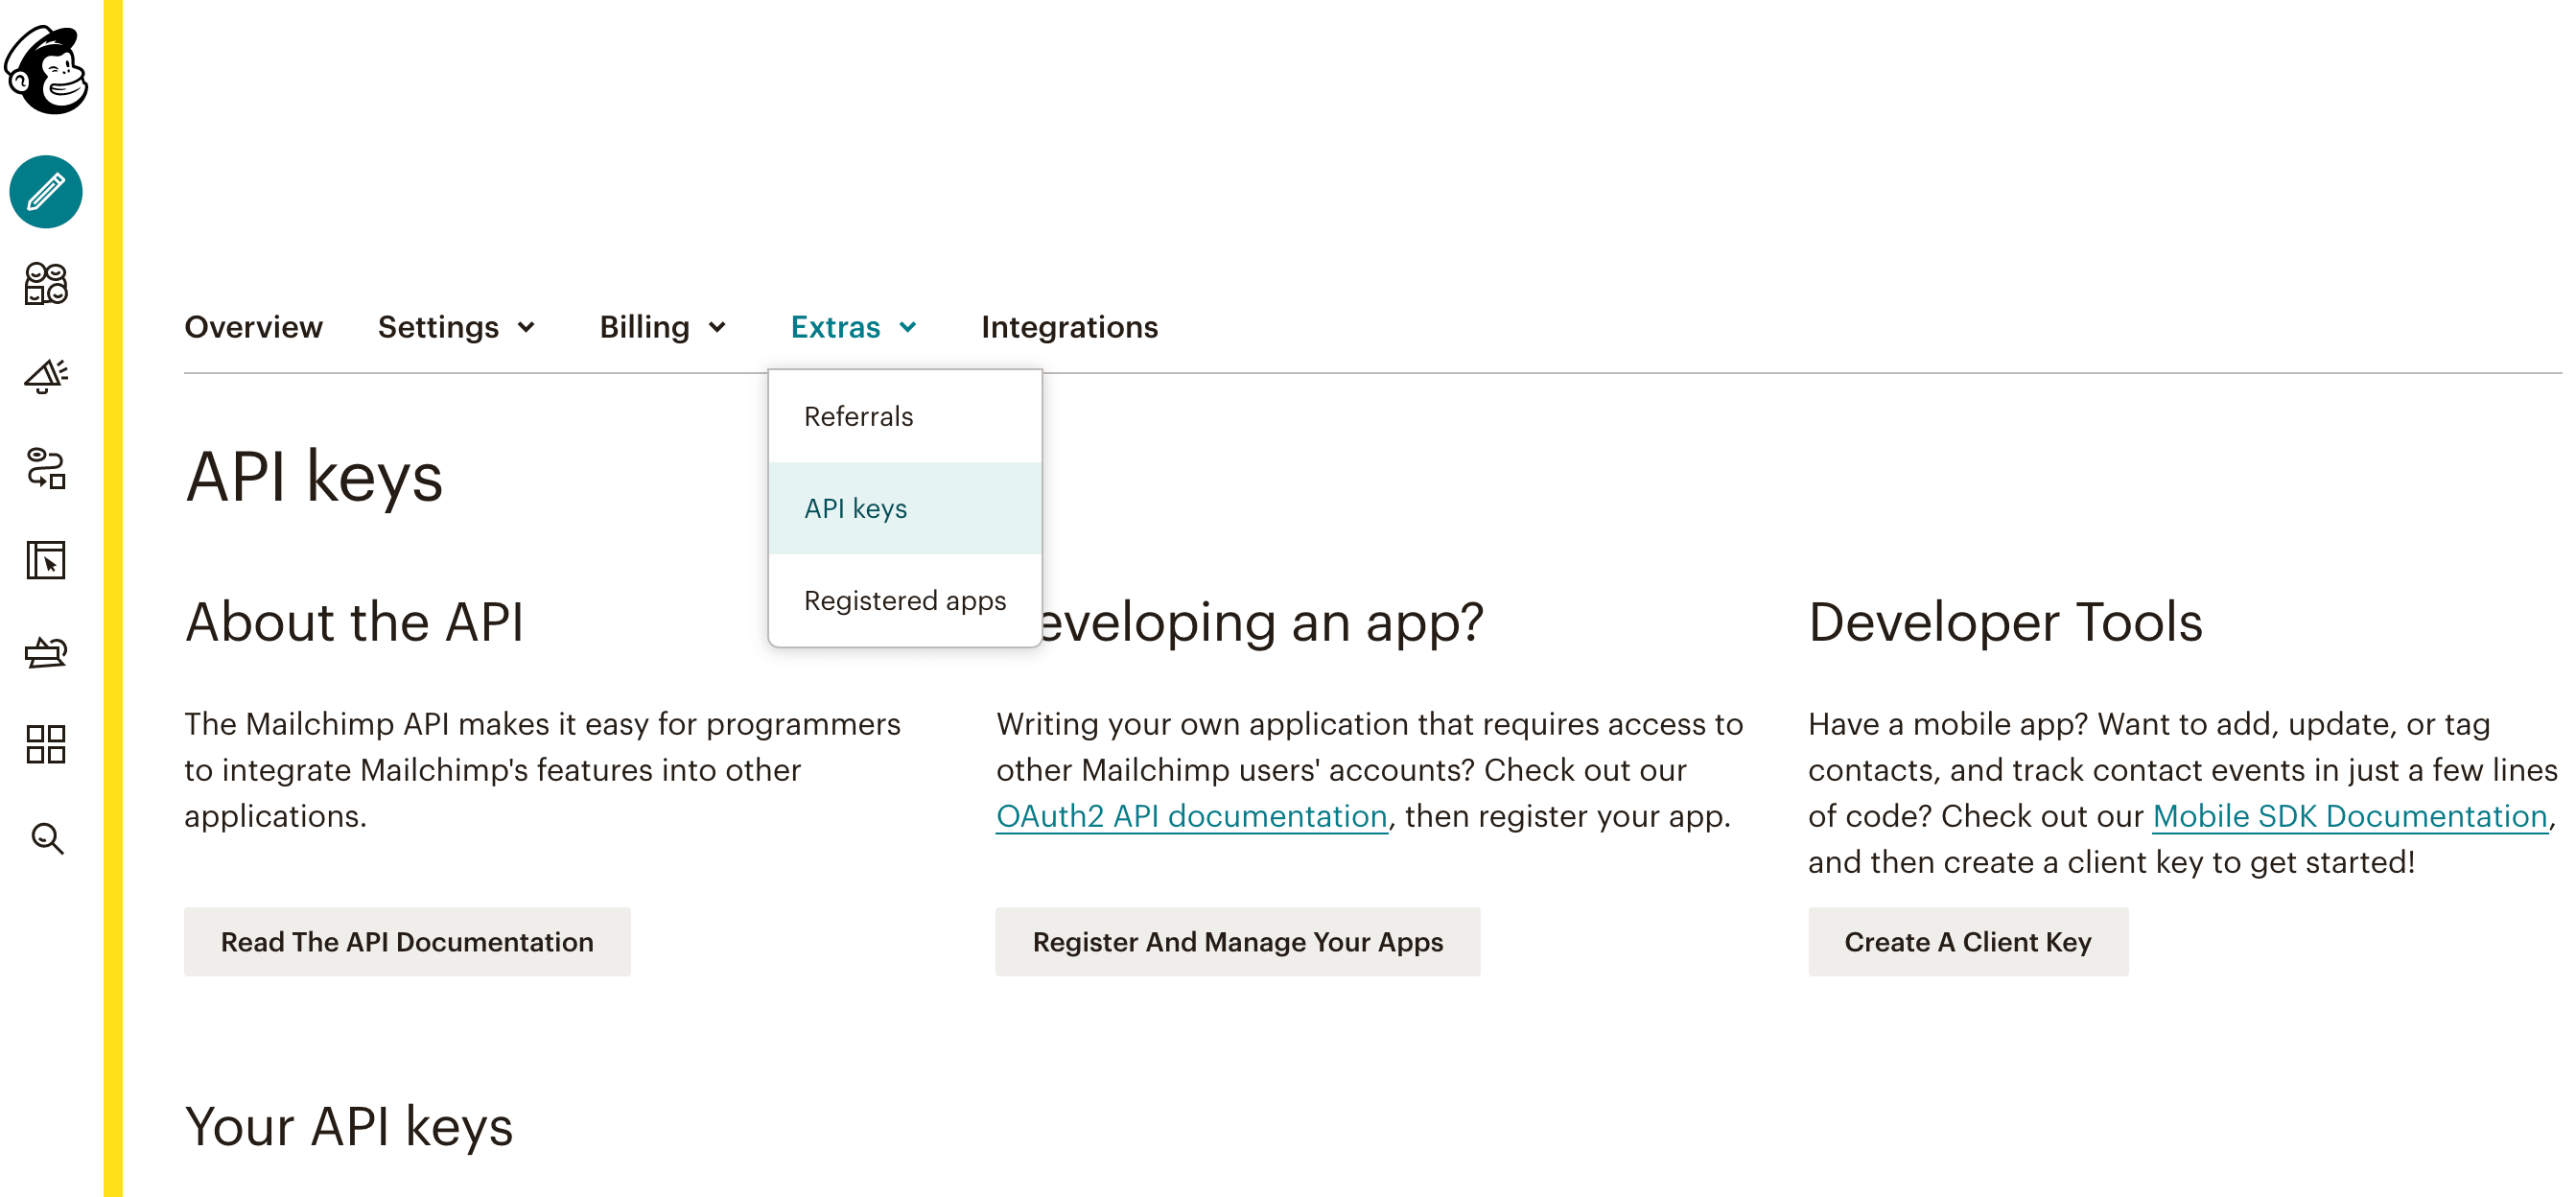
You’ll need an API key to connect Mailchimp to your WordPress website. To generate one, log into your Mailchimp account and then select your profile picture in the upper-right corner. Then navigate to Account > Extras > API keys:
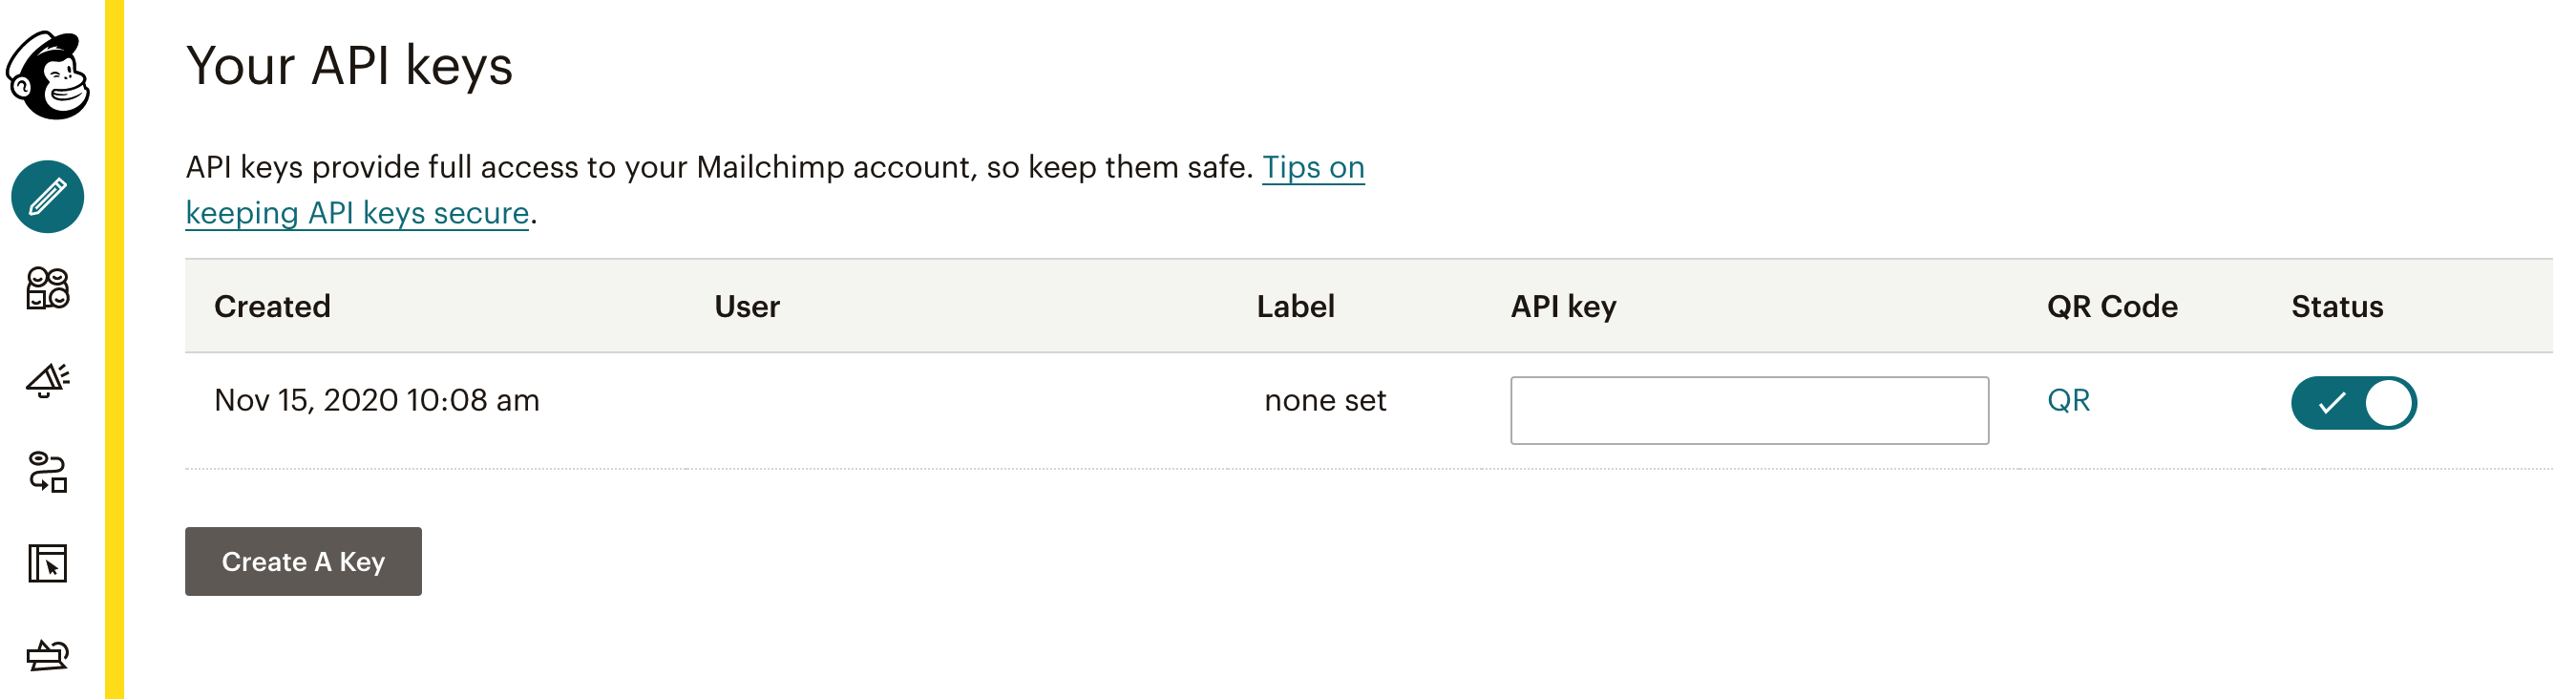
Under Your API Keys, select Create A Key. Mailchimp will then generate your API key:
The easiest way to add this key to your WordPress account is via a plugin such as Mailchimp for WordPress (MC4WP). After installing and activating it, navigate to MC4P > Mailchimp in your WordPress dashboard:
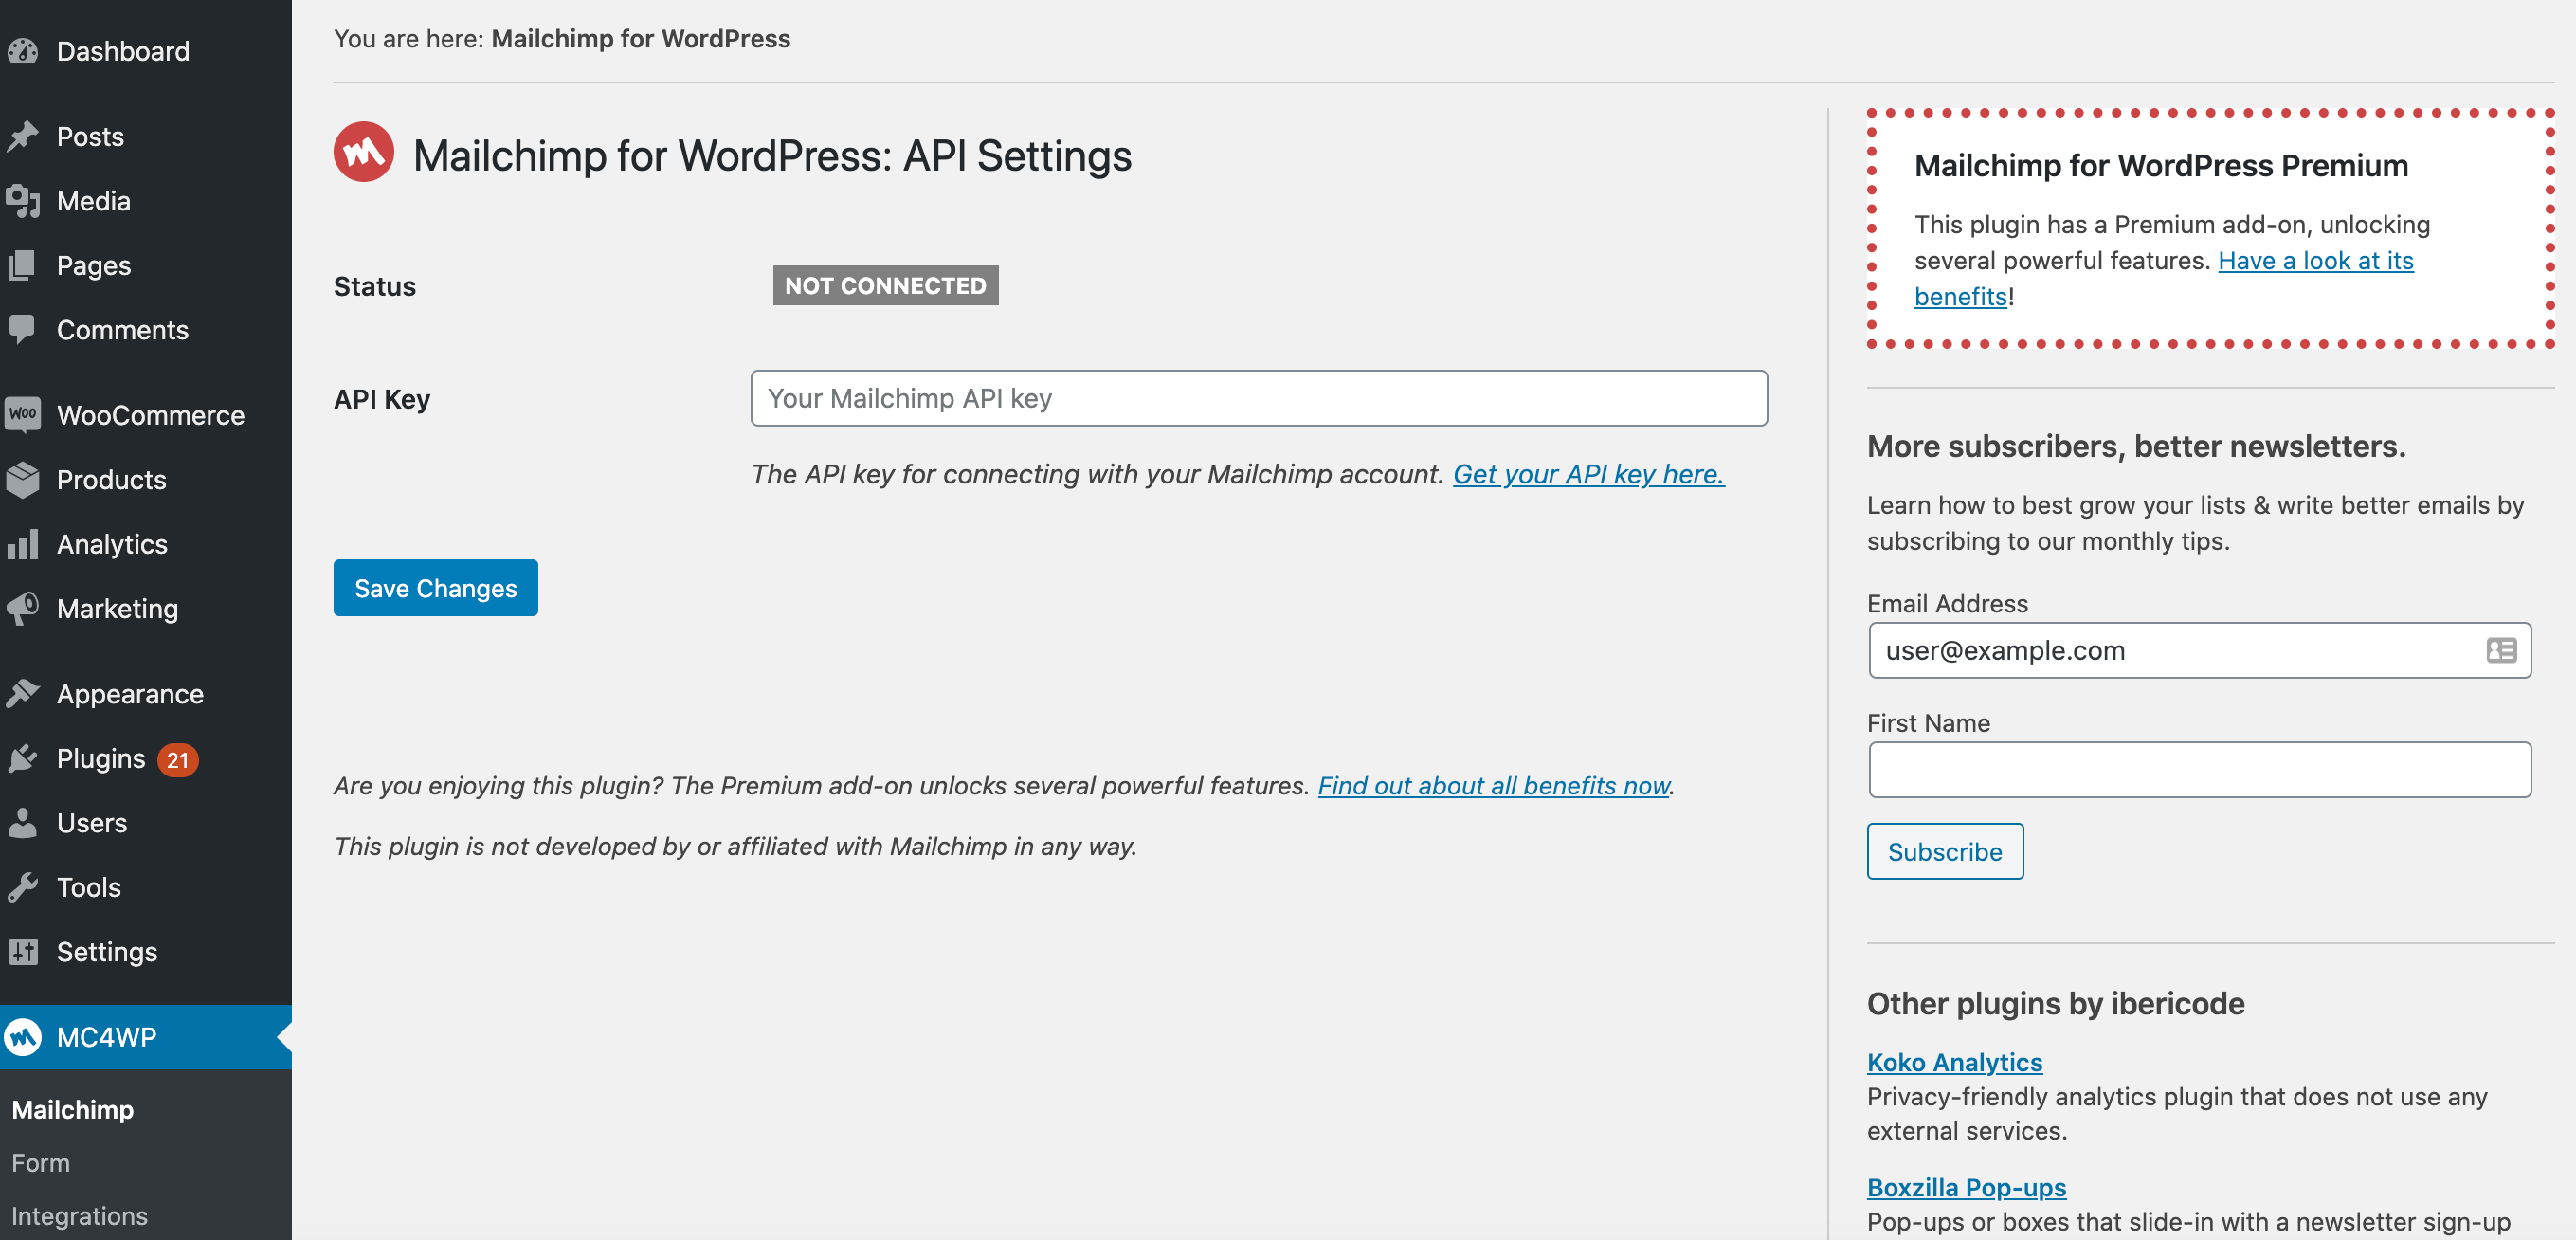
Enter your API key in the relevant field, then select Save Changes. When you first make this connection, it‘s wise to click on the Renew Mailchimp lists button. This will refresh your cached lists configuration and ensure you’re working with the latest version of your Mailchimp data.
Step 2: Build your Mailchimp signup form
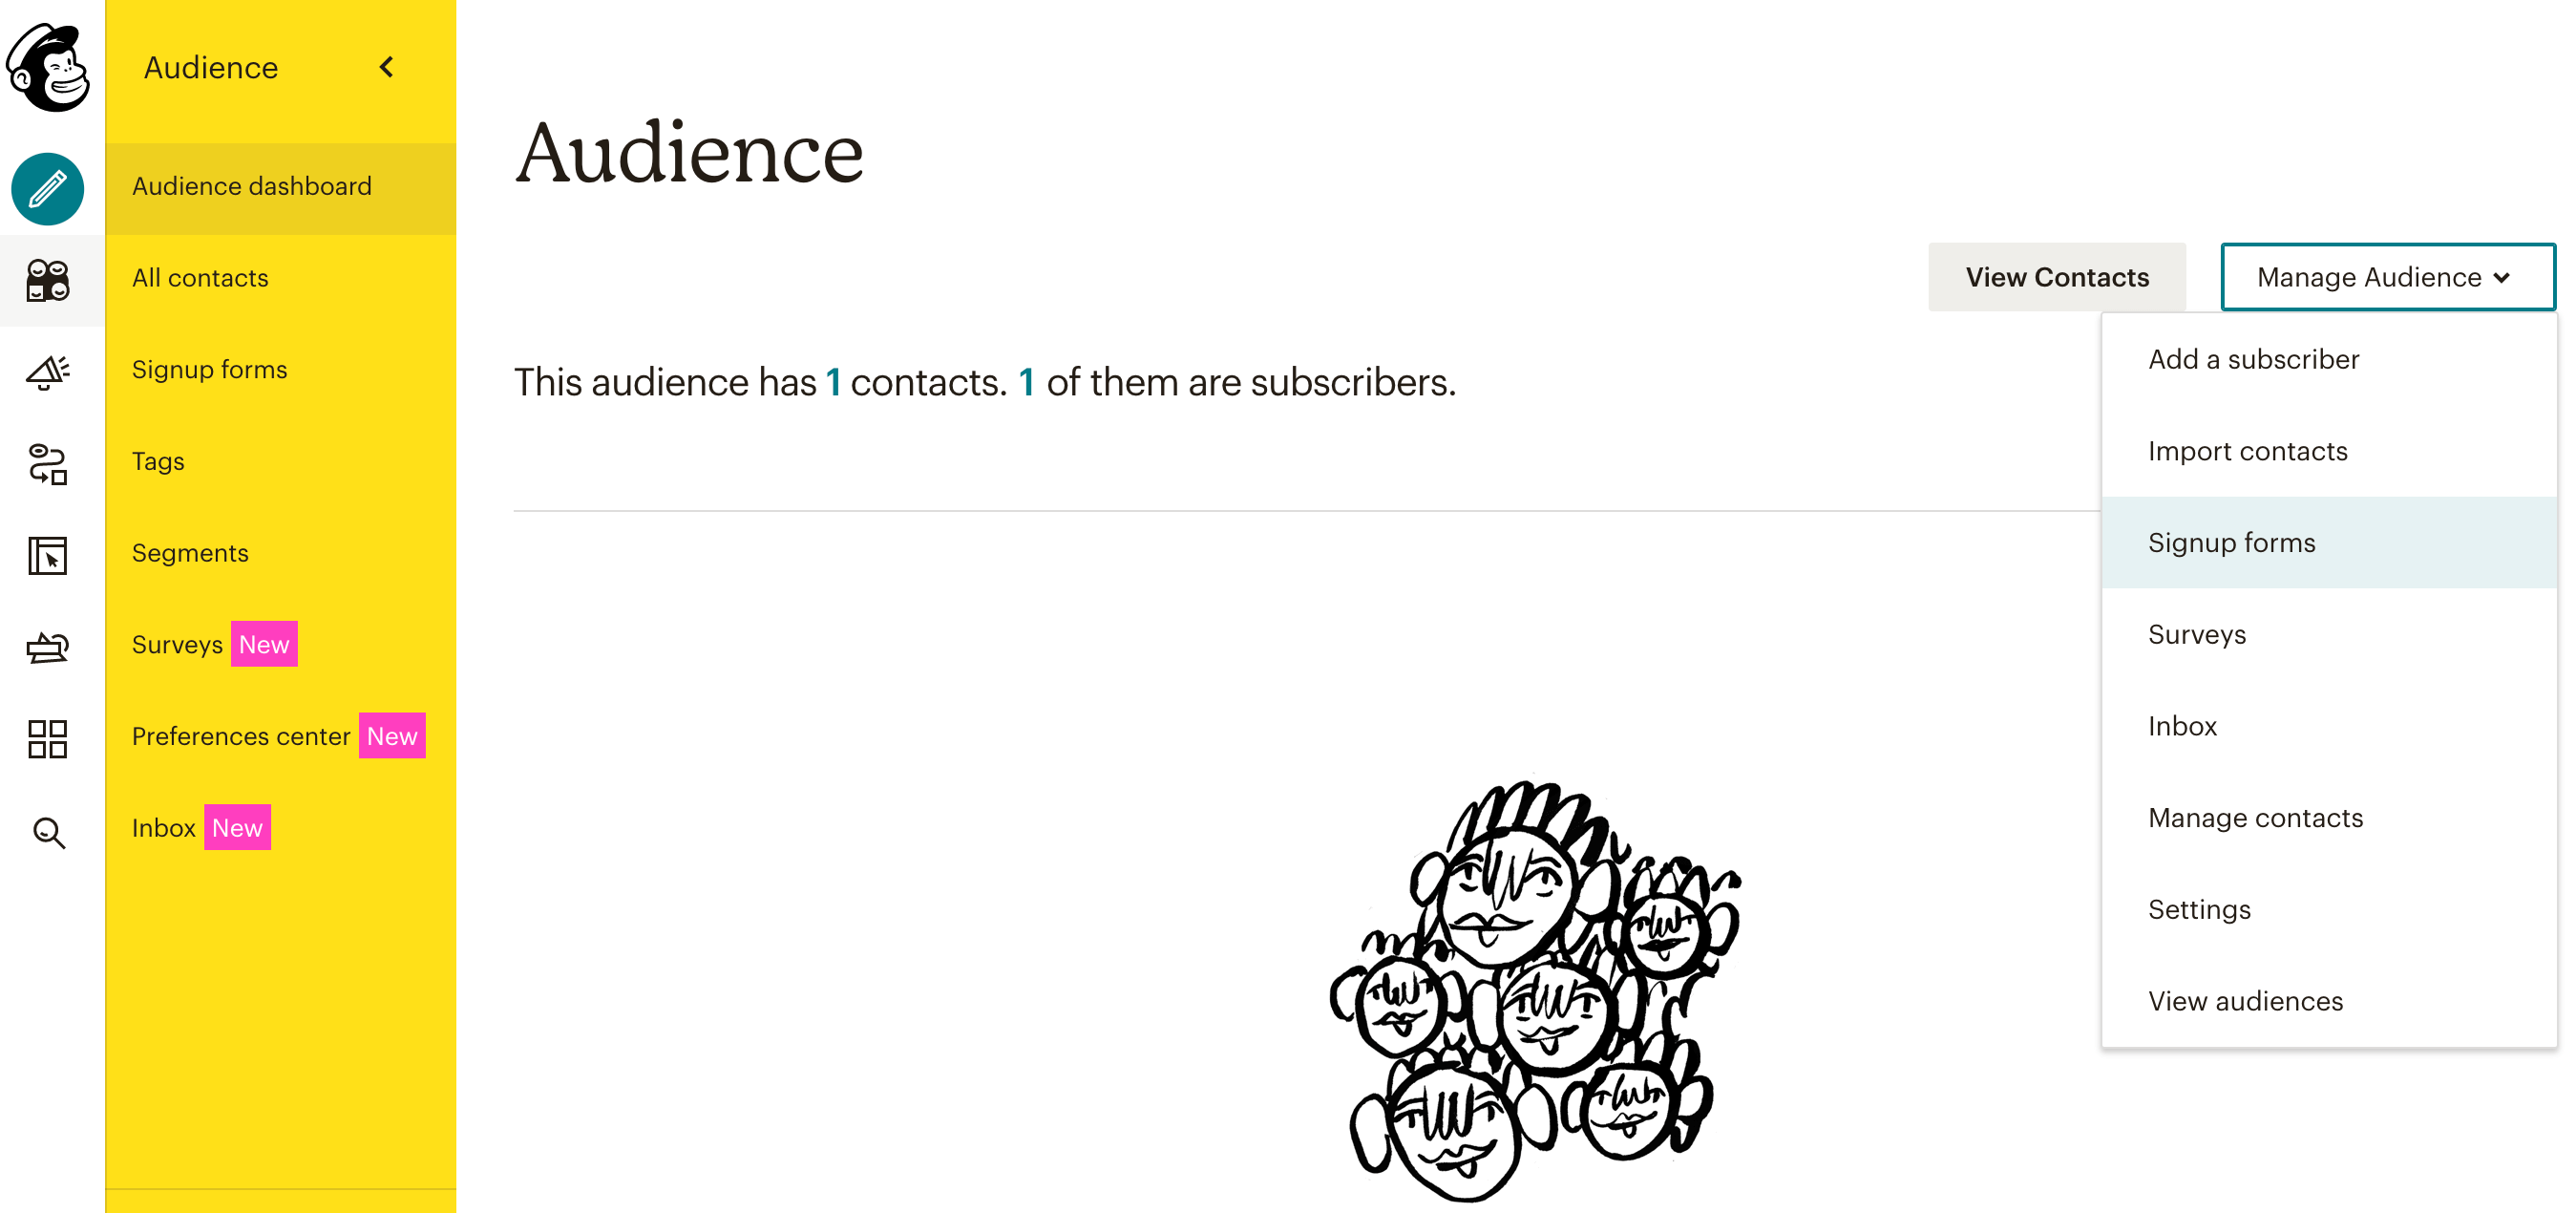
To add a signup form to your WordPress website, log into your Mailchimp dashboard and select the Audience icon. You can then navigate to Audience dashboard > Manage Audience > Signup forms:
Here, you can opt to create either an embedded form or a subscriber signup popup. Alternatively, you can create a form using Mailchimp’s Facebook integration feature:
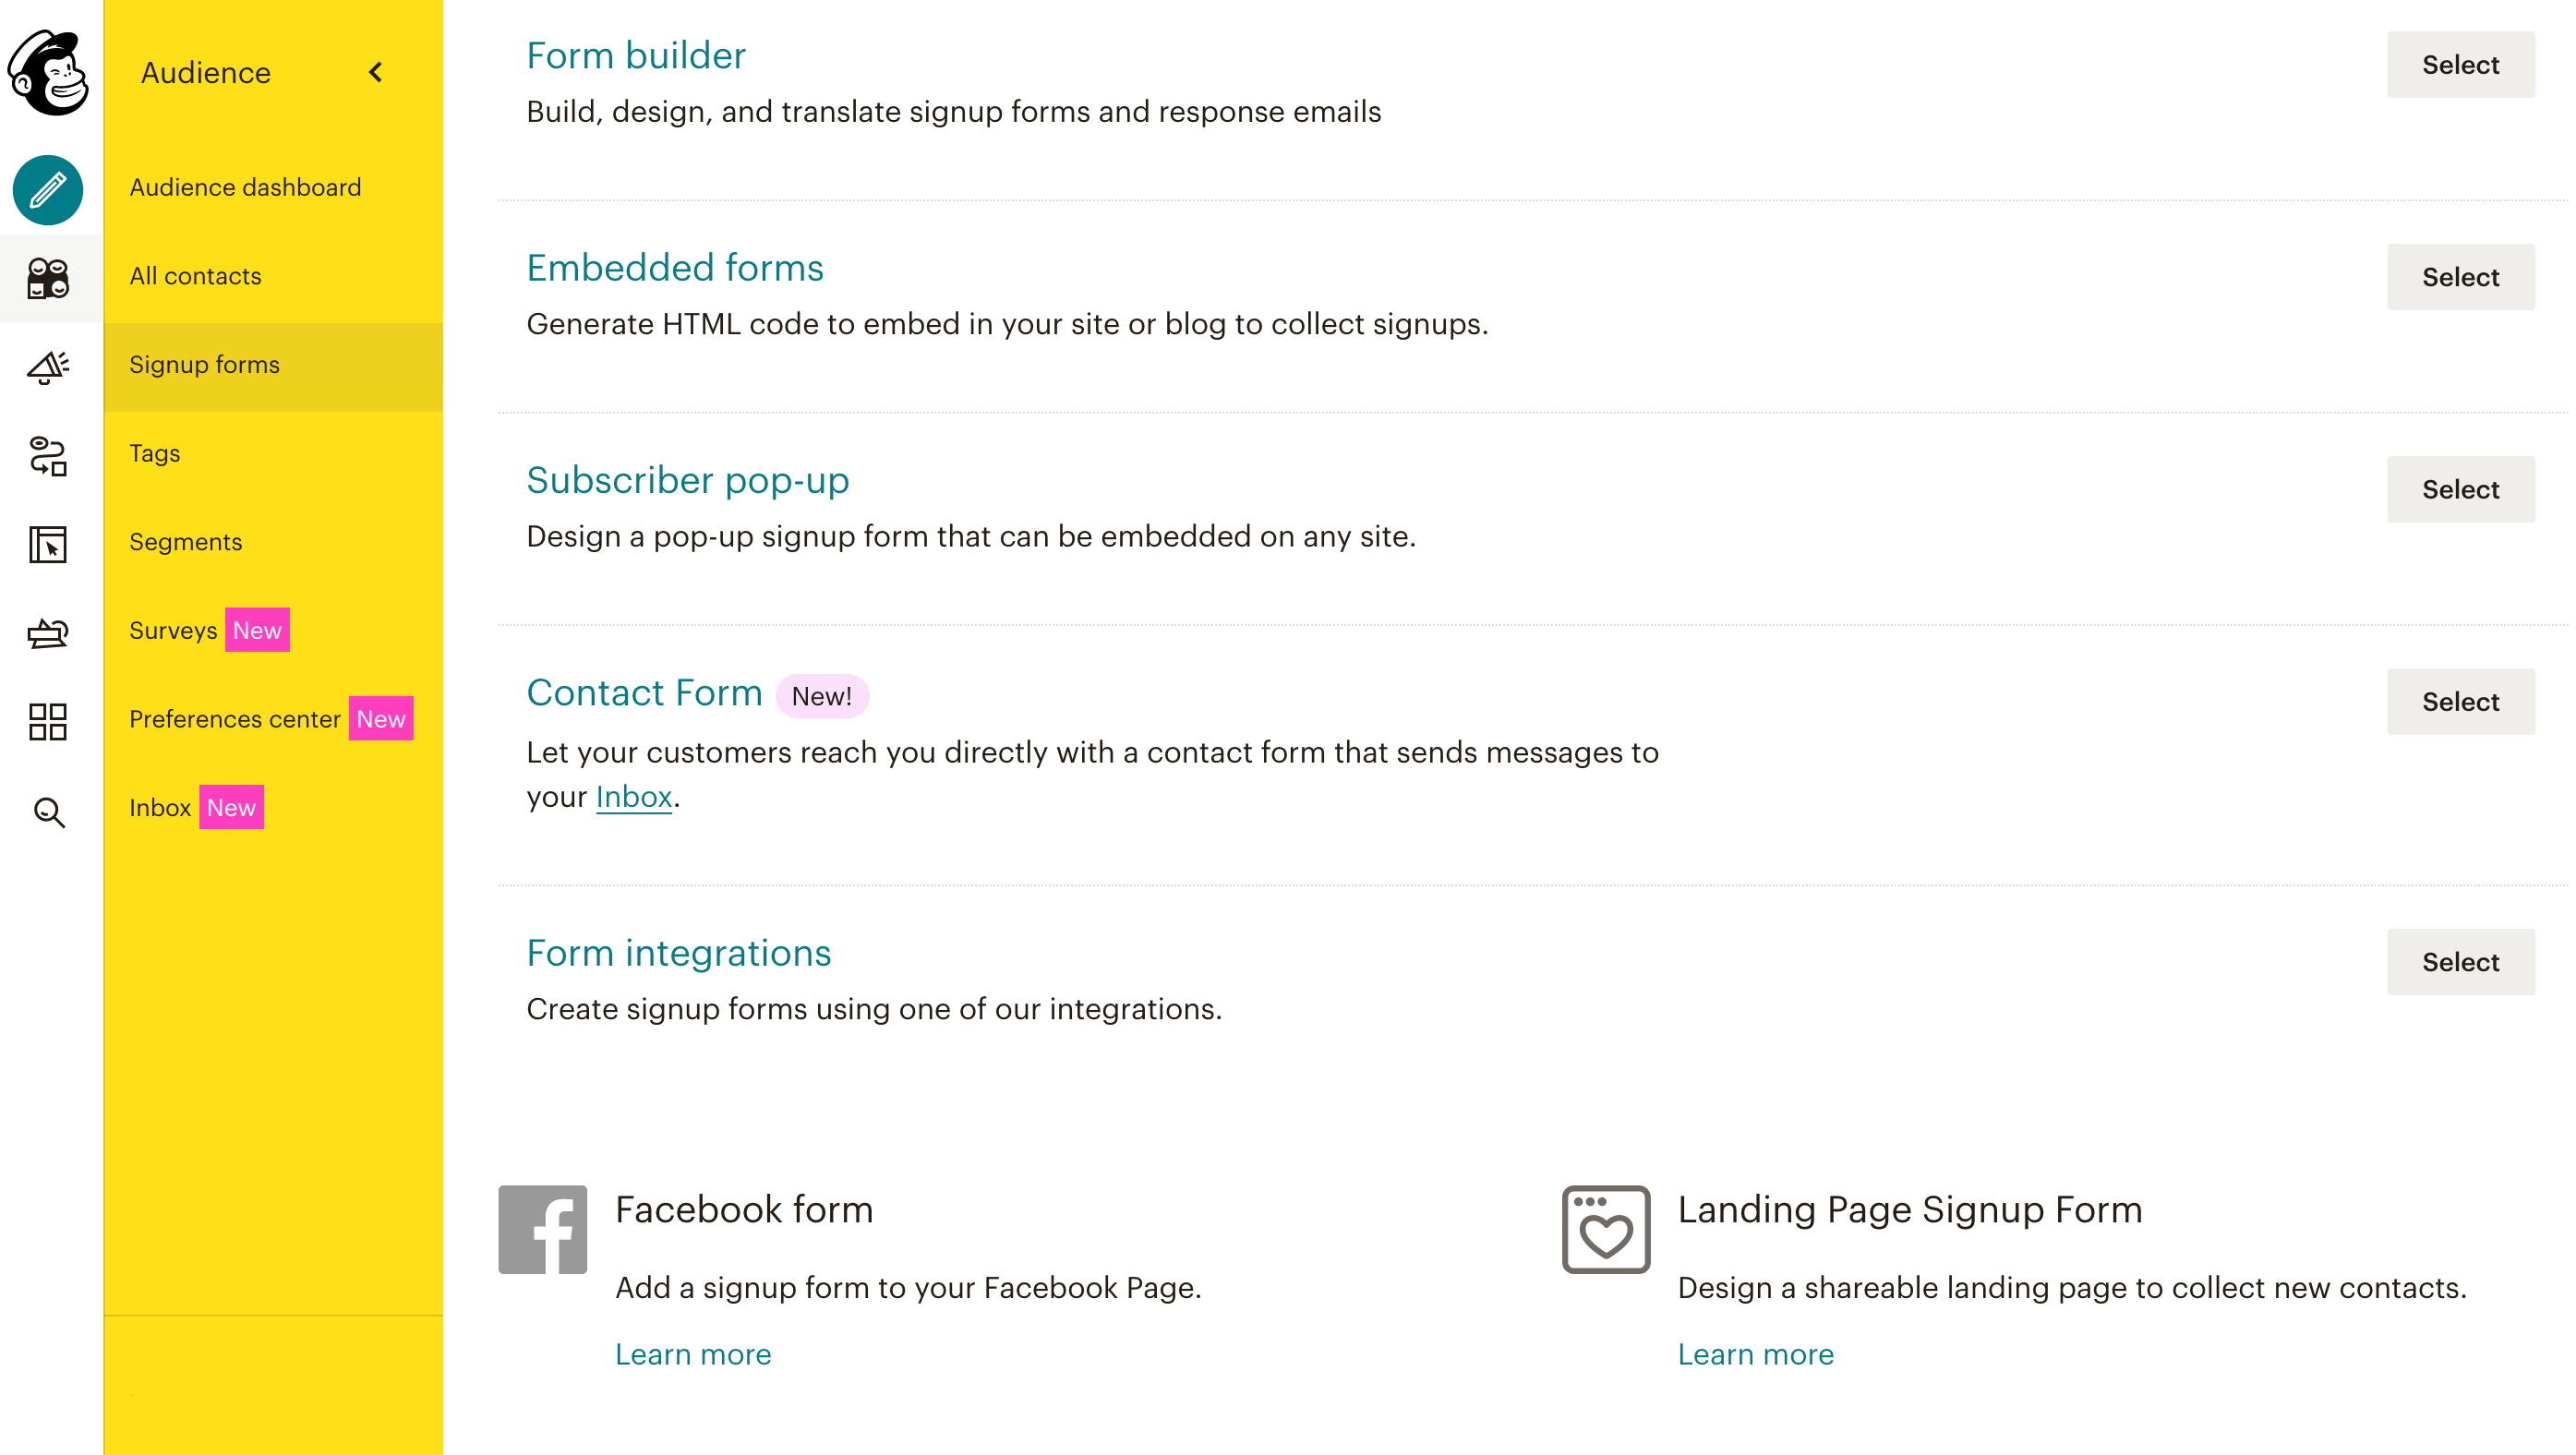
Embedded forms are less obtrusive, but they’re also easier to ignore. Meanwhile, popups are a great way to catch the visitor’s attention, but they can disrupt the browsing experience, particularly on smaller screens such as smartphones and tablets.
Even if you have a popup form for signing up new subscribers, it’s advisable to have an embedded form somewhere on your site as well. As such, this is the option we’ll be focusing on for the purposes of this tutorial.
After choosing which type of form you want to use, you’ll have access to various layouts. As you explore these templates, Mailchimp will generate a preview based on the one you’ve currently selected:
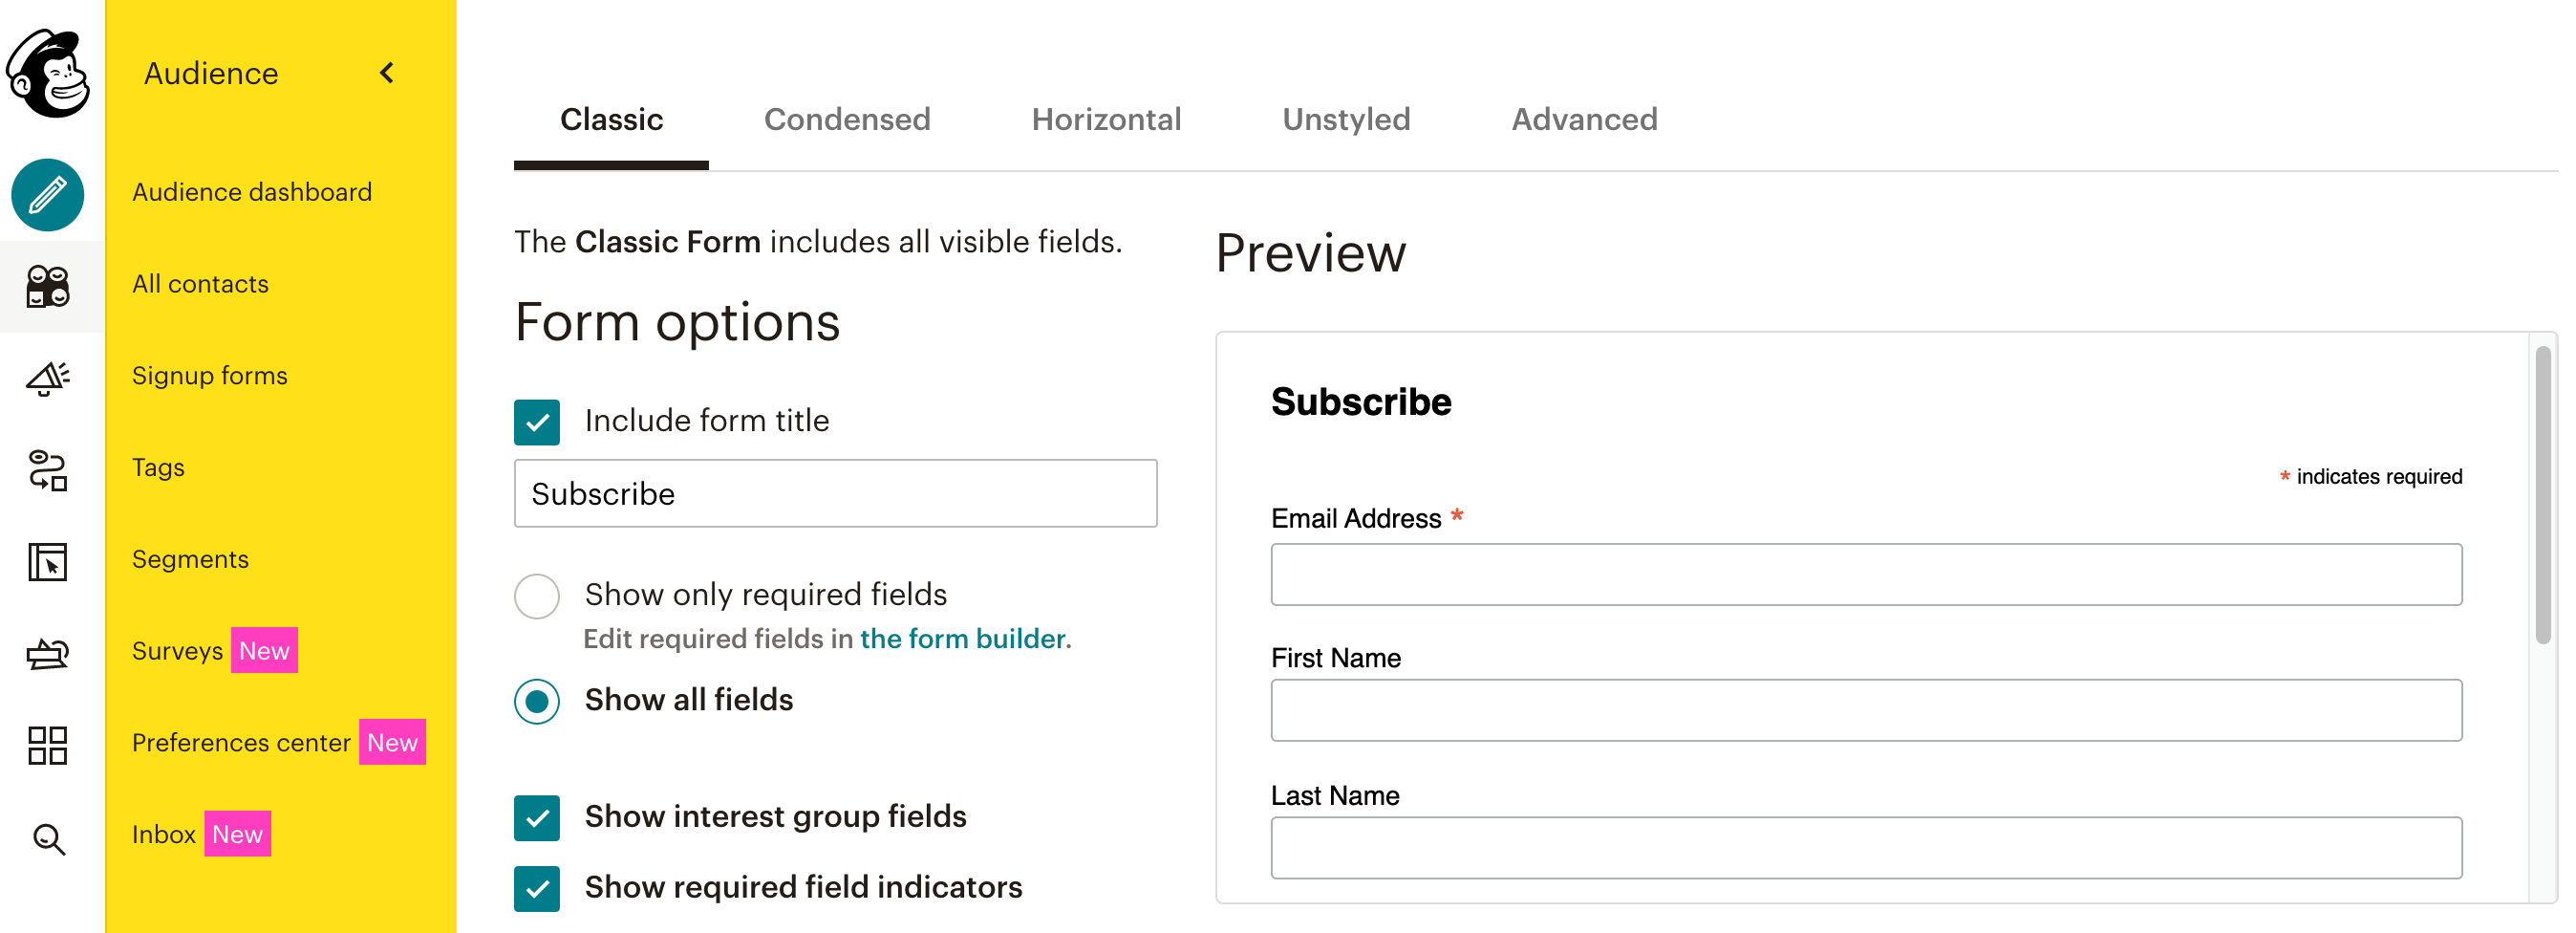
For each layout, you’ll have access to various settings. For example, you can change the title that appears along the top of the Condensed layout. You can also specify the form’s width:
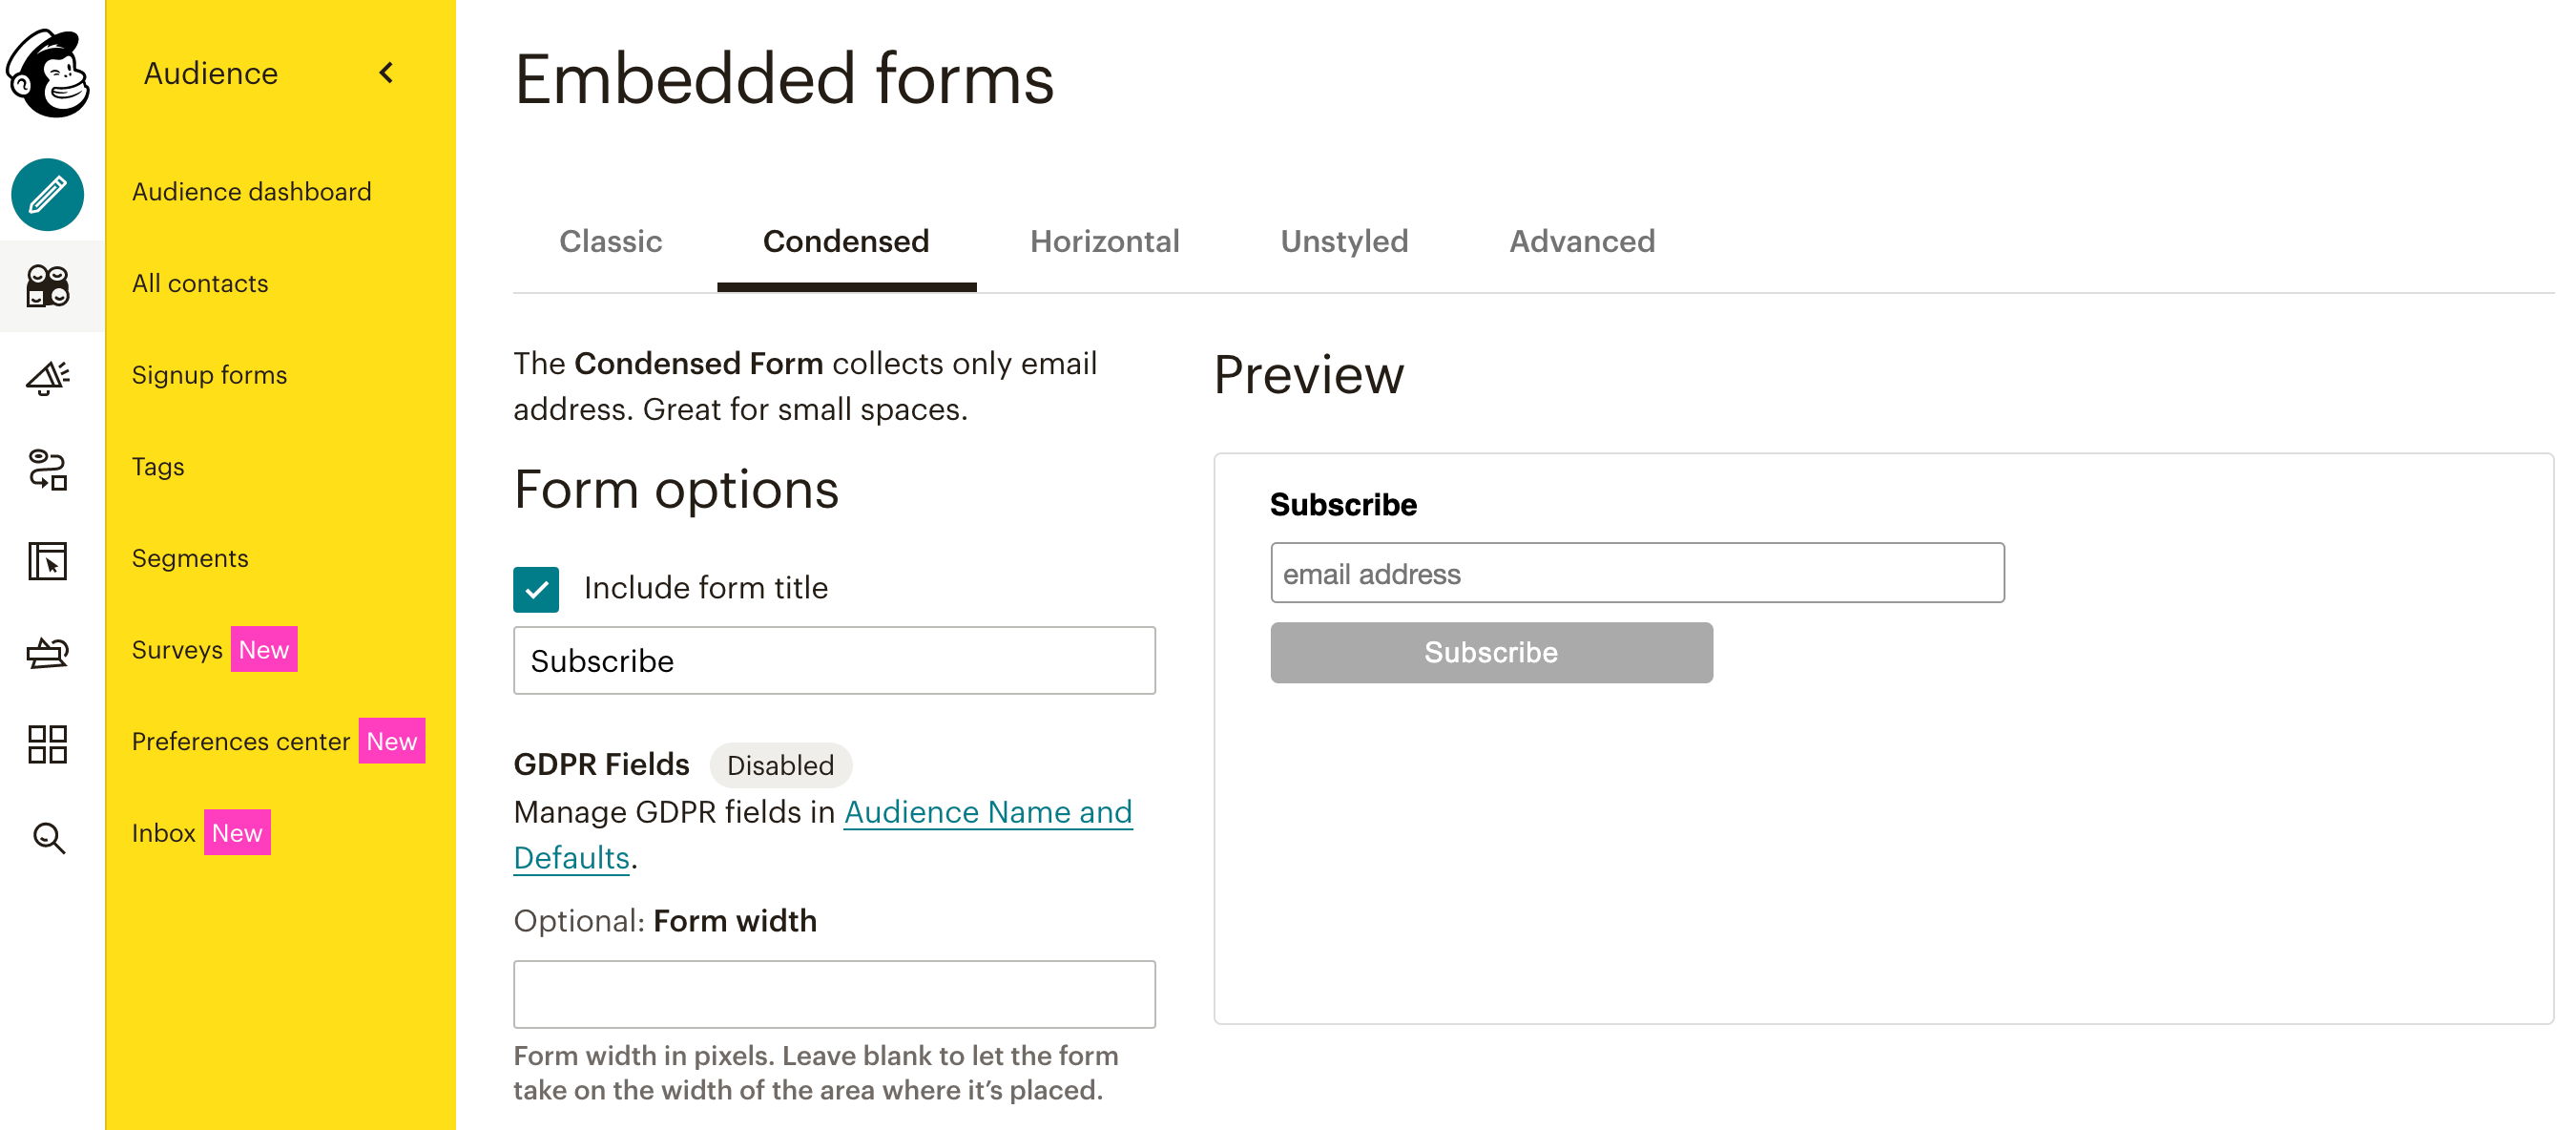
It’s worth spending some time exploring the different layouts and experimenting with the settings to see what effects you can create. When you’re happy with how your Mailchimp signup form looks and functions, you can add it to your website by copying its embed code.
Step 3: Display your Mailchimp signup form using a widget
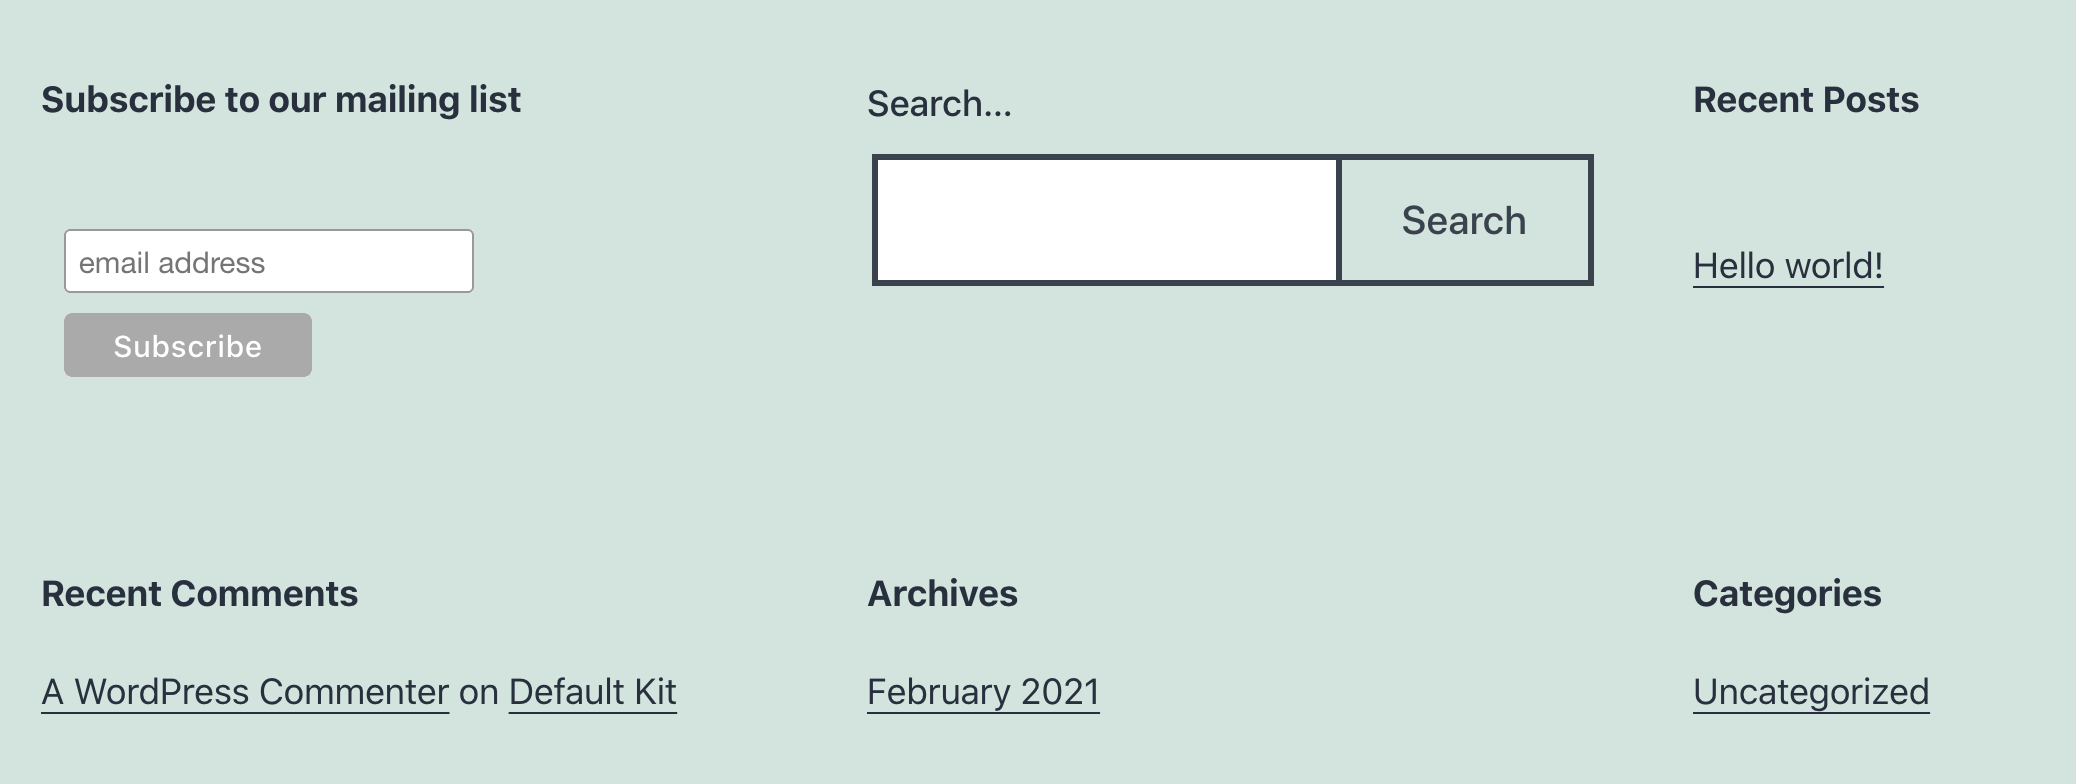
You can now position this signup form anywhere on your website using its embed code. This includes adding your form to recurring elements such as your sidebar or footer. If you take this approach, visitors will be able to subscribe from any page of your website, which can help drive conversions:
You can add a Mailchimp signup form to your sidebar or footer using a custom HTML widget. To create one, navigate to Appearance > Widgets:
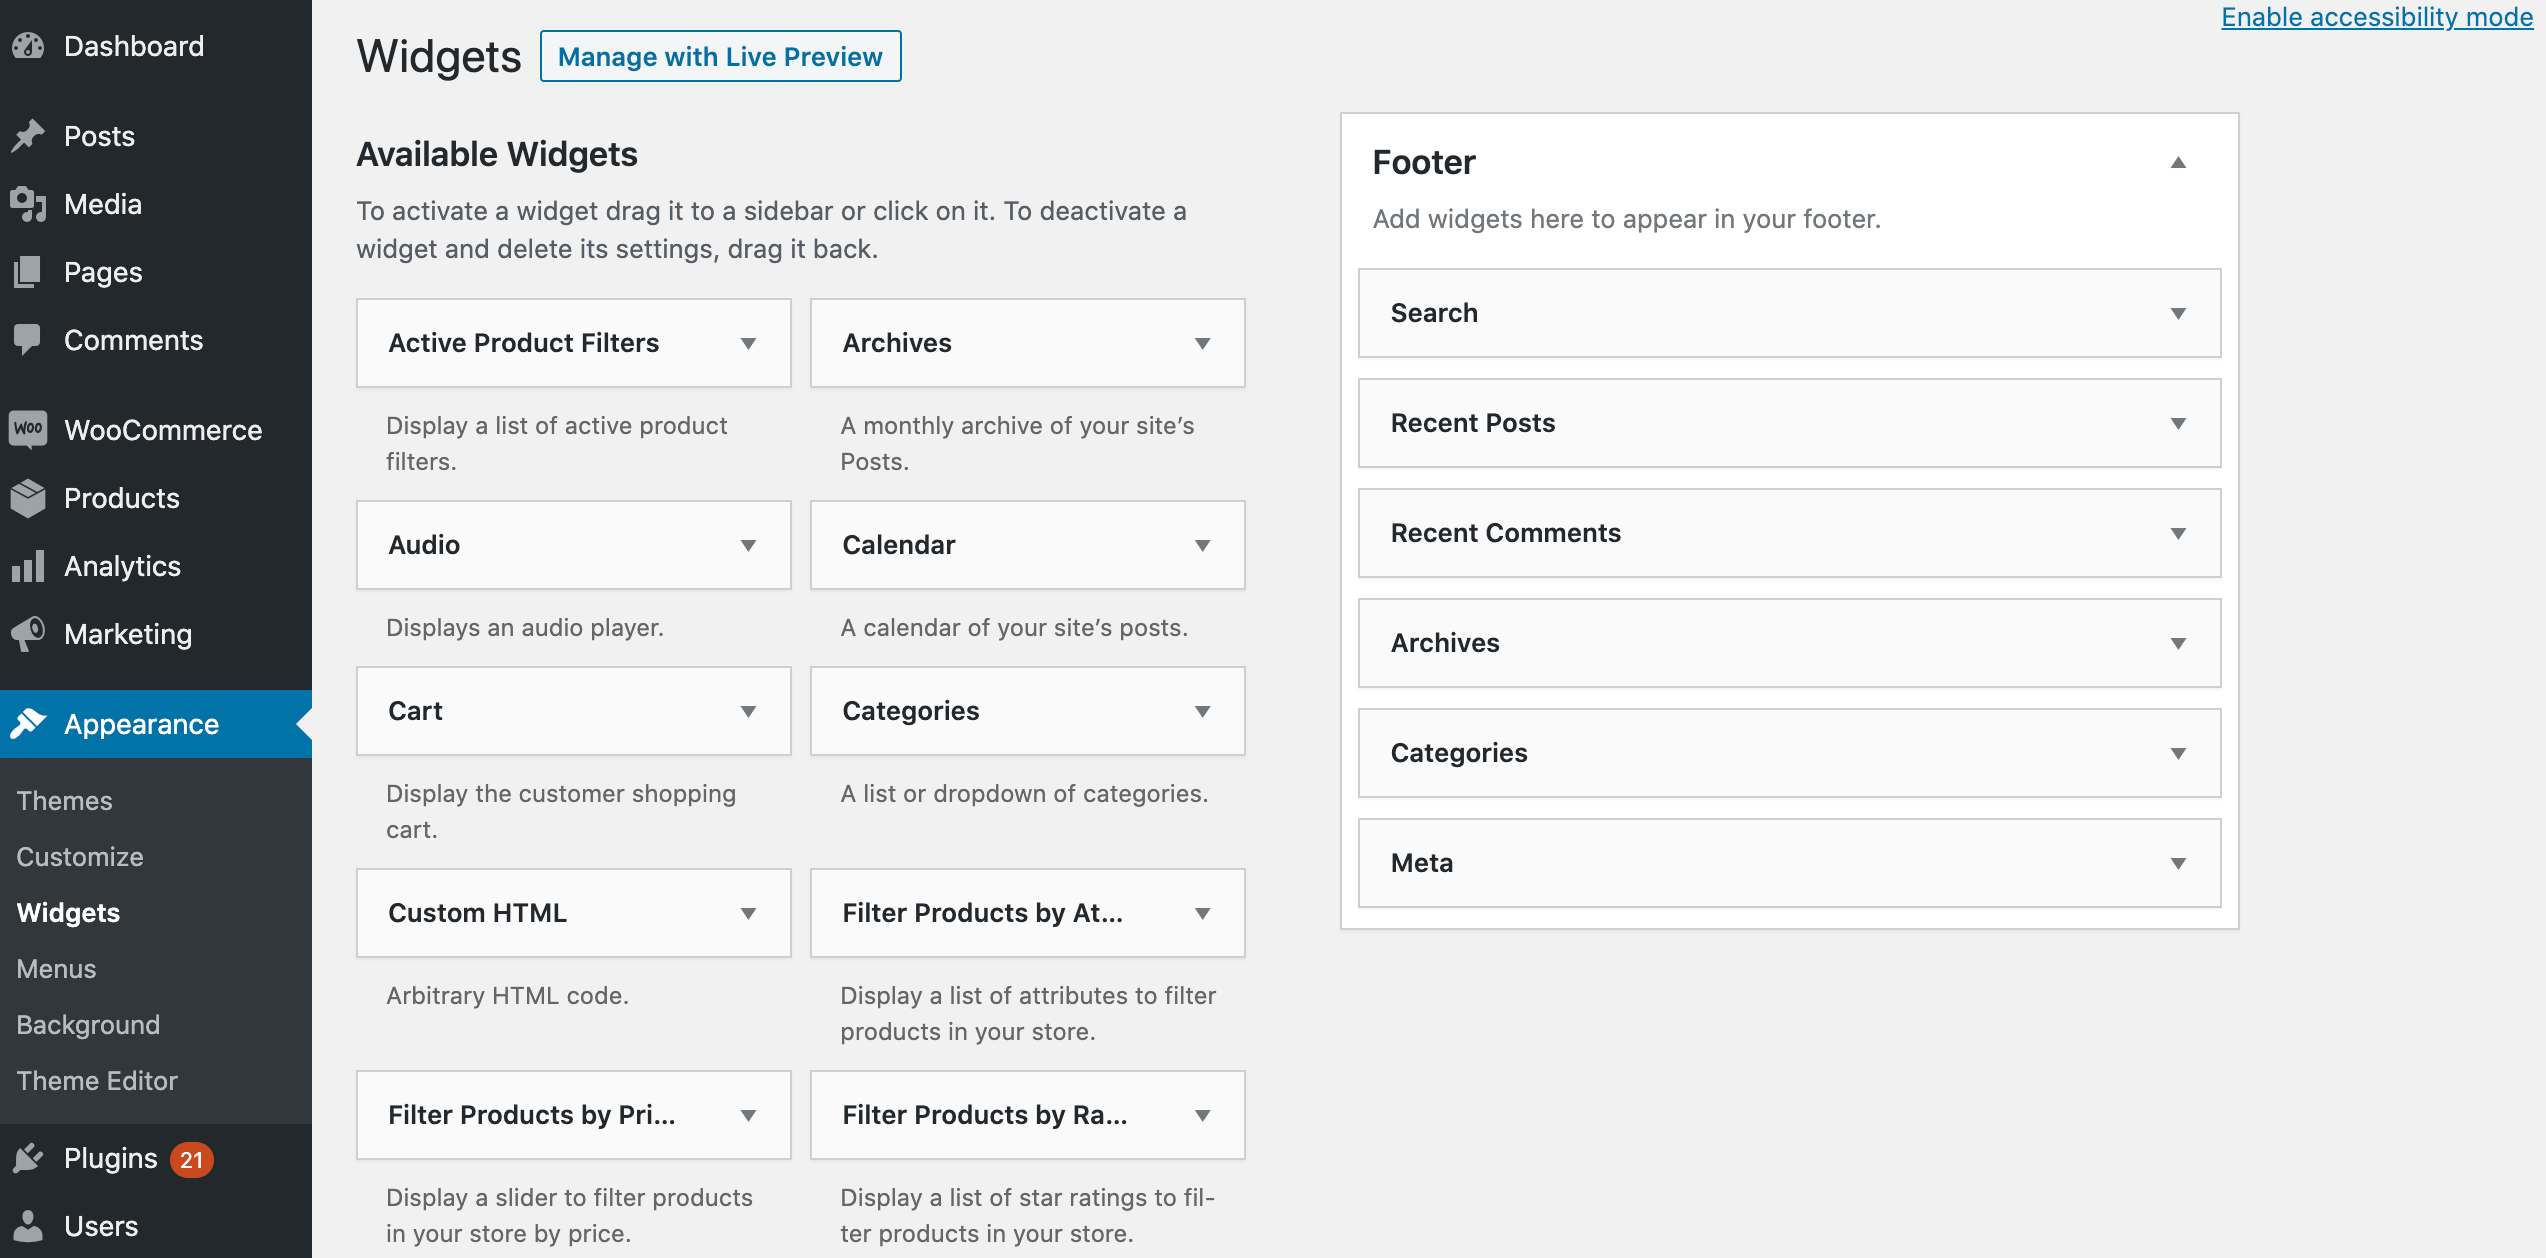
You can then select the Custom HTML widget and drag it to the area where you want to display your signup form. For example, you might drop the widget into the Sidebar or Footer column. Note that your options may vary depending on your WordPress theme:
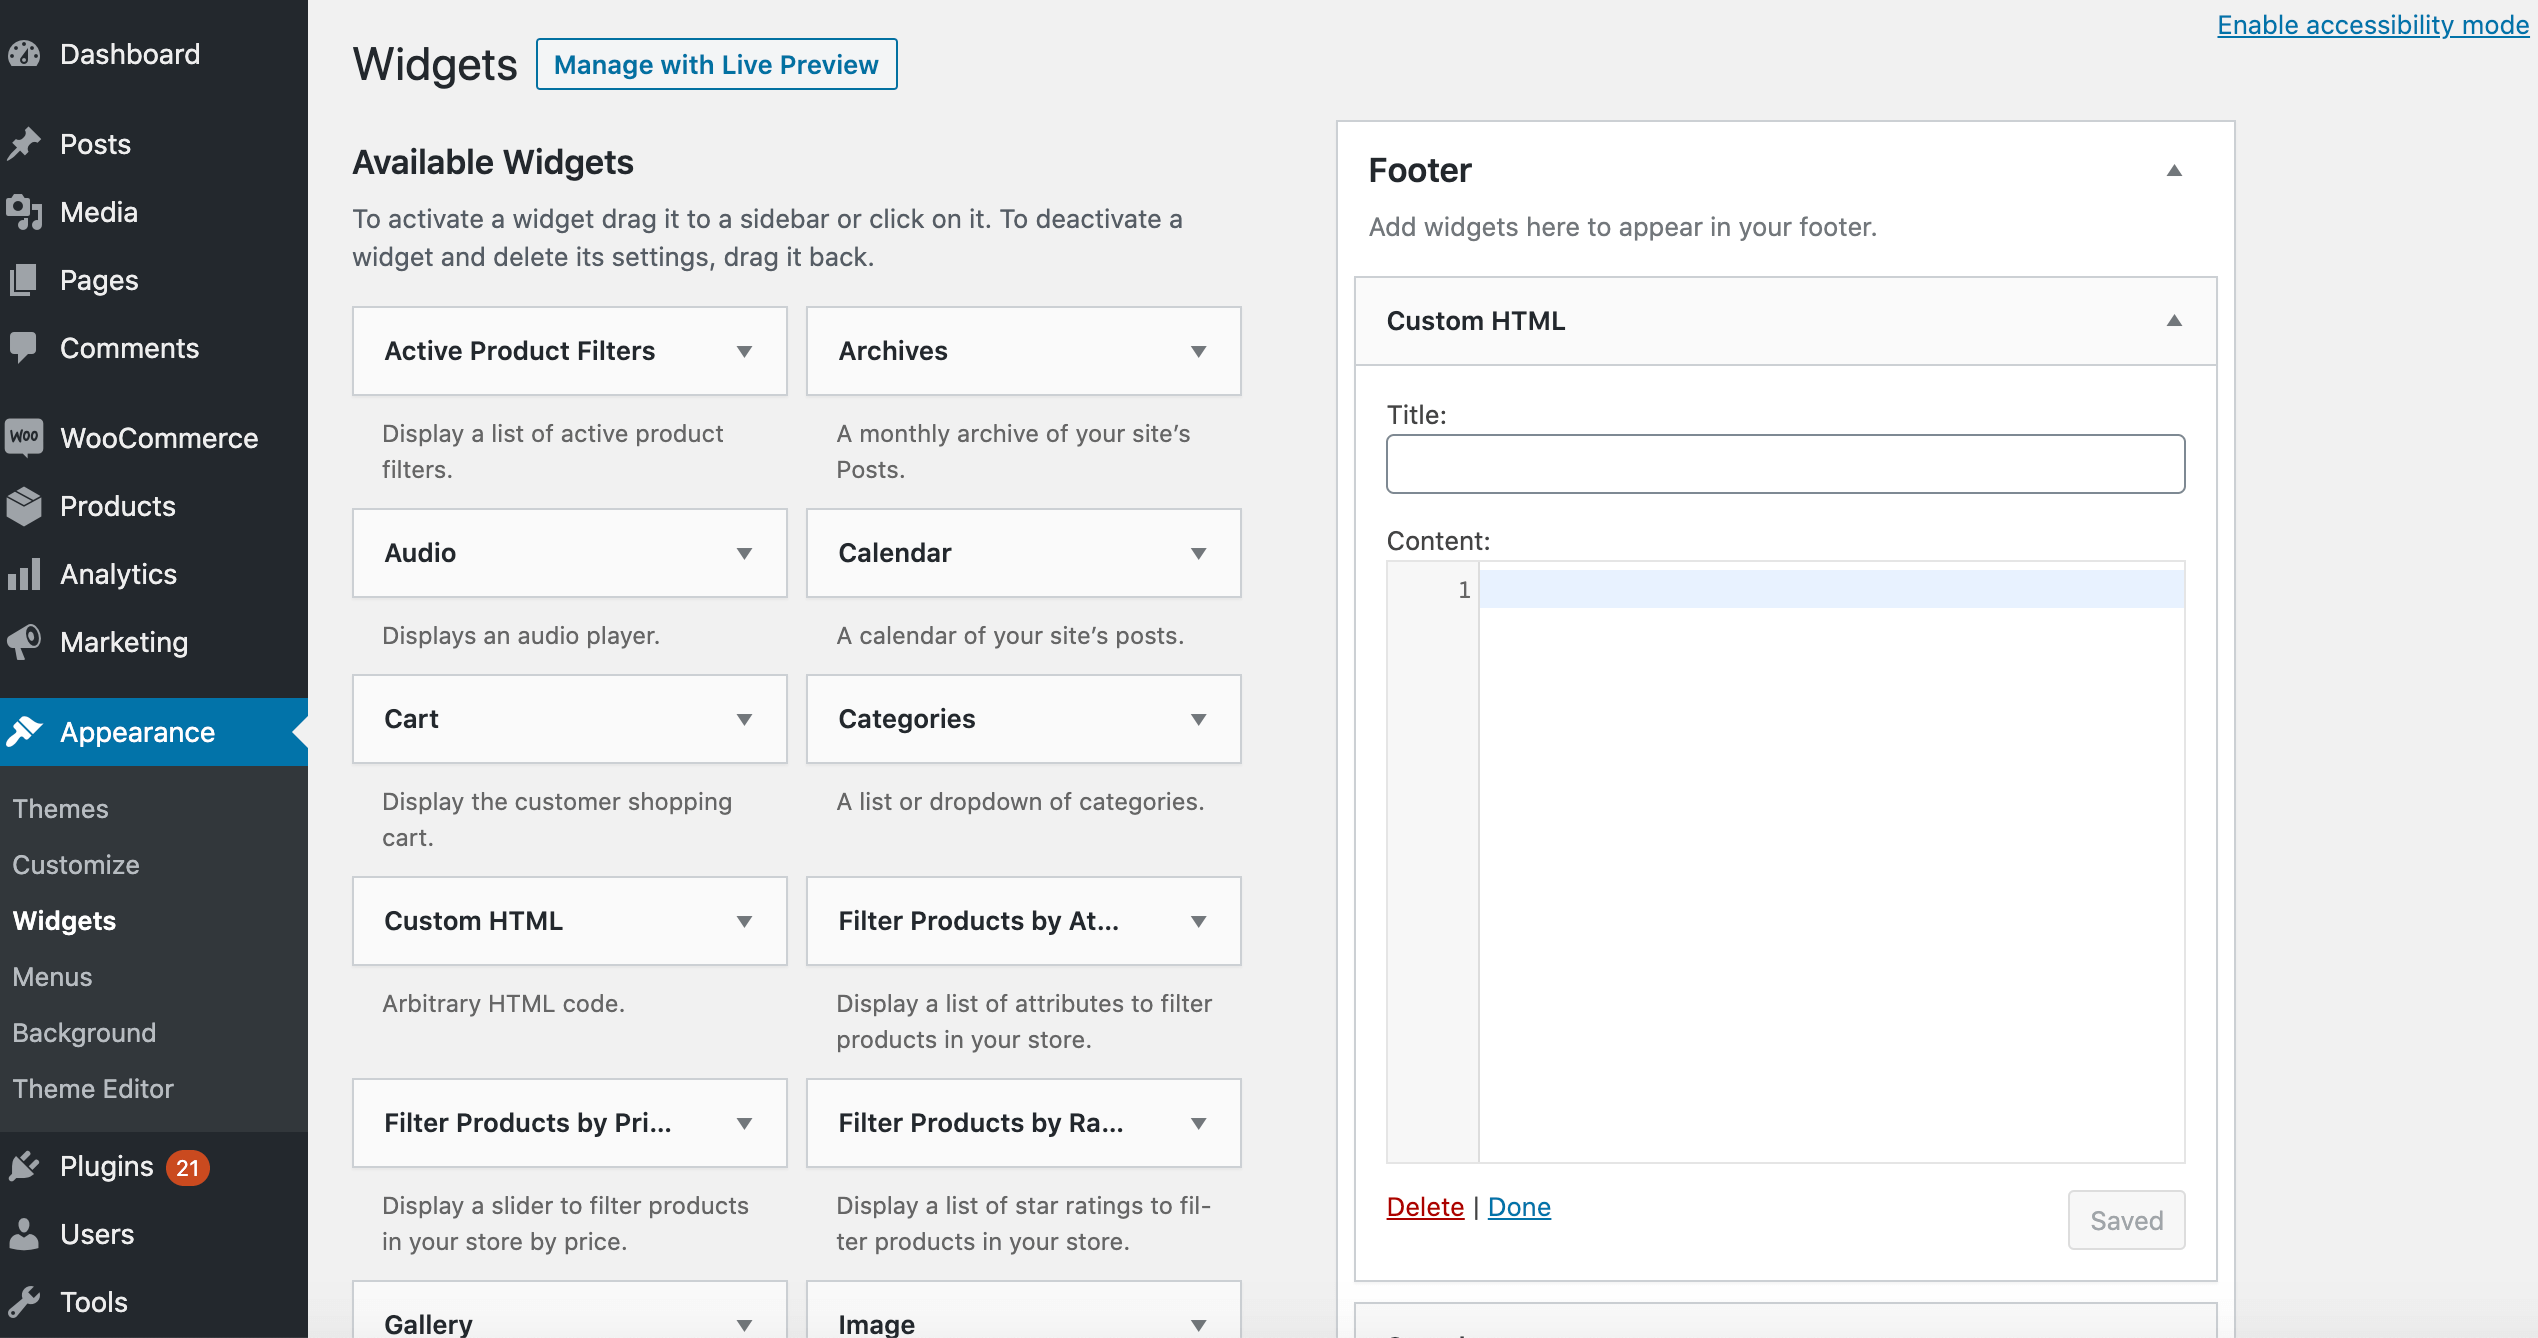
You can now paste the embed code for your form from your Mailchimp account into the widget’s Content area. At this point you may also want to add a title, which will be displayed above your signup form:
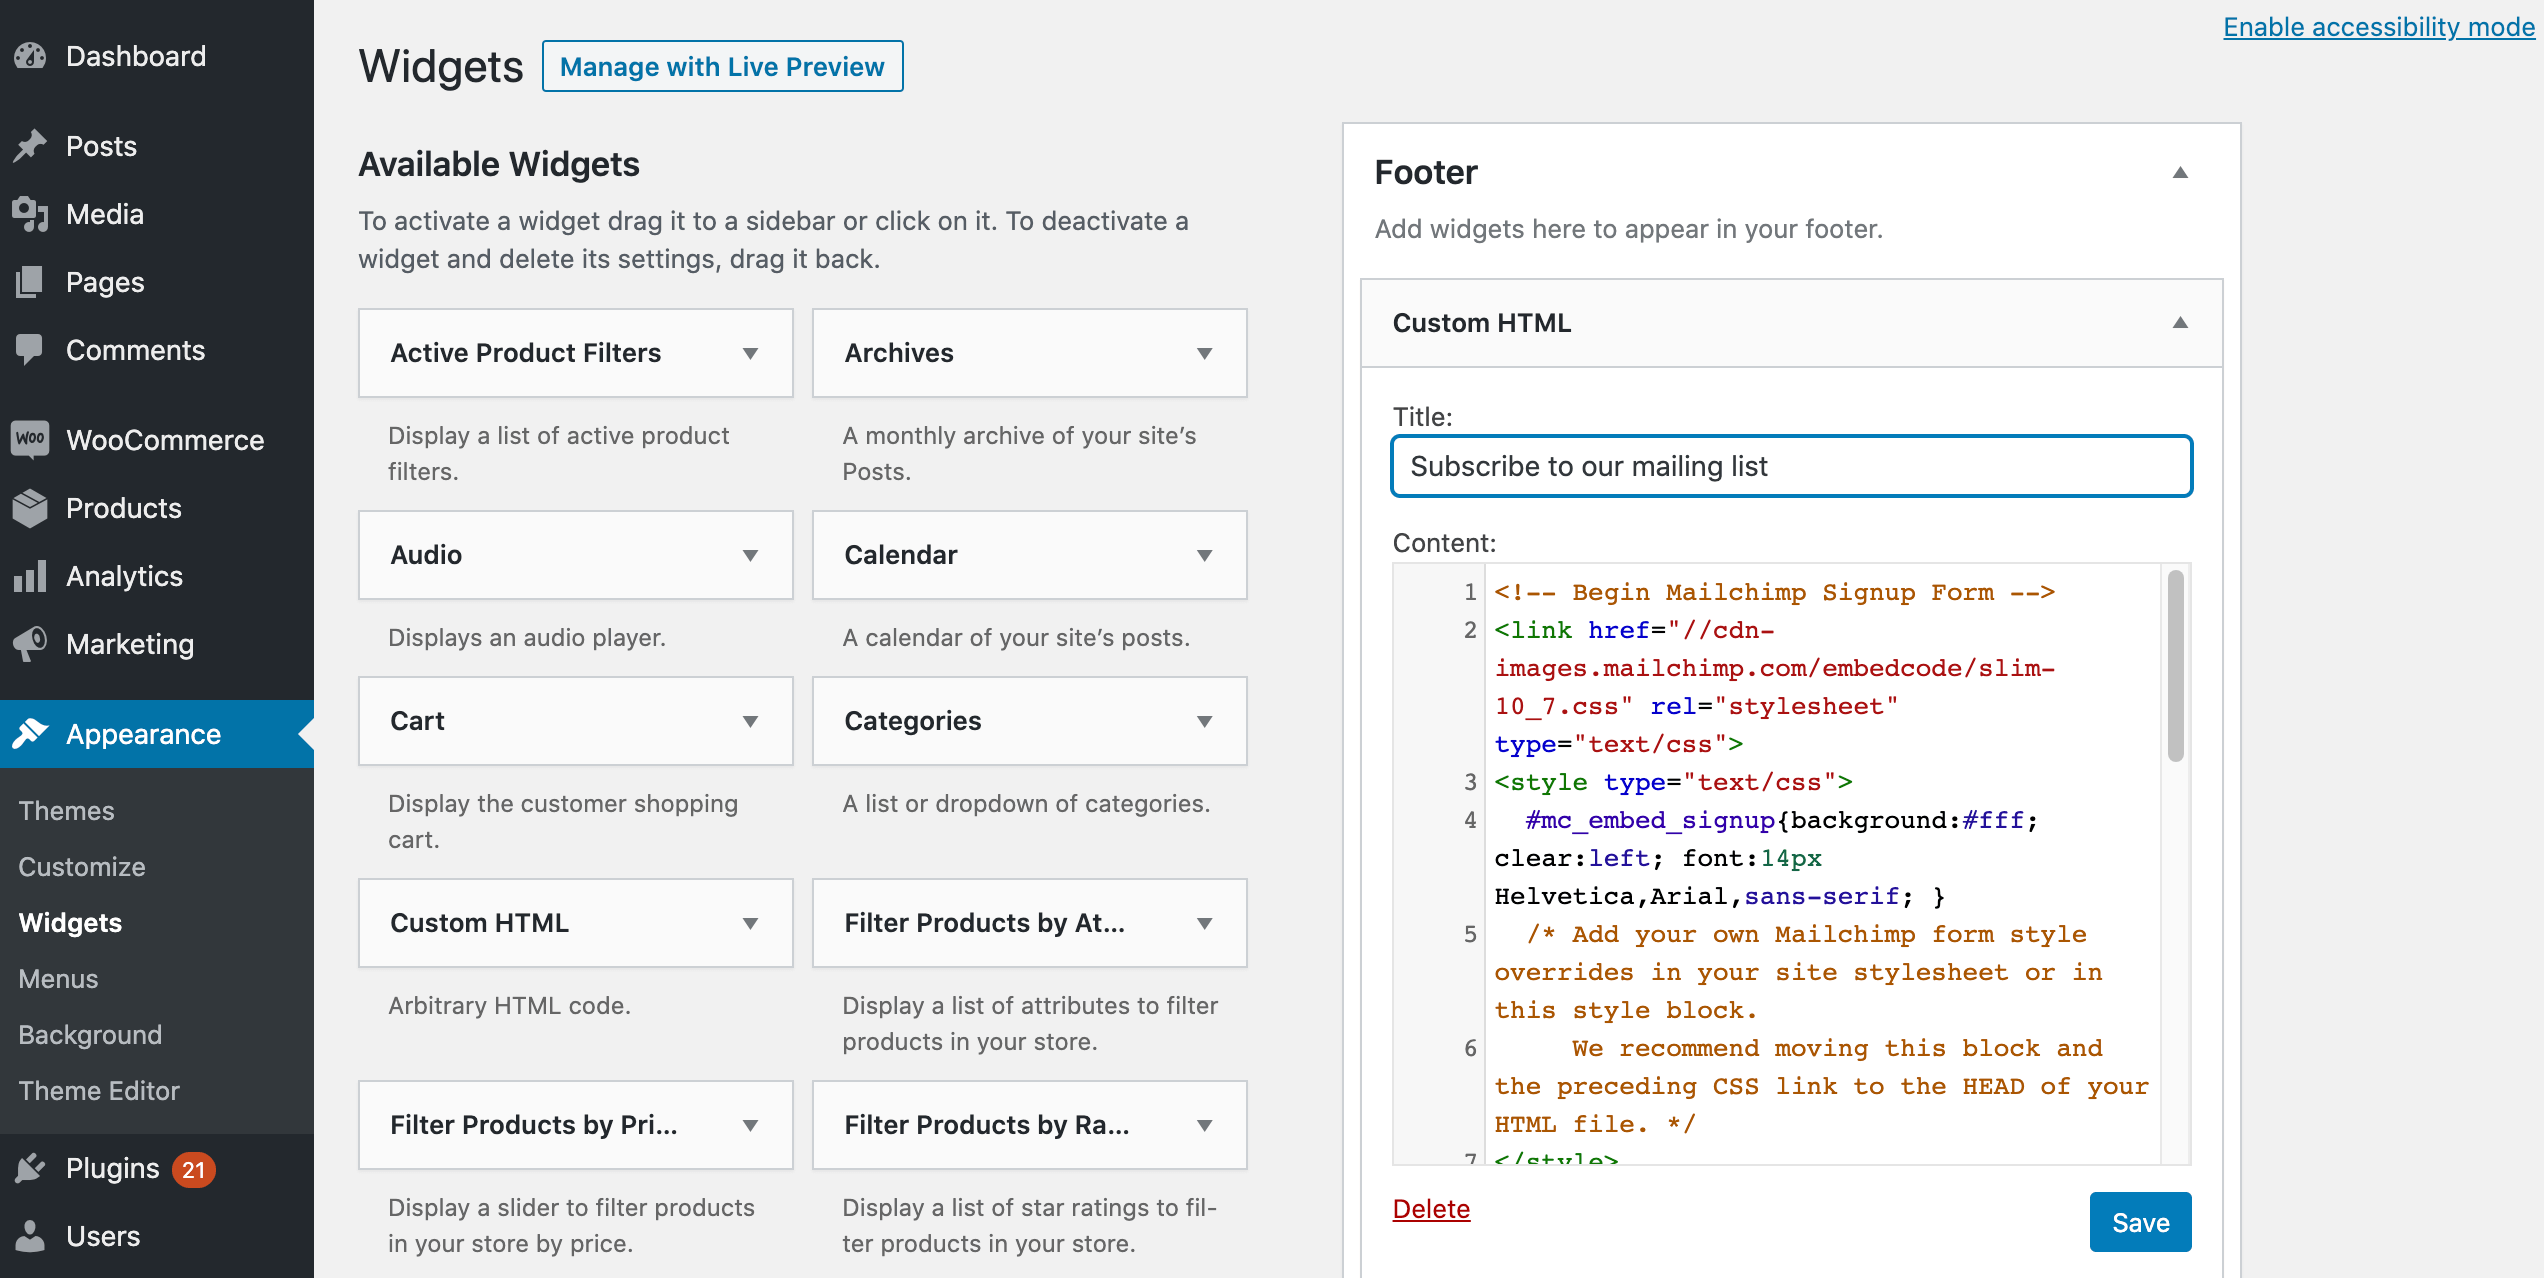
Then, click on Save. Your signup form will now appear across your WordPress website.
Step 4: Add your signup form to a page using a Custom HTML block
Alternatively (or additionally), you may want to pick and choose exactly where your signup form appears. For example, you might create a dedicated page where visitors can subscribe to your mailing list.
You might also embed this form inside your content, such as midway through a blog post or landing page. This can help catch visitors’ attention as they’re scrolling through your content, and may increase conversions.
To add your signup form to a specific page, open it for editing and add a new Custom HTML block:
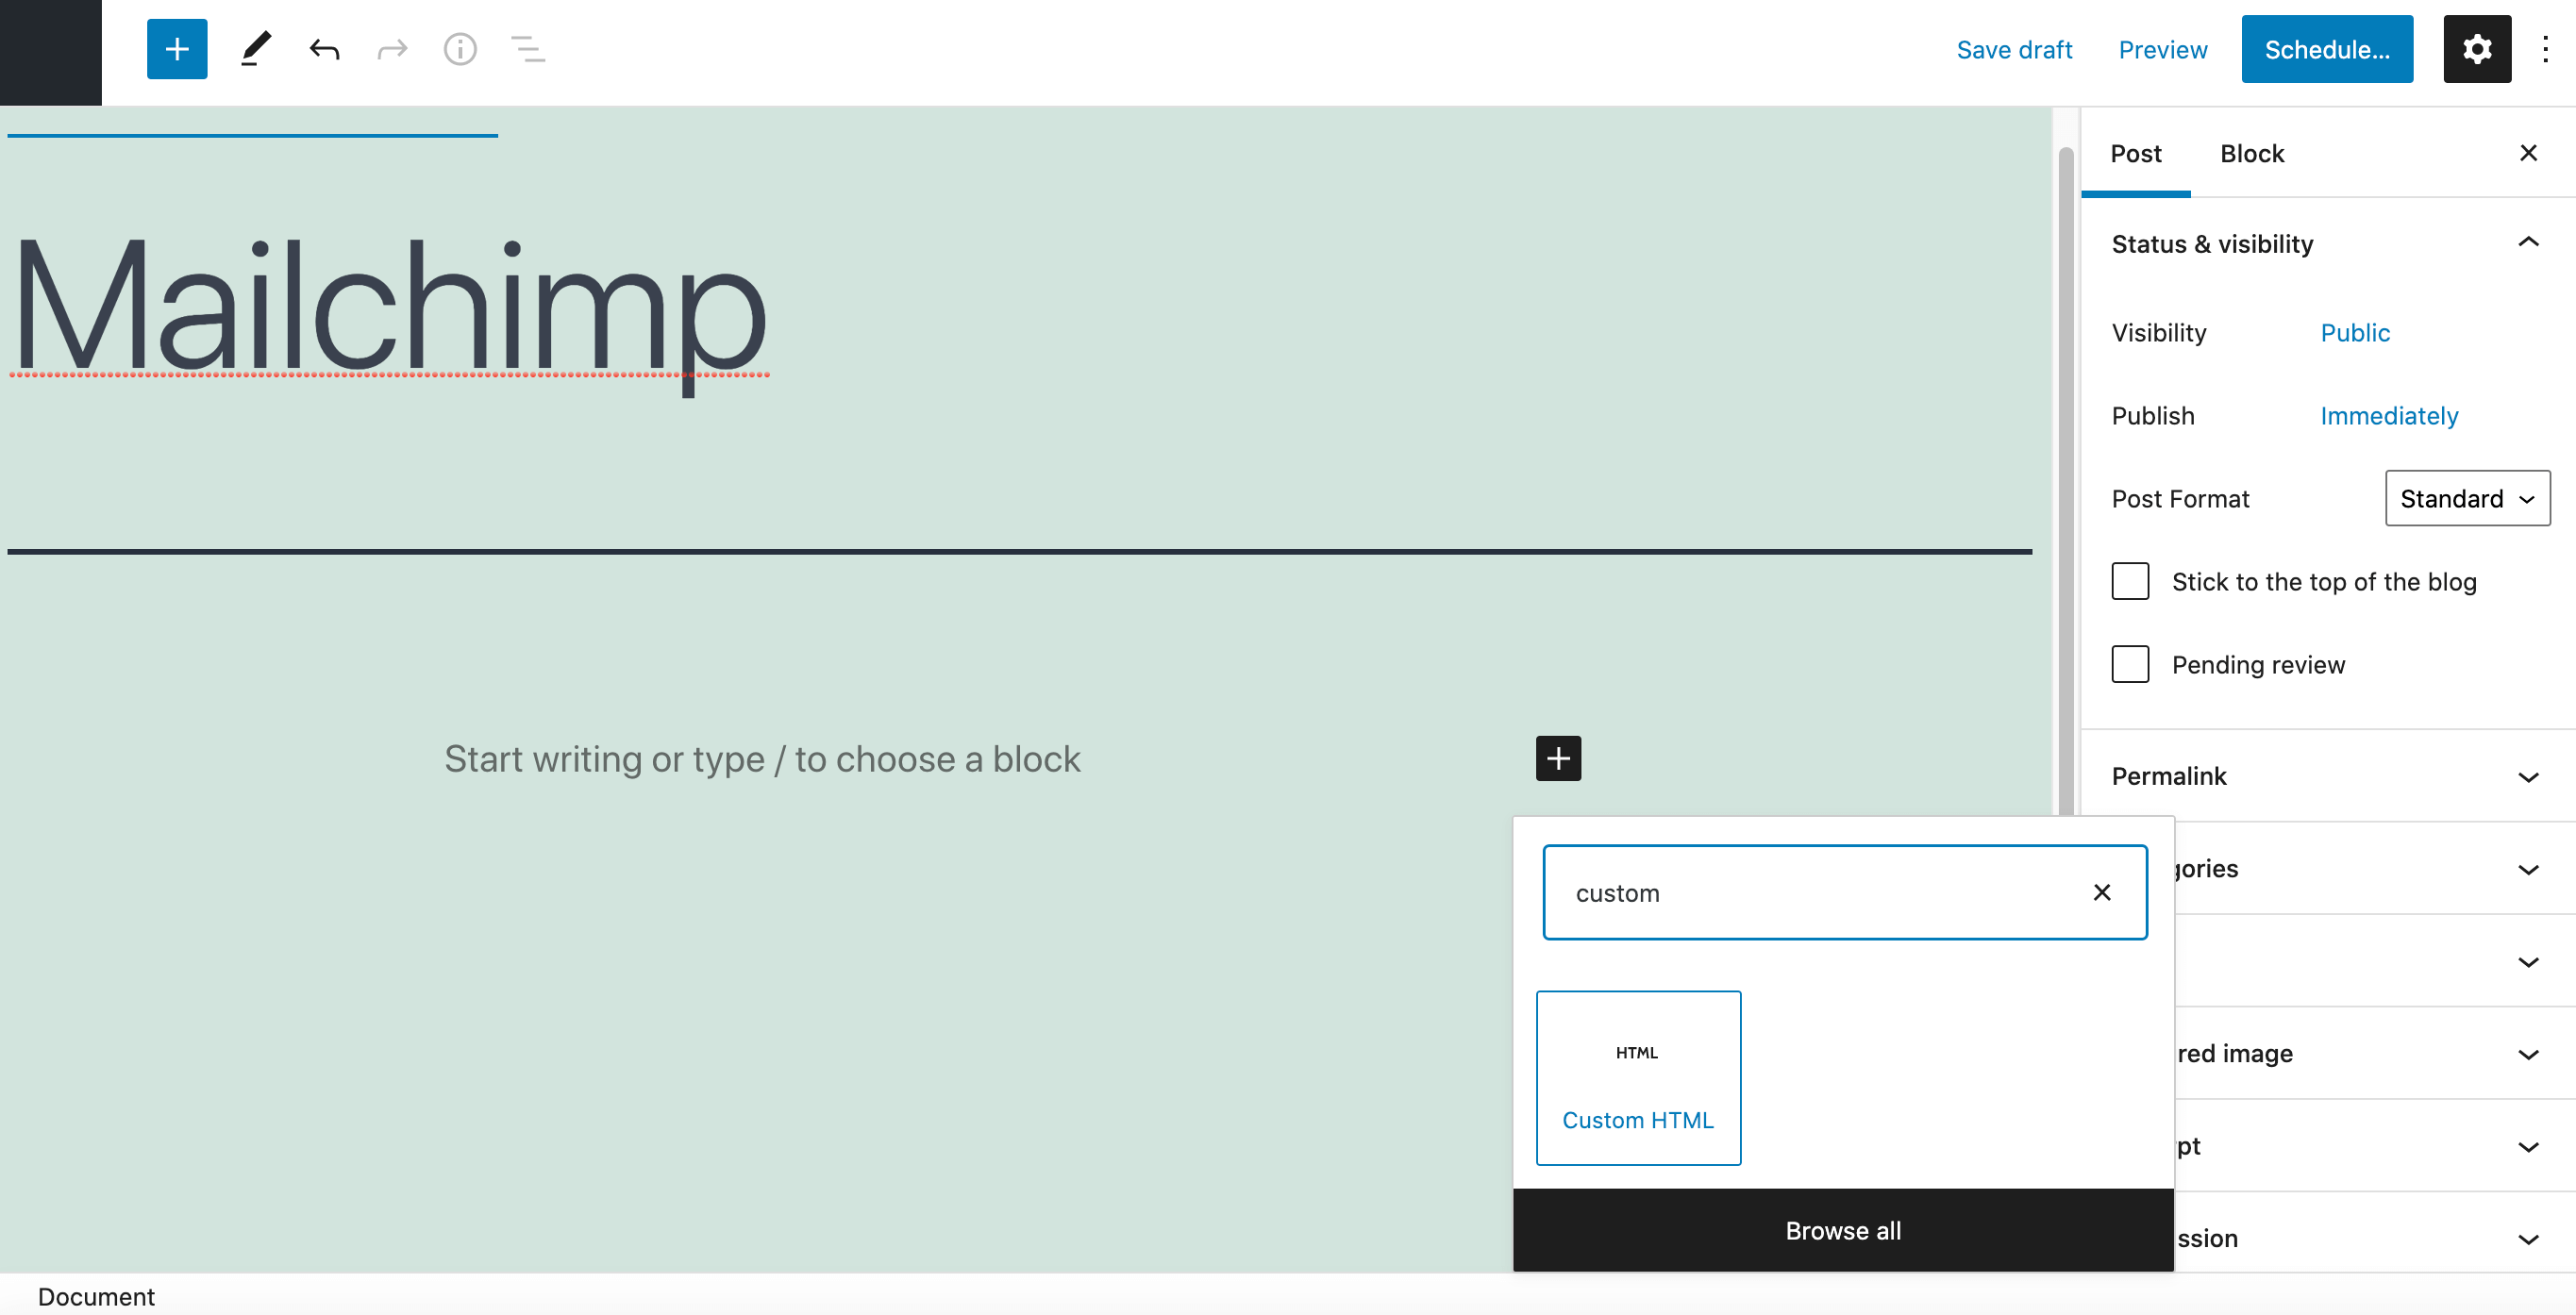
Then, paste your Mailchimp embed code into the custom HTML block. You can now publish or update this page, and your signup form will appear in the location you’ve specified. Just repeat this process to feature your form in multiple locations across your WordPress website.
Conclusion
There are many factors that can convince visitors to subscribe to your mailing list. However, they all rely on you getting the foundations right by creating a user-friendly and accessible signup form.
In this article, we created a Mailchimp signup form and added it to a WordPress website in four steps:
- Connect your Mailchimp account to WordPress using a plugin such as Mailchimp for WordPress (MC4WP).
- Build your signup form in the Mailchimp drag-and-drop editor.
- Display your Mailchimp signup form in your sidebar or footer using a widget.
- Add your signup form to a specific page.
Do you have any questions about adding an email signup form to your WordPress website? Let us know in the comments section below!
Featured Image credit: Pexels.

0 Comments