You put a lot of time and energy into your website’s Search Engine Optimization (SEO). If you want to move your site to a new domain, naturally you’re going to be nervous about undoing all the work you’ve put in and hurting your rankings.
Fortunately, it is possible to move your site with minimal impact on its SEO. While minor fluctuations in your content’s rankings are inevitable when changing domains, there are steps you can take to minimize the effects.
In this article, we’ll discuss how moving a site to a new domain or web host can negatively impact its SEO. Then we’ll walk you through some steps for avoiding this problem. Let’s get started!
How moving your website to a new domain can impact its SEO
As you’ve probably learned from experience, SEO doesn’t happen overnight. Therefore, the thought of switching hosts or domain names can be terrifying.
Of course, the primary goal of moving a site is usually to help its long-term search engine visibility and overall performance. Perhaps you’ve outgrown your current web host and need one that can better handle your site’s increased traffic. Maybe you’re rebranding and want to switch to a more appropriate URL.
Unfortunately, moving a website to a new address can negatively impact its SEO. Google uses domain-level metrics to determine authority. Migrating to a new URL will cause you to lose these indicators of your site’s quality.
A change in hosting provider means a new IP address and server. Migrating modifies the Domain Name System (DNS) so your web address points to your new host. This means search engine bots will need to recrawl your site at its updated location.
There’s a variety of content and website errors that can impact SEO during migration, too, including:
- Broken redirects and links
- Duplicate content
- 404 Page Not Found errors
- Missing images
You could liken website migration to moving homes. You need to properly pack and label items so everything is easy to find and doesn’t break in transit. It’s also vital to forward and update your mailing address with your post office, cancel and change utility service companies, etc.
It can no doubt be a stressful process. However, the good news is that proper preparation can make the move significantly easier.
How to migrate your WordPress site without hurting your SEO (in 5 steps)
With the right strategy and support in place, site migration can be a simple process. Still, there’s always the risk of something going wrong and it’s better to be safe than sorry. Therefore, we recommend first backing up your site. Once that’s complete, you can get started with the steps below.
Step 1: Install the Duplicator plugin
Moving your website to a new web host involves transferring both your WordPress files and your entire database from your old server to the new one. Manually, this task can be time-consuming and complicated for less tech-savvy users.
However, you can make the process a lot smoother using the Duplicator plugin:

This tool lets you migrate between hosts or domains without downtime. It bundles your site’s content, files, and database into a .zip file. You can then use that ‘package’ to move the contents to your website’s new location.
To get started, first install and activate the plugin. You can do this directly from your WordPress dashboard, or download it via the WordPress Plugin Directory.
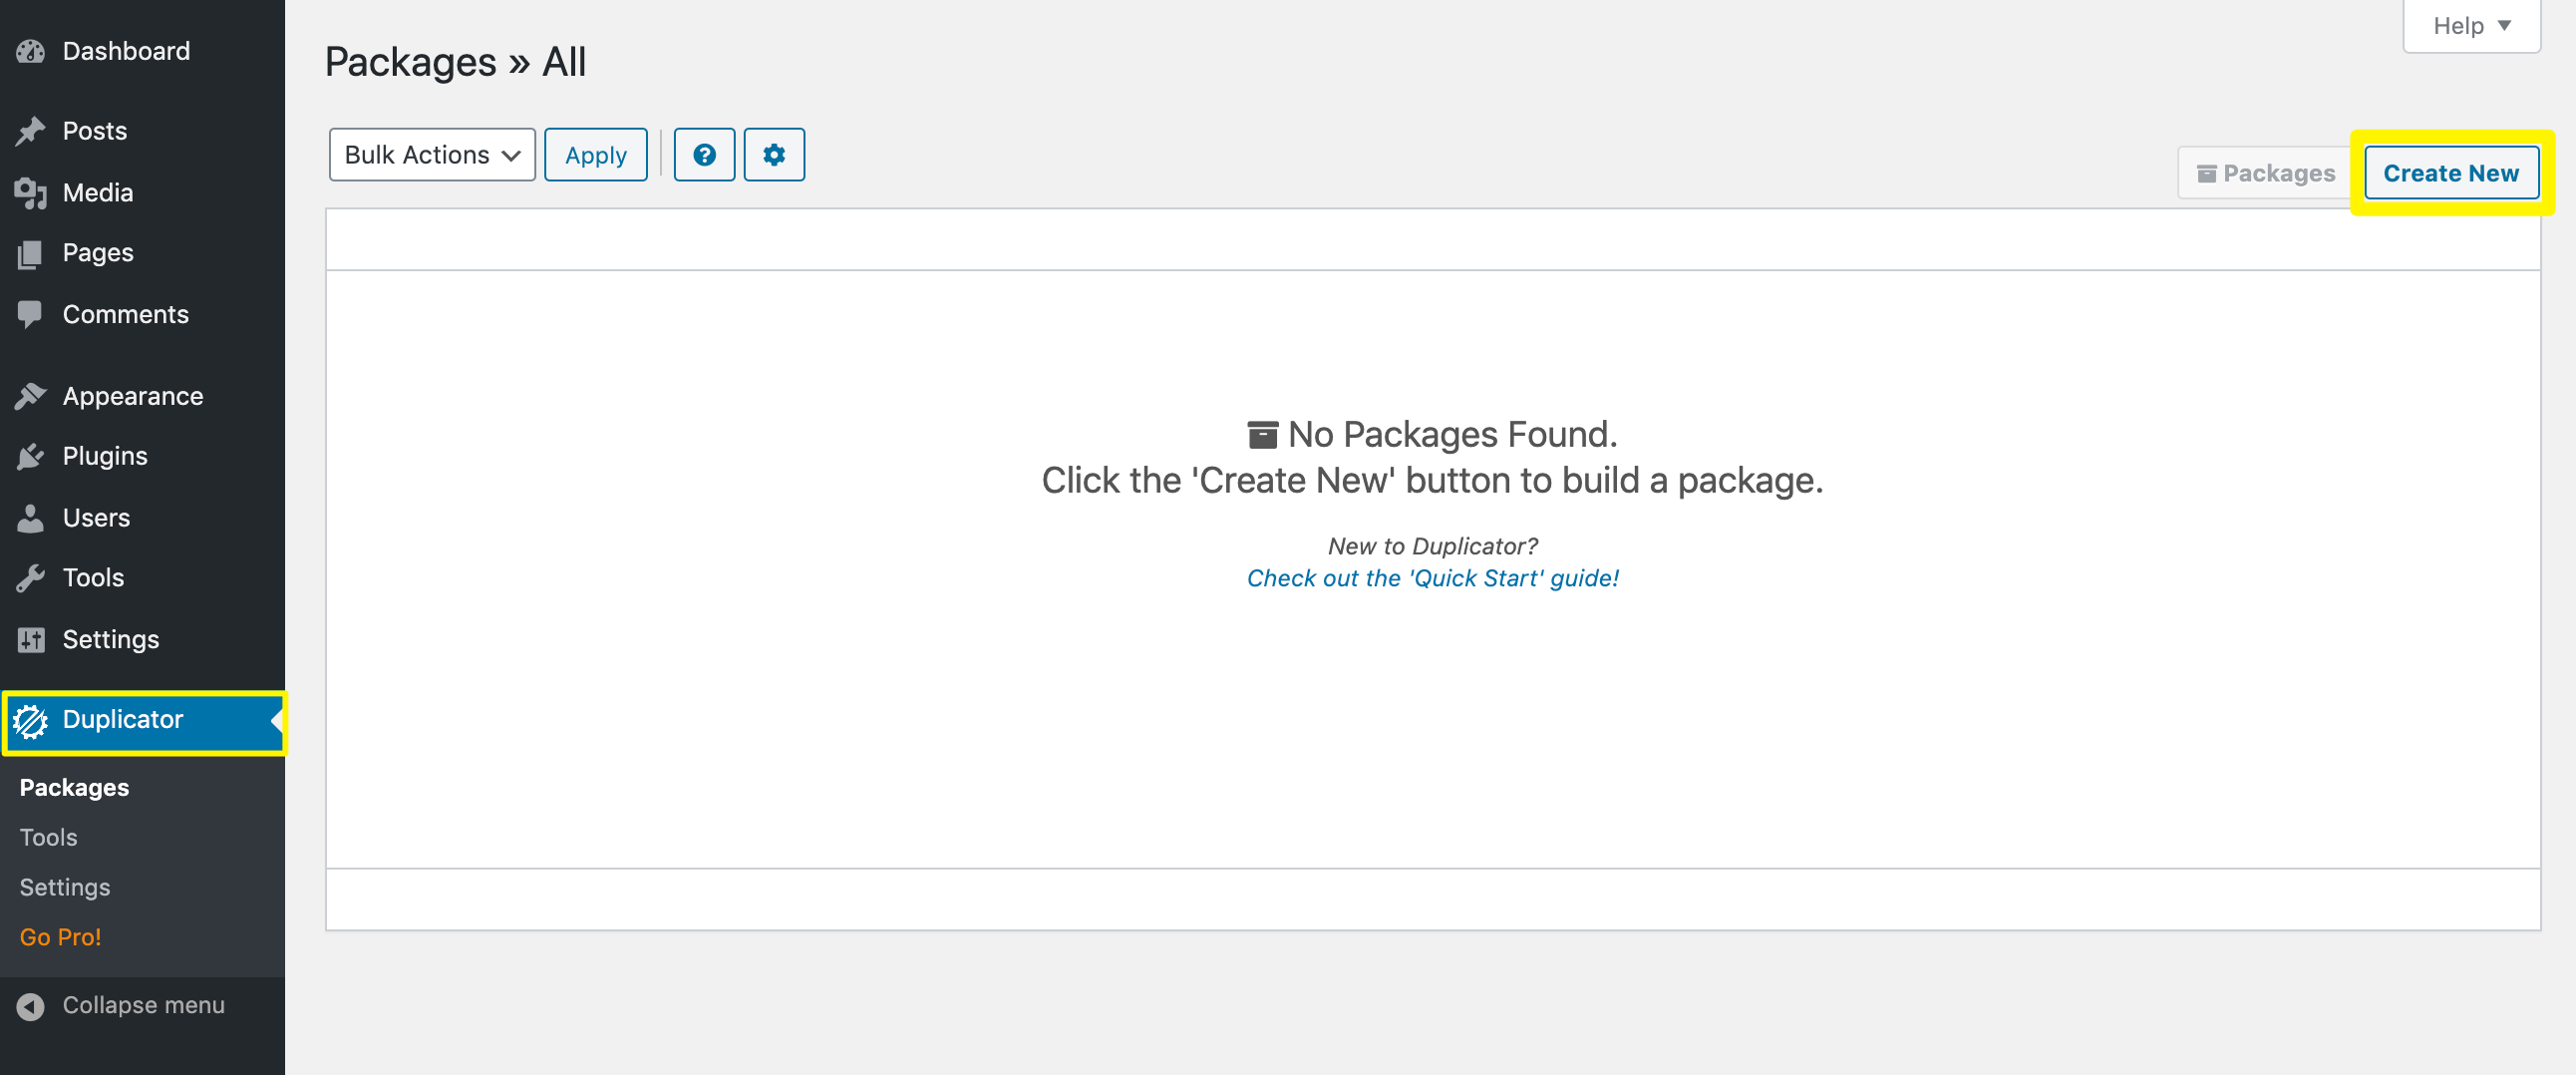
Once it’s activated, a Duplicator link will be added to your WordPress admin menu. Click on it, then select Create New in the top right-hand corner of the screen:
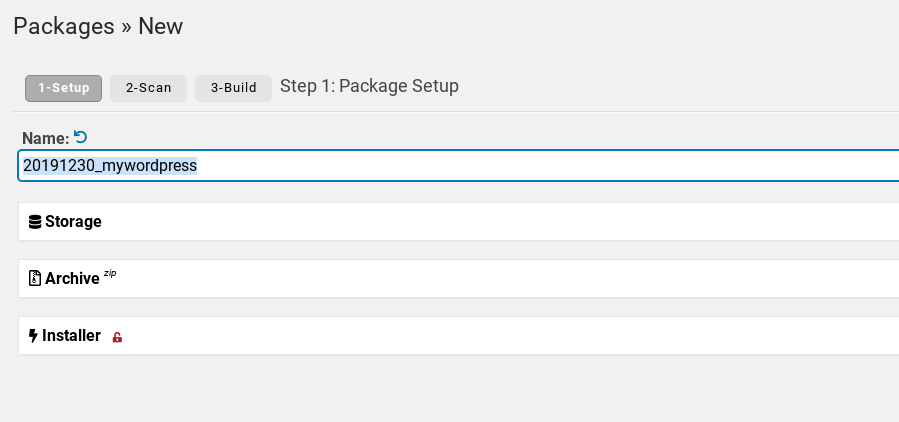
Then, create a name for your package. Under the Archive section, you can choose which files and database tables to include:
When you’re done, click on the Next button. Duplicator will then conduct a scan of your site and notify you of any issues:

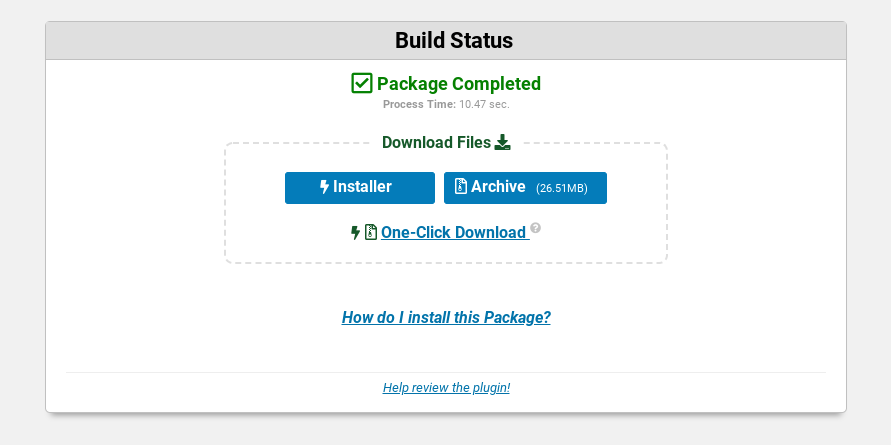
If everything looks good, click on the Build button, then download your package:
You can import this package to your new WordPress installation. If you want to download the package to Cloud storage, you might consider upgrading to Duplicator Pro. Doing so also unlocks premium support features. For detailed instructions, you can refer to the plugin’s documentation.
Step 2: Set up permanent 301 redirects
Setting up permanent 301 redirects is a critical step in migration, particularly when it comes to SEO. Doing so ensures that both search engines and visitors will be able to find your new site from old links.
301 redirects are essential for maintaining domain authority. Without them, you run the risk of compromising User Experience (UX) and your site traffic taking a severe nosedive due to irritating 404 errors.
There are a couple of ways you can implement redirects. To do so manually, locate and open your original site’s .htaccess file. Then add the following snippet of code to the bottom:
#Options +FollowSymLinks
RewriteEngine on
RewriteRule^(.*)$ http://www.newsite.com/$1 [R=301,L]
Make sure to replace http://www.newsite.com/ with your new domain. You can check to make sure the process worked by heading to your old site and confirming it forwards you to your new one.
Another option is to use the Redirection plugin:

This plugin makes it easy to setup 301 redirects as well as monitor and manage 404 errors. You can visit the Redirection Support page for further instructions and guidance.
Step 3: Update all of your links
One of the most important aspects of moving your site is managing your links. This includes both internal and external links.
Hopefully, if you set up your 301 redirects properly, most of your links will be pointing to the appropriate domain. However, it’s not wise to rely on this method alone. Not only can too many redirects overload your server, but they can also hurt your page rank.
Where possible, you’ll want to manually update internal links throughout your site. For instance, say you have your About page in your navigation menu. Instead of keeping the link to your old content and using a redirect, simply change the URL to your new About page.
It’s also a good idea to use a tool to monitor your site for broken links. This will make it easier to spot any that didn’t properly transfer or redirect.
Additionally, it’s essential to make sure incoming links from other sites are pointing to the appropriate domain. This can be a bit trickier than updating internal links, but is crucial for SEO.
You can start by updating all your social media channels and email signatures. You may also want to ask external sites to update any backlinks to your site, or disavow them so Google doesn’t crawl them.
Step 4: Notify Google about the change
As we mentioned earlier, when you move homes, there are certain agencies you have to notify, such as the post office and utility companies. Well, the same goes for migrating your website.
To minimize the impact the move has on your site’s SEO, it’s important to let Google know about the change. Fortunately, this is a simple process.
First, sign in to your Google Search Console account. Click on Settings in the left-hand navigation sidebar, then click on the Change of Address option:
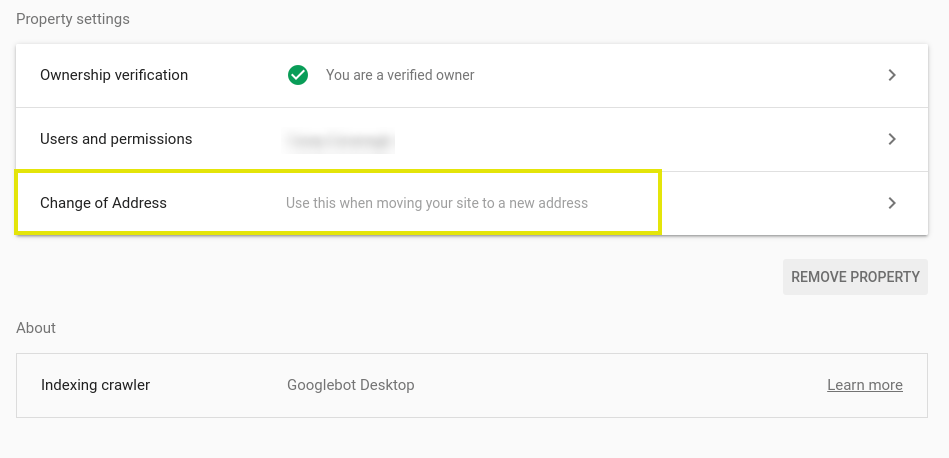
From there, you can submit your old and new domains. When you’re done, Google will be notified of your site migration and can account for a large volume of redirects accordingly. To learn more, refer to Google’s support documentation.
Step 5: Add an XML sitemap
Your sitemap tells search engine crawlers about the relationships between your content. This helps the bots index your pages more effectively. Therefore, for SEO purposes, it’s important that Google has an updated one for your new domain.
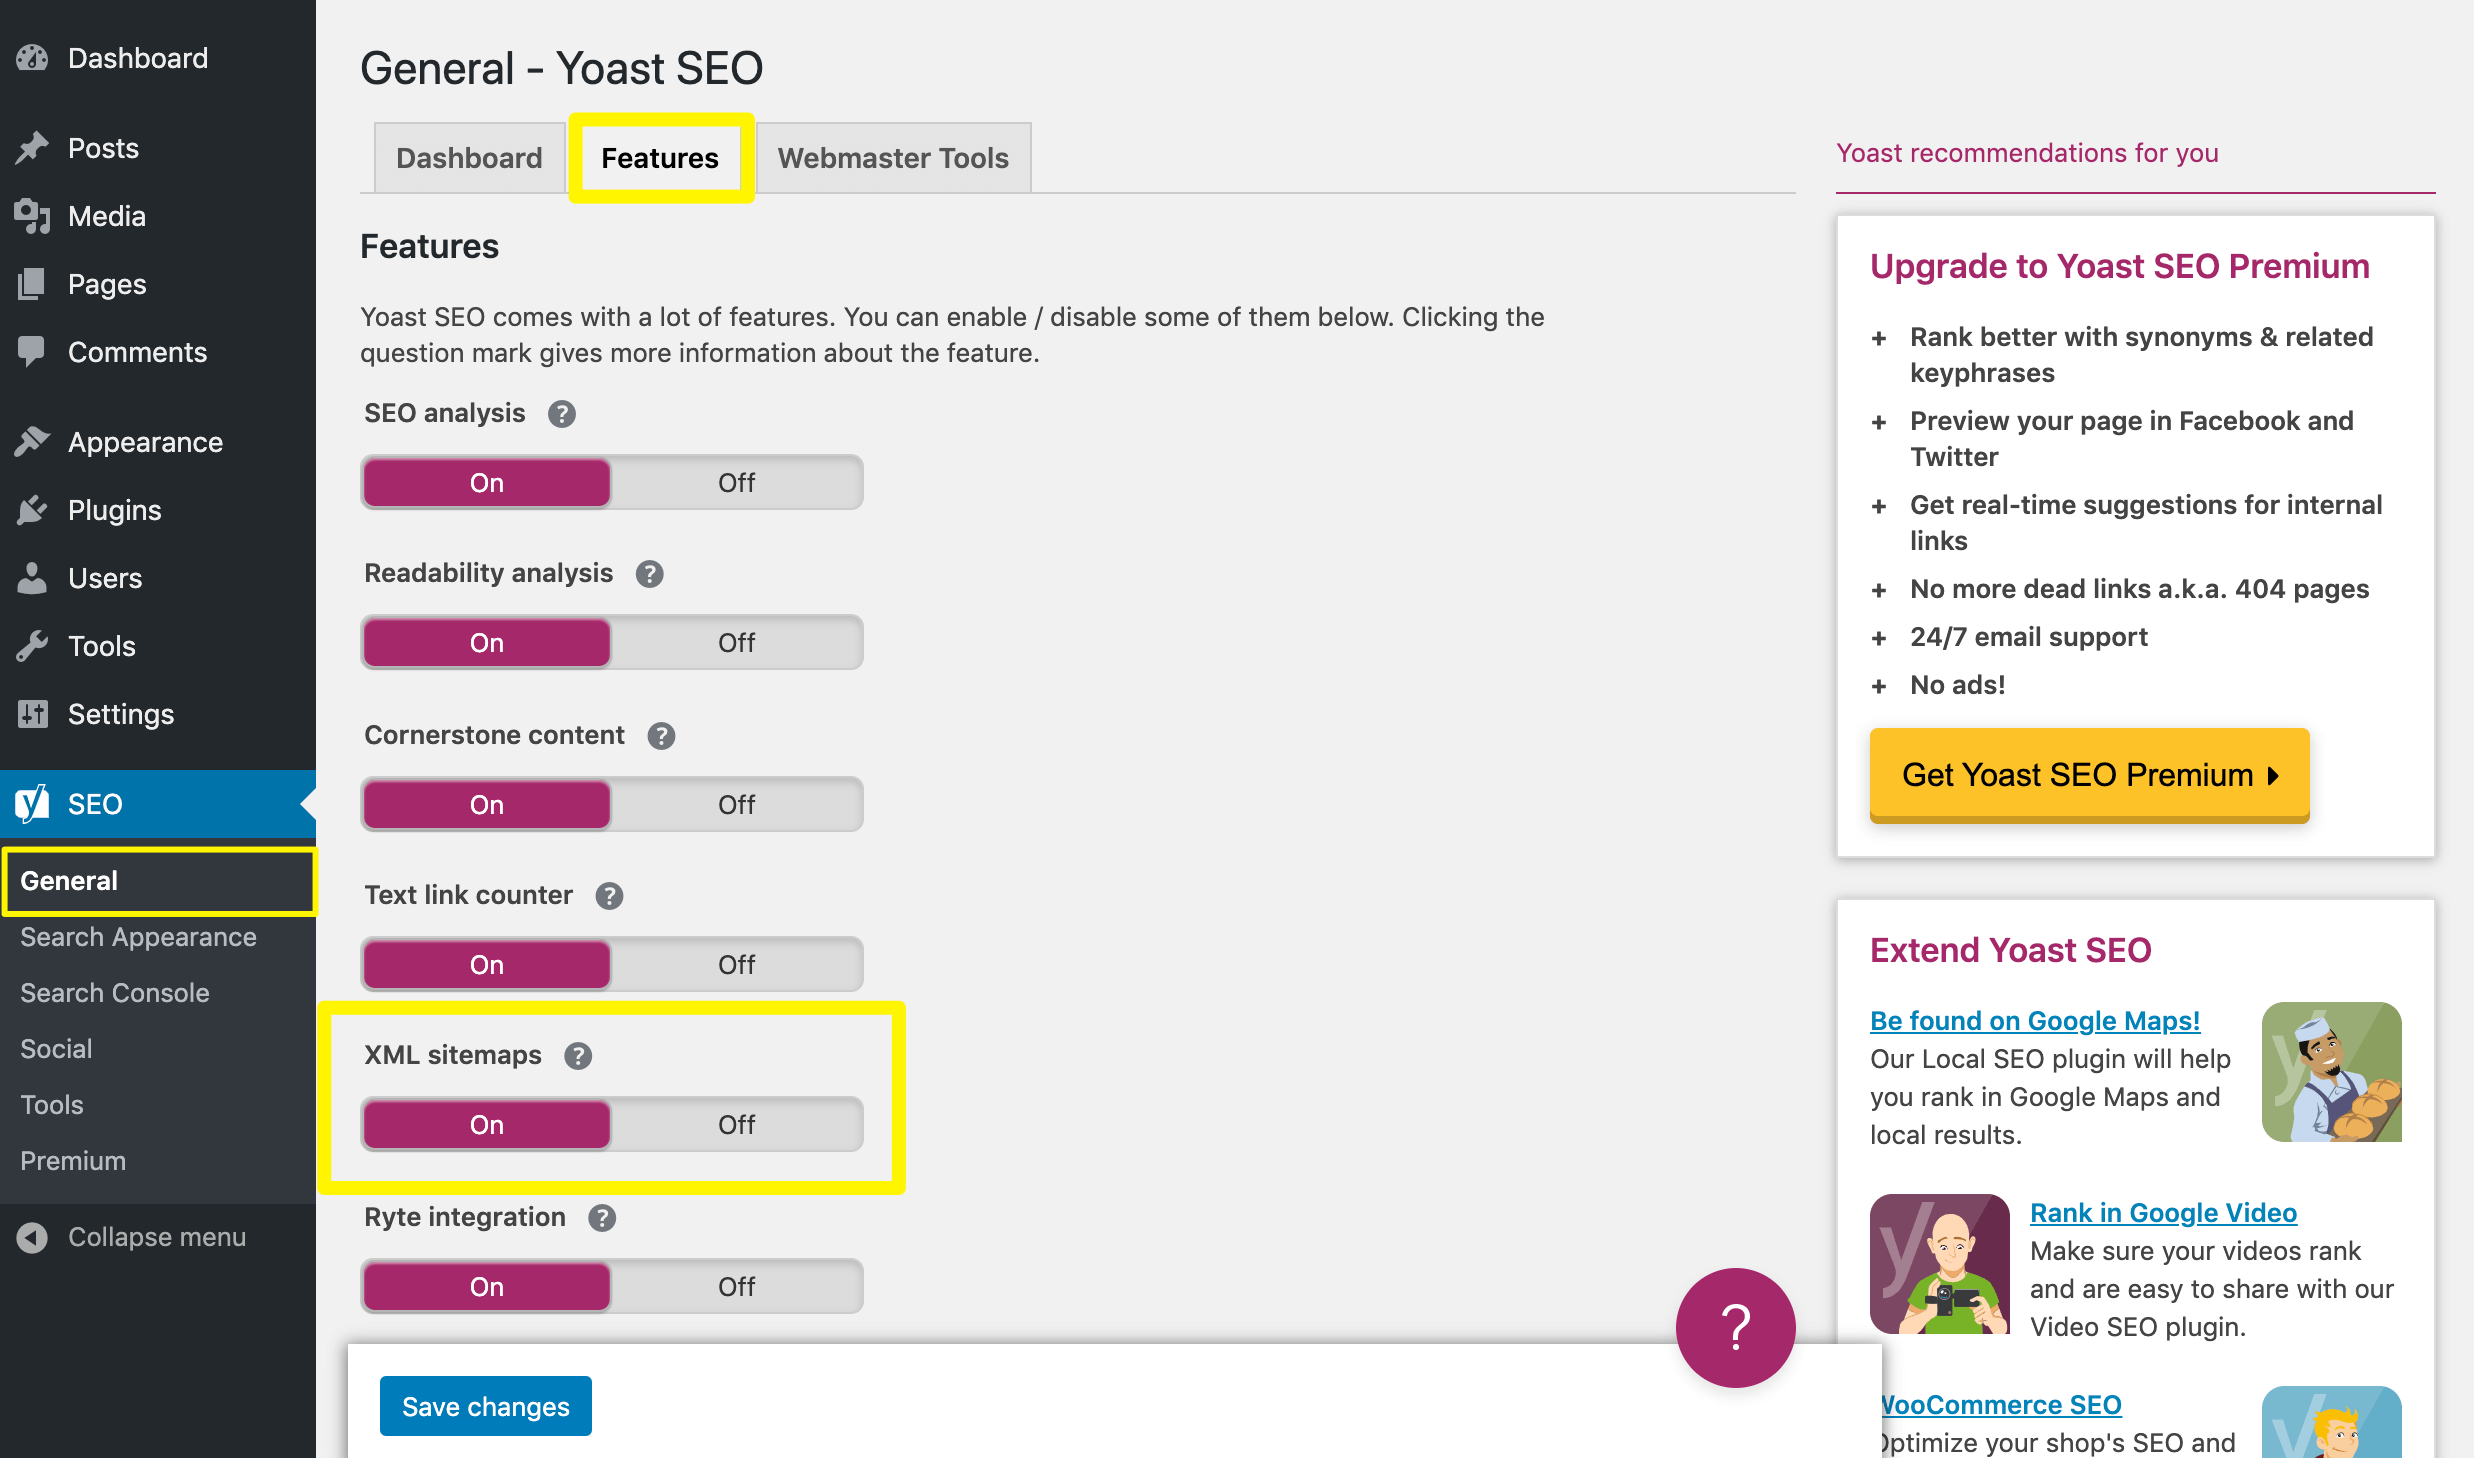
For WordPress sites, Yoast SEO‘s sitemap generator is a popular method for creating this key content. With the plugin installed and activated, simply navigate to SEO > General > Features and make sure the XML sitemaps option is toggled On:
This will generate a new sitemap at yourdomain.com/sitemap_index.xml. The next step is to submit this URL to Google Search Console. From your dashboard, click on Sitemaps in the left-hand navigation sidebar under the Index section:
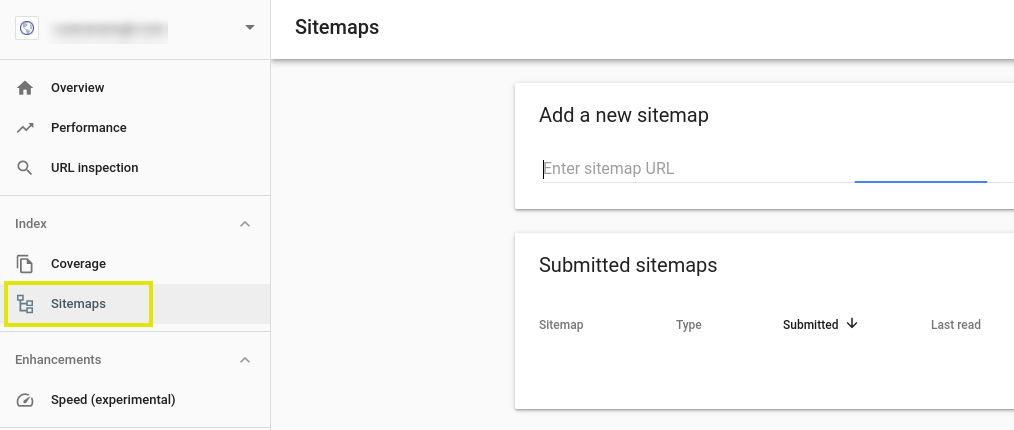
Then enter your sitemap URL. When you’re done, click on the Submit button.
Conclusion
Whether you’re changing web hosts or investing in a new domain, the thought of migrating your website can be daunting. The last thing you want is to lose your position in search engine rankings because of the move. Fortunately, you don’t have to.
As we discussed in this article, there are five steps you can follow to migrate your WordPress site with minimal impact on its SEO:
- Install the Duplicator plugin.
- Set up permanent 301 redirects.
- Update all of your links.
- Notify Google about the change.
- Add an XML sitemap.
Do you have any questions about migrating your WordPress site? Let us know in the comments section below!
Featured Image credit: Pexels.

Andy Globe
Thanks for this. What is the difference for migrating to new host (and domain)? Is there any difference in steps and instructions?
CatalystPR
i havent tried the duplicator plugin,
other things like redirection, XML updation worked for me.