Great content is what keeps people coming back to your blog time and time again, but having a nice design that includes relevant, interesting images helps to keep visitors on your site for longer. They increase the likelihood they’ll read your full post and come back later for more.
Today, I’m going to outline some tips for choosing great photos with plenty of editing and sizing tips to ensure their presentation is professional and lives up to the standards of your blog as a whole.
What’s an Awesome Image Made Of?
Any image can be great for your blog post if it makes sense to use. But that whole “makes sense to use” part might not be so clear to everyone, so let’s take a moment to talk about what that means.
Great blog post images do the following:
- Fit the tone of your post: If you write a post with a tone that’s supposed to evoke feelings of home, a photo of a hearth, family, or fuzzy puppy might be a good choice. If your post is about corporate relationships, a photo of an office or of two business people talking fits. Photo selection is all about illustrating your blog posts. Think about what photos will best describe your post visually. The old adage, “a picture is worth a thousand words,” has never been truer online. A photo that “pops” encourages people to click.
- Go with your theme: Now, every image in every blog post you ever write doesn’t have to match the look, feel, and color scheme of your theme exactly, but you should try to select photos that, at the very least, don’t clash. This is all the more reason to pick a theme that is really versatile and uses a color palette that goes with just about anything (but that’s a topic for another blog post).
- Surprise the reader: Much of the time, your photo selections will match perfectly with your headline. If you write, “10 Ways to Spice Up Your Eggnog This Season,” the photo is probably going to be of a frothy glass of eggnog. But sometimes the photo that’s an unlikely choice is even better. It catches readers off-guard and makes them say, “Hmm, how does that fit in with the headline?” It can encourage the click even more than relevant images when done right.
Where to Find Blog Post Photos
Regardless of the above, if you don’t know where to look for these awesome photos, you might feel like you’re up a certain creek sans paddle. And no, searching Google Images and tossing the first result for your keyword into the post without attribution is not okay!
There are several stock photography sites online, but I always come back to the same small number of tools:
- Compfight (Flickr search engine)
- Google Advanced Image Search
- Icon Finder
- Stock.xchng
As far as I’m concerned, that’s all you need. Always remember to pick Creative Commons images only and always attribute the author!
Editing and Sizing Photos
For the most part, you don’t even need Photoshop to make basic edits to the images you want to use because WordPress has an image editor built right into the user interface.
It’s not super robust, but it offers the basics: resizing, cropping, rotating, etc., which covers what most users would need on a day-to-day basis.
To manipulate your photos, you need to first upload them. You can do this within an individual post by clicking Add Media > Upload at the top of the post editor or from the Media > Add New option on the lefthand side of the Dashboard. However you get to an individual image, once on the image view screen, click on Edit Image beneath it. This opens up the Edit Media screen:
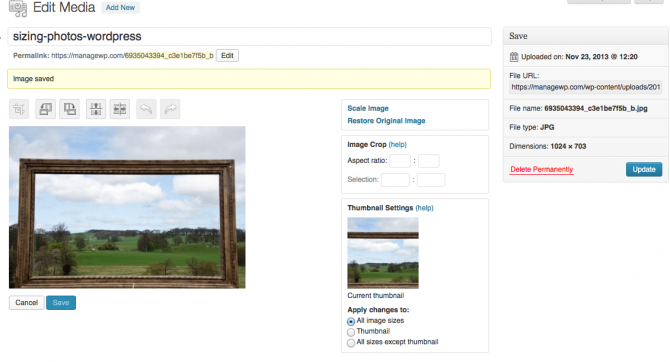
If the image needs to be rotated, click the appropriate button across the top of the image: Rotate Counter-Clockwise, Rotate Clockwise, Flip Vertical, or Flip Horizontal. Undo and Redo buttons are also there if you need them.
Next, you should scale your image. This is located to the right of the image preview. Scaling an image allows you to modify its size proportionally. So, if you like the photo as is, but it’s just too big or it needs to be a specific pixel height or width, you can scale it down. WordPress will maintain proportional dimensions (if you input a number in the height box, it will automatically adjust the width box), so you don’t have to worry about oddly stretched images.
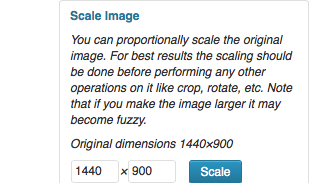
As a general rule, scaling a photo up is a bad idea. It tends to result in blurry or pixelated images. If you do decide to do this, don’t exceed a 10% increase.
The next thing you should do is crop your image. To do this, drag your cursor over the image to select the area you wish to keep. Adjust the borders of the selected space from left to right and up and down to get it just so. Then press the Crop button. It’s the first option in the listed tools above the image preview area:
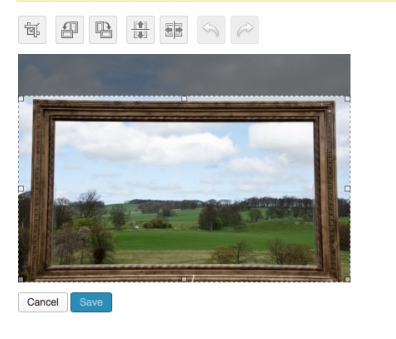
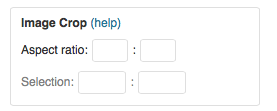
To be more precise in your cropping selection, you can use the Image Crop tool, which is located right beneath the Scale Image tool. This allows you to crop an image to specific size. Input the aspect ratio you want then drag across the image to make your selection. But hold down shift as you do. Press the crop button and you should be good to go.
Also, be sure to give your image a title, description, and alt text. Add a caption if you see fit.
Lastly, you can select where you want these changes to appear. That is, do you want the edits to apply to wherever the photo appears on your blog? Just in the thumbnail view? Everything but the thumbnail? Make your selections then click Save beneath the image preview.
The good news here is if you discover you’ve messed up after saving the image, you can always click Restore Image and it’ll go back to how it appeared when you first uploaded it. Safety protocols for the win!
Once you’re all done editing, go ahead and insert the edited and resized photo into your post of choice. Or, if your theme called for it, set it as your Featured Image. Depending on your theme, featured images are handled in one of three ways:
- The Featured Image appears above your post’s title
- The Feature Image appears as your post thumbnail
- The Featured Image appears as the thumbnail and above the post’s title.
If you wish to insert several photos into a single post, you might want to make use of the Image Gallery tool. You do this by going to Add Media > Create Gallery and selecting all the photos you want included. Once you’re satisfied with your selections, click Create a New Gallery to insert it into the post.
Conclusion
Photos make a huge difference in how your blog posts are received by readers. They also give you plenty of opportunities to catch attention on social media, so choosing the right imagery is key.
However, knowing what to do with those photos once you’ve picked them out of a lineup is just as important. So, hopefully these quick tips get you started on the right path toward blog post photo greatness!
How do you pick photos for your blog posts? What’s does a picture need to have to be a winner in your eyes? Let us know in the comments section below!
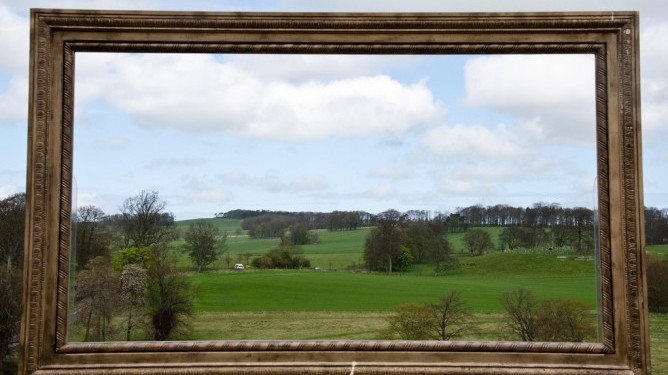
Image source: Darrel Birkett

image editing company
Sizing photos for wordpress is really vital and without having proper size and editing work an image cannot be perfectly fit with wordpress and that’s why should have to editing photos for wordpress perfectly. Thanks
John Cameron
I just wanted to say thanks for this blog. I just moved my website over to WordPress and your blog contains by far the clearest instructions I’ve come across. I’ve favorited it because I expect to be returning many times.
Tom Ewer
Thanks John! Glad it helped 🙂
ginger
I think you are reading my mind as to my un-asked questions 🙂 I want to use quality, legal photos in my posts but wasn’t sure what stock sources existed. Also, I was wondering where to find those images on the columns in the new theme designs I see — it looked like those are referred to as icons (your Icon Finder link) This is a big relief. I am confident I will pick up WordPress rather quickly but designing images? Well, just think stick figures 😉
Tom Ewer
Hi Ginger,
Sorry — are you asking me where to find free images for the web?
Cheers,
Tom
ginger
Hi Tom, I was thanking you for the links in your post that I believe already show me images I can use. If you can think of more, however, sure, send them on…..especially those flattened — iconish ones.
Susan
Hi Tom
Just tried going through all the steps outlined above to practice editing and sizing of photos but my WP site doesn’t appear to have this function. I can add media and upload it with no problems but can’t seem to edit the images. As far as I am aware I have the latest version of WP, so is there a plugin that I should be uploading to do this???
Tom Ewer
No Susan…I’m afraid I have no idea why you’re struggling! :-S
serge
No offense, but recommending the use of Google search might as well recommend stealing. 90% of the time people do not bother seeking to find the owner of the image. As a photographer I have heard multiple times “I thought I could use it, I found it on Google Image Search”
serge
Also, your advice on scaling is incomplete. Scaling DOWN does not reduce image quality. Any tool if you scale a pixel (non vector image UP will reduce quality. New Photoshop CC has some algorithms that guess and do better but in general scale up just is a waste of time. Scale down, at least in my experience, does not reduce quality of images and for people with no image editing software reduced file size (aka load time in many themes)
Tom Ewer
I’m not sure what your point is here — I recommend scaling down and don’t say that it reduces image quality.
Tom Ewer
Hi Serge,
I’m confused by this comment, considering I state (in bold type) in the post that “searching Google Images and tossing the first result for your keyword into the post without attribution is not okay!”, and follow that up with, “Always remember to pick Creative Commons images only and always attribute the author!” Finally, I link to Google Advanced Image search (not just plain Google search), which enables you to filter results by usage rights. How more explicit could I be that you shouldn’t steal images and not attribute image authors?
Cheers,
Tom
wsspoelstra
WP Smush it plugin runs automatically, and reduce your file-size. There are also plugins that can reduce the size of the image when uploading, so that saves file-size as well.
Tom Ewer
Beat me to it! 🙂
Willem-Siebe
Resize Image After Upload by Jepson Rae!
321media
Great article.
What I’m missing is how te reduce (in simple way) the file-size within WP? Because a lot of people just drag the images into WP and not thinking about file-size.
Tom Ewer
This could help: http://wordpress.org/plugins/wp-smushit/