How to Restore a WordPress Site From Backup
It’s everyone’s worst nightmare and it has just happened to you! – your site has failed, been hijacked, or just fallen to pieces. This is why it is so important to backup WordPress websites regularly. And it’s one of the reasons ManageWP is so great – it takes care of your backups for you. You can restore a backup in just one simple step, giving you a whole lot of peace of mind when it comes to managing your WordPress sites.
This tutorial will show you different methods of restoring a backup to a site. You’ll see just how much easier it is to restore your backup using ManageWP than to carry out a manual restoration.
To get started with it, you should already have your backup files available. You can read here about how to create a backup with ManageWP.
There are three ways you can restore a backup:
- From the ManageWP Dashboard (if the backup is stored on your site server)
- Using the ManageWP Clone Tool
- Manually
Let’s take a look at all three methods:
Restore a Backup from the ManageWP Dashboard
The quickest and simplest way to restore a backup is from the ManageWP Dashboard. Click on the site’s name at the website sidebar and take a look at the Recent Backups widget.
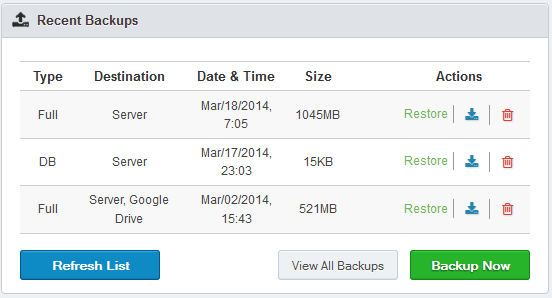
You’ll be given a list of your backups. If you have one available on the server you will be able to simply click Restore and your site will be restored.
In order to restore your backup from the Backups widget, the site would have to be properly connected to your ManageWP dashboard ( which you could check by clicking on the Sync Dashboard button in your ManageWP dashboard ).
If the site is not properly connected, please attempt using the ManageWP Clone tool to restore your site from a publicly available backup URL or attempt a manual backup restore.
Please note, that if after clicking on restore, a 500 Internal Server Error is generated, this indicates that your site probably doesn’t have enough server resources and asking your hosting provider to increase them should help.
Using the ManageWP Clone Tool
If the communication between ManageWP and the site you wish to restore is interrupted and you are unable to restore a backup from the Recent Backups widget, you can use the clone tool to take care of it for you.
1. Re-install WordPress
There will be some cases in which your WordPress installation will be so badly damaged that you will need to re-install WordPress. Most web hosting companies now offer Fantastico which offers one-click installation of WordPress. If you need help with the manual installation of WordPress you can check this guide in the WordPress Codex.

2. Re-Add Your Site to ManageWP
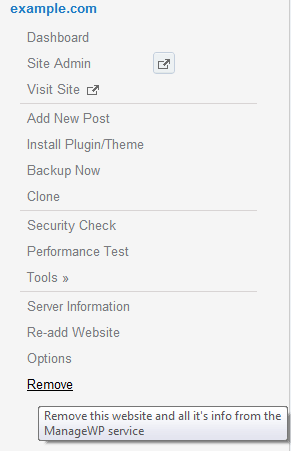
You will need to drop the site from ManageWP and then reinstall it. To remove a site from ManageWP, click on its name at the website sidebar and then click Remove.
Now add your site again. If you need help with this you can follow this tutorial.
3. Upload the Backup file
You need to upload the backup of your site to your server so that you can clone it to your WordPress installation. Open up your FTP client. On your local computer find your backup, and on your remote site navigate to your root domain. It’s a good idea to rename your zip file to something like backup.zip to make it easier for you to transfer to the site.

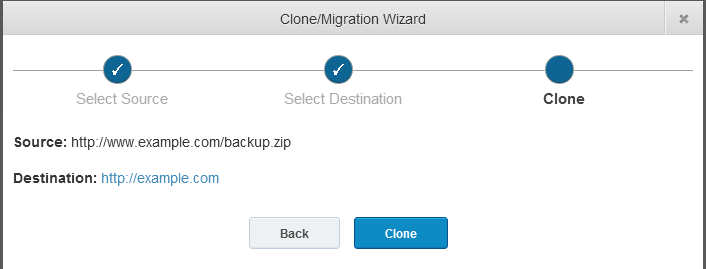
4. Clone the Site
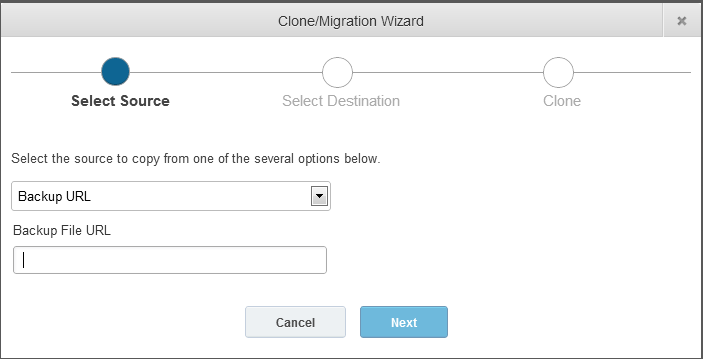
Now it’s time to log into ManageWP. Navigate to Backup/Migrate > Clone/Migration wizard. Input the location of the backup file that you just uploaded.
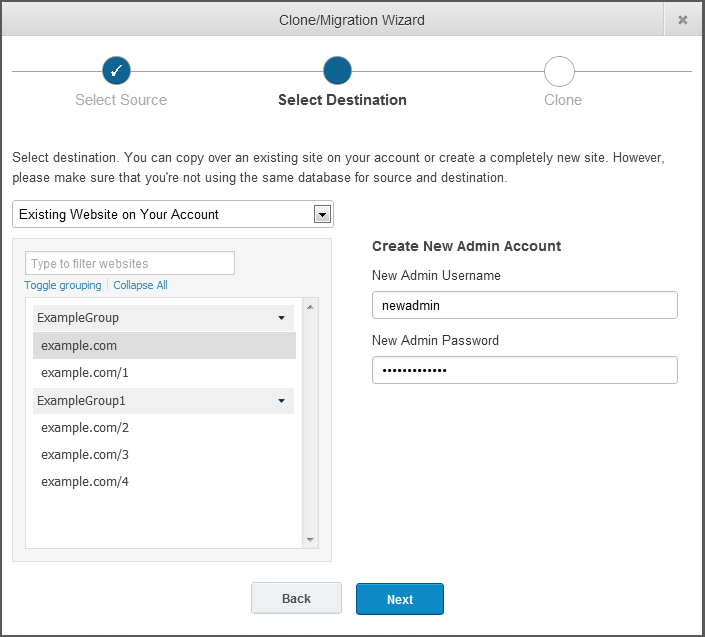
Choose to install to an Existing Website. Select the site you wish to install to.
In order to clone to an Existing site, the site would have to be connected properly to your ManageWP dashboard, and to check this you could click on the Sync Dashboard button in your ManageWP dashboard.
Click Next and confirm that you wish to start the clone process.
Now sit back and watch your site getting restored!
Manually Restore a Backup
When all else fails, here’s how to manually restore a backup.
1. Grab Your Backup Files
Your backup will be available to you as a .zip file. The files in it will need to go to two places:
- restore the MySQL database using phpMyAdmin
- restore the files using FTP
First, you’ll need to unzip the backup file to an easy-to-reach location on your computer.

2. Restore your Database
The first thing you need to do is to upload your MySQL database backup. To do this, log in to your hosting account’s control panel and click on phpMyAdmin. If you don’t know how to find it check your host’s support documentation.

If your database no longer exists you will need to create a new one. You can read about how to do that here.
If the database still exists, click on it.

You’ll see a list of all of your database tables. You will need to drop these.
Scroll down to the bottom and select Check All so that they are all selected. Then, from the drop down menu select Drop.

You will be asked if you’re sure you want to drop the tables. Select Yes.

When the tables are successfully dropped your database should now look like this.

You now have a completely empty database that you can restore your backup to.
Go to More > Import

You will now need to find the correct file to upload. Click on Choose File and navigate to the folder where you unzipped your backup to.

Open the folder and select your database backup.
You’re then set to hit go.
The content of your site has now been restored!
If it’s just your database that has been corrupted then your site will be restored. However, if your files are also missing you will need to upload these via FTP.
3. Restore Your Files
Now you’ve got to restore your files to replace all plugins, themes and media. Open your FTP program and input your login details. These will be available from your web host.

On your local site navigate to your unzipped backup. On your remote site navigate to the location of the website you want to restore. Select all of the WordPress files on your local site and drag and drop them to the root of your remote site.

Once your files have finished uploading your site will be completely restored!