Install the ManageWP Worker Plugin
ManageWP offers the optimum working experience in managing multiple WordPress websites, and for this reason we made setting up ManageWP as easy as possible. The first step involves installing our Worker Plugin on any WordPress site you intend on managing with ManageWP. This plugin lets ManageWP communicate with your website. Once the plugin is installed you can add the site to your ManageWP Dashboard.
Important! You should only install the Worker Plugin when you are ready to add your site to your ManageWP Dashboard!
Once the plugin is installed, your website can be added to any ManageWP account. Adding your own site straight away closes the loop and prevents any security issues.
There are three main ways you can install the Worker Plugin:
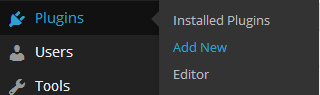
The Worker Plugin is in the WordPress repository, and you can simply search for it in your dashboard. Navigate to Plugins > Add New.
Another viable option is to upload the plugin using an FTP client.
Let’s take a look at each of these methods.
1. Installing From ManageWP
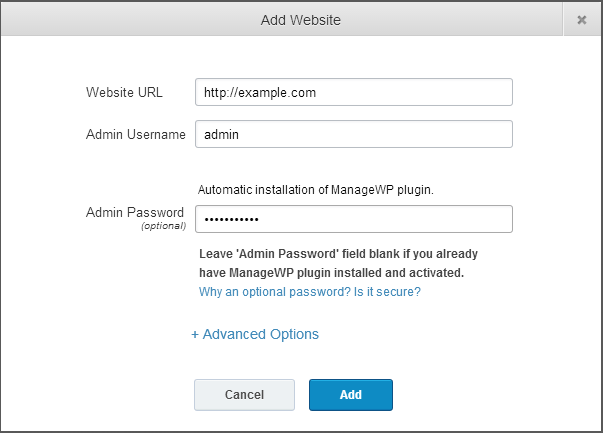
When you want to add a site to ManageWP, by filling in both the Admin Username and the Admin Password fields, the ManageWP Worker Plugin will automatically get installed and activated and your site will be added.
2. Installing via the WordPress Dashboard
If you’re familiar with WordPress then you know how easy it is to install plugins from the dashboard. Log into the site that you wish to manage using ManageWP.
Navigate to Plugins > Add New:
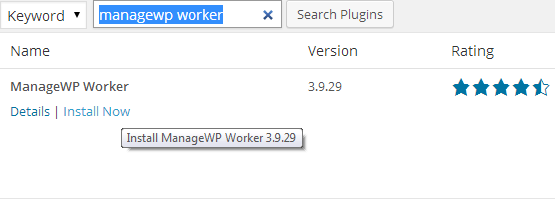
In the search box type in “managewp worker”. The first search result that appears should say “ManageWP Worker”. Click Install Now.
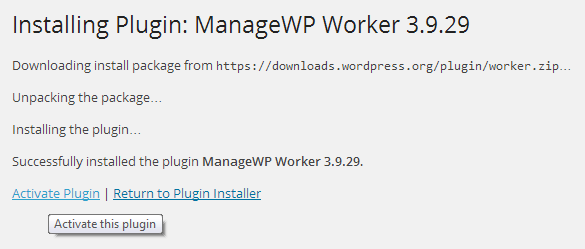
When the plugin has been installed click Activate Plugin.
You should now add the site to your ManageWP Dashboard immediately.
3. Uploading via FTP
Some website administrators prefer to upload their plugins using an FTP client. If you prefer to use FTP, you can follow the steps below to manually install the Worker plugin using an FTP client like FileZilla. Here’s how you do it:
Download the ManageWP Worker Plugin.
Unzip the plugin.

Open your FTP program and log in. If you do not know your FTP login credentials you should check with your web host.

On the left hand site you’ll see your local site (i.e. your computer) and on the right you will see your files stored on your server.

On your computer navigate to the location of the unzipped worker plugin and on your server navigate to yoursite/wp-content/plugins. To upload the plugin all you have to do is drag the plugin folder to the correct location on your server. Like so:

Finally, you need to activate your plugin. Log in to your WordPress Dashboard on your website.
Navigate to Plugins > Installed Plugins
Under ManageWP – Worker click Activate.

The Worker Plugin is now installed and activated. You should immediately claim your site by adding it to ManageWP.
Also, if you are a command-line person, check this part of our FAQ on how to install and activate ManageWP Worker from the command line by using WP-CLI!