

Last year, I offered up a tutorial for creating a local WordPress site using Xampp for Windows. I also gave you pointers on how to create a local copy of a live WordPress site. Ever since those posts were published, I’ve received multiple requests for a tutorial on what to do once you’re done tinkering locally and wish to upload your site to an online server.
You have a couple of main options. You can use a plugin to turn your local site into a package to be uploaded to your hosting server. There are actually some great tutorials online already about how to make the most of such plugins. Here are a few I’ve come across:
- Duplicator: This plugin makes duplicating, moving, and transferring your site in a variety of different configurations simple. Here’s a nice tutorial from AlumoFowl.
- WordPress Move: This plugin makes migrating a site on localhost to a live host straightforward.
- Update (2018) With a launch of our new Local Sync feature, ManageWP now can be used to push the website changes between localhost and live environments with a single click. No port forwarding or desktop apps needed!
But if you don’t want to use a plugin, the uploading process isn’t that complicated and can be accomplished within a relatively short period of time. All of your settings, themes, posts, pages, and plugins will be uploaded in the right place, intact.
Let’s get to it!
1. Get Familiar with phpMyAdmin
The first step is to familiarize yourself with phpMyAdmin. Why? Because WordPress runs on PHP. It actually uses PHP to call up information from a database.
You’re not making new HTML pages when you make new posts in WordPress. Rather, WordPress is using PHP to reference the database and dynamically generate your posts and pages on the spot. And while you don’t need to be an expert in this programming language, you do need a basic level of knowledge to upload a WordPress site from a local server to your hosting account.
phpMyAdmin is a piece of open source software that puts an easy-to-use UI on top of your MySQL database. The good news here is that most hosting providers include phpMyAdmin in cPanel, so it is on hand in a convenient place. For more information on this piece of software and how to use it, check out this tutorial over at WPBeginner.
2. Backup Your Database
Before you do anything, it’s essential that you backup your database. This way, in case you make a mistake when trying to upload the local version of your site to a live server, you will have something to fall back on.

To backup your database, select your local WordPress database within the phpMyAdmin list then click Export.
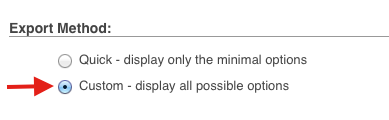
Select Custom then zip as your compression method.

Then click Go. That’s all there is to it.
3. Export Your Database From localhost
Now you’re going to do pretty much the same thing as in the previous step with just a couple of slight variations.
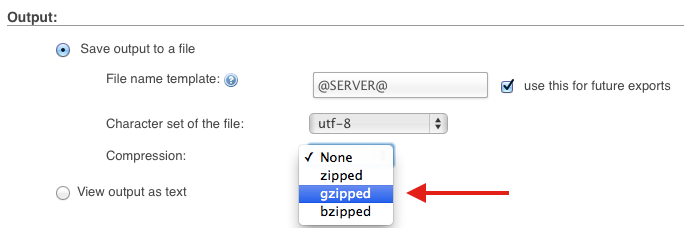
In phpMyAdmin, select your local WordPress database once again and click Export. Click on Custom when prompted for your preferred Export Method. This time, you’re going to select all tables to export and gzipped rather than zip.
Click Go. This will create a copy of your database. This is the version you’ll upload to your live site.
4. Upload Your Database Using FTP
The next thing you’re going to do is actually upload your WordPress files to your hosting account. To do this, you’ll need an FTP client. If your face has gone pale and you have no idea what I’m talking about, check out this tutorial at WordPress.org for FileZilla (my FTP client of choice). It explains all the basics quite nicely.
Once you have a handle on how to use an FTP client, launch your preferred one and connect to your live hosting account. Next, find the directory where you’d like your site to appear.
Typically, you want a site to appear at yoursitename.com. To make sure this happens, select the public_html directory. Then locate the files for your local WordPress site (everything in the WordPress folder when you originally downloaded it), select them all and upload them to the appropriate directory.
5. Create a MySQL Database
Congratulations! Your files are now where they need to be in order for your WordPress site to be visible to the public. However, your job isn’t done yet. You now need to create a MySQL database on your live site.
Doing this will ensure your site appears as you intended and all of your posts, pages, and settings load as they should. Go into the cPanel on your hosting provider. From there, scroll down to the Databases subheading. There you should find an option for MySQL Databases, which looks like this:

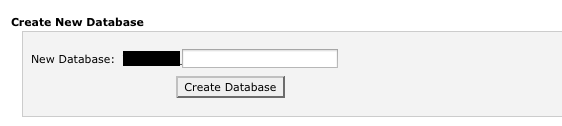
Click on it. Once you’re on the Create New Database screen, input a name for your database. Then click the Create Database button.
Next, locate the MySQL Users section. Create a new user. You will need to create a username and password.
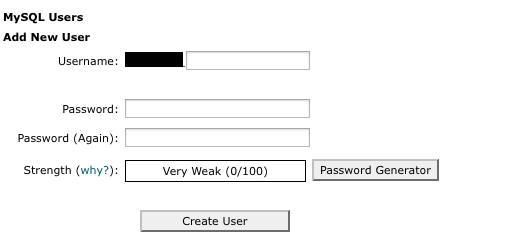
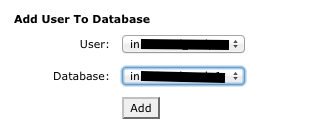
Then add that user (or an existing user) to the database.
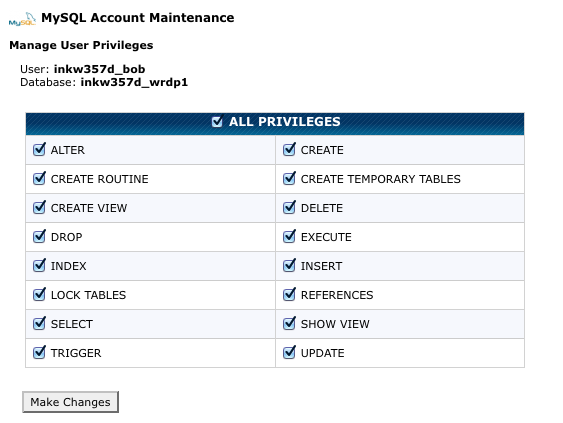
Finally, set the new user’s MySQL privileges. In order for this to work properly, the new user should be granted all privileges.
6. Import Your WordPress Files
Now that you have your database created, you need to import the files you uploaded earlier into this database. Prior to this step, your WordPress files were just kind of hanging out, waiting to be deployed. This is where you fire them into action!
Go back into your cPanel and click on phpMyAdmin. Next, select the MySQL database you created in the previous step. You’ll notice that it doesn’t have any tables. This is where you want to plug in your WordPress info. To do this, click on Import.

A file selection window will pop up. Find the gzipped file you created earlier and upload it by clicking Go.

7. Fixing the URL
You’re getting closer to the end — now you just need to switch some settings so your WordPress site realizes it has a new home.
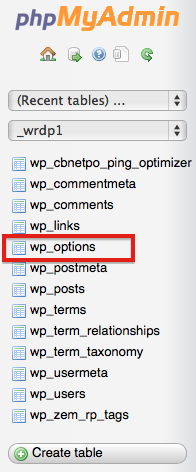
Basically, at this point it time, it will still have configuration settings that match your localhost. You need to fix that. Thankfully, it’s pretty simple. While still in phpMyAdmin, scroll down to the wp_options table. There should be a Browse button to the right of it. Click this.
Once on the next screen, you should see a field called option_name. Beneath that, there should be something called siteurl. Click the Edit link to the lefthand side of this row.
Once the edit window opens, look for the option_value field. It should be to the right of siteurl. It likely currently says something like http://localhost/blahblah. Get rid of this and type or paste in your live site URL.

Click Go to save your changes.
Now, look for the home option underneath the option_name column. Click Edit and input your live site URL under the option_value.

Click Go to save your changes. You can now close out of phpMyAdmin.
8. Finishing Setup
Now you need to open up your FTP client and edit your wp-config.php file. Remember the MySQL database you made earlier? I hope you kept that info on hand because you’ll need it now.
Input your database name, username, and password on the appropriate lines — here’s a quick rundown of how to do it — then save the file and re-upload it onto your live server.
When you type in your website address in your browser now, your WordPress site should appear. And that’s pretty much it! If you find broken links or image pathways, WPBeginner has a nice tutorial of how to deal with that. Other than that, you’re good to go.
Conclusion
Many web masters find building a WordPress site on a local server to be advantageous. It allows for the freedom to experiment without the risk of potential Google caching. Still, the task of uploading the site and changing all of the required settings can be daunting to some. Hopefully this tutorial helped to waylay your fears a bit so you can make the most of your offline WordPress development efforts.
Over to you. What has your experience been with uploading a local site to a live server? Did you run into any problems? Or was it a breeze? I’d love to hear your WordPress migration story.
Image source: screenpunk
Leave a Reply