How to create a template using the new client report design
Basic steps for creating a template:
- Editing general template settings (template name, report language, date range, choose which data to include in the report)
- Customization (add introduction, closing message, logo, customize front page of the report, header and footer settings)
- Edit client information and email settings (change send as email, edit email subject and content)
General template settings
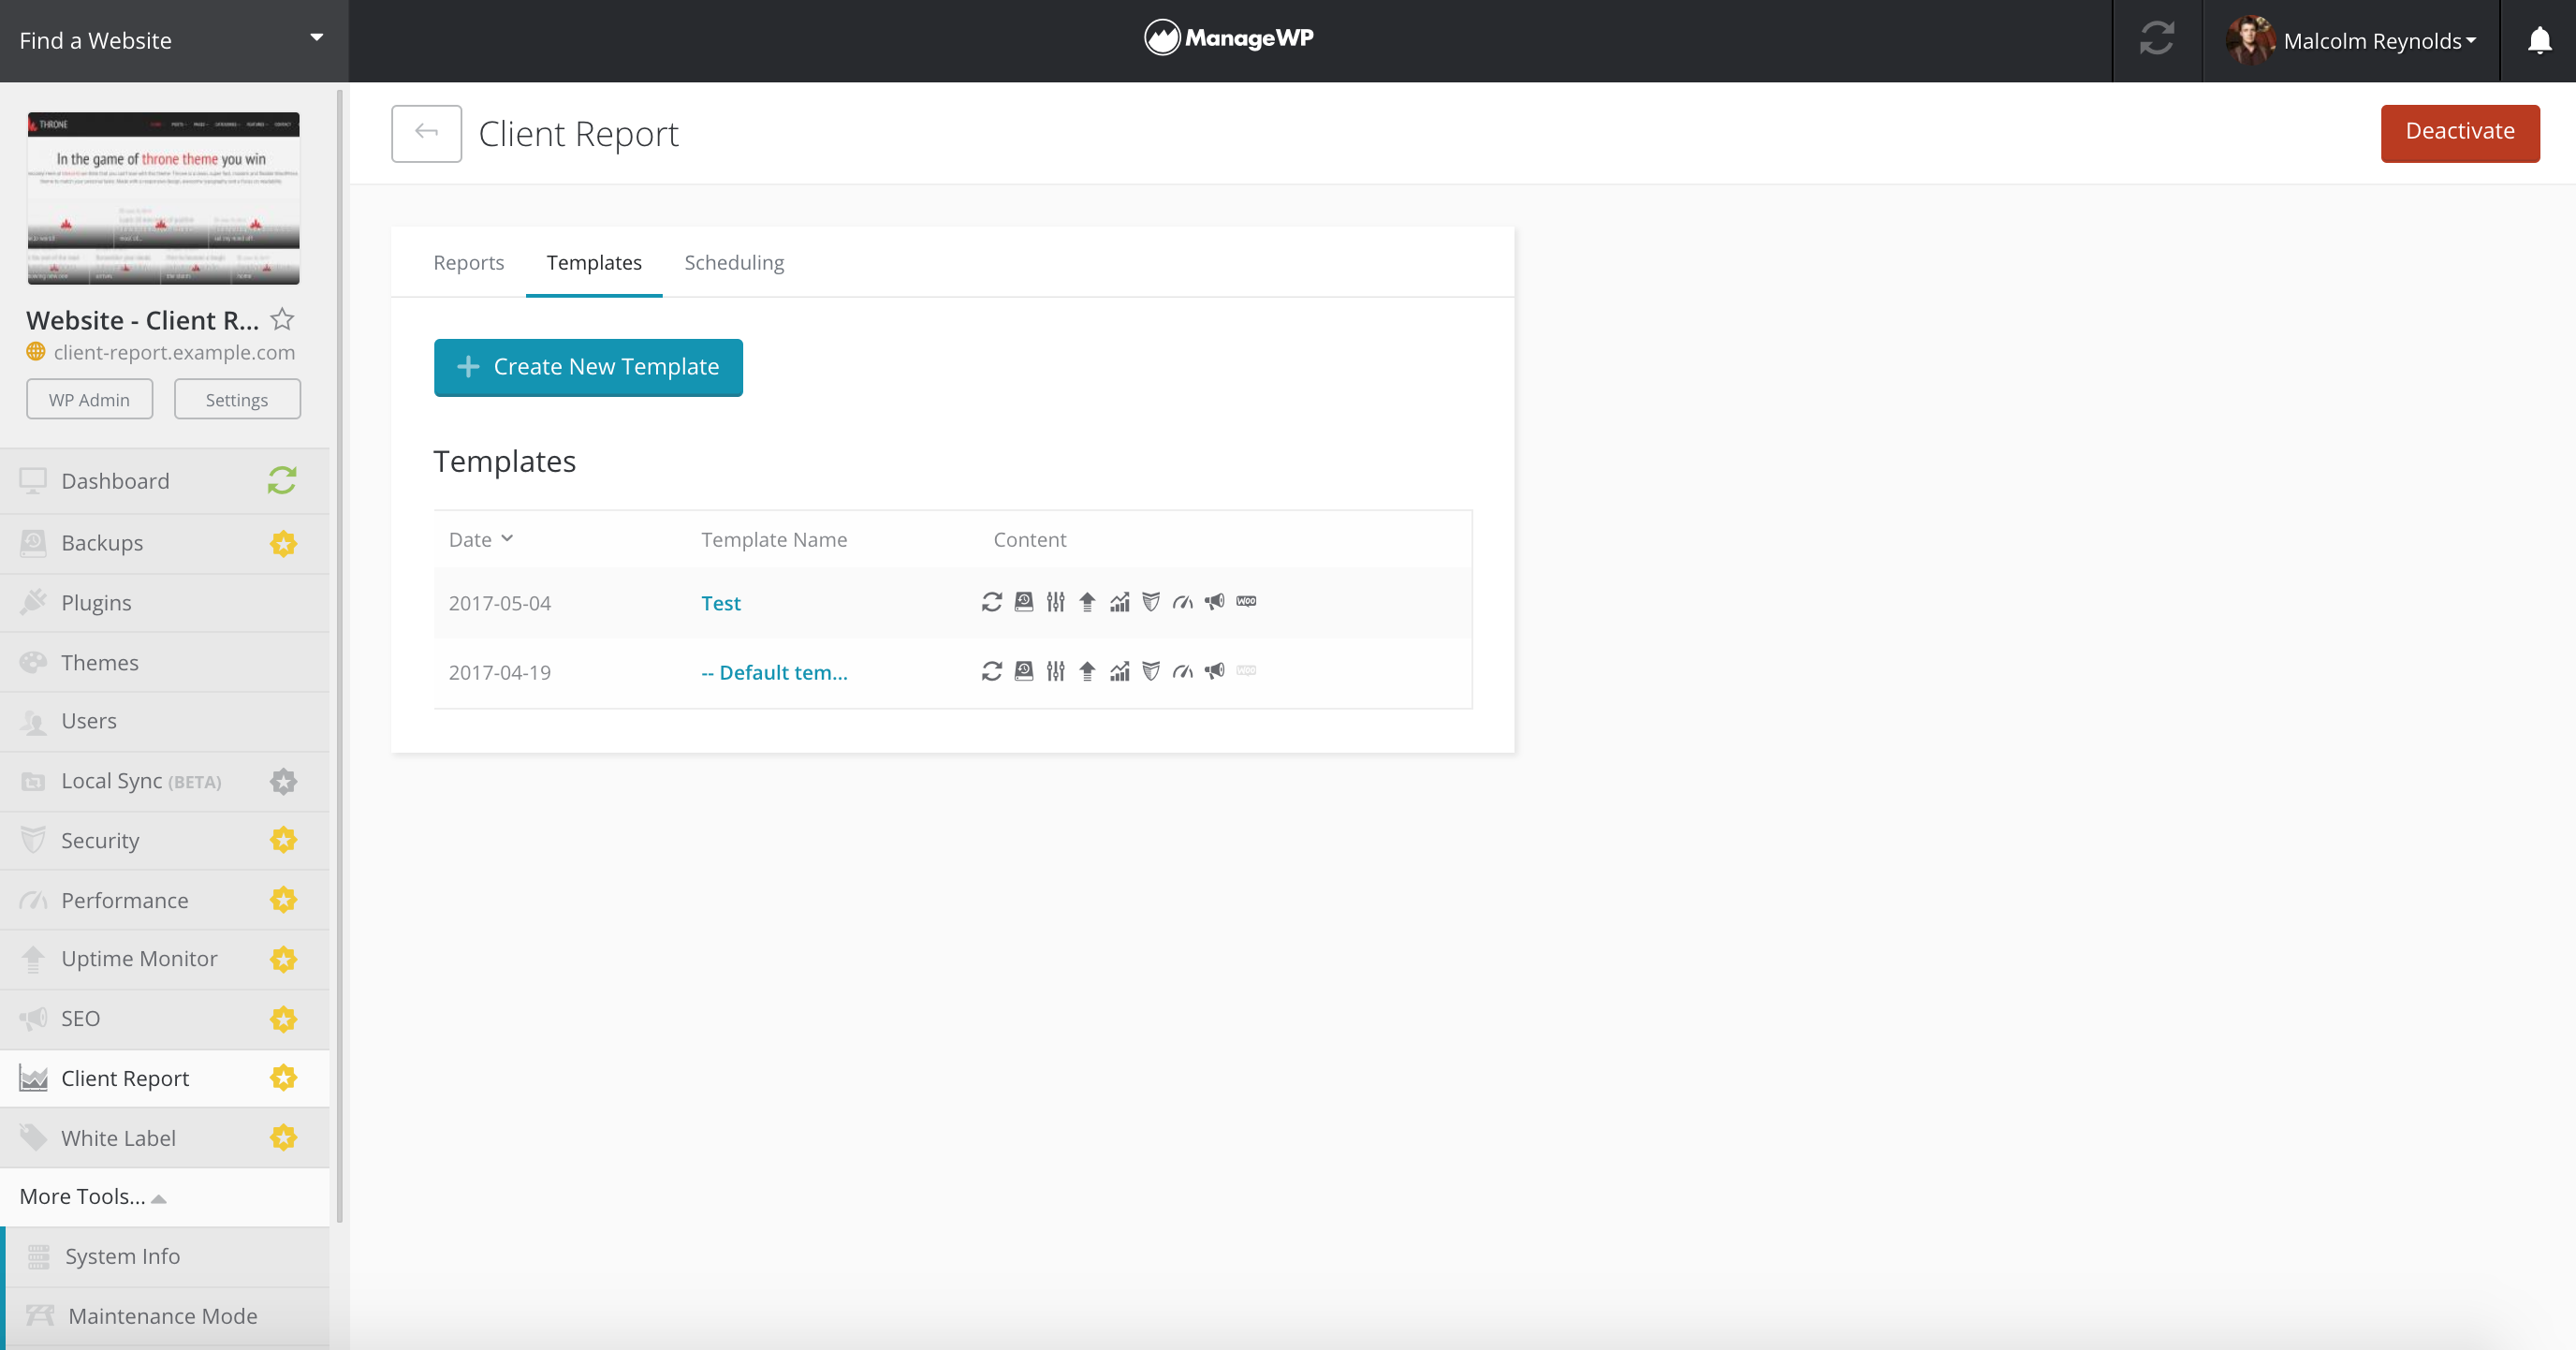
To create a template using the new client report design, click on the Create New Template under the Templates tab.
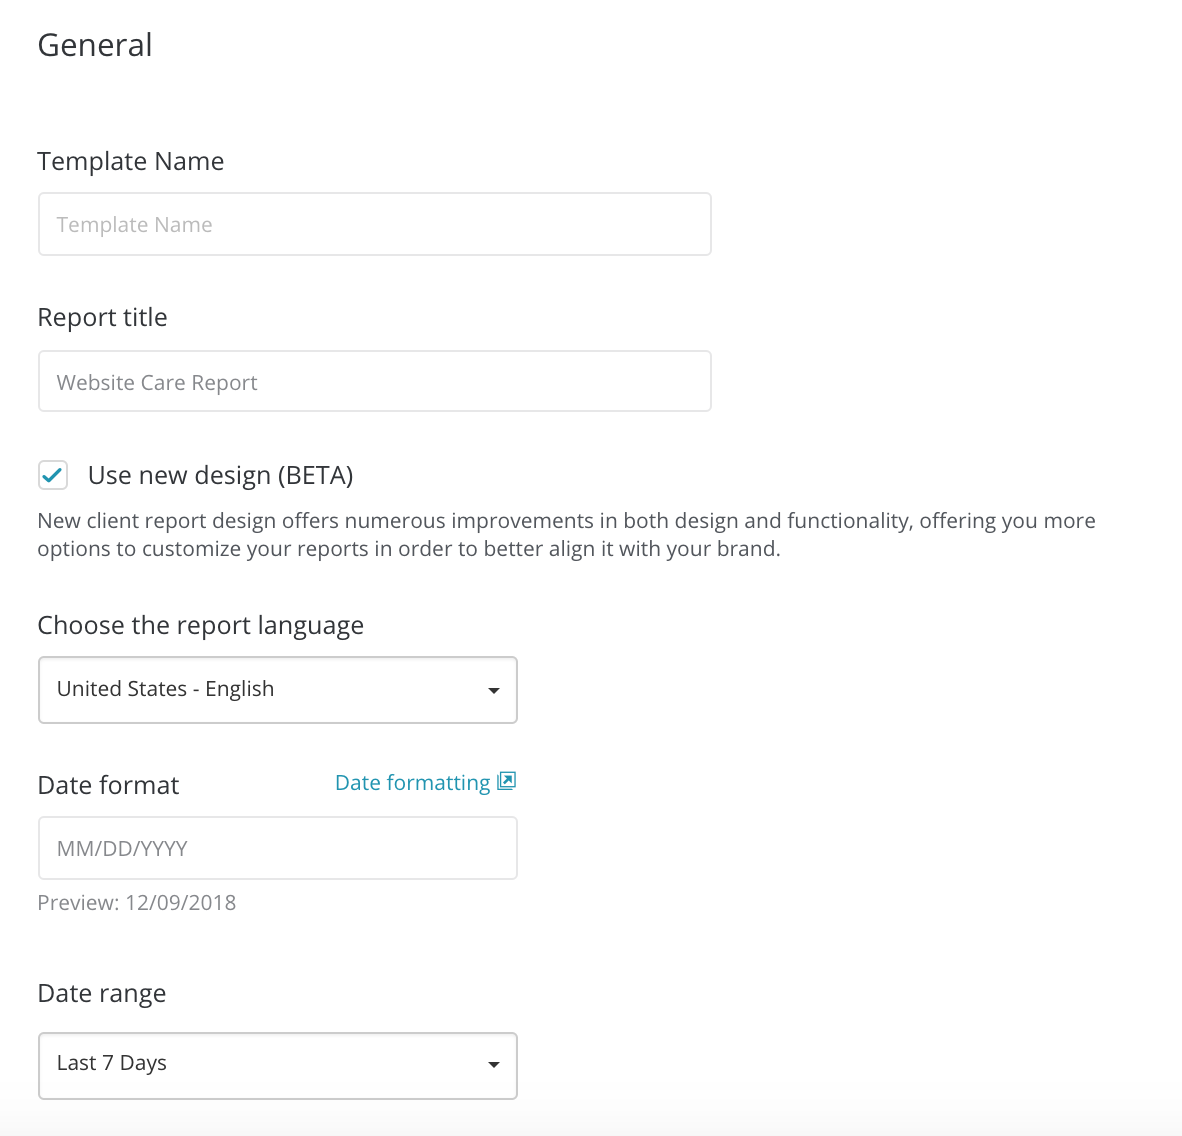
In the first step of creating the template you can:
- Add the template name, report title and after that, check the Use New Design (Beta) box to use the new design of the report
- Change the report language
- Customize the date range of the client report and choose the date format
- Next, choose the tools you want to include in the report and rearrange the order using new drag&drop functionality
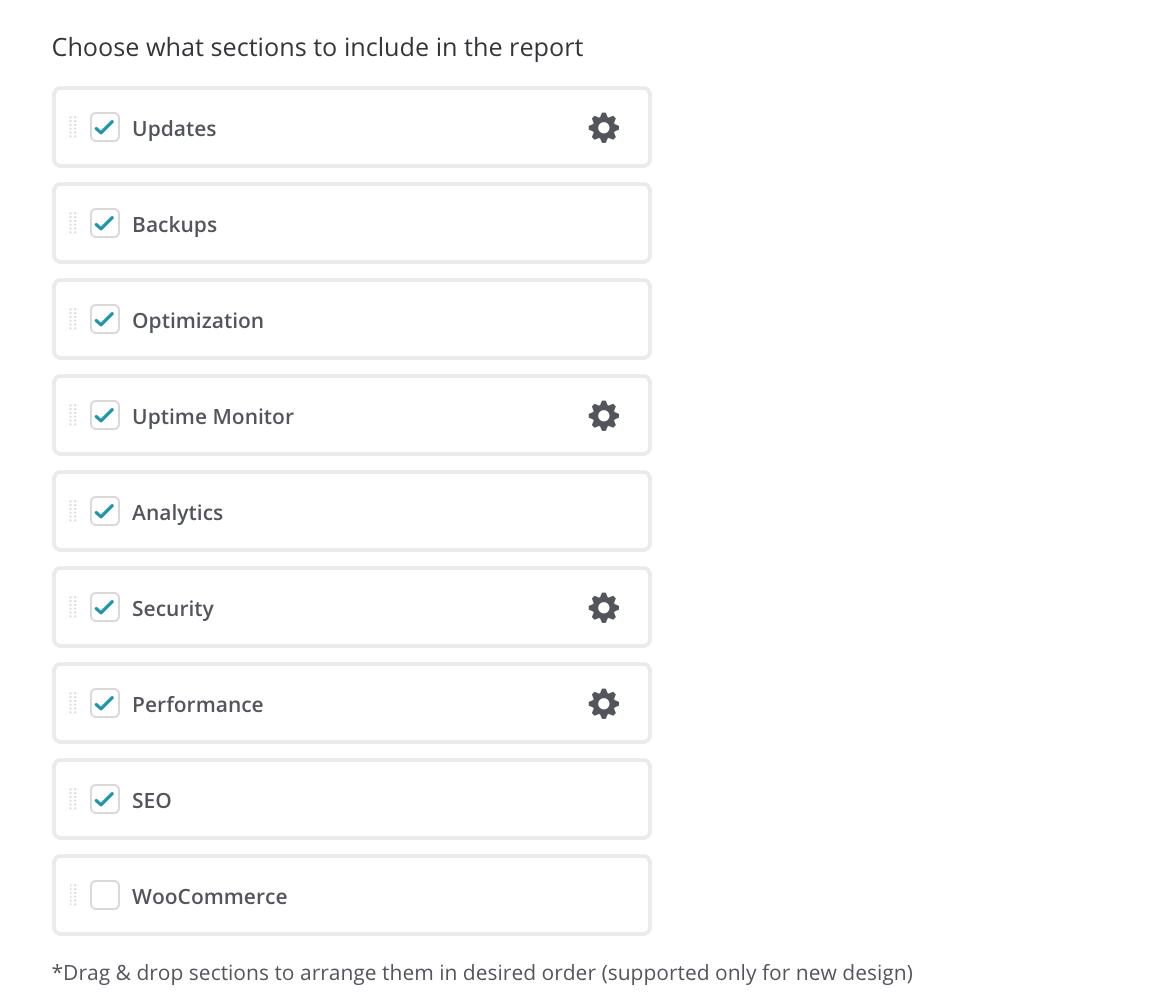
- For Updates, Security and Performance check add-ons, you can choose how many details would you like to see in the report.

Customization
In order to customize the report template, you can do the following:
- Write the introduction message and logo (which is displayed on the first page of the client report)
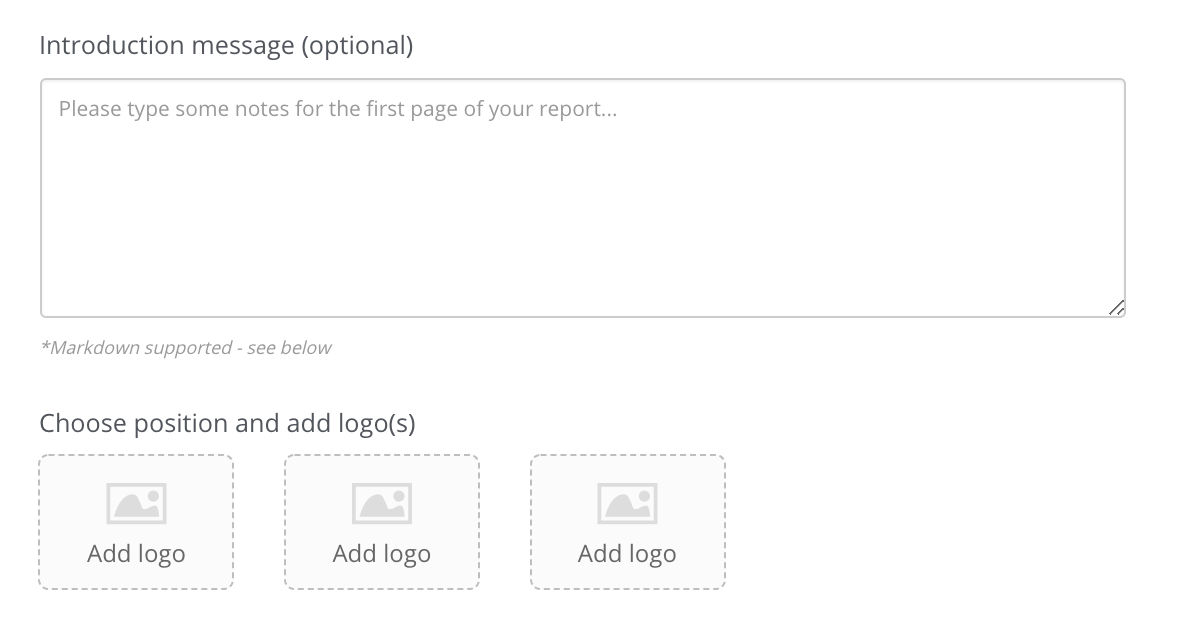
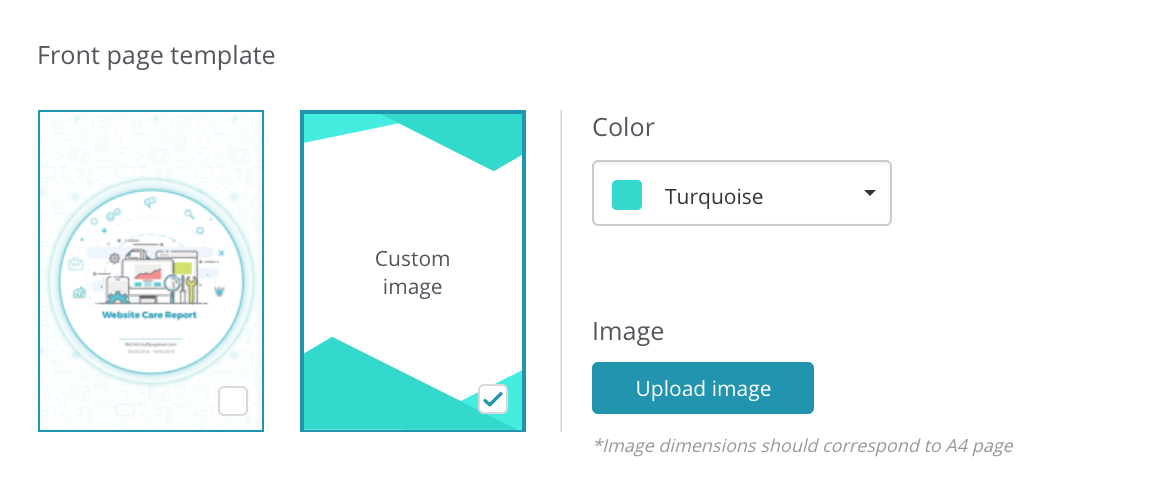
Note: You are able to use Markdowns from this cheatsheet for Intro and Closing messages - Choose the front page design – you can select the default front page look or use a custom image instead. When using a custom image, you can select the desired color for the header and footer (for the main page only)
- Change the main report color – this includes the color of the headlines in the report and the footer color
- Select the font style – you can choose between regular and condensed (the letters of a condensed font have set-widths that are narrower than in the standard typeface from the same family)
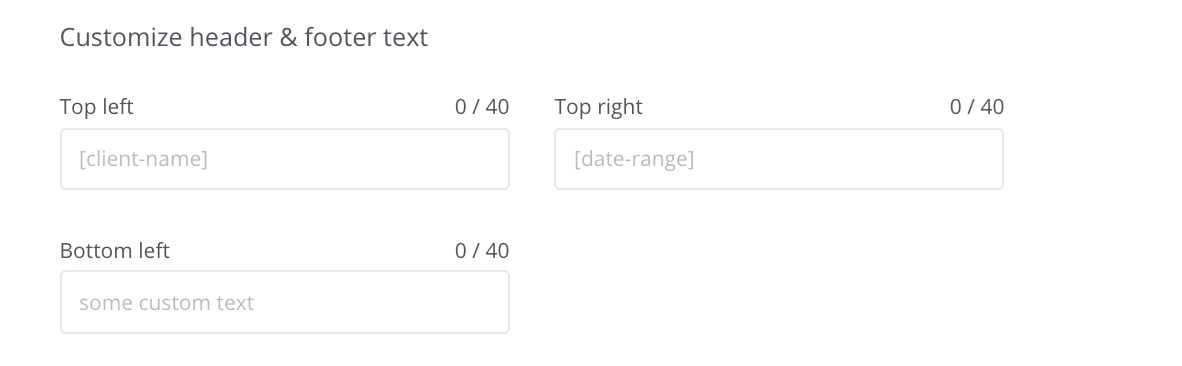
- Customize header and footer text – Header and footer contain predefined text by default. You can enter any custom text or use any of predefined placeholders: [client-company], [client-phone-number], [client-name], [client-first-name], [client-last-name], [client-email], [date-range]
- Customize header background – you can leave it blank (no style) or choose between pattern or solid color
- Write a closing message
Note: to add an image to a report us the following syntax:

Edit client information and email settings
This is a final step in creating a template. You can:
- Change the Send As email – you can use your personal email to send the reports instead of our default one (noreply@managewp.com)
- Add your name and email
- Client name and emails (if you leave the field blank, we will automatically pick up the information regarding the client that is assigned to the website for which you are creating the report)
- Add email subject and content
When you are done, click on the Create button to save the Template settings.
December 11, 2018
 Yes
Yes
 No
No
