

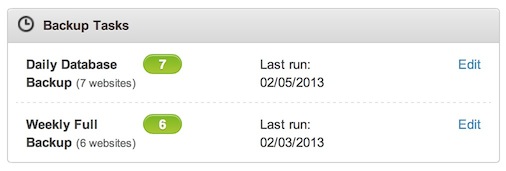
If you’re a ManageWP user then you probably know all about our scheduled backups feature. If you’re anything like me then you’ll be a little bit in love with it — I thought you couldn’t buy peace of mind but it turns out that I was wrong. There are few things more reassuring than those little green icons that inform me of successful backups:
However, occasionally we can be presented with the dreaded red icon that signifies a failed backup. If you don’t use ManageWP’s backup functionality then your equivalent to the red icon, whatever it may be, is probably just as frustrating and scary. The reality that our precious site data isn’t being backed up is one we’d all rather avoid.
In my experience one of the most common causes of failed backups is simply the sheer size of your website. If you take a few minutes to convert that lumbering beast of a site into a more lithe version of itself, you may find that backups are no longer an issue. And even if you are not having backup issues, I would recommend that you read the following and put my advice into practice so that you don’t run into problems in the future.
Step 1: Take a Manual Backup
You should never do anything to your site without first taking a backup. If this rule is not already firmly drilled into your head, make sure that it is before you proceed.
With the above said, I strongly recommend that you take a manual backup of any files that you will be editing or removing during this process. You may not know what those files are yet so this step is something to bear in mind throughout the process rather than put into action right now. Just remember: for each of the following steps make sure that you take a backup before making any changes.
You will need FTP access to take backups and carry out some of the following steps. If you’re not set up with an FTP client yet I recommend FileZilla (for both PC and Mac). You can get the FTP login details from your hosting provider.
Step 2: Remove Redundant Themes and Plugins
Let’s start with the basics. There are two things that you should know about deactivated themes and plugins on your WordPress dashboard:
- They take up unnecessary space
- They represent a security risk (your site can still be breached via deactivated themes and plugins)
That’s two good reasons to get rid of deactivated themes and plugins. I would also recommend that you take a close look at your activated plugins and ask yourself whether you really need all of them. It could well be that the functionality present in two plugins is actually covered by one (for instance, WordPress SEO by Yoast includes XML sitemap functionality, therefore negating the need for a separate XML sitemap plugin), or that you have a bloated plugin whose resource intensiveness is not worth the added functionality. Use the Plugin Performance Profiler Plugin to single out the main offenders.
Beyond mitigating the two issues above, removing plugins should also result in an increase in site speed, which is never a bad thing.
Step 3: Change Your Media Settings
The media files on your server probably account for the majority of your website’s bulk. This is to be expected, but WordPress is particularly notorious for creating various duplicates of the same file and making your media folder two or three times larger than it needs to be.
It comes down to image sizes, which you can define on your WordPress dashboard by navigating to Settings > Media:
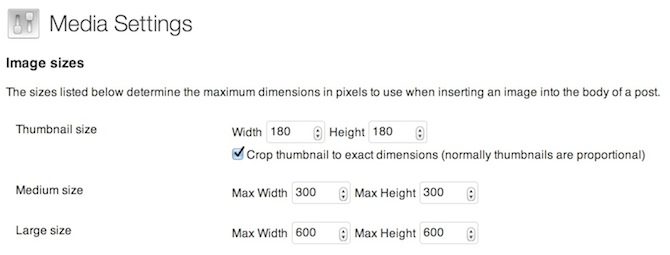
With these three image sizes defined, WordPress creates three separate image files in addition to the version you upload. That’s four images for each file you upload of which you may only use one.
You probably don’t need more than one size of a particular image, and if you do, you’d probably be better off uploading them in their respective sizes (so that you have control over cropping etc). And that is precisely my recommendation — start uploading images in the correct size and dimensions so that you do not need to do any fiddling on the WordPress side.
But what about those pesky image files that WordPress creates? Simple — just change the Max Width and Max Height fields to zero in the Settings > Media screen and WordPress will no longer create them. This may have adverse effects depending on how your theme is set up so I would advise that you take a backup and experiment before committing.
A final tip is to use a lossless optimization plugin like WP Smush.it to reduce the size of your image files when they are uploaded. It’ll only take a minute to install and activate the plugin and from then on it in it will do its job without you having to lift a finger.
Unless you have major size issues I wouldn’t worry about deleting the old image files that you don’t use. There is no foolproof automated way of doing it and it is probably more trouble than it is worth.
Step 4: Remove Old Backups
Many WordPress sites become huge and bloated due to the fact that full backups are stored on the server. Putting the size issue aside for a moment, this is not a particularly effective way of backing up your data as if the server upon which your website resides is corrupted you may well lose both your site and the backup. That is why we recommend scheduled remote backups to cloud services like Dropbox and Google Drive.
Going back to the size issue, you should get rid of the backups on the server and ensure that whatever process that is causing backups to be stored locally is stopped (of course, you should set up a remote backup before taking this step). The key is to look out for suspicious folders (e.g. ones labelled “Backups”) and particularly large files — for the most part, there are few instances where you will be storing files in excess of more than 10mb on your site (videos and audio being two potential exceptions).
This is something to look out for if you have been using a free third party backup plugin or service — you may find that the developers have little regard for how much space they take up on your server. If on the other hand you are using a more professional service such as ManageWP’s scheduled backups feature, you may find that a copy of the backup is stored locally as well as remotely:

However, in this case you should make sure that only one backup is being kept and that duplicates aren’t piling up over time. The tool should be excluding that backup folder from being included in the regular backups (as ManageWP does), which negates the size issue.
Step 5: Remove Random Files
There are plenty of things that may appear on your site’s servers that simply don’t belong there. One personal example I have is “core” files (e.g. a file labelled “core.129483”) — an issue that can arise occasionally. These files (which are actually core dumps) can be upwards of 100mb each and appear in droves, yet they shouldn’t be there at all. You can safely delete them and should also inform your hosting provider of the issue so that they can resolve it.
As a rule of thumb, any file that is particularly large should be viewed with suspicion. As I said previously, there are few times when a website will utilize a large file. I am not however suggesting that you should start deleting large files willy nilly — it pays to be sure that what you are deleting isn’t conducive to the running of your website, even if you do have a backup ready should something awry happen. If you do find something suspicious then turn to Google or the WordPress support forums for help.
What Tips Do You Have?
There’s five tips which are likely to result in you having a far smaller site than you did before without it making any difference to the user experience. Your backups should be error free and also run more quickly and take up less space — a nice trifecta of wins.
I would be curious to know if you have any alternative suggestions for reducing the size of your WordPress website. If you do please share them with us in the comments section!
Photo Credit: arimoore
Leave a Reply