How to create a Client Report
Client Reports help you create professional and personal reports that can be downloaded as a PDF and sent via email directly from the ManageWP dashboard to your client.
In this article
- Where to find Client Reports
- How to create a Client Report
- How to send a report to a client
- Create a Client Report for multiple websites
- How to make a Client Report Template
- How to schedule a Client Report
- How to check your report history
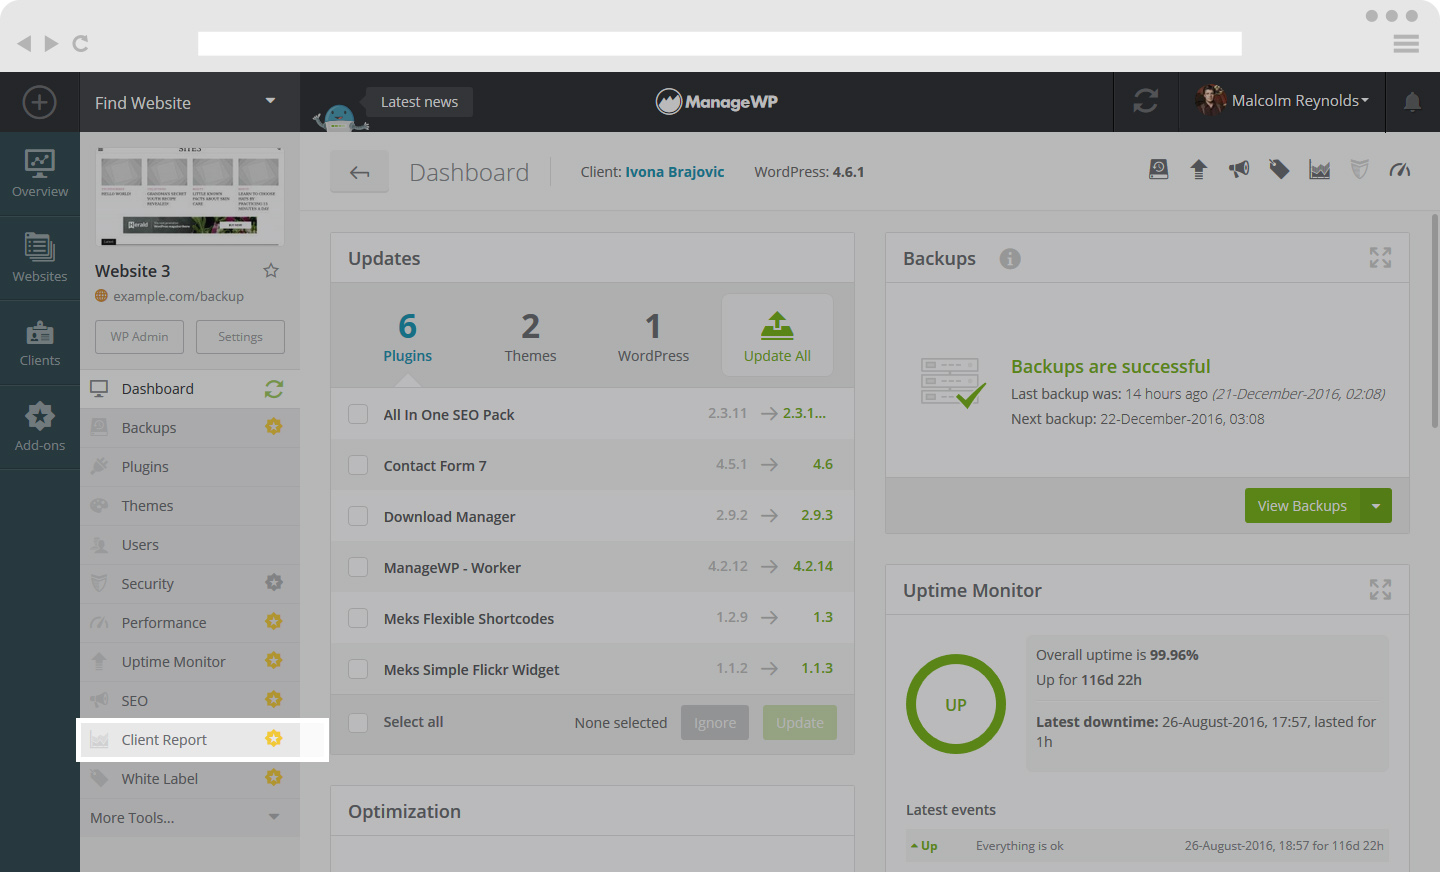
Where to find Client Reports
In order to create a Client Report, first of all select the website you wish to create the report for. On the left hand side you will see a Client Report button. Here you get to choose if you want to create a New Report, or manage your templates.
How to create a Client Report
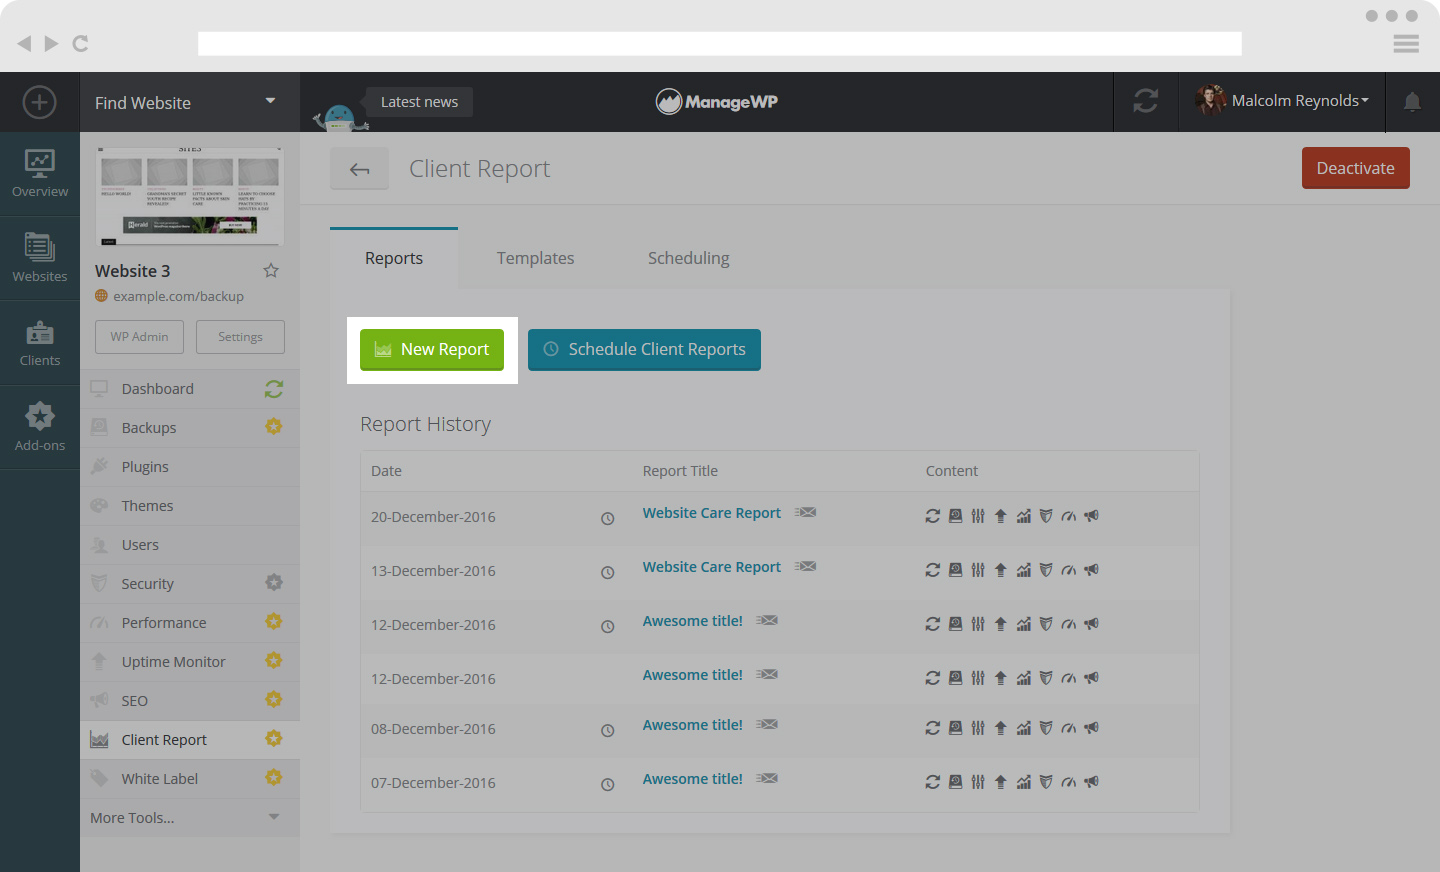
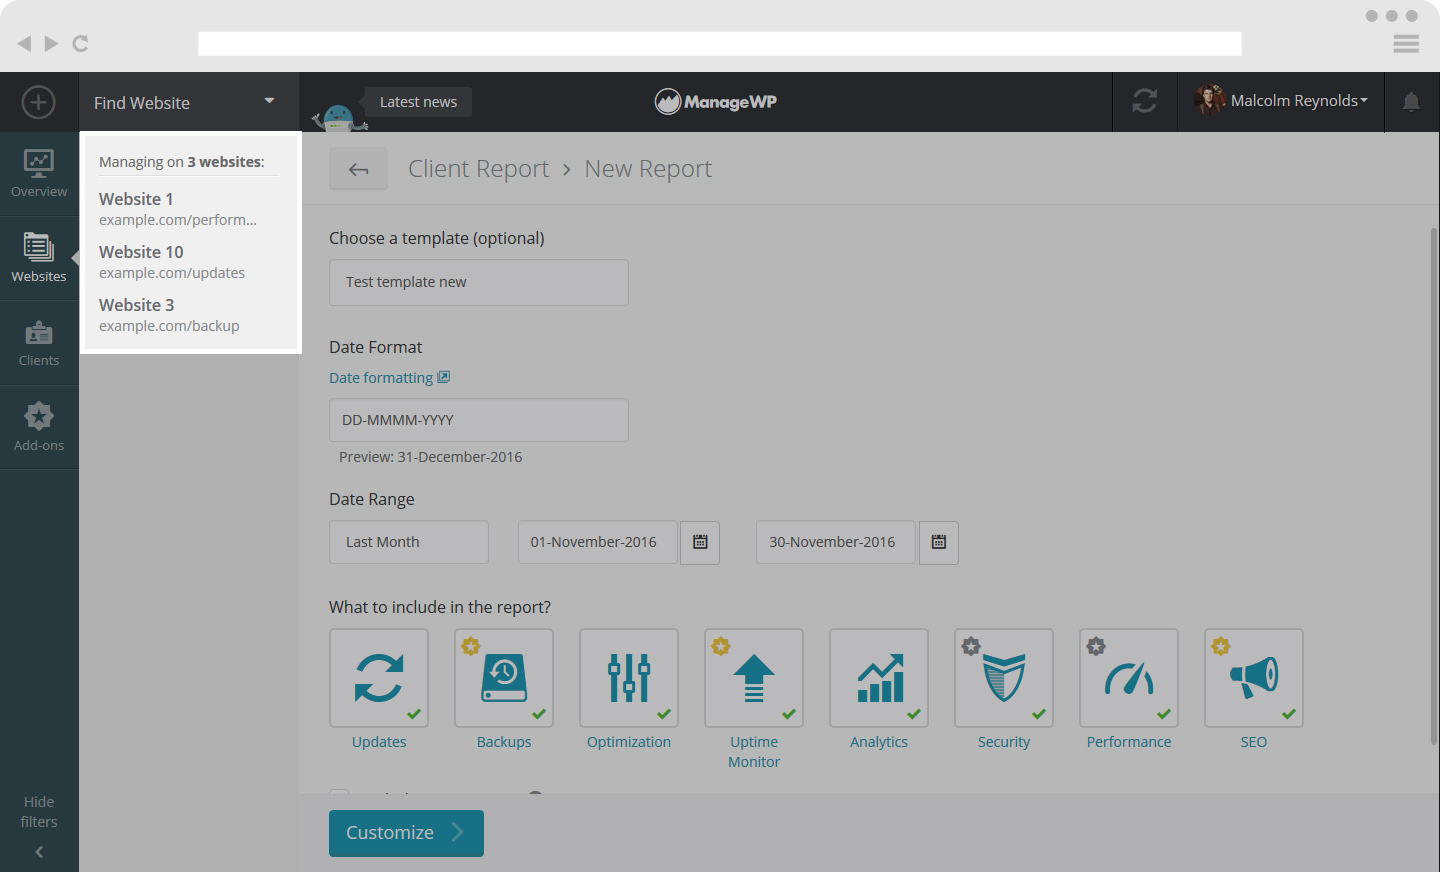
Start by clicking on the New Report button.
You will see there are three steps when creating your Client Report.
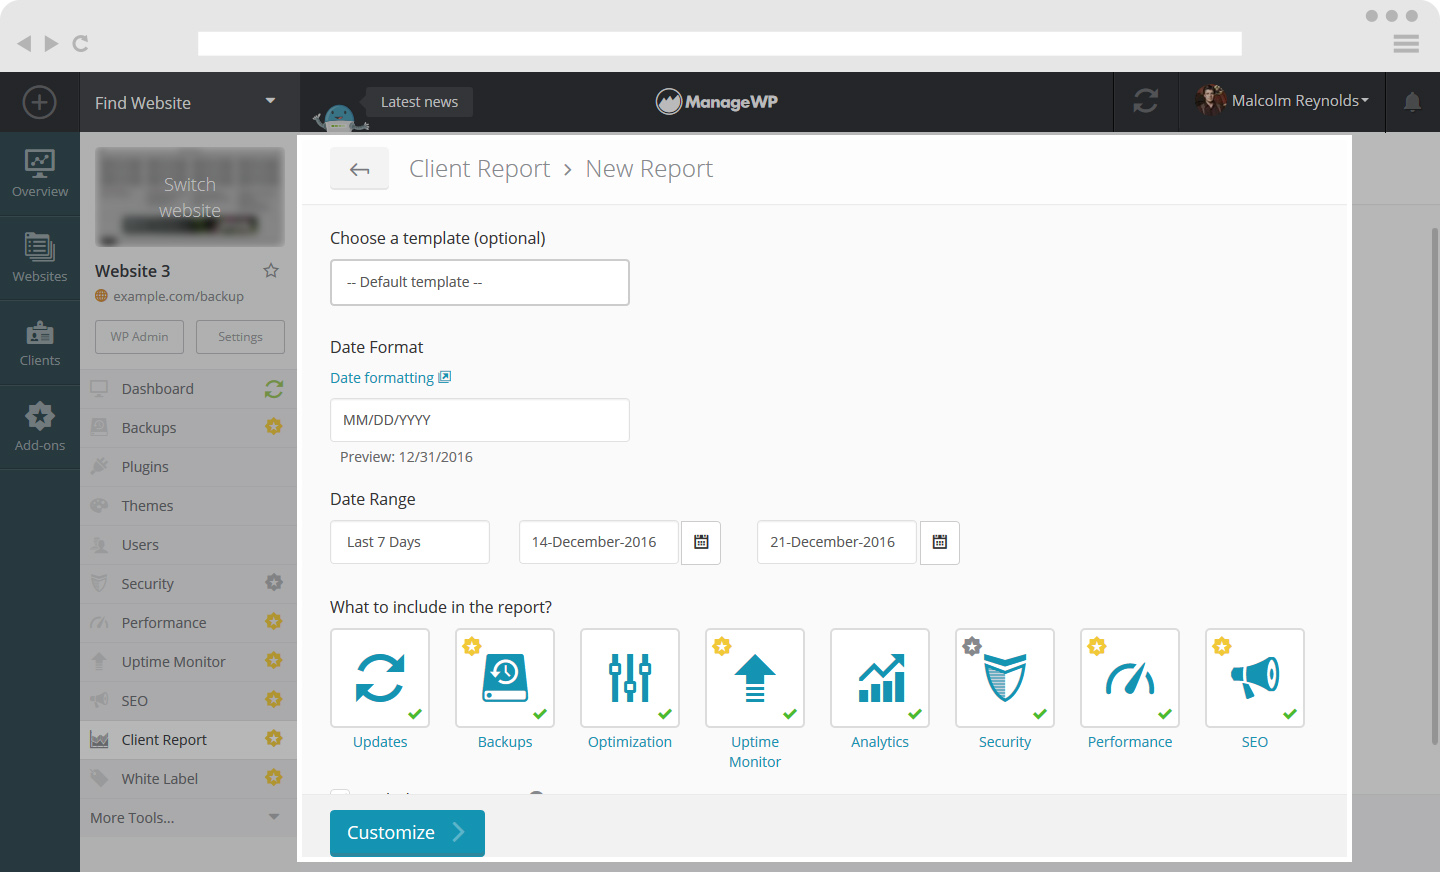
In the first step you are able to set the following:
- Choose a template (set a default or pick loose).
- You can customize the date range of your Client Report.
- You can select what you report on: Updates, Backup, Optimization, Uptime, Analytics, Security, Performance, SEO. This gives you the option to send your clients a fully customized report.
- Check the box if you wish to include cover pages to your Client Report.
Proceed to the second step by clicking on Customize.
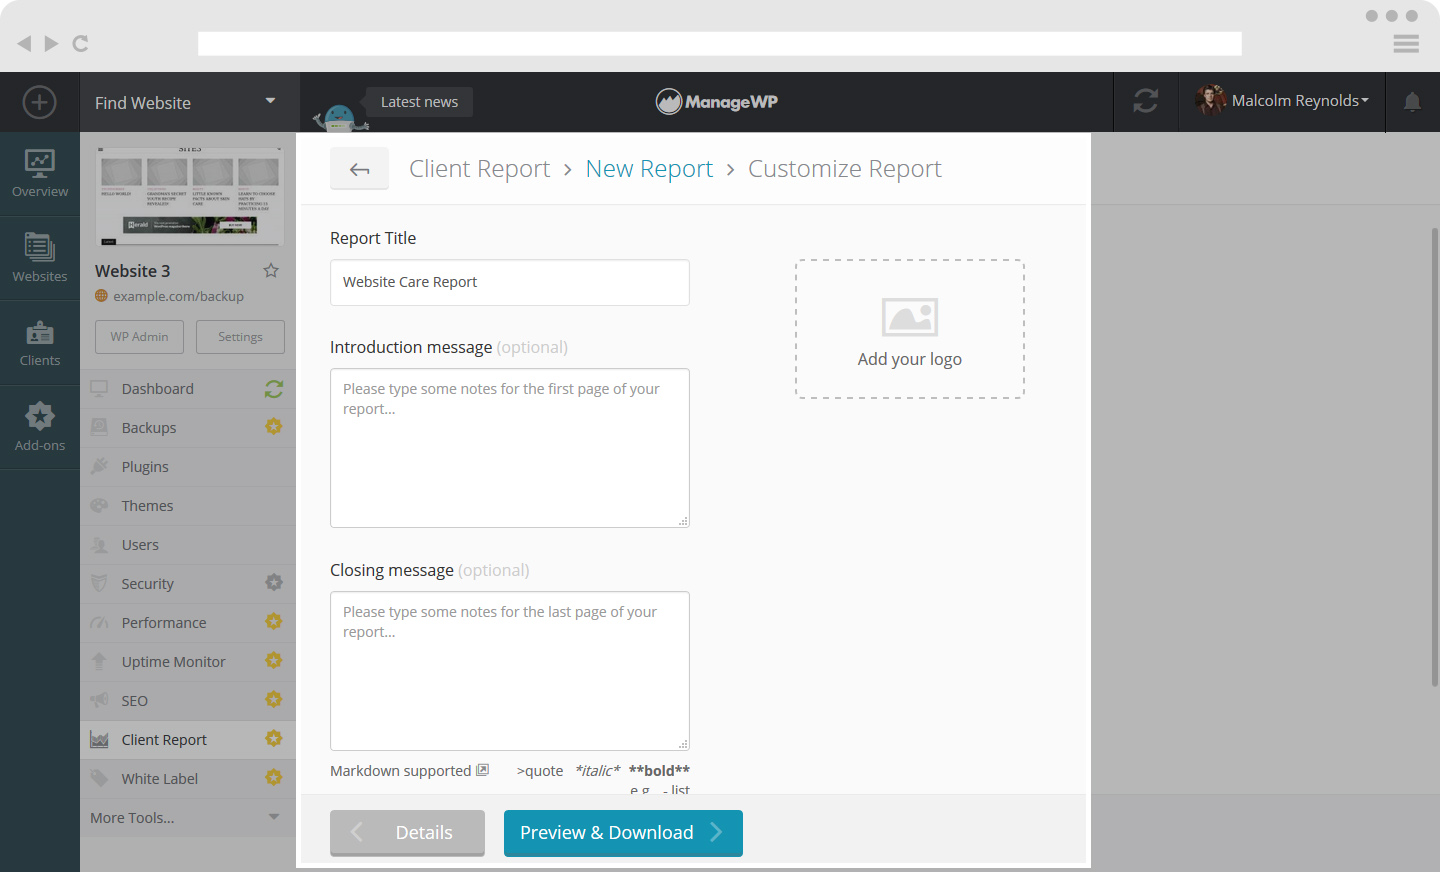
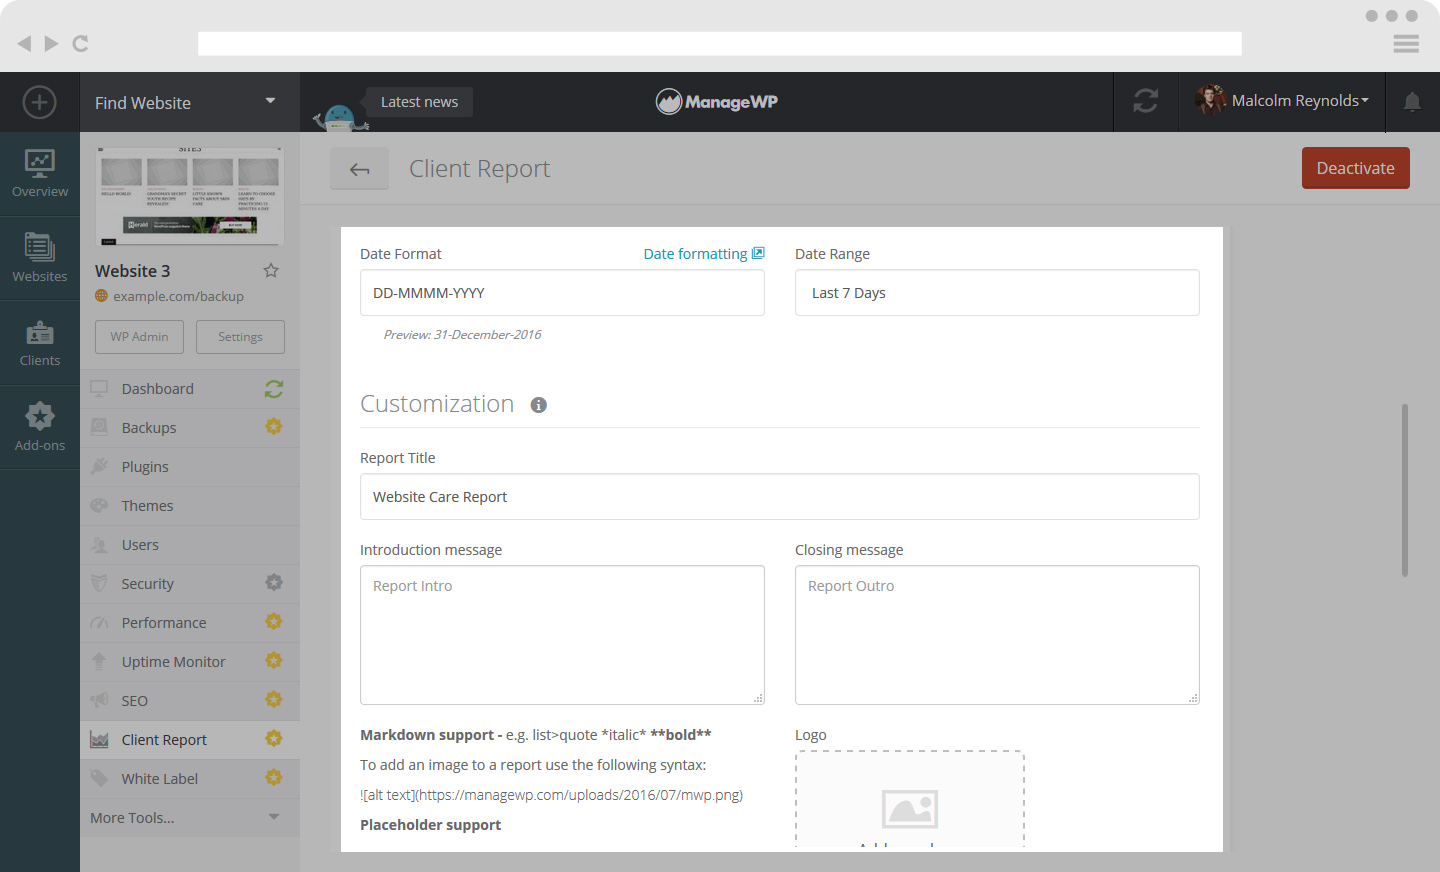
In the second step you are able to:
- Set the title of your report.
- Write an introduction.This is the first page of your report.
- Write an outro message. This is the last page of your report.
- Add your business logo.
You are able to use Markdowns from this cheatsheet for Intro and Closing messages.
When you are done, click on the Preview & Download button.
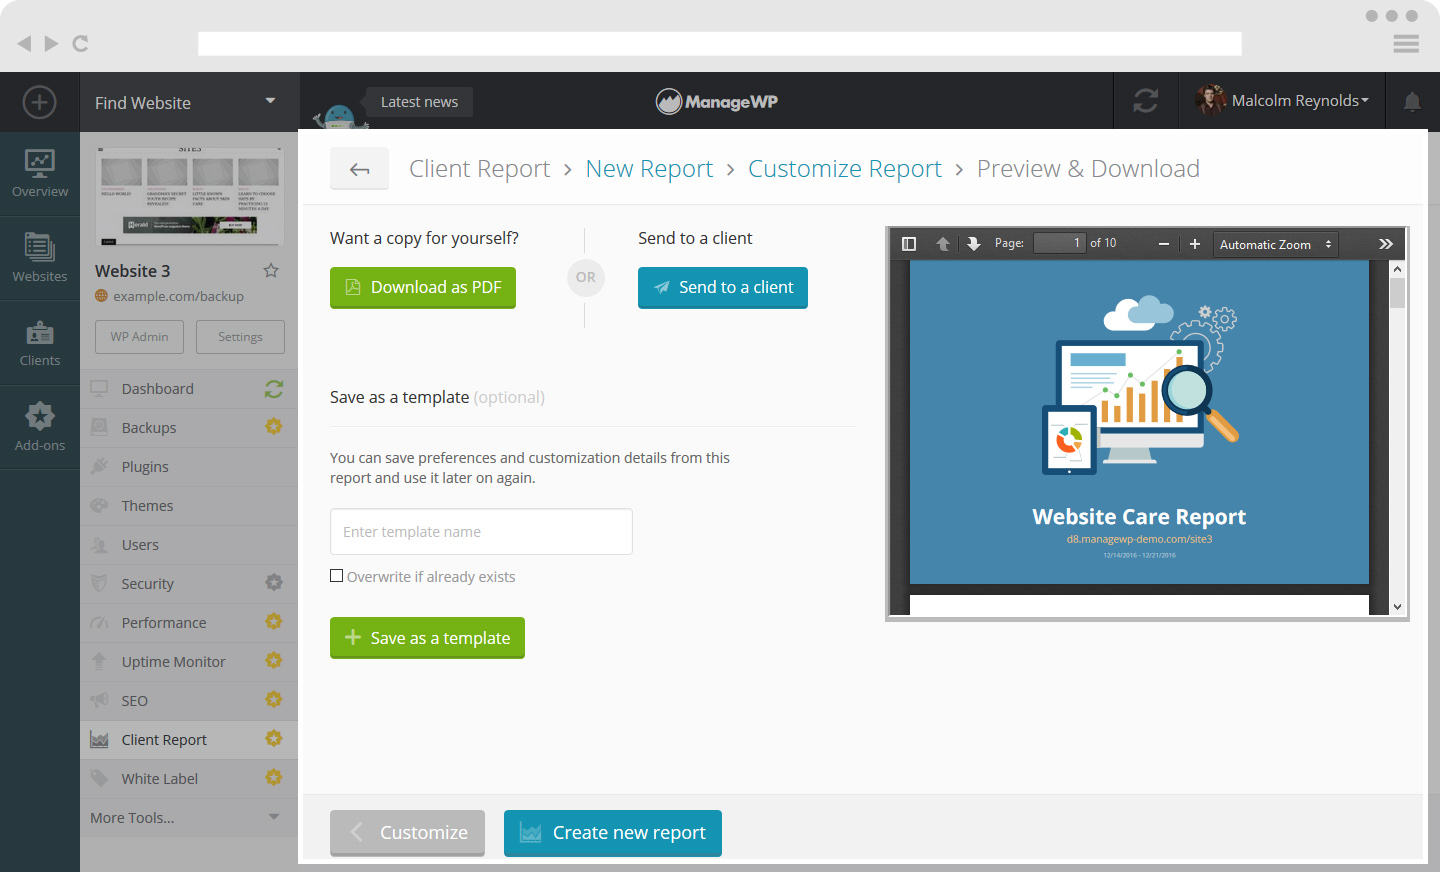
In the third step you are able to:
- Preview your Client Report before sending it to the client or downloading it.
- Download your Client Report as a PDF, by clicking on the Download as PDF button.
- Send your report to a client.
- Save it as a template.You can save preferences and customization details from this report and use it later on again. Just type the name of your Template and click on Save as a Template.
- You can check the box to overwrite an already existing template.
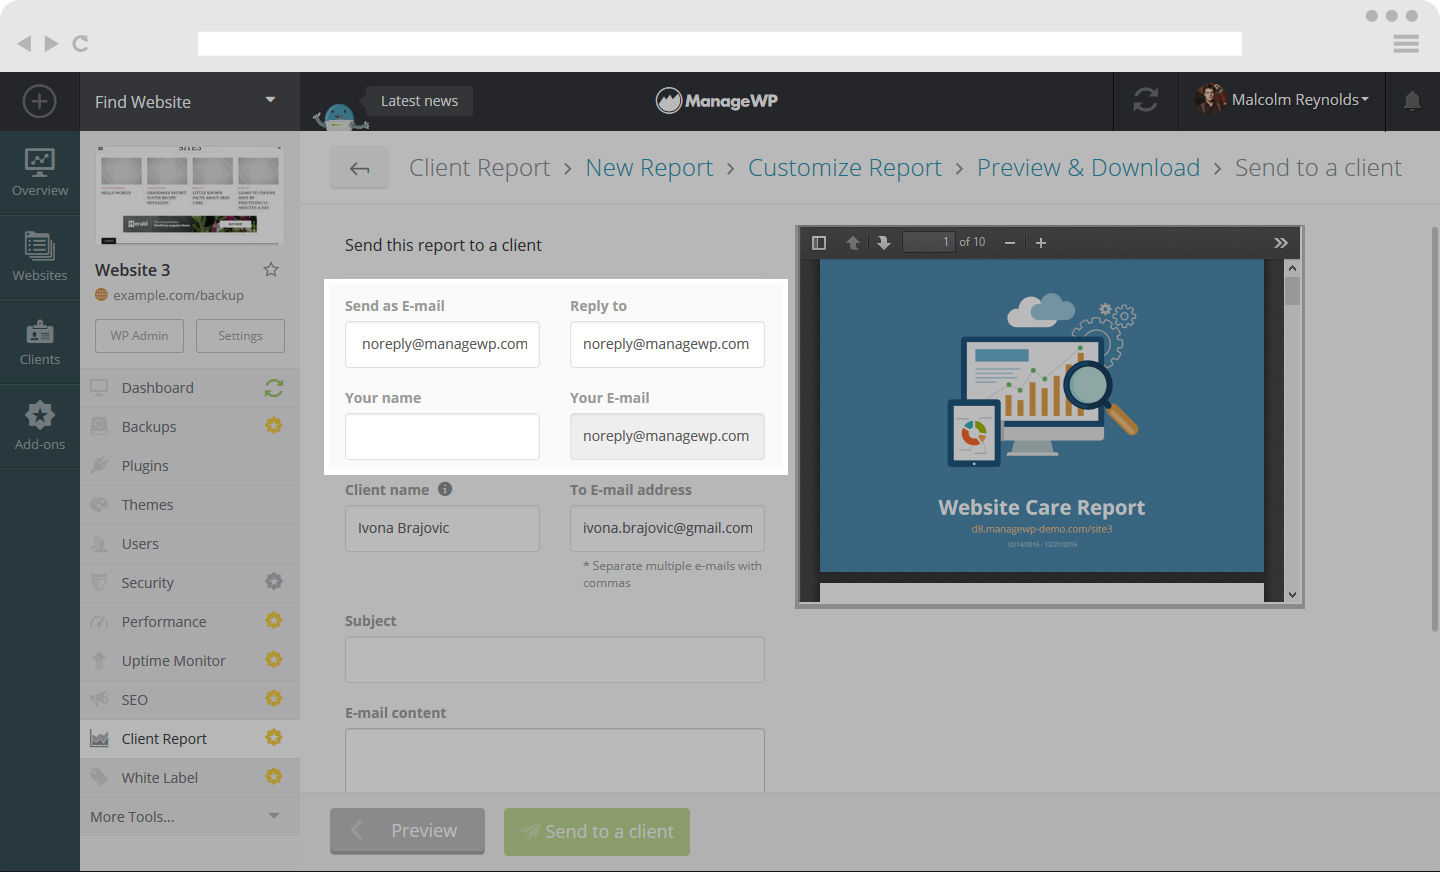
How to send a report to a client
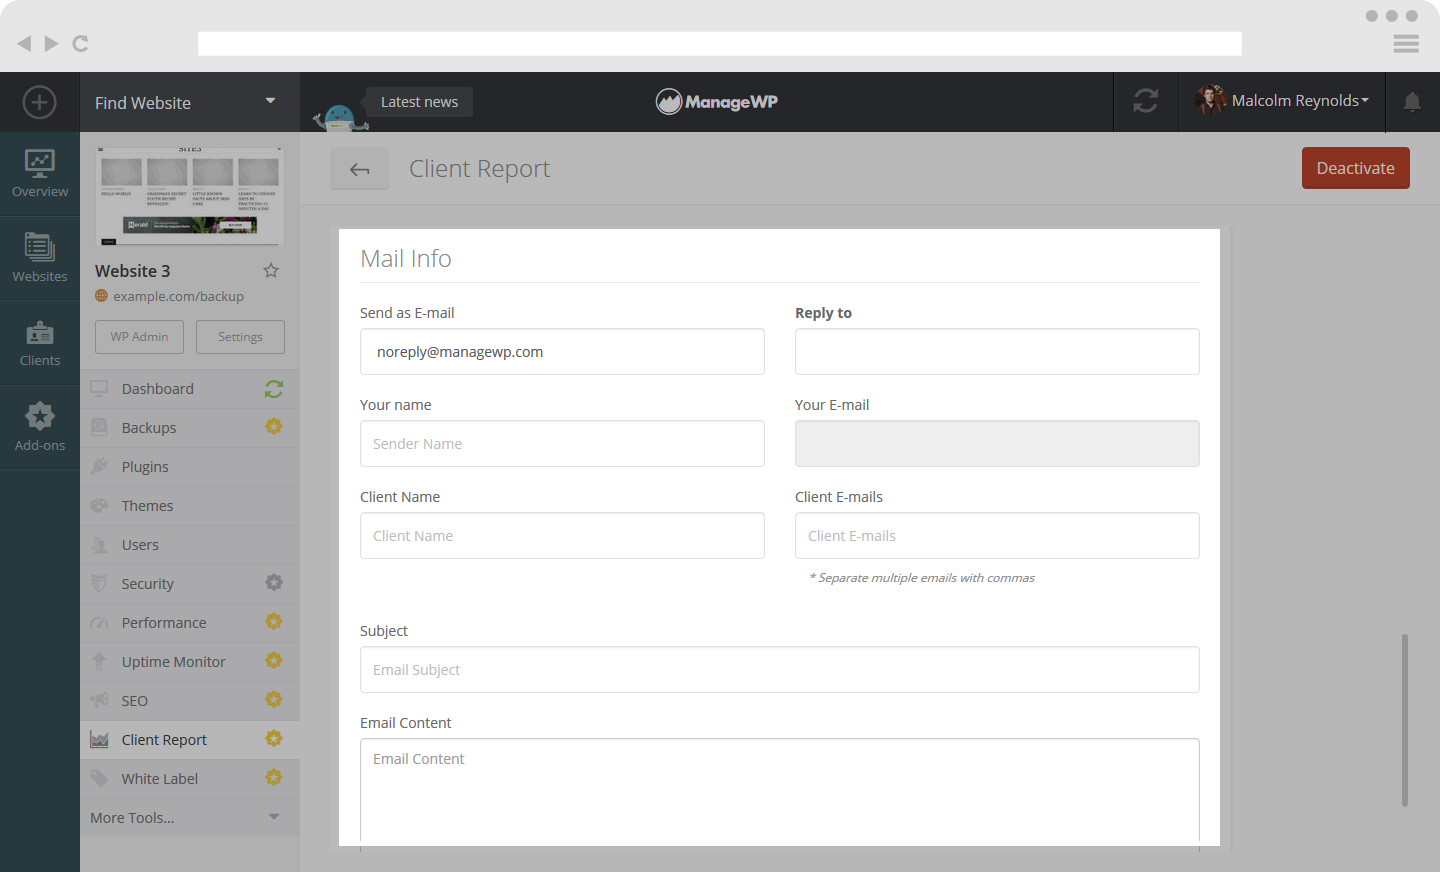
Here is how to send a report to your client. If you don’t mind exposing ManageWP to your clients, you have noreply@managewp.com email available. Your clients will still be able to reply to your email, just type it into Reply To and Your email area. But if anyone takes a better look, they’ll notice ManageWP as the sender.
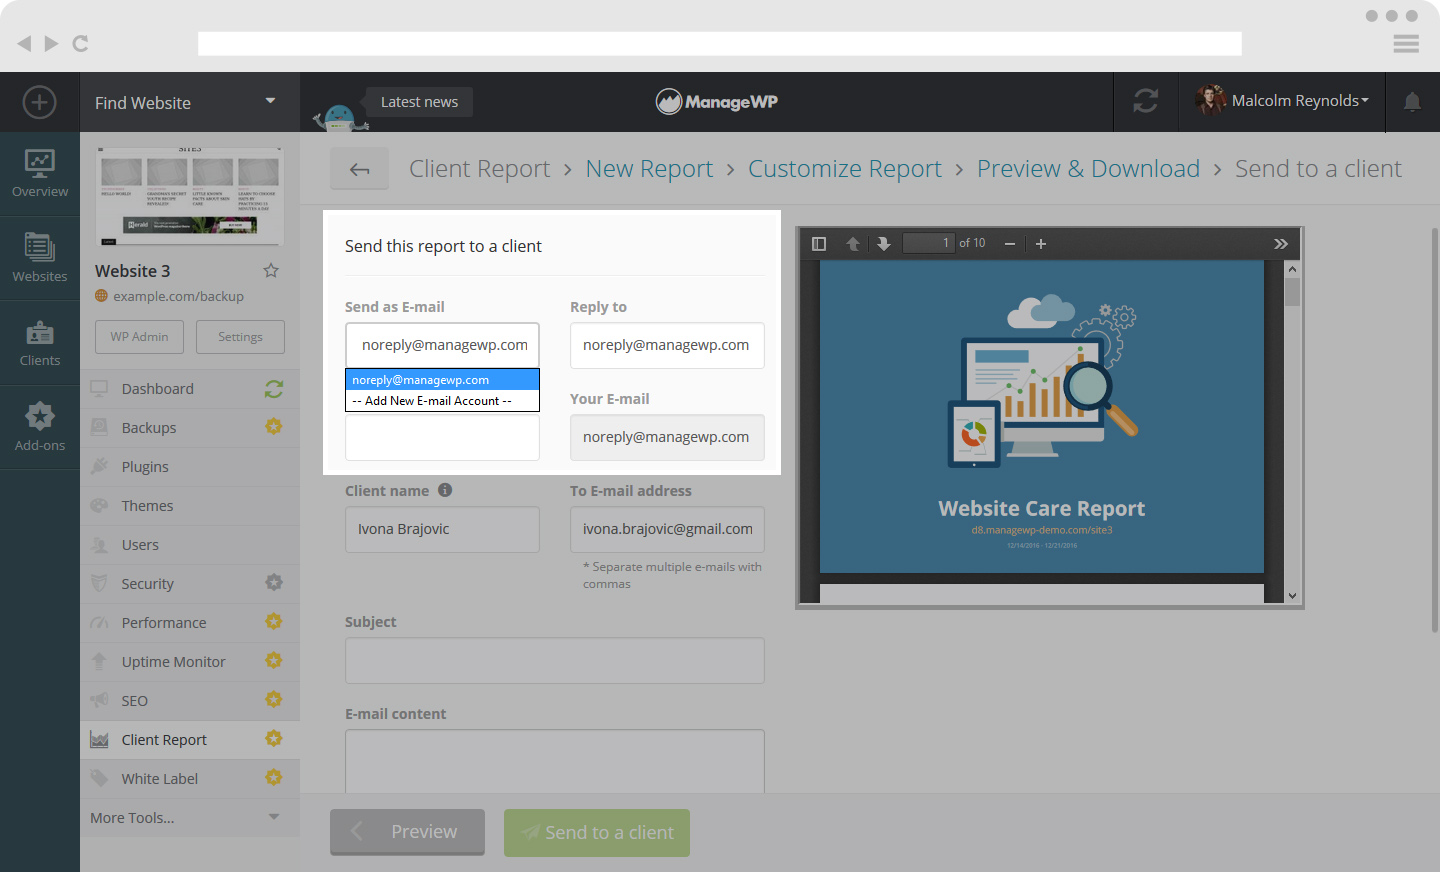
If you don’t want to use noreply@managewp.com, you can choose to add a new email account from the dropdown list.
You will be prompted to add all the relevant email domain data.
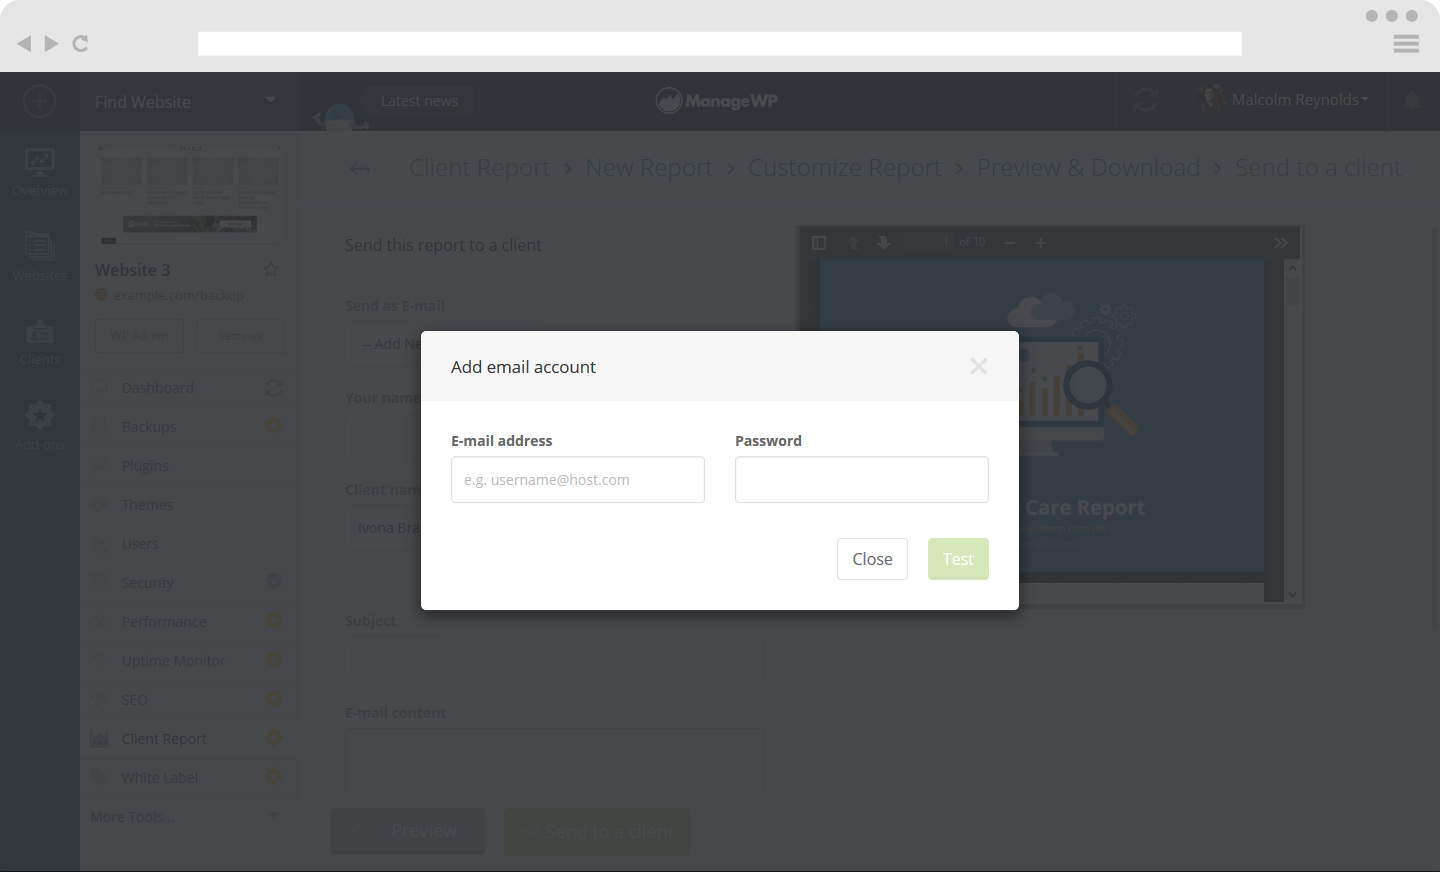
Now you’re all set to send Client Reports with your own email showing to your clients.
Create a Client Report for multiple websites
If you need to create a client report for more than one website. Firstly go to your Website Dashboard and select the sites you wish to include in your report. On the top menu bar you will find a Create Client Report icon. Click on it.
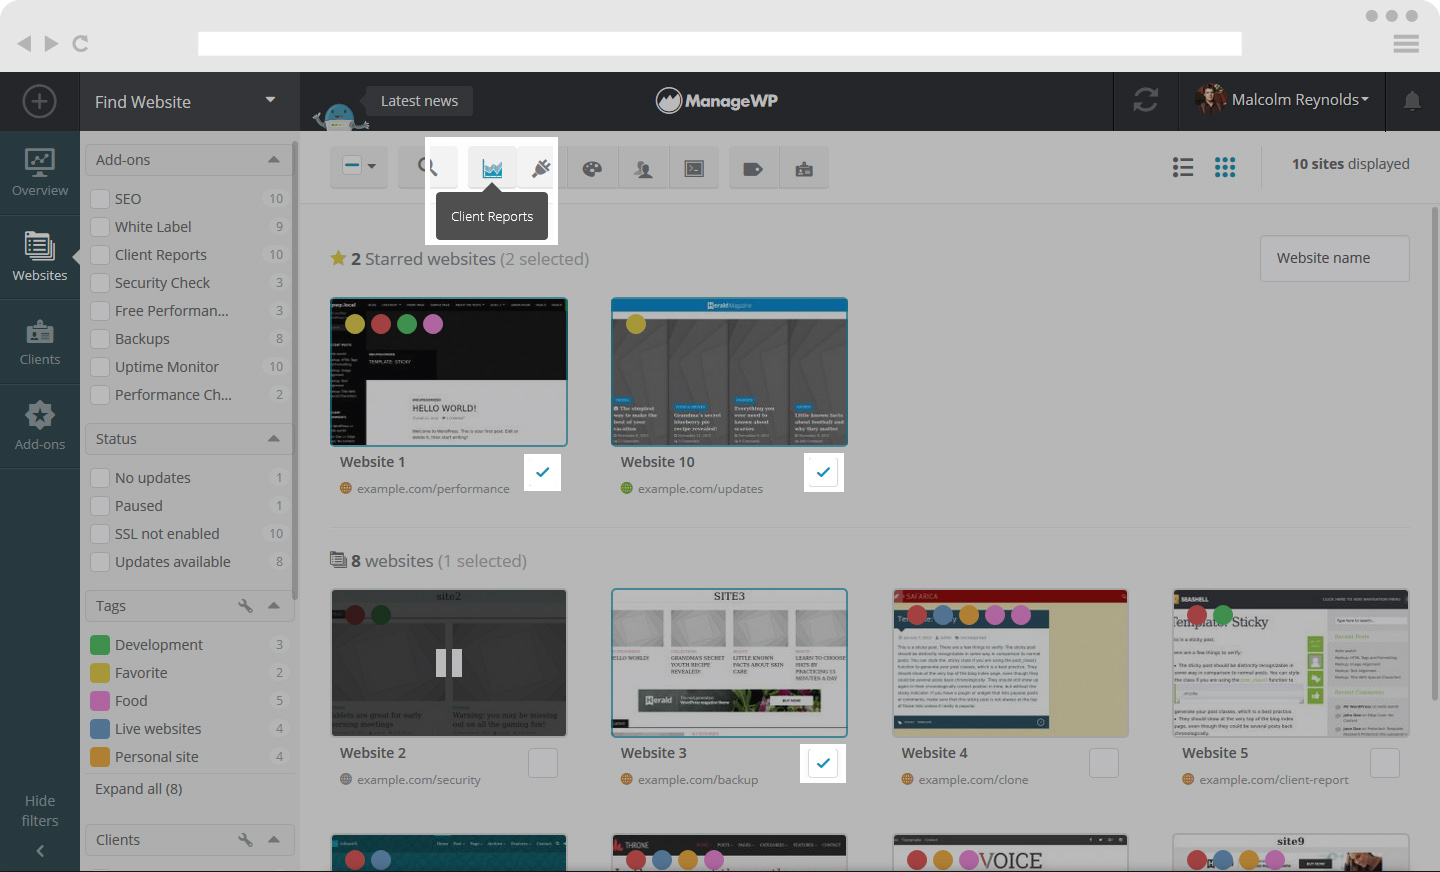
This will send you to the Client Report Tool. On the left hand side you will be able to see the websites that are included in your report.
The process is the same as when creating a Client Report for a single website. Please follow the instructions above.
How to make a Client Report Template
You can make a template for your Client Reports and use them for creating new Client Reports or scheduling automated Client Reports.
To make a Client Report template click on Create New Template under Templates tab.
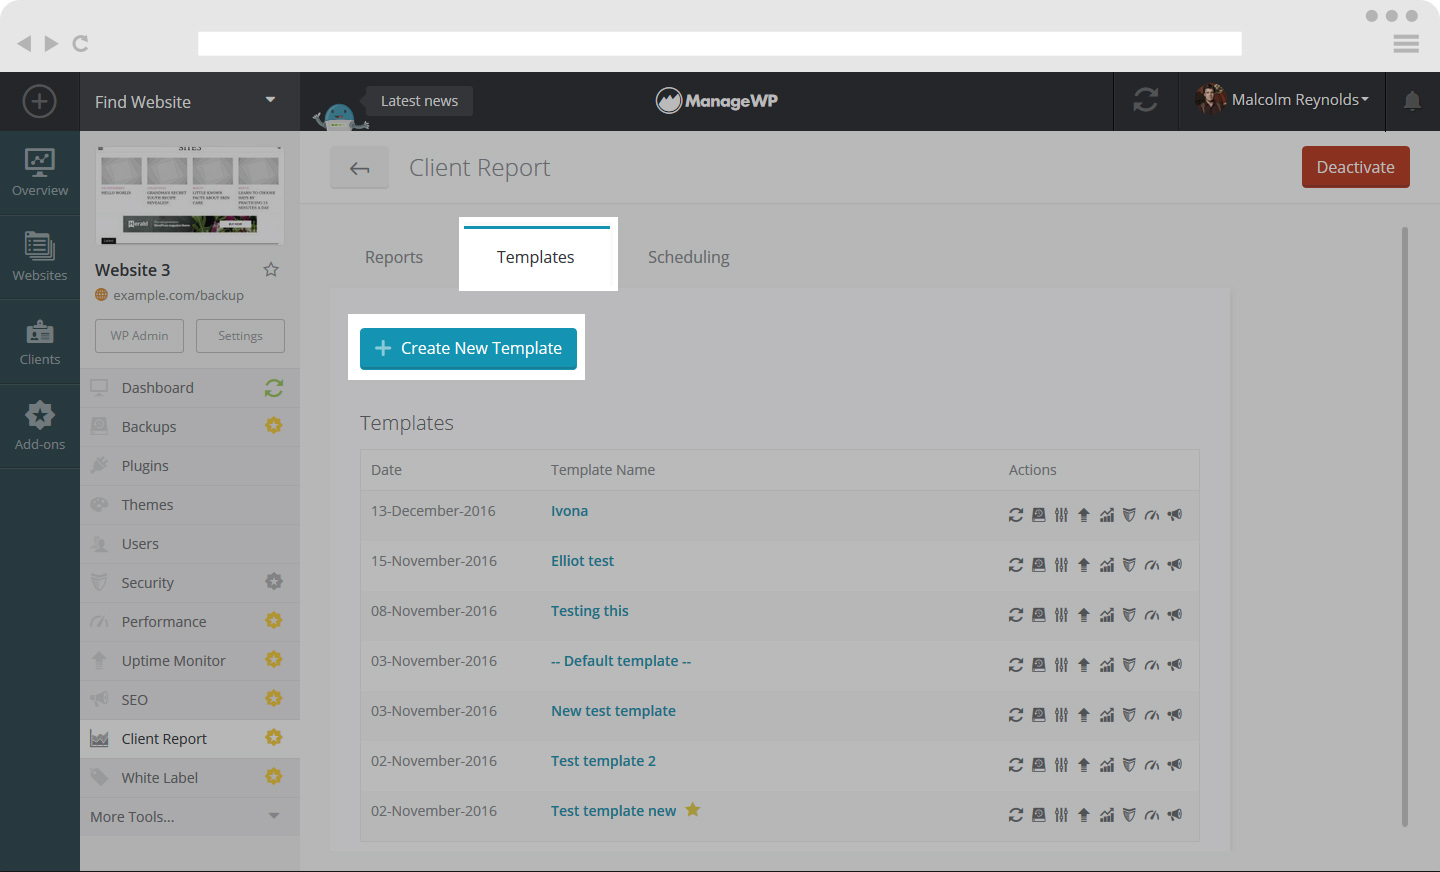
In template you can set :
- Template Name
- Select which Add-ons you want to include in the client report
- Select do you want to include cover pages
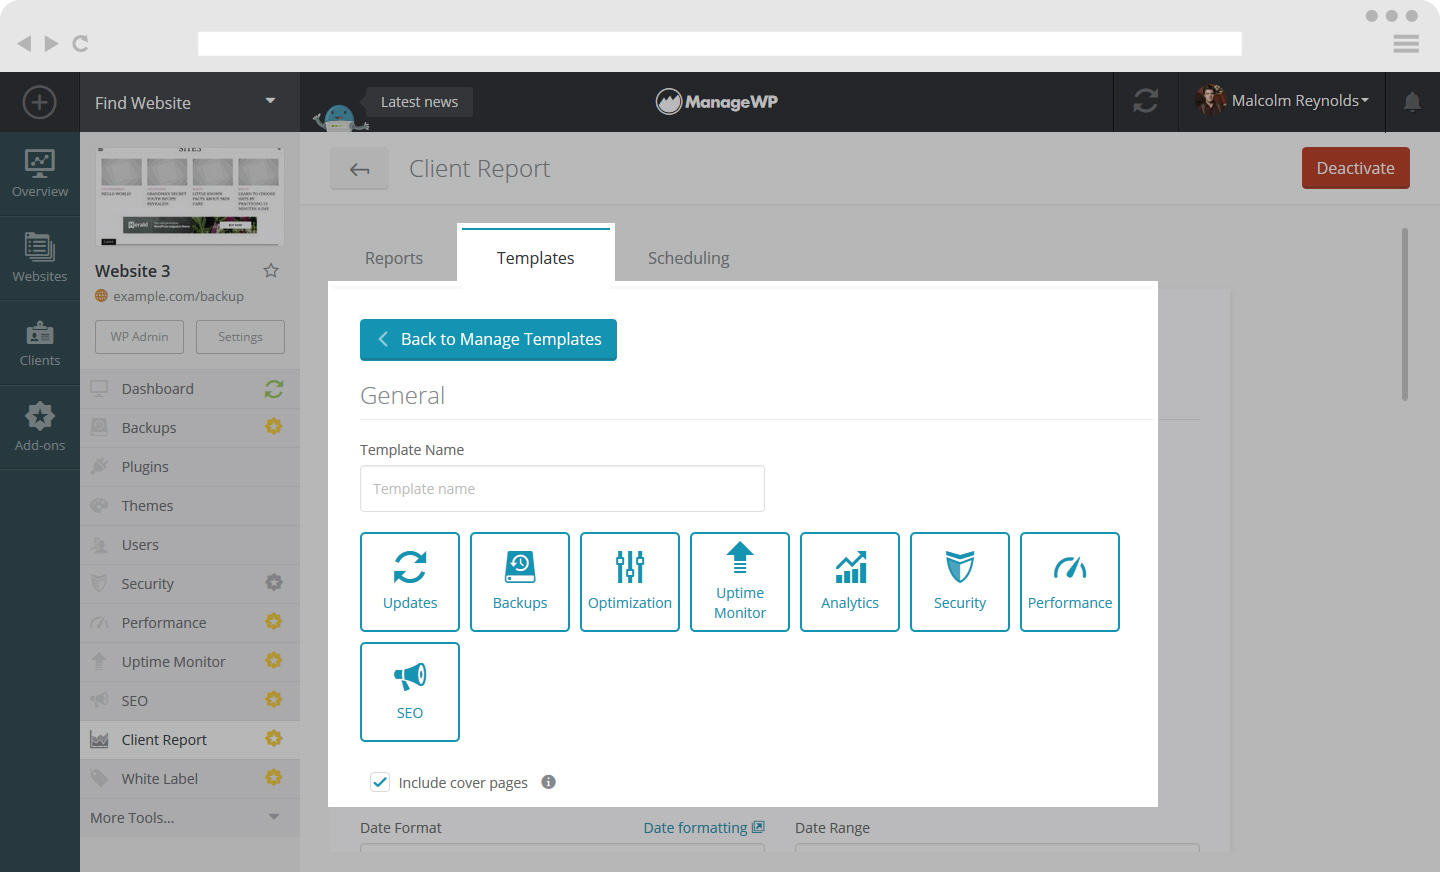
- Date Format and Date Range
- Report Title
- Introduction message
- Closing message
- Logo
You can also add Mail info in the template:
- Send as e-mail
- Reply to
- Your name
- Your E-mail
- Client Name
- Client E-mails (You can add multiple emails separated by commas)
- Subject
- Email Content
How to schedule a Client Report
You have the option to set Client Reports to be automatically sent to your client with Scheduled Client Report.
You can do this two ways:
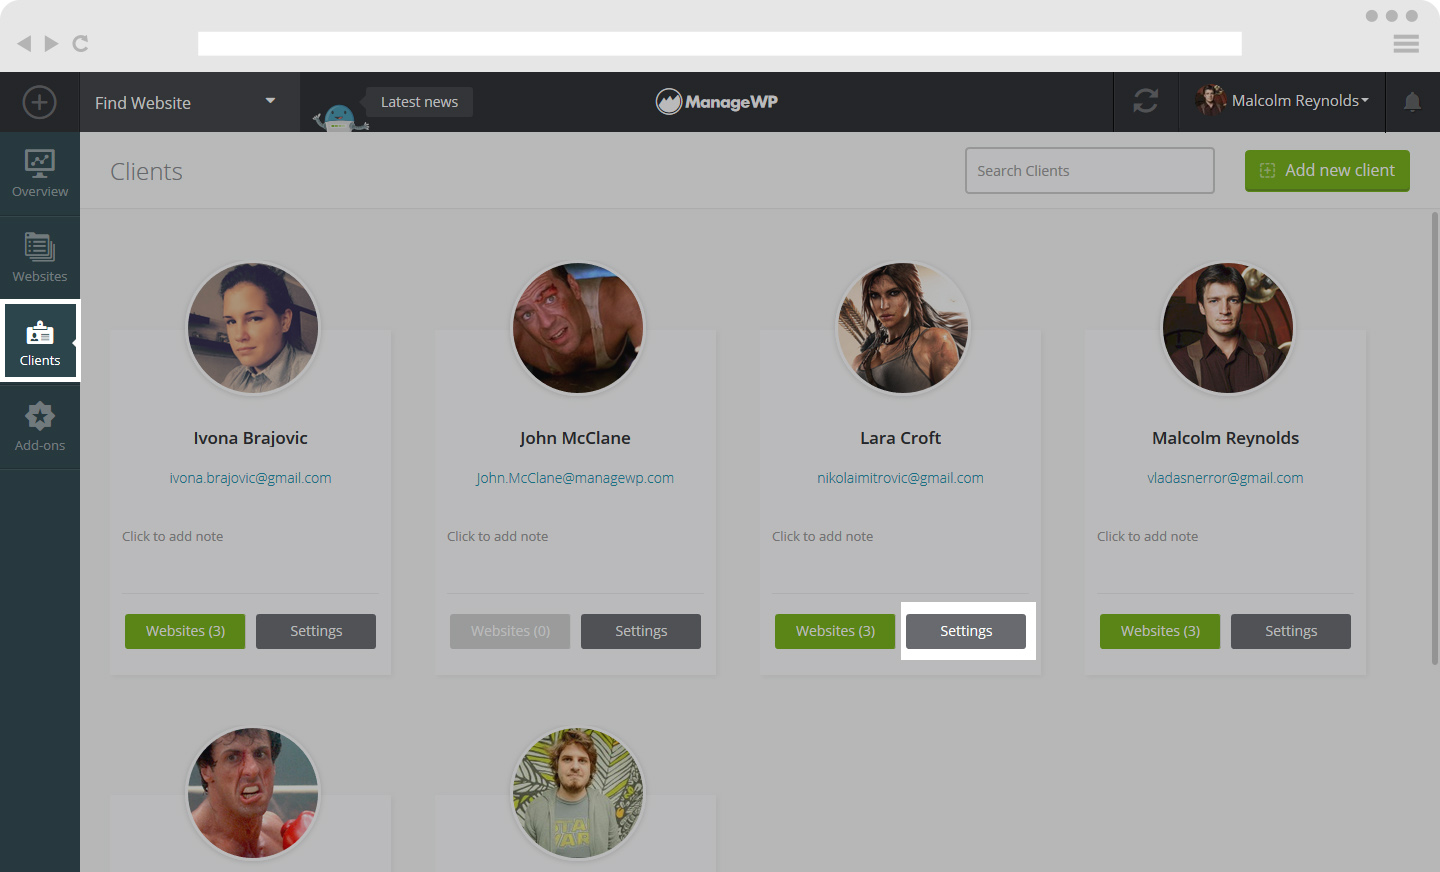
1. From Client Tab
Click on Client Tab and then click on Settings for the desired Client.
Under Schedule Report Settings you can set frequency to Weekly, Bi-Weekly or Monthly, Delivery Time, Delivery date, select a Template you want to use.
Also, you have the option to Preview report.
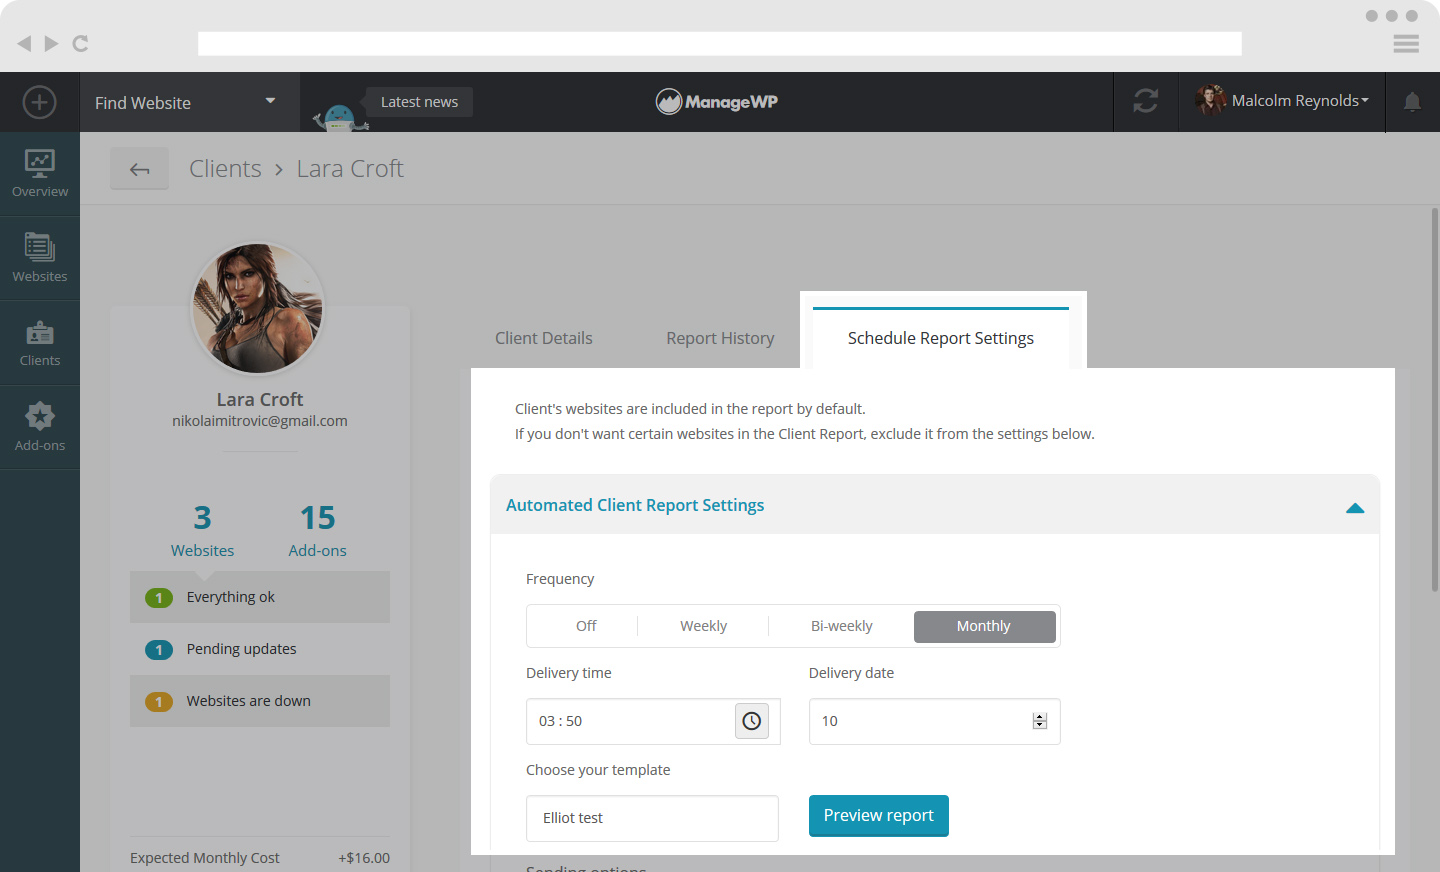
You can set sending options and Include/Exclude Client Websites.
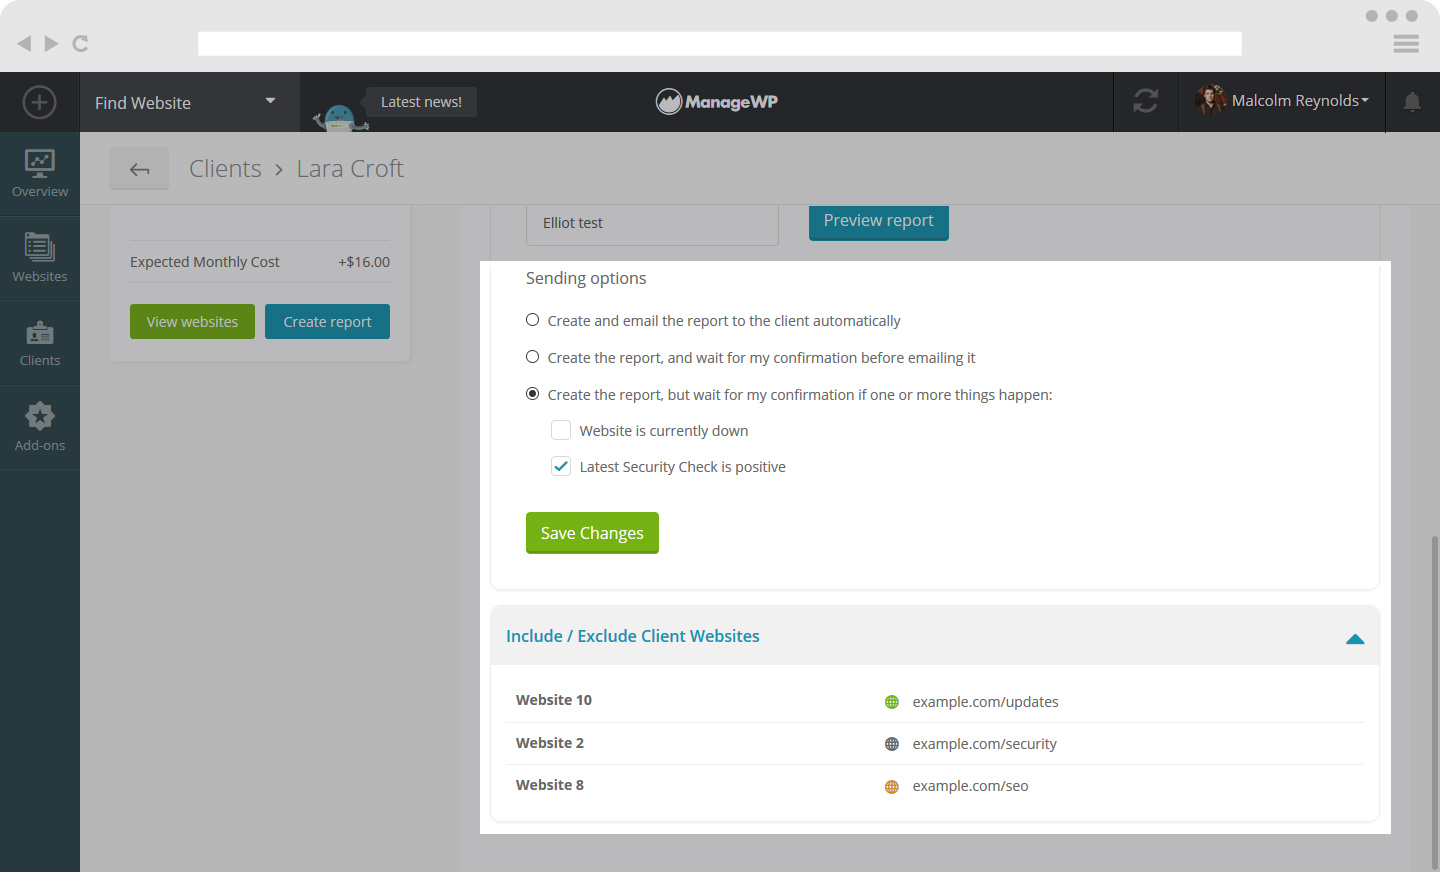
This will schedule Client Report for all the sites for this client unless you have excluded some websites, and email which Client Report will be sent to is the one added for Client and not the one in template.
2. From the Client Report tool for the website
When you Select Scheduling from the Client Report tool you will have all the same options as when selecting from the Client tab.
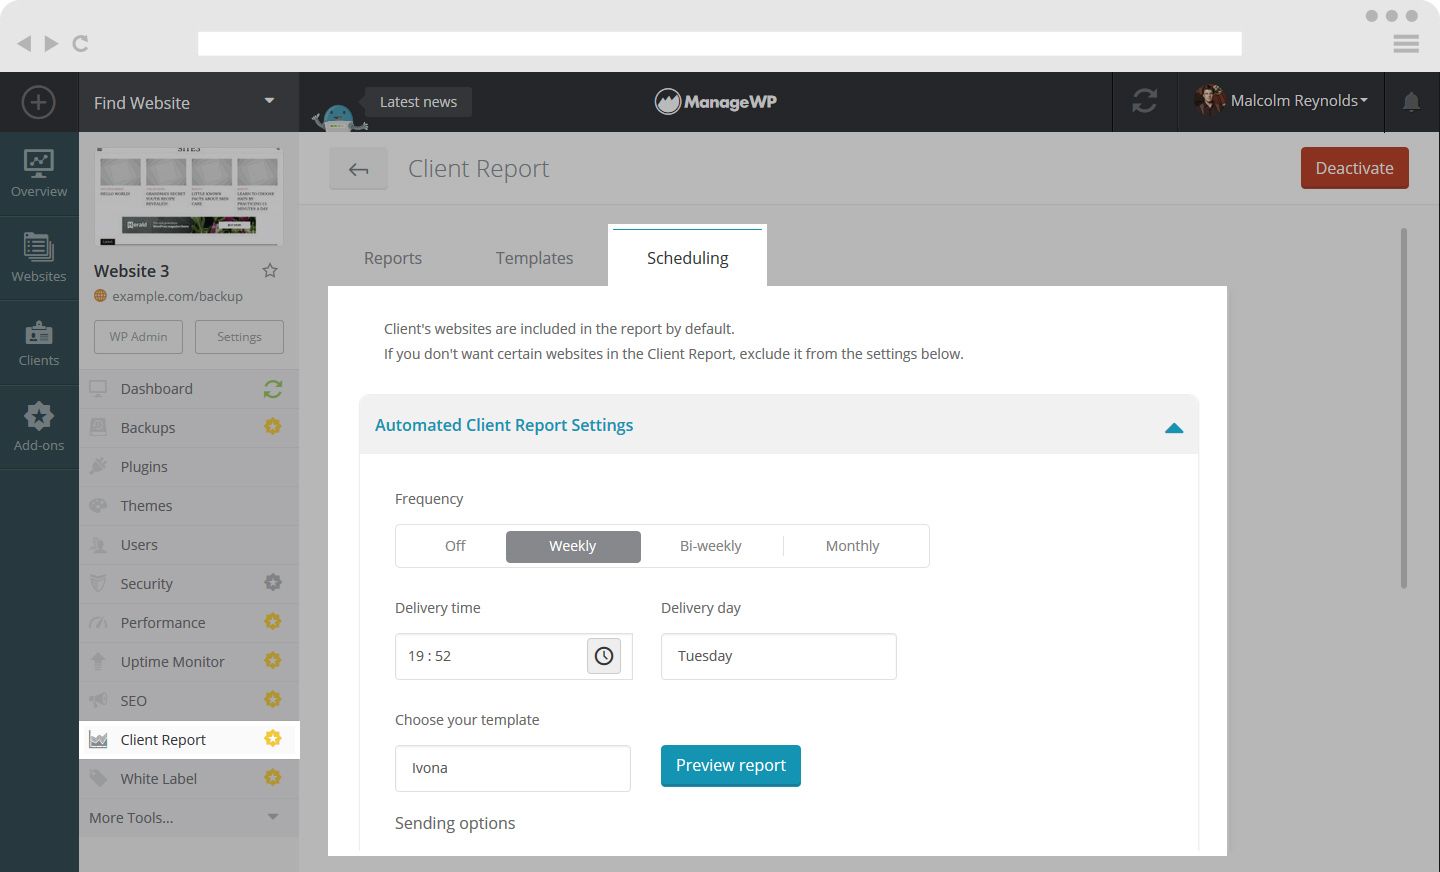
When you schedule Client Report from here, keep in mind that it will be made for the Client of that site and the rest of that Client sites will be included in the report unless you excluded them.
How to check your report history
You can check when you have made your reports, if and when your automated report was made and sent.
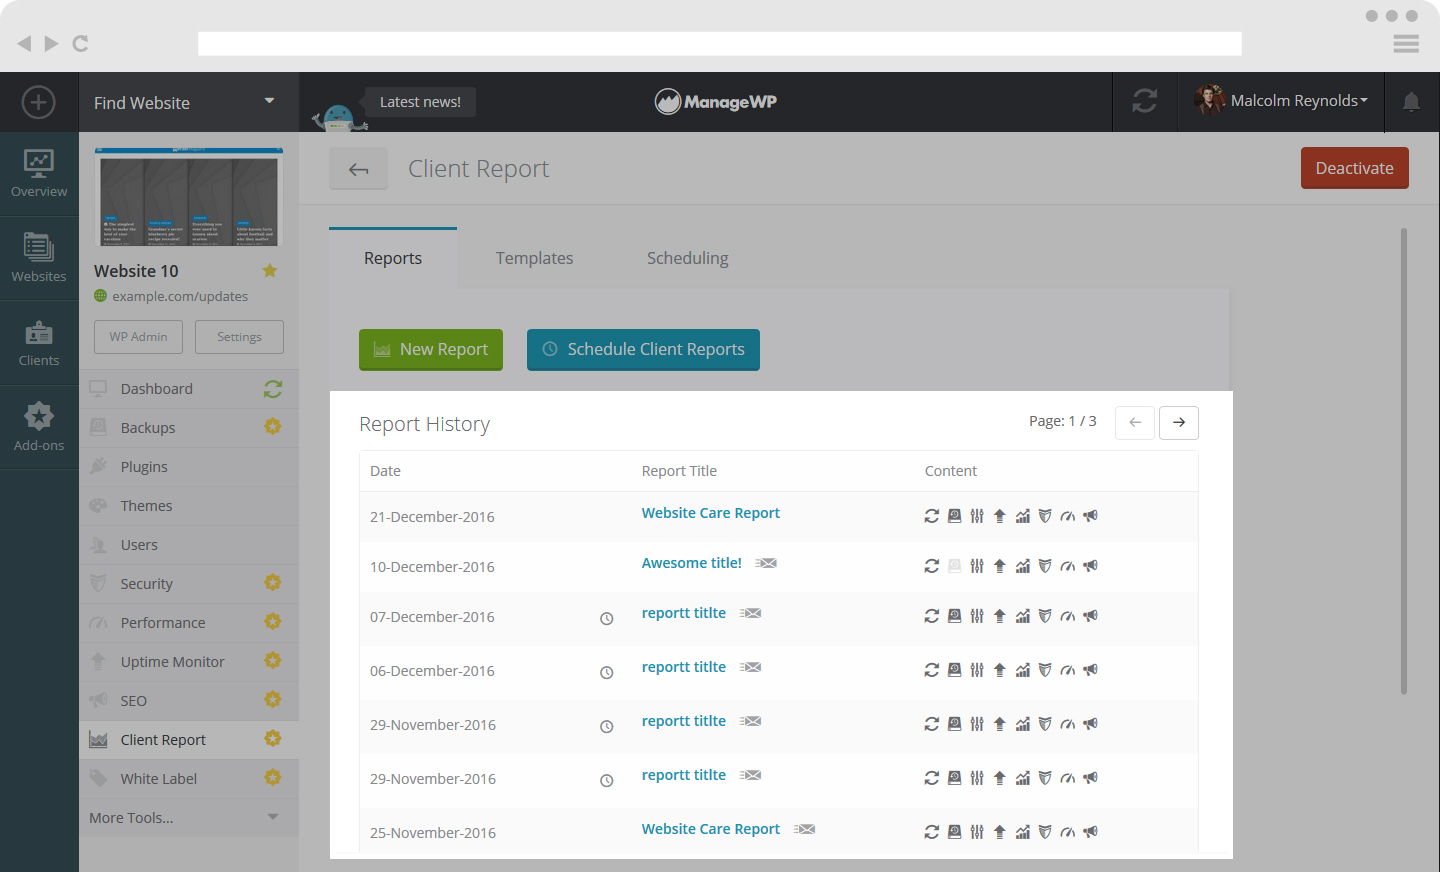
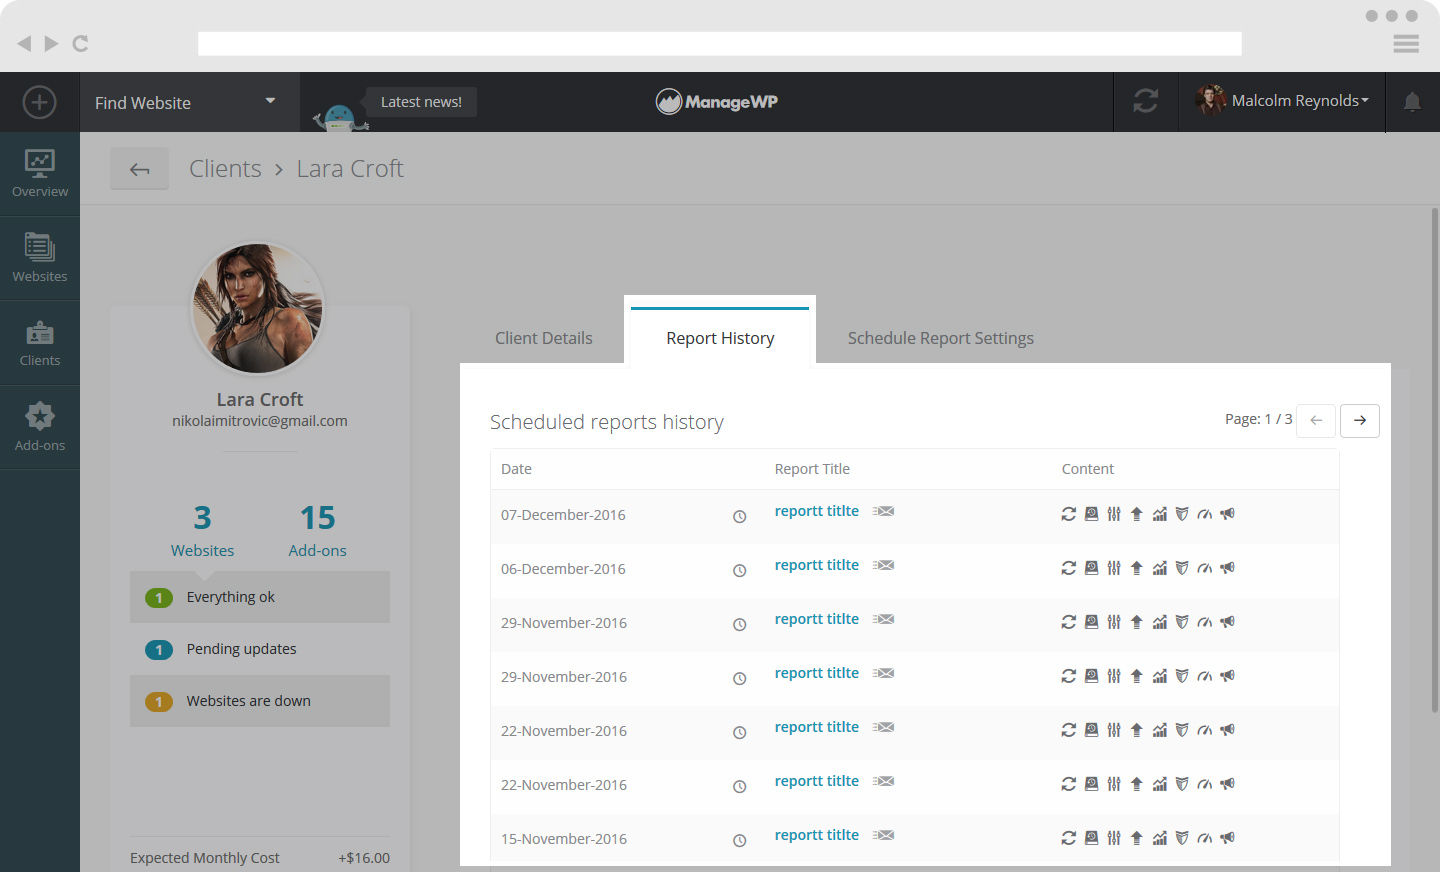
The clock icon shows which report was automated, the mail icon shows if it was sent to a client and when you hover over the mail icon you can see when it was sent.
 Yes
Yes
 No
No
