Hypertext Preprocessor (PHP) is the scripting language used by WordPress, and your website can’t function without it. However, PHP isn’t static, and it needs frequent updates to improve its functionality. You’ll want to keep up with these new releases, but first, you’ll need to know your current PHP version.
Fortunately, checking this in WordPress is fairly straightforward. You can either use the Site Health tool, access your hosting provider’s control panel, or upload a PHP file to view the software version.
In this guide, we’ll explain what PHP is and why running the latest release is essential for your website’s performance. Then we’ll walk through three easy methods to check your PHP version in WordPress. Let’s get started!
What PHP is (and why using the latest version is important)
PHP is the robust server-side scripting and programming language that powers your WordPress website. It accesses information from your database and serves it to visitors as HTML pages that contain your content. As such, your site won’t function without PHP.
However, PHP is constantly changing. There are frequent updates that include security patches, bug fixes, and website performance improvements.
If your site is running an outdated version of PHP, this could negatively affect its performance. It may also leave it vulnerable to security breaches or cause occasional errors from bugs. Therefore, it’s in your best interests to keep your PHP version as current as possible.
Before you can update your PHP, however, you’ll need to know if this step is even necessary. As such, you’ll want to check your PHP version first. Fortunately, there are a few ways to do that.
How to check your PHP version in WordPress (3 methods)
Prior to checking your PHP version, you’ll likely want to know what the most recent update is. We recommend looking at the latest PHP releases so you have a valid reference point.
You can then use a few different methods to check your PHP version in WordPress. Let’s take a look at each option!
1. Use the Site Health tool in your WordPress dashboard
Your WordPress dashboard enables you to administrate almost every aspect of your website. Furthermore, you can check your PHP version directly from your admin area. This is also one of the easiest methods, which makes it ideal for WordPress beginners.
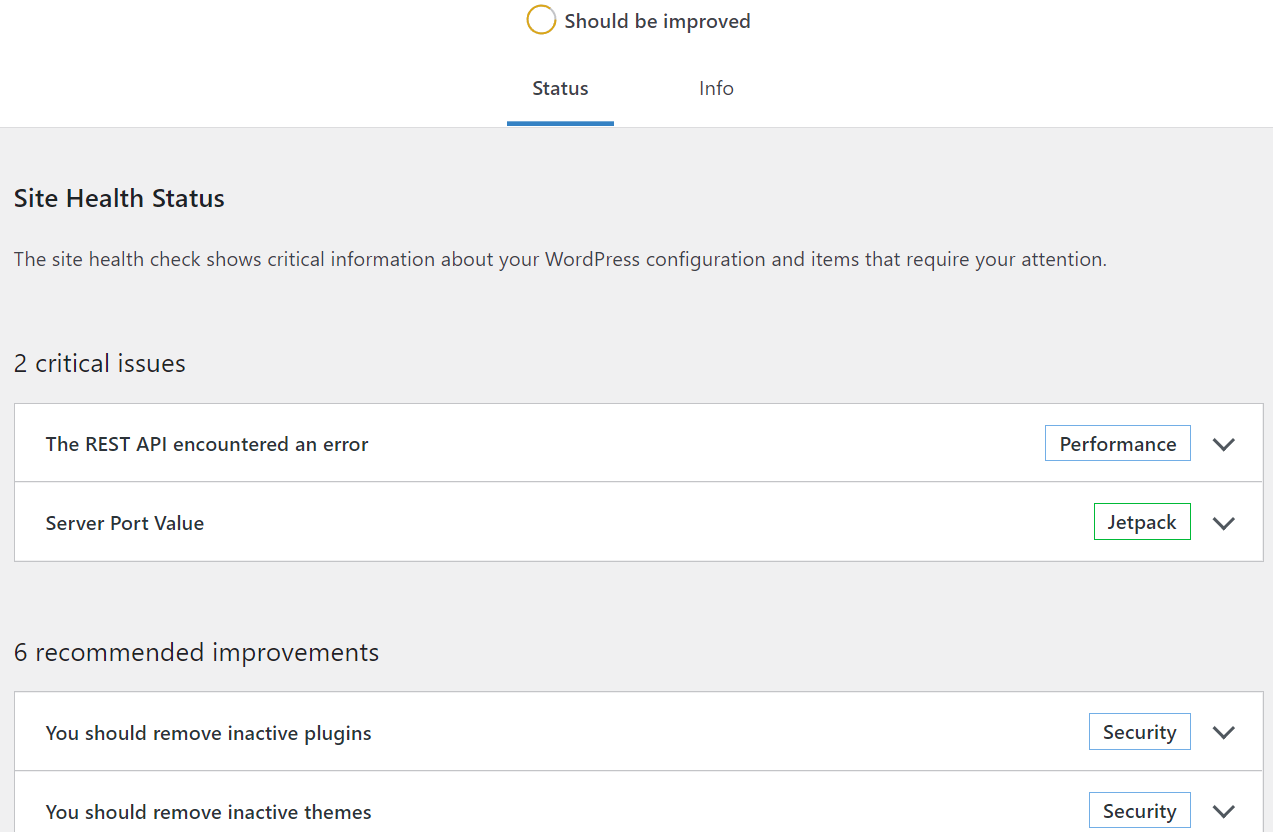
To start, navigate to Tools > Site Health in your WordPress dashboard. You should now see a summary report of any issues related to your website’s status and performance:
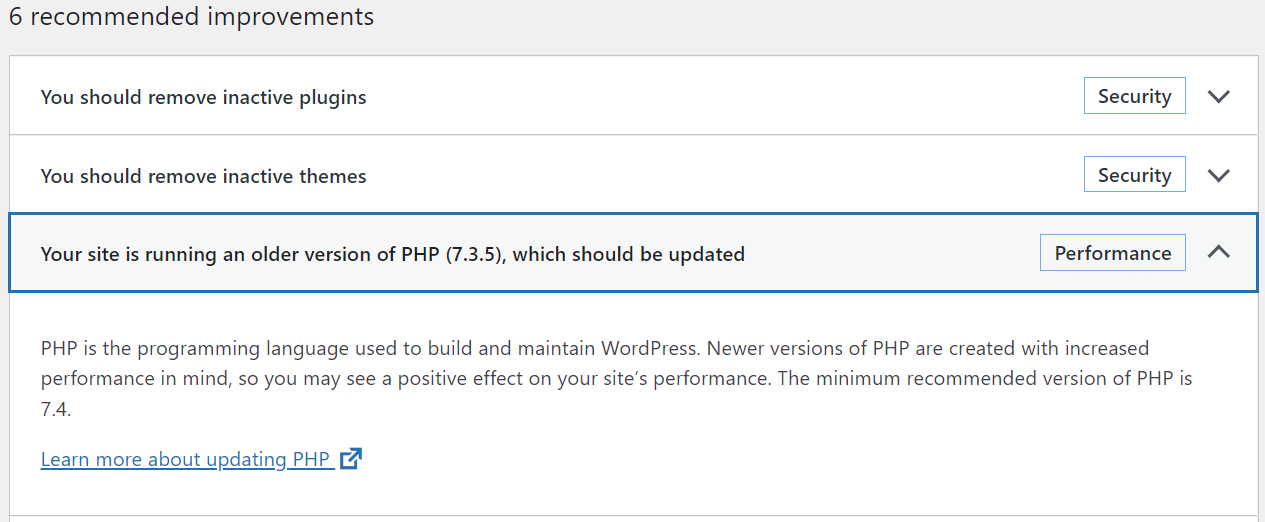
If you scroll down, the report may even inform you if you’re running an outdated PHP version, and prompt you to update it:
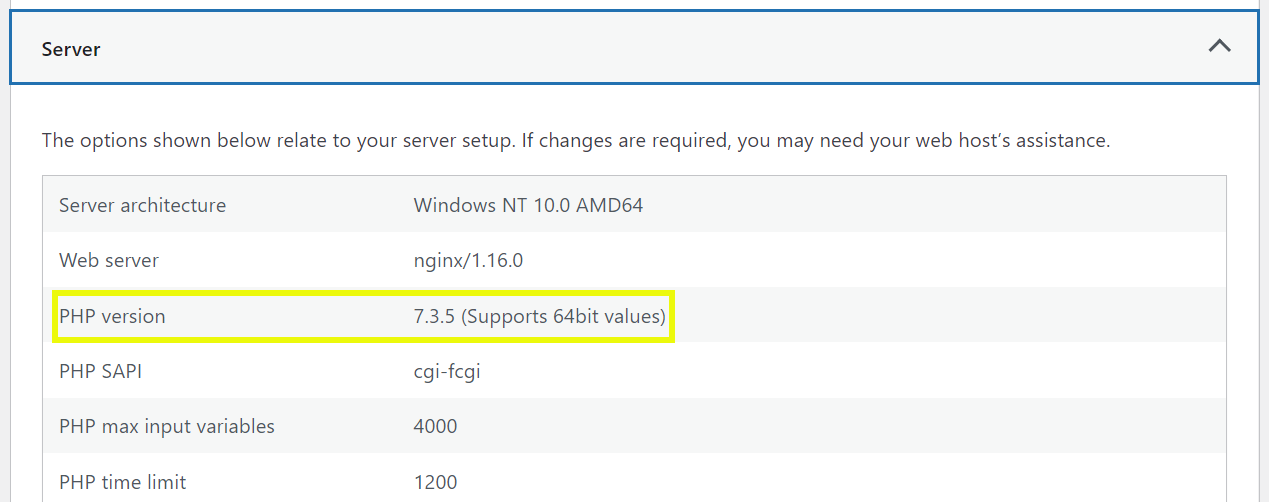
However, you may not see this message if your PHP is up-to-date. If so, you can verify the release by heading to Info and opening the drop-down menu in the Server section:
It’s that easy! However, in some scenarios – due to site issues – you may not be able to reach your WordPress dashboard. Fortunately, if that’s the case, you can try two other methods that don’t require access to your admin area.
2. Access your hosting control panel
For whatever reason, if you can’t reach your WordPress dashboard, you won’t be able to use the previous method. However, your web hosting provider’s control panel may provide an alternative. This process is also relatively straightforward.
It’s important to note that the following steps will differ slightly depending on your specific host. However, you’ll likely want to start by navigating to your host’s control panel.
If your host uses cPanel, you should look for a label such as Software > MultiPHP Manager. It may also say Select PHP Version:

Click on the icon you find, and you should now see your website’s PHP version:
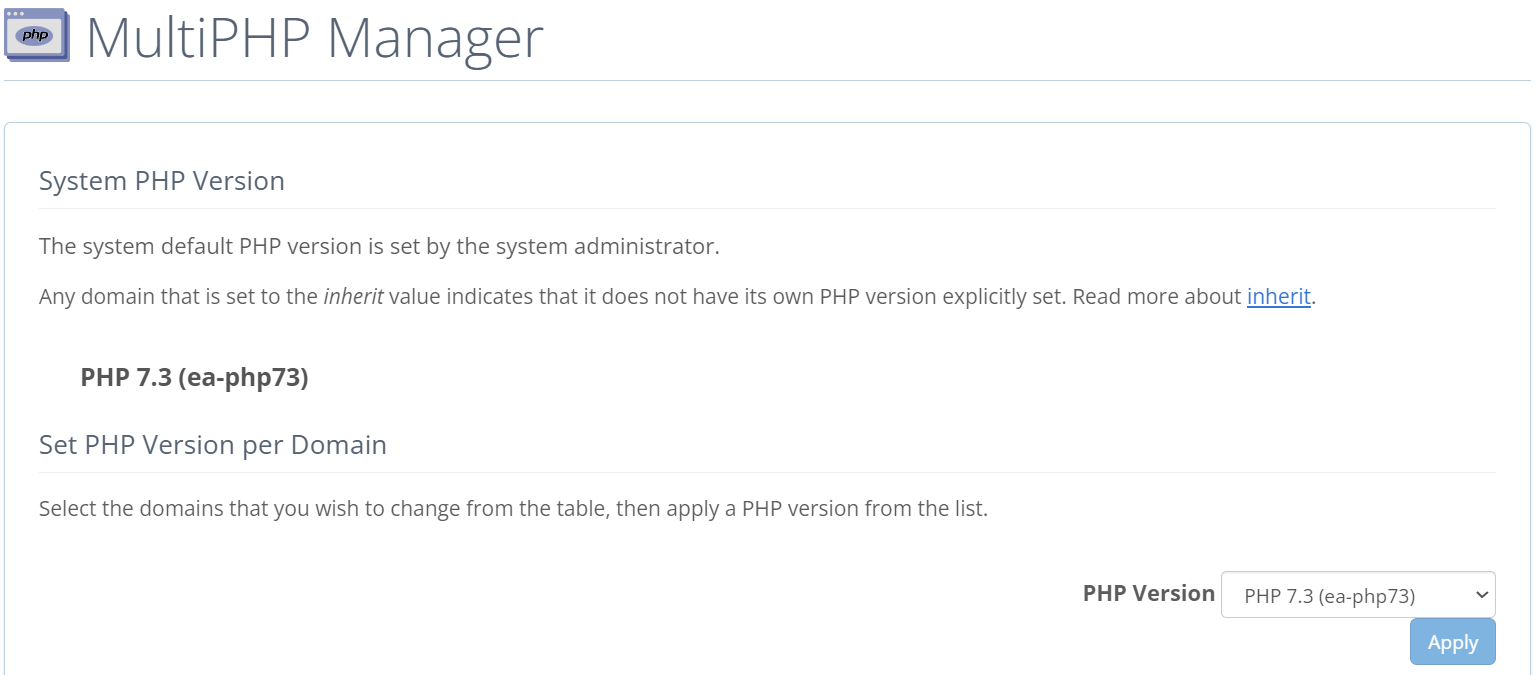
On this screen, you might also have the option to update your PHP to a newer release. Simply click on the drop-down menu and choose the latest version from the list.
3. Use a PHP file
There is one final method you can use to track down your PHP version in WordPress. This option is slightly more technical, and therefore a bit more challenging than the others. As such, we only recommend it if you can’t access your WordPress dashboard or find your details in your host’s control panel.
First, you’ll need to connect to your website via File Transfer Protocol (FTP). If you’ve never used this tool before, we recommend starting with a trusted program such as FileZilla. It’s completely free and easy to use:

Next, you’ll need to create a PHP file. You can do this by making a file in Notepad or a similar text editor and naming it “phpversion.php”. Then, paste the following code in, and save the file:
<?php phpinfo(); ?>
Next, upload your new PHP file to the root directory of your WordPress website using FTP. Finally, enter the URL “yourwebsite.com/phpversion.php” into your browser and hit your space bar. Note that you’ll need to add your site’s domain name instead of the placeholder.
You should now see a report with various data points about your website, including your PHP version:
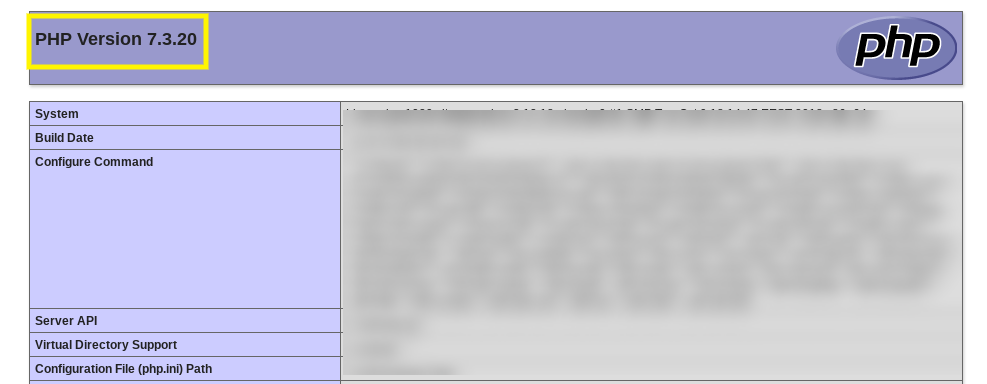
It’s as simple as that! At this point, we recommend deleting the file you just created. Otherwise, anyone can view the detailed information it contains about your website, simply by entering the same URL into their browser.
Conclusion
PHP is core to any WordPress website. It comes built-in, but it requires a bit of maintenance. What’s more, using the latest release can improve your site’s performance and security. Therefore, you’ll likely want to know if your site is running the newest PHP version and whether you need to update it.
To recap, you can check your PHP version in WordPress using any of the following methods:
- Use the Site Health tool in your WordPress dashboard.
- Access your hosting provider’s control panel.
- Upload a PHP file to your website via FTP.
Do you have any questions about verifying your PHP version in WordPress? Let us know in the comments section below!
Image source: Unsplash.

Leave a Reply