
If you’ve ever gone for an interview at an office building, you know that reception doesn’t just let anyone walk in and start wandering around.
Instead, visitors are screened against an appointments list to ensure that they’re actually supposed to be there. Those who are whitelisted (AKA on the appointment list) get in. Everyone else gets redirected.
Your WordPress website is a business – so there’s no reason you can’t apply the same logic to your digital office.
Whitelisting IP addresses is your website’s equivalent of a reception desk – it lets authorized visitors through while blocking access to those who aren’t supposed to be there.
In this post, I’ll start by making my metaphor a bit more concrete with a more detailed discussion of whitelisting. Then, I’ll show you exactly how you can apply this technique to your WordPress site using your .htaccess file and some other methods.
What Does Whitelisting IP Addresses Mean?
Whitelisting, like its counterpart blacklisting, is a way to control who can (or cannot) access your website. That could be your entire website or just a specific area (like your wp-admin dashboard).
While whitelisting and blacklisting both control access, they do so in completely opposite ways – hence the stark color dichotomy:
- Whitelisting – this tells your server to block ALL traffic except for the specified IP addresses.
- Blacklisting – this tells your server to allow ALL traffic except for the specified IP addresses.
Blacklisting is good for dealing with a few malicious actors while whitelisting is more helpful for locking down access for unauthorized users.
What Are The Benefits Of Whitelisting IP Addresses?
Whitelisting IP addresses can come in handy in two main situations:
- Boosting security for sensitive areas of your site – like your dashboard
- Helping restrict access to your site
On the security front, whitelisting lets you only grant access to important areas of your WordPress site (like wp-admin) for authorized IP addresses. Any visitor who isn’t whitelisted can’t get in.
Beyond that, whitelisting can also come in handy if you’re working on a development site. For example, if you’re getting ready to launch a new site, you might not want the Internet-at-large to be able to check things out until you’re ready.
By whitelisting IP addresses, you and other authorized users can view the actual site, but anyone else won’t be able to visit until you’re ready to launch.
Potential Drawbacks Of Using IP Addresses To Restrict Access To Your Site
There are some potential drawbacks to using IP whitelisting to restrict access to your site. If you:
- Have a home IP address that changes often
- Work from lots of different locations
- Need to consistently give access to other people
Then you might get a little annoyed at how often you have to update your IP address whitelist.
If those situations apply to you, you might want to seek out another method (like using a .htpasswd file).
But if you do want to continue with whitelisting IP addresses, here’s how to do it…
How To Restrict Access To Your WordPress Site By Whitelisting IP Addresses
For most users, the first method on this list is the best and most flexible. But I’ll also include two bonus methods that apply to more niche situations.
1. How to Whitelist IP Addresses With Apache .htaccess
Most WordPress hosts use the popular Apache web server which means that you can whitelist IP addresses to all or part of your WordPress site using something called a .htaccess file.
The .htaccess file is a basic configuration file that you can use to alter how Apache functions on a folder by folder basis. For example, in addition to helping you whitelist IP addresses, you can also use it to set up redirects.
To access your .htaccess file, you can either:
- Connect to your site via FTP and look for it in the root folder
- Use cPanel’s File Manager tool (if your host uses cPanel)
Here’s what it should look like when you connect via FTP:

And here’s what it looks like when you go in via cPanel File Manager:
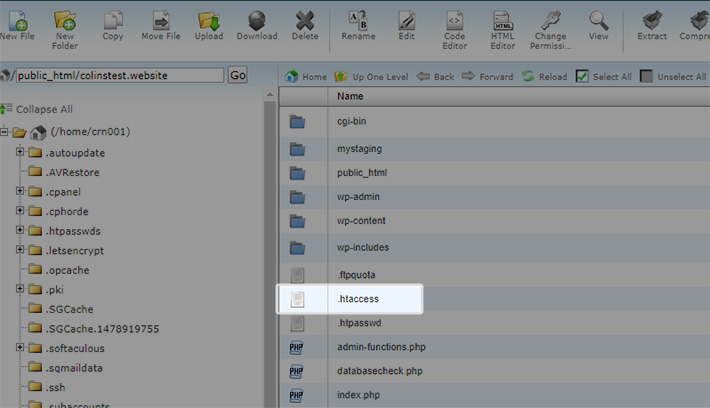
Before you start editing your .htaccess file, though, it’s important that you make a copy of your existing .htaccess file. That way, you have a clean copy in case you accidentally break something.
Once you have your backup copy safely stored away, you can enter the following code snippets, depending on how strictly you want to limit access:
To control access to your ENTIRE WordPress site, enter the following code snippet:
order deny,allow

deny from all

allow from 123.123.123.123
Make sure to replace the example IP address with your actual IP address (you can go here to find your IP address).
If you want to whitelist multiple IP addresses, just add another allow from line like this:
order deny,allow

deny from all

allow from 123.123.123.123

allow from 234.234.234.234
To block access to just your wp-admin and wp-login.php pages, enter the following code snippet:
RewriteEngine on

RewriteCond %{REQUEST_URI} ^(.*)?wp-login\.php(.*)$ [OR]

RewriteCond %{REQUEST_URI} ^(.*)?wp-admin$

RewriteCond %{REMOTE_ADDR} !^123\.123\.123\.123$

RewriteRule ^(.*)$ - [R=403,L]
Make sure to replace the example IP address with your own but leave the slashes. Just replace the actual “123” numbers.
As before, you can whitelist multiple IP addresses by duplicating the line containing the IP address like this:
RewriteEngine on

RewriteCond %{REQUEST_URI} ^(.*)?wp-login\.php(.*)$ [OR]

RewriteCond %{REQUEST_URI} ^(.*)?wp-admin$

RewriteCond %{REMOTE_ADDR} !^123\.123\.123\.123$

RewriteCond %{REMOTE_ADDR} !^234\.234\.234\.234$

RewriteRule ^(.*)$ - [R=403,L]
Make sure to save your changes and you’re done!
2. How to Whitelist IP Addresses With A WordPress Plugin
If you’d rather not dig into your .htaccess file, there are also plugins that can help you whitelist IP addresses for just your login page.
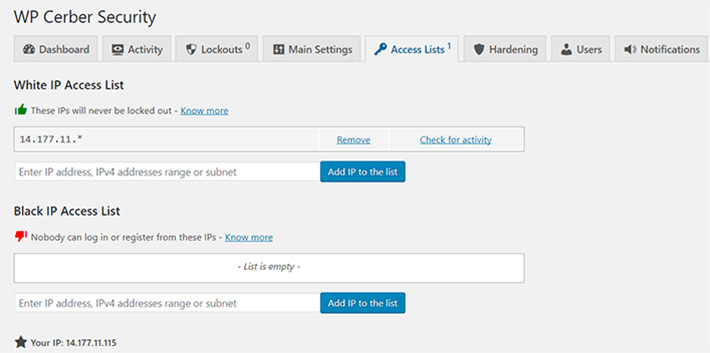
The best that I’ve found is the free Cerber Security & Antispam plugin. It doesn’t completely block unauthorized IP addresses. But it does help you strictly lock down your login page for all IP addresses that aren’t whitelisted.
It’s listed at WordPress.org – so you can install and activate it right from your WordPress dashboard. Once it’s activated, you can configure the plugin by going to the new WP Cerber tab in your WordPress dashboard.
Look for the Access Lists tab to start whitelisting IPs from WP Cerber’s strict login controls:
 3. How to Whitelist IP Addresses on Nginx Web Servers
While most WordPress hosts use the Apache web server, many premium performance-oriented hosts use, or at least offer, the Nginx web server instead.
Nginx advises against using .htaccess, instead opting for a single configuration file.
If your host is using Nginx, your best approach is probably to consult your host’s documentation or talk to your host’s support.
I tried to make a demo for this post – but my host didn’t actually allow me to access the necessary folder – so there’s a good chance your host might not either!
Wrapping Things Up
Whitelisting IP addresses is an effective way to control access to all or parts of your WordPress site.
Assuming your host uses the Apache web server (which most WordPress hosts do), the best way to whitelist IP addresses is using your .htaccess file.
If you’re more interested in just locking down your login page via whitelisting, you can also find plugins to help you out, though they don’t offer as much control as your .htaccess file.
And finally, if your host uses the Nginx web server, you’ll likely need to contact them to ask the best way to whitelist specific IP addresses.
Leave a Reply