![A Complete Guide to WordPress SEO by Yoast [Part II] A Complete Guide to WordPress SEO by Yoast [Part II]](http://s42013.pcdn.co/wp-content/uploads/2012/10/seo-by-yoast.jpeg)
This is part II of a two-part guide. You can find the first post (which you should read before this) here.
Assuming that you have set up WordPress SEO by Yoast as per my recommendations in the first post of this two-part guide, you will now have a very well optimized site.
Redundant pages will have been ‘nofollowed’ or removed altogether, your meta titles across all posts, pages and taxonomies will be set, you will have created an XML sitemap, and more. In short, you are now putting your best foot forward when it comes to presenting your site appropriately to Google and other search engines.
However, we have not yet covered all of the functionality offered by SEO by Yoast. There are in fact a number of powerful features available to you on a per post/page basis, and we are going to take a look at those now.
Your Focus Keyword and Meta Data
You should find the SEO by Yoast meta box somewhere on your post/page screen. If not, hit the ‘Screen Options’ tab at the top right of your screen and select it from the available options:

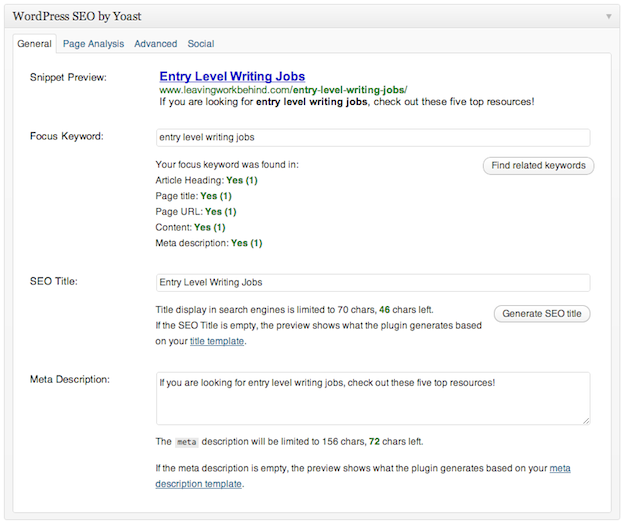
The features available to you are split into four separate tabs. Let’s start by taking a look at the ‘General’ tab, where you define your focus keyword and enter meta data. Here’s an example from a post on my blog:

As you can see, there are four elements on this tab:
- Snippet Preview: a mockup of how your page will display on Google and other search engines (not always accurate).
- Focus Keyword: enter the primary keyword for your page/post here so that the plugin can provide information on how well optimized your content is.
- SEO Title: the title that will display in the search engine results. Can be different from the page/post’s actual title.
- Meta Description: the description that will usually be shown on Google and when published on social media networks like Facebook and Google+.
I would recommend that you take just a minute or two to fill in all of this information when creating a new post or page. It may seem like a chore, but it may make the difference between ranking on the first page or not.
As you can see from the above screenshot, on a basic level my post is well-optimized for the focus keyword, as it appears in all of the important places. But SEO by Yoast has more to offer in terms of optimization guidance.
Page Analysis
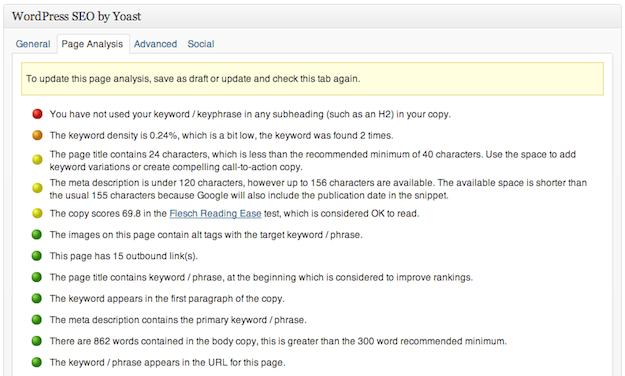
Once you have confirmed your focus keyword and saved your page/post, the Page Analysis tab will offer you a wealth of information relating to how well optimized your page or post is:

As you can see, the analysis is pretty comprehensive. I would advise that you don’t get too carried away with the recommendations here — your focus should always be on writing for the reader first, and the search engines second. Having said that, this information is invaluable as general guidelines if nothing else.
Advanced Settings
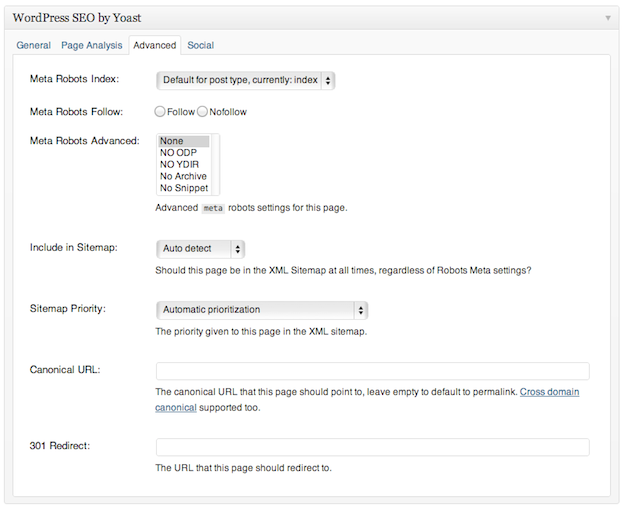
The third tab is full of a bunch of options that you may never have cause to use, but can be extremely useful under certain circumstances:

Let’s look at each in turn:
- Meta Robots Index: define whether the individual post or page should be indexed.
- Meta Robots Follow: set universal ‘follow’ or ‘nofollow’ rule for all links on the page.
- Meta Robots Advanced: four meta tags you will probably never use — more information can be found here.
- Include in Sitemap: override the default sitemap settings for the page/post.
- Sitemap Priority: give the page/post a higher or lower priority than the default in your sitemap.
- Canonical URL: use this field to point the post to the primary URL for the content. Find out more about canonicalization here.
- 301 Redirect: use this field if you want to direct visits to this page/post to another page/post.
Social Settings
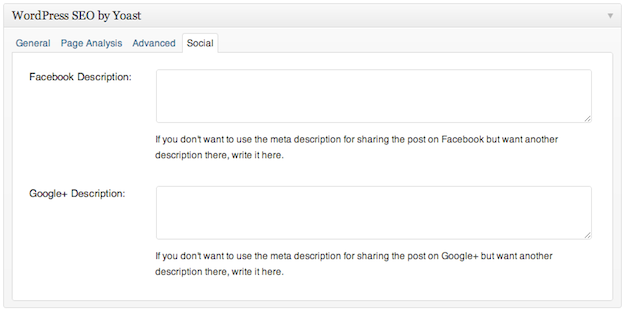
This last tab offers up just two very simple fields:

Your options here are pretty self-explanatory — enter alternative descriptions for Facebook and Google+. For instance, by default the page/post’s meta description will be used to populate the relevant field on the social media network:

If I were to enter a custom description in the Facebook field under the ‘Social’ tab in SEO by Yoast, the description highlighted in the screenshot above would change to suit.
That’s It!
That’s all there is to it folks — your site should now be well and truly optimized and you should have a good handle on how to optimize each individual page and post.
Do you have any additional tips for using SEO by Yoast, or do you have any onsite optimization tips in general? Let us know in the comments section!
![A Complete Guide to WordPress SEO by Yoast [Part II]](https://s42013.pcdn.co/wp-content/uploads/2012/10/seo-by-yoast-310x165.jpeg)
Leave a Reply