
Your website’s theme is an essential part of its identity. As such, you may occasionally need to swap it out as your focus or branding evolves. However, changing a site’s theme can put you at risk for aesthetic problems and broken elements.
Fortunately, there’s a way to reduce that risk. By taking a few careful precautions at every stage of the installation process, you can change your WordPress theme safely and seamlessly.
In this article, we’ll cover a few reasons to swap out your theme, and explore the risks involved. Then we’ll take you through four steps to help you change your WordPress theme safely. Let’s get started!
Why you might want to change your theme
There are a few reasons you might need to know how to change your WordPress theme safely. One prominent consideration is rebranding. If you or your client has undergone an image refresh, you might need a new design to reflect that.
If a theme is being deprecated, your decision might be driven by security concerns. Deprecation usually means that updates, including critical security measures, will no longer be released. This liability can put your site at risk for security attacks.
Alternatively, you could be ready to upgrade to a premium option. Many WordPress users begin with free themes as an economical choice. However, as your site expands you may be willing to pay for extra features that will support its growth.
Finally, your motivation might be as simple as desiring a new look. If you’re like many WordPress users, your website is constantly evolving. Knowing how to change your theme safely is thus critical.
The risks of applying a new theme
Despite the advantages, there are also risks involved when you swap themes. Generally, site elements that are unconnected from the theme are unaffected. This includes your content, and any customization added via code.
However, theme-specific features can pose a problem. For example, any shortcodes unique to the design won’t carry over. The same will be true of home pages, widgets, or file alterations directly related to the theme.
When you combine those aspects with possible formatting errors, you’re altering many integral aspects of your site. Big changes like these have the potential to render your website unusable, or at least give it a messy and unprofessional appearance. As such, learning how to change your WordPress theme safely is critical.
How to change your WordPress theme safely (in 4 steps)
The impact of a theme swap can have far-reaching effects on your website as a whole. Here are four steps to help you mitigate the risks when you need to switch to a new theme.
Step 1: Back up your current site
The first thing you’ll want to do is prepare for the worst. While the following steps should help to keep your site safe, there are no guarantees. As such, we highly recommend that you create a backup of your current site.
Frequent backups are also a smart idea for general site security. Therefore, you might already conduct them regularly. If you don’t, it’s a good idea to add this task to your administrative checklist.
One of the easiest ways to create a backup is to use our own ManageWP backup tool:
ManageWP has all the features you’ll need to support a safe theme change. It’s also ideal for administrating multiple sites on a day-to-day basis.
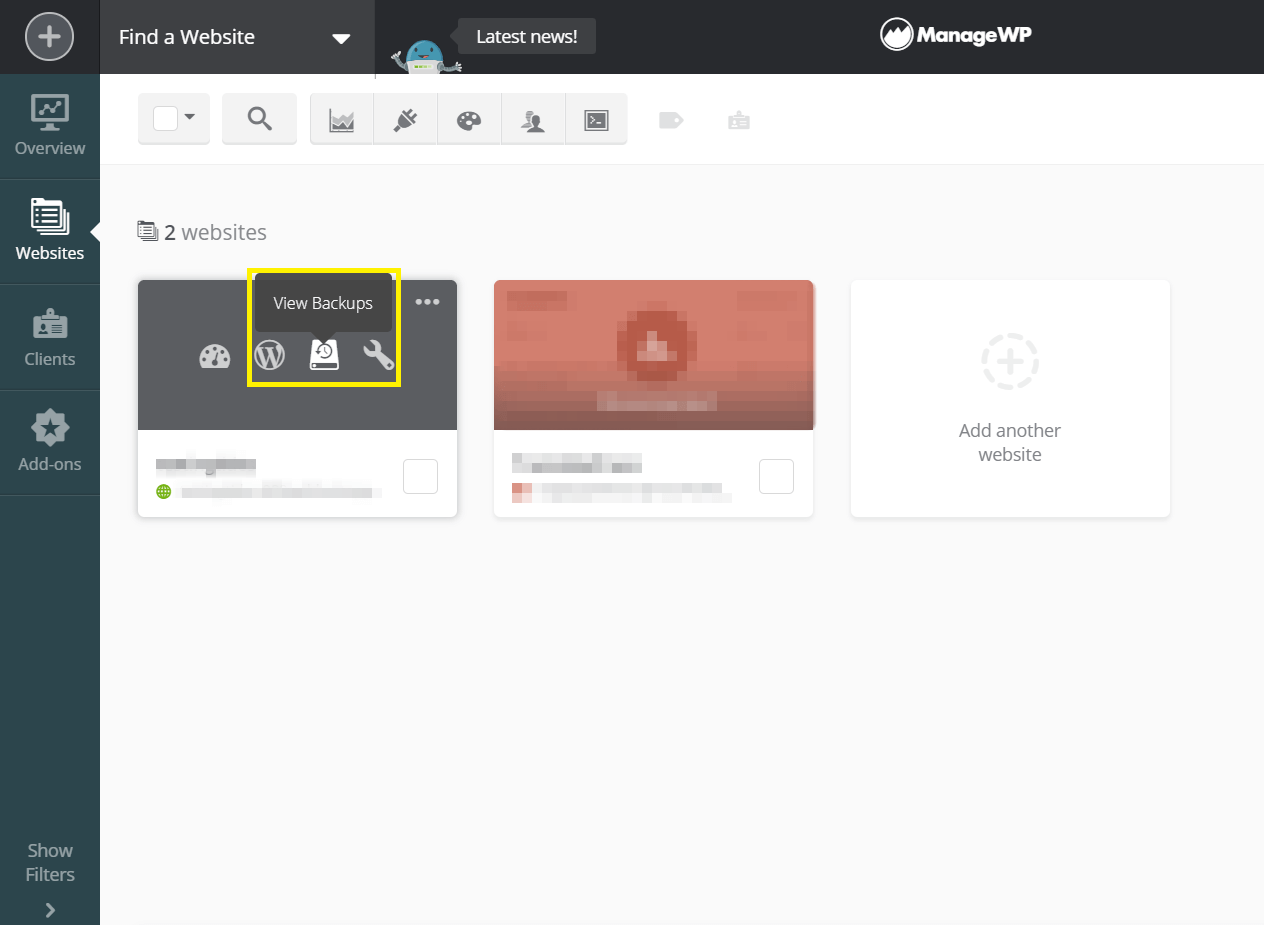
To create a backup with ManageWP, navigate to your dashboard and hover over the site you want to work with. Select the View Backups option:
If this is your first use of ManageWP’s backup function, the program will begin to run right away:
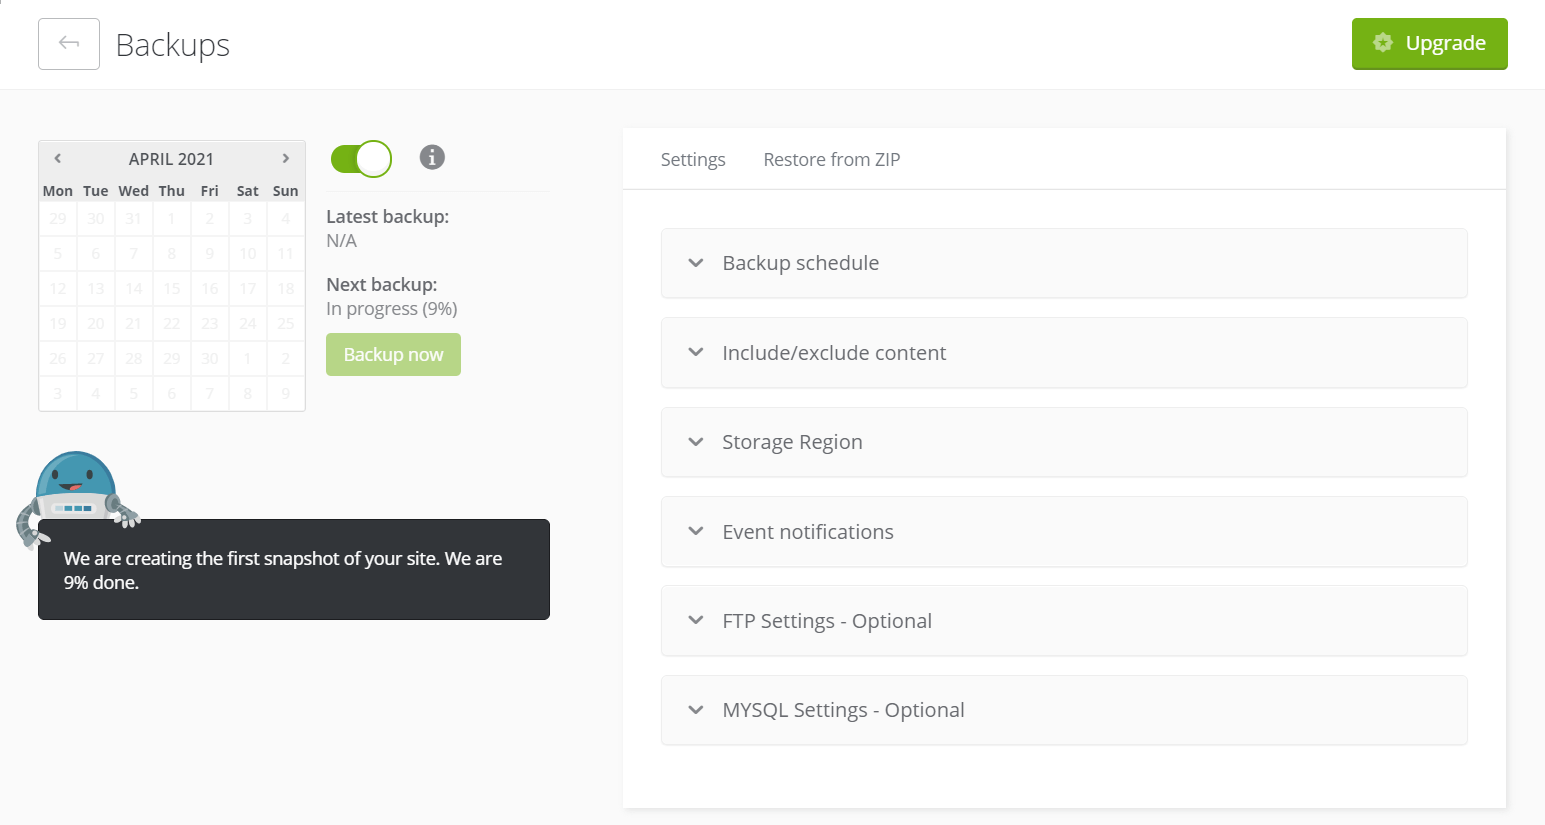
You can also click on Backup now to start the process. Alternatively, if you plan to change your theme on a certain date, you can adjust your backup schedule accordingly.
Either way, make sure you give the program time to fully complete the copy. After that, you’re ready to move on to the next step.
Step 2: Create a staging site or put your page in maintenance mode
Next, you’ll want a way to prevent changes from immediately going live. We recommend using a staging site, which is a stable environment where you can edit a copy of your website. You can make any changes you want without affecting the main site.
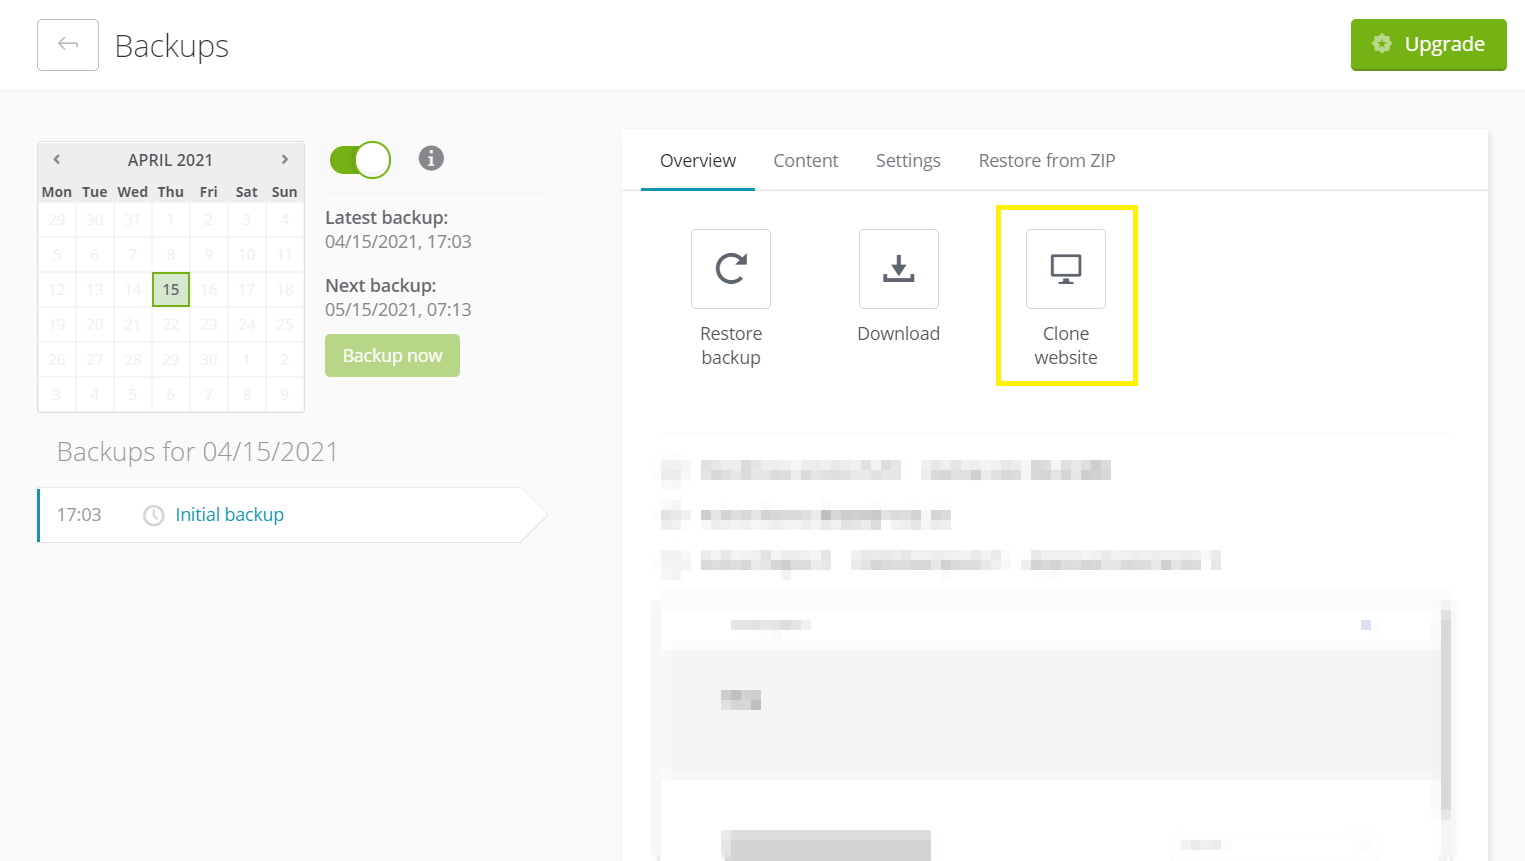
To create a staging site with ManageWP, you can use our premium Clone feature. Once you’ve set that up, you can access it through your ManageWP dashboard by going back to the Backups section. Select Overview > Clone website:
From there, you’ll be asked to choose a destination for your site. You’ll then be taken through a setup wizard. If you want more in-depth guidance, you can consult our staging site tutorial.
Your other option is to use maintenance mode. You’ll be making all the changes on your live site, but visitors will see a message explaining that your site is temporarily unavailable and explaining when it will be back online.
When it comes to staging sites, it’s important to remember that no change made to your original site will be carried over while you edit. For this reason, we recommend using maintenance mode alongside a staging site. This will prevent users from making alterations that you can’t replicate (such as by adding new comments).
There are a few ways to enable maintenance mode. If you’re using ManageWP, you can select the site you want to stage from your dashboard. Then navigate to the left-hand menu and scroll down. Select More Tools > Maintenance Mode:
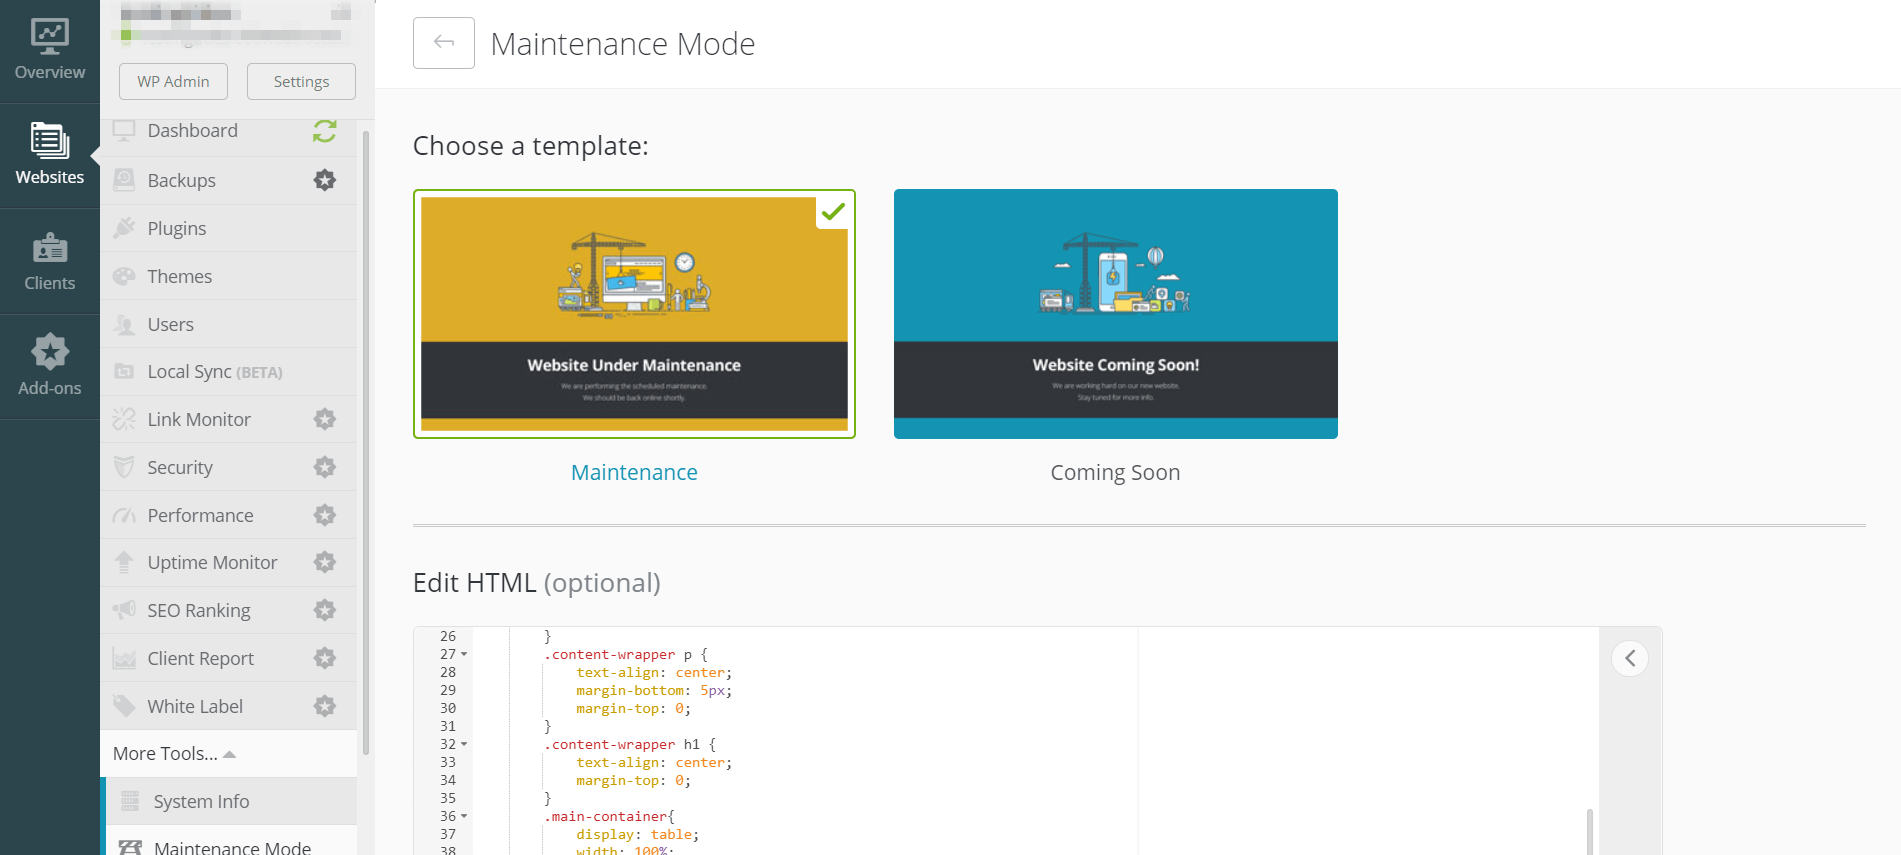
From there, you can choose your design and click on Activate maintenance mode to apply the message. While this step is not explicitly necessary, it’s a simple way to ensure that you can change your WordPress theme safely.
Step 3: Install your new theme and preview it for potential issues
After you’re all set with a staging site, you can install your new theme. We recommend taking careful time to preview it before you make the change permanent, to ensure that it’s safe and won’t break any parts of your site.
To do that, install the theme on your staging site. After that’s completed, you can start the troubleshooting process. This means carefully examining your site for any problems, such as missing or broken elements, content that displays poorly, and so on.
We also recommend that you keep an eye out for formatting issues and trouble with your navigation or sidebar. These issues are fairly common with a theme swap. You can even run a security check to make sure the theme hasn’t introduced any problematic code.
After you’ve resolved any issues, you can start customizing your site so that it looks just right. This might include adding shortcodes, making file edits, or tweaking the color scheme. Once you’ve finalized the design and it’s ready to go public, save your changes and move on to the final step.
Step 4: Go live with your new site
For this last step, you’ll need to use the Clone feature again. Navigate to your staging site from the ManageWP dashboard, and from the Backups section, select Overview > Clone website. When you’re asked to select a destination, enter your original site’s URL. This will copy the work you’ve done on the staging site over to your live website.
If anything goes wrong during that process, you can fix it by restoring the backup you created in Step 1. Navigate to the Backups section and select Restore backup:

Then you can return to your staging site and perform whatever troubleshooting is needed to resolve the remaining issues, before pushing your site live for good.
Conclusion
If you’re looking to breathe new life into your site, a change in theme can have a big impact. However, certain missteps during that process can risk breaking your site.
Fortunately, you can upgrade your design with confidence by taking the right precautions before you start. In this article, we covered four steps to change your WordPress theme safely:
- Create a backup of your current site.
- Set up a staging site, maintenance mode, or both.
- Install your new theme on the cloned website and perform testing.
- Push your staging site live.
Do you have any questions about how to change your WordPress theme safely? Let us know in the comments section below!
Image credit: Pixabay.
Leave a Reply