For those who use WordPress primarily for its remarkable ease of use and intuitive interface, digging below the surface in order to achieve more can be rather intimidating.
But more often than not, you simply don’t need to get your hands dirty. Either advanced customization can be achieved with the default GUI options, or you can find a plugin that does the hard work for you.
Today I want to take a close look at one such plugin – Widget Builder. It does exactly what you would expect – it helps you to build more advanced widgets than WordPress affords you by default, without the need to touch a line of code.
The Problem with WordPress Widgets
WordPress comes packaged with a generous selection of widgets, with everything from recent posts, to a calendar, to a search box (even though WordPress’ default search functionality is awful).
but despite this choice, one widget in particular lets WordPress users down – and it is typically the most used. I am talking about the text widget:
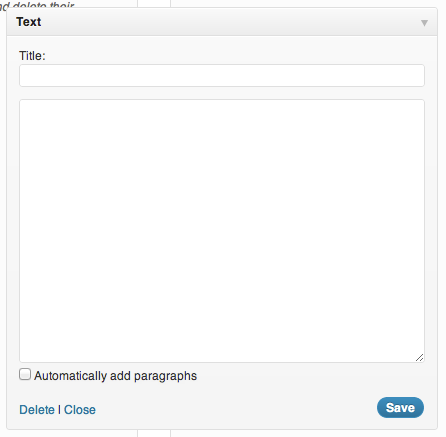
What you see above is actually a pretty functional tool in the right hands. If you have a good understanding of HTML and CSS, you can use the text widget to achieve most things. But at the risk of sounding lazy, I believe that we should only have to resort to coding by hand as a last resort.
With that in mind, given that WordPress has a capable WYSIWYG editor available elsewhere on the backend, surely it only makes sense that we should be able to utilize it for widgets?
With Widget Builder, we can do just that.
Check out our list of best rated WordPress widgets
Using Widget Builder
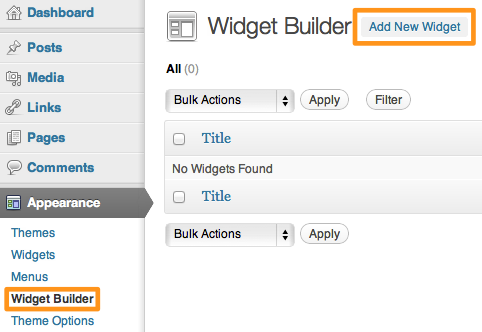
Once you have installed Widget Builder on your WordPress site, you can create new widgets by clicking on the “Widget Builder” option under the Appearances section on your admin sidebar, then clicking “Add New Widget” on the subsequent page:
You will then be presented with a screen that looks much like the New Post/Page screens:
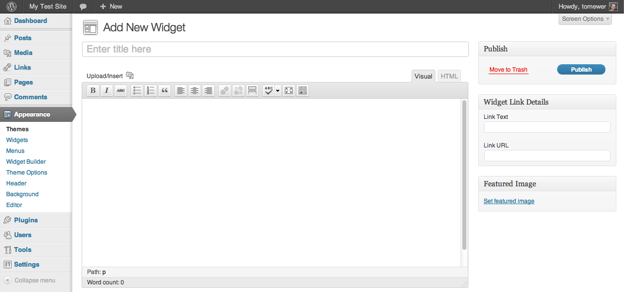
There are four areas that you need to concern yourself, in order of where they appear in any widget you create:
- The widget title – this will appear at the very top of the widget
- The featured image – this will appear directly below the widget title
- The content – this will appear directly below the featured image
- The widget link – this will appear at the bottom of the widget
All of the fields are completely optional, so you have a high level of flexibility in terms of what you show, and where. Here’s a sample widget that I put together:
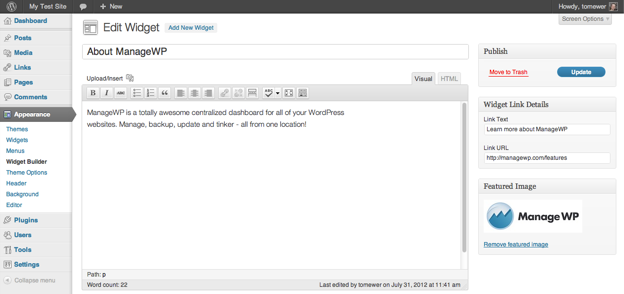
And here’s how it looks when I add the widget to my sidebar:

Whilst you could have achieved the same effect with the standard text widget and HTML, using Widget Builder is a lot quicker and easier.
Besides, we are only scratching the surface in the above example. Another plus that Widget Builder offers above the normal text widget (beyond all of the WYSIWYG capabilities) is the fact that you can include any shortcodes that you might typically use in a post or page.
For instance, let’s say that I wanted to use the Twitter Hashtag Shortcode plugin to display recent tweets relating to ManageWP in a widget. Using Widget Builder, I just paste the shortcode into a new widget and add it to my sidebar. Then I get this:

The same shortcode entered into a standard text widget produces this:
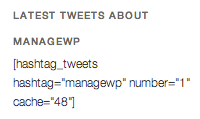
Not quite the effect I intended.
Again – whilst you can use shortcodes anywhere if you know the right hacks, I like a simple life.
At the end of the day, using Widget Builder rather than the standard text widget is much like using the visual editor rather than the HTML editor. Sure – there will always be people who swear by the bare bones manual approach, but I’ll always go for the least path of resistance.
So what do you think? Will Widget Builder take pride of place amongst your WordPress plugins? Let us know in the comments section!

Leave a Reply