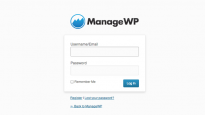

When you visit your WordPress login page, what do you see? If you are still using the default page, you are missing an opportunity to stand out.
The default login page will do its job well but it isn’t the most inspiring page on your website. It’s very boring. The flat grey background, basic white login box and using the WordPress logo doesn’t tell your users anything about the site.
While customizing this page isn’t necessary, doing so will show your users that you care about the details on your website. It lets them feel confident that you care about the presentation on your site and a customized login page will make your users pause for a second on a page they normally completely ignore. You can use that reaction in future to add content or information for your users. Though that’s a topic for a later day.
Let’s take a look at how you can simply customize the most undervalued page on your website with a very useful plugin.
The Memphis Custom Login Plugin
The Memphis Custom Login plugin gives you a simple way to customize various aspects of the login page, giving it a more personal touch.
There are several aspects of this page you can alter with the plugin options. This includes the basic background color, text font options, link color as well as adding a custom message for you users. You have the ability to alter the login form itself in several ways as well as changing the logo that is displayed on the page.
The plugin also gives you various blog protection options and the ability to track it independently in Google Analytics.
Blog Protection Settings
 While this isn’t the core function of the plugin, Memphis’ blog protection settings do offer a few useful additional protection options for you to use on your blog.
One protection feature is the ability to completely password protect your blog. This is in effect a simple way to make your site a membership site. There are no other features to enhance this mode but it is a simple way to ensure that only users can access your website content.
You are give the options to hide the lost password link as well as hide any error messages that occur when trying to login. This gives those people trying to guess your password very little information to work with and also removes the possibility of them intercepting and lost password requests.
The other useful feature in the protection settings is the redirect upon login option. Normally when you login you are taken to the admin dashboard. However, with this setting you can specify exactly where your users are sent when they login. This includes custom pages. This can be exceptionally useful if there is information you need your users to see when they login. Rather than hope they stumble onto that information, you can send them directly to it.
Google Analytics Settings
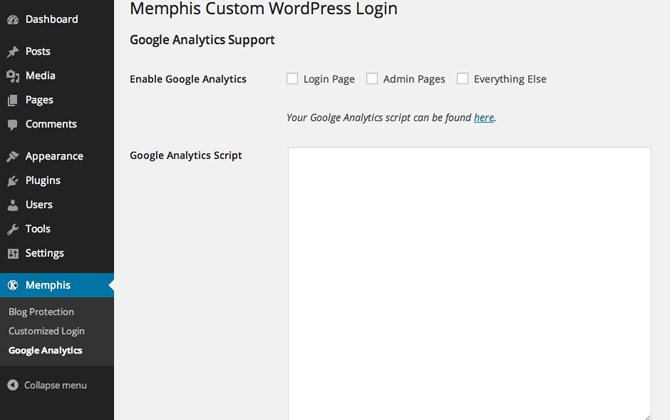
These settings allow you to enable Google Analytics on your Login page, Admin Pages, or everywhere.
If you already use Google Analytics on your site this may not be a useful section for you. However, if you haven’t implemented them on your website yet, then you don’t need to install another plugin to do so. Simply add the tracking code to this page and mark all three tracking options available to you.
Customized Login Settings
This is the main function of the plugin. This page is broken down into three separate sections to allow you to control various aspects of the page customization. To enable page customizations you must make sure the “Check to customize login page” box has been ticked.
Generic Customization of Login Page
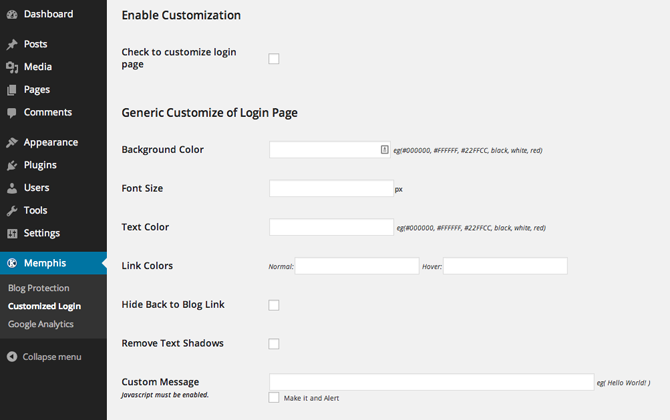
The generic customization area allows you to change simple settings on your login page. This includes the page background color. This can be altered using a color hex code or by simply writing the name of the color into the color setting field. Obviously the hex code will provide a far more precise color choice.
Here you can also alter the font size used on the page and the text color. The link color options for normal and hover over effects can be altered here as well as the ability to remove the text shadow style.
Finally you can hide the Back to Blog link that takes your users back to the home page as well as add a custom message for them. This custom message can be set to either be text displaying on the page or as a pop up alert that can be used for important information your users need to know.
Form Customization
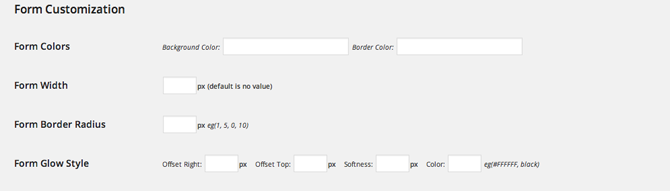 This section allows you to customize the styling of the login form itself.
You are given the options to change the background and border color of the form in order to style it to suit the background options you chose previously. This allows you to either make sure the login form stands out from the page, or subtly blend it in with the overall design.
While the default form is compact and in the center of the page, the customization options in this section will allow you to make the form as wide or as narrow as you want it to be. This is particularly useful for matching the form to your logo size if you display it directly above the form.
You can alter the form border radius and the form glow style at this point too. These are subtle design elements but they can make your page look very professional when done correctly or extremely amateurish when done badly. They may be minor elements but you must spend time making sure they work with your new design choices.
Logo Customization
![]() The logo customization is the final piece of the puzzle in designing a custom login page.
The logo customization is the final piece of the puzzle in designing a custom login page.
In this section of the customization settings you are given complete control on where your logo is positioned on the page. While the default logo is directly above the login form, you don’t need to be tied to that location. You can give your logo pixel positioning from the left and from the top of the page.
With this simple option you can experiment with your logo positioning and place it where it makes sense for you. Leaving the fields blank will place your logo directly above the login form. A negative value in the position left field will move the image to the left hand side of the page. A positive value will move the logo image to the right hand side of the page
It is in this section that you can customize the logo image title and also where it redirects to when clicked. This can be a good place to direct people to your home page or your about page to read more about your website.
If you change nothing else on your customization form, make sure you change this redirect field. Having people sent to WordPress.org when they click the logo doesn’t help you at all and should be changed straight away.
With all of your logo settings in place you must make sure you tick the Enable Custom Logo check box. Once this is done you will be given a logo uploader area on the top right hand side of the page. This is where you upload your logo image file. Checking the “Make This Your Background” check box that appears above the logo will active logo image on your login page.
Conclusion
Your login page can be changed to make it as simple or as complex as you would like to make it. Using the Memphis Custom Login page plugin makes this process extremely straightforward and will allow you to change everything you need to give the page a personal touch.
Have you customized your own login page or is it now something you are considering? We’d love to hear your thoughts on this plugin or any others you’ve used to make these customizations in the comments below.
Leave a Reply