
Moving to a new web host or changing domain names involves a lot of work. One task you need to complete is migrating your website. This can be a scary process if you’ve never done it before. There’s a lot that could go wrong, and your website might be unavailable during this time.
Fortunately, it’s possible to successfully migrate your website without any problems. Understanding the steps to take for a successful migration and the potential issues that may arise can help you avoid lasting issues.
In this article, we’ll look at some scenarios in which you might need to migrate your website. We’ll then discuss the steps to take to successfully do so using WordPress plugins and ManageWP. Let’s get started!
Why you might need to migrate your website
Migration is the process of moving your website to a new server or domain. Some common scenarios in which you might carry this out include:
- Switching to a new web host. If you’ve determined that your current hosting provider can’t meet your site’s needs, you may decide to move your site to a new server.
- Pushing a local site live. This is a common practice in website development. Developers who build websites locally (offline) have to migrate the final site to a live server once it’s ready to launch.
- Rebranding. When a business undergoes extensive rebranding, a new domain name may be in order. The migration process can be adapted to this situation as well.
Unfortunately, when it comes to migrating your website, there are many problems you may encounter. The most common is losing files. Your website may also be down for extended periods of time, resulting in a loss in revenue. Additionally, if your migration is not carried out properly, your website might become riddled with broken links and 404 errors.
How to migrate your website successfully (3 available methods)
There are actually several ways to migrate your website. Some hosting companies will offer to do it for you, but this service often comes at a steep price. Another option is manual migration. However, this route isn’t advisable for beginners or those with limited technical ability, as it tends to be somewhat difficult. It also leaves a lot of room for human error.
Therefore, we’re going to focus on some more accessible methods for migrating a WordPress website. These are smart alternatives to paying a professional or trying to handle the manual process yourself.
1. Use the Duplicator Plugin to avoid downtime
There are many migration plugins available, but Duplicator is unique in that you can avoid downtime for your site.
Exporting your site with Duplicator
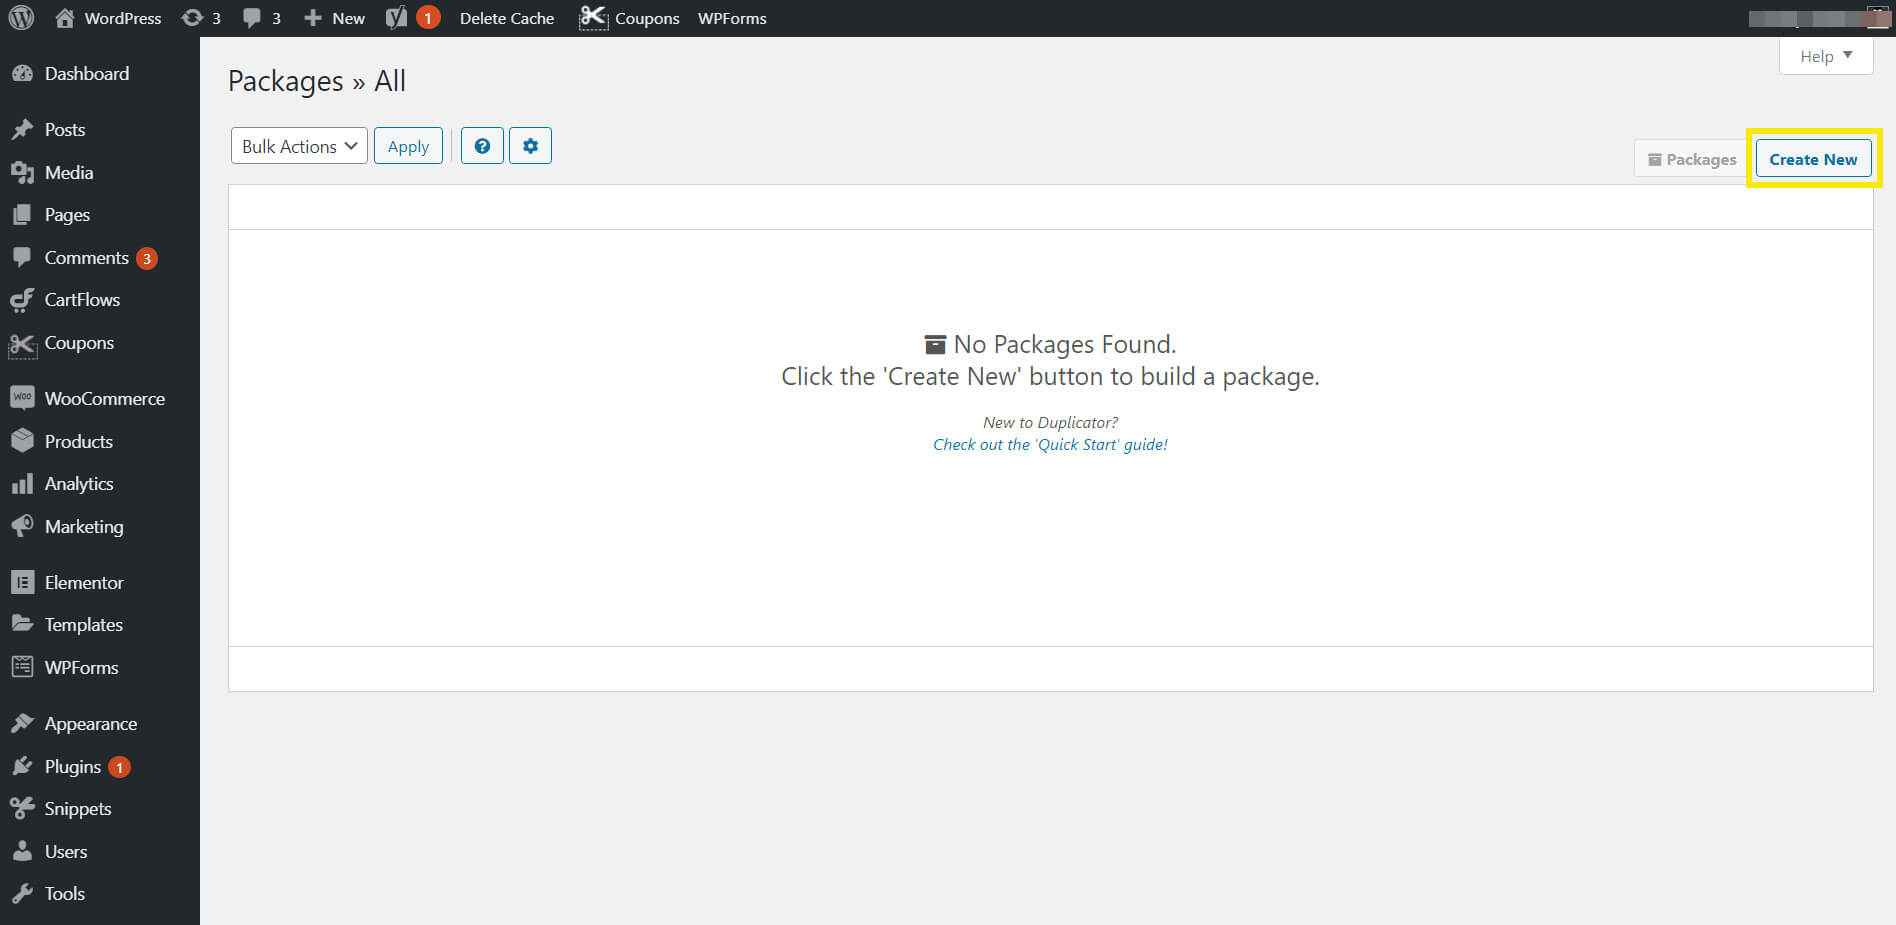
Once you’ve installed and activated the plugin, navigate to Duplicator > Packages in your WordPress dashboard. Select Create New:
The plugin will walk you through the steps to set up your ‘package’, which is a copy of your site’s files and database. After Duplicator is done scanning your site, it will enable you to download your package with a single click:
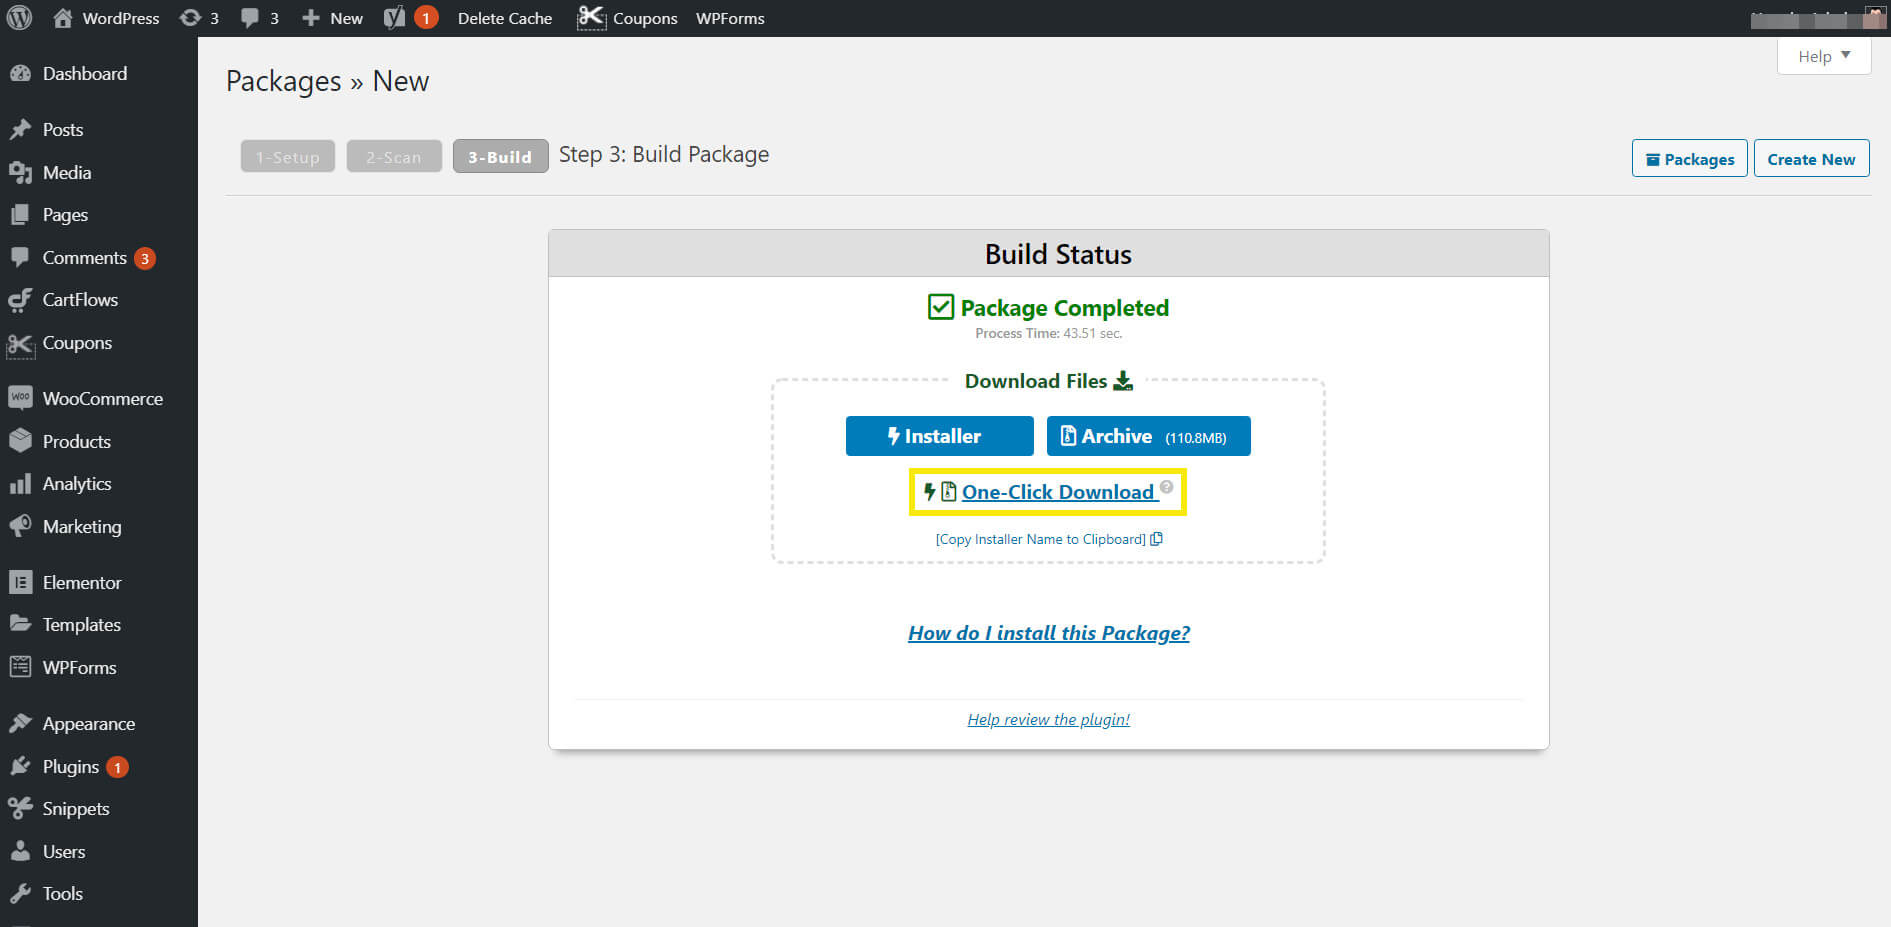
It should include two files – archive.zip and installer.php.
Importing your site with Duplicator
Next, you’ll need to use File Transfer Protocol (FTP) to connect to the server you want to migrate your website to. You should be able to find your FTP credentials in your hosting account, then enter them in an FTP client such as FileZilla to do so. Upload the two files from Duplicator to the root directory of your website (usually it’s named public_html).
Then, you’ll need to add your domain name to your hosts file on your new server. This is what prevents downtime for your site when moving it. The hosts file will enable you to access your site from your new server, while everyone else continues to use it on your old server.
To accomplish this:
- Retrieve your server’s IP address from your hosting account.
- Windows users should run Notepad with administrator privileges. Select File > Open and navigate to C:\Windows\System32\drivers\etc. Then choose the hosts file.
- Mac users should launch Terminal and run the command sudo nano /private/etc/hosts.
- Users on both operating systems should enter the IP address for their new server followed by their domain name at the bottom of the file, like so: 123.456.7.89 yourdomain.com.
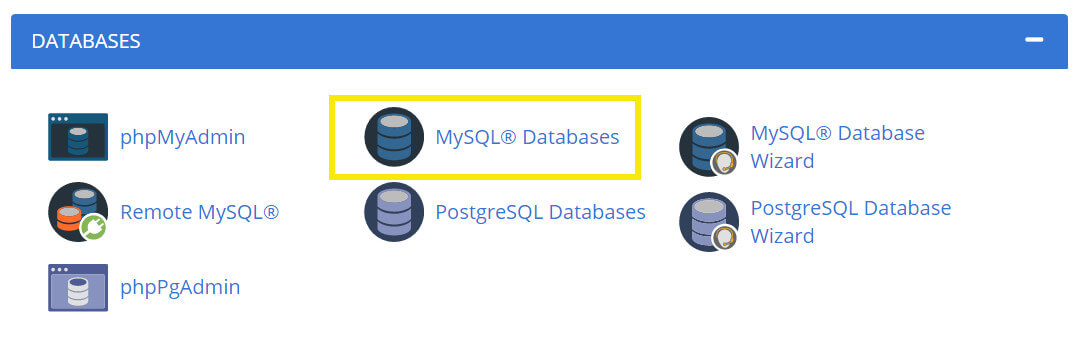
Once your hosts file is squared away, you need to create a MySQL database for your site on your new server. This process will vary somewhat depending on your hosting provider. In cPanel, you can navigate to the Databases > MySQL Databases and click on Create Database:
When you database is ready, enter https://yourdomain.com/installer.php in your browser. This should return the Duplicator migration wizard:
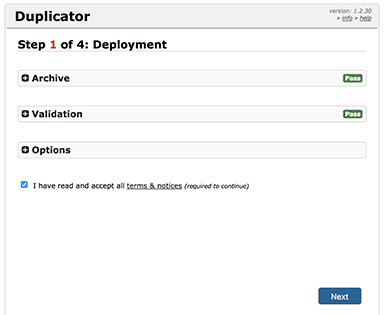
Follow the migration wizard steps to complete the process. You may need to update your DNS nameservers afterward.
2. Move your site with All-In-One WP Migration
While Duplicator has the advantage of preventing downtime, it may still be a bit too technically advanced for some. All-In-One WP Migration can be a better alternative, especially if you’re changing your domain name in addition to your hosting.
This plugin only moves your site’s contents and its database, unlike Duplicator which also carries over your WordPress installation. In order to use it, you’ll need to already have the platform installed on your destination server. If your new host will install WordPress for you, this should be quite simple.
Once your fresh installation is ready, install and activate the plugin. Then navigate to All-In-One WP Migration > Export in your dashboard:
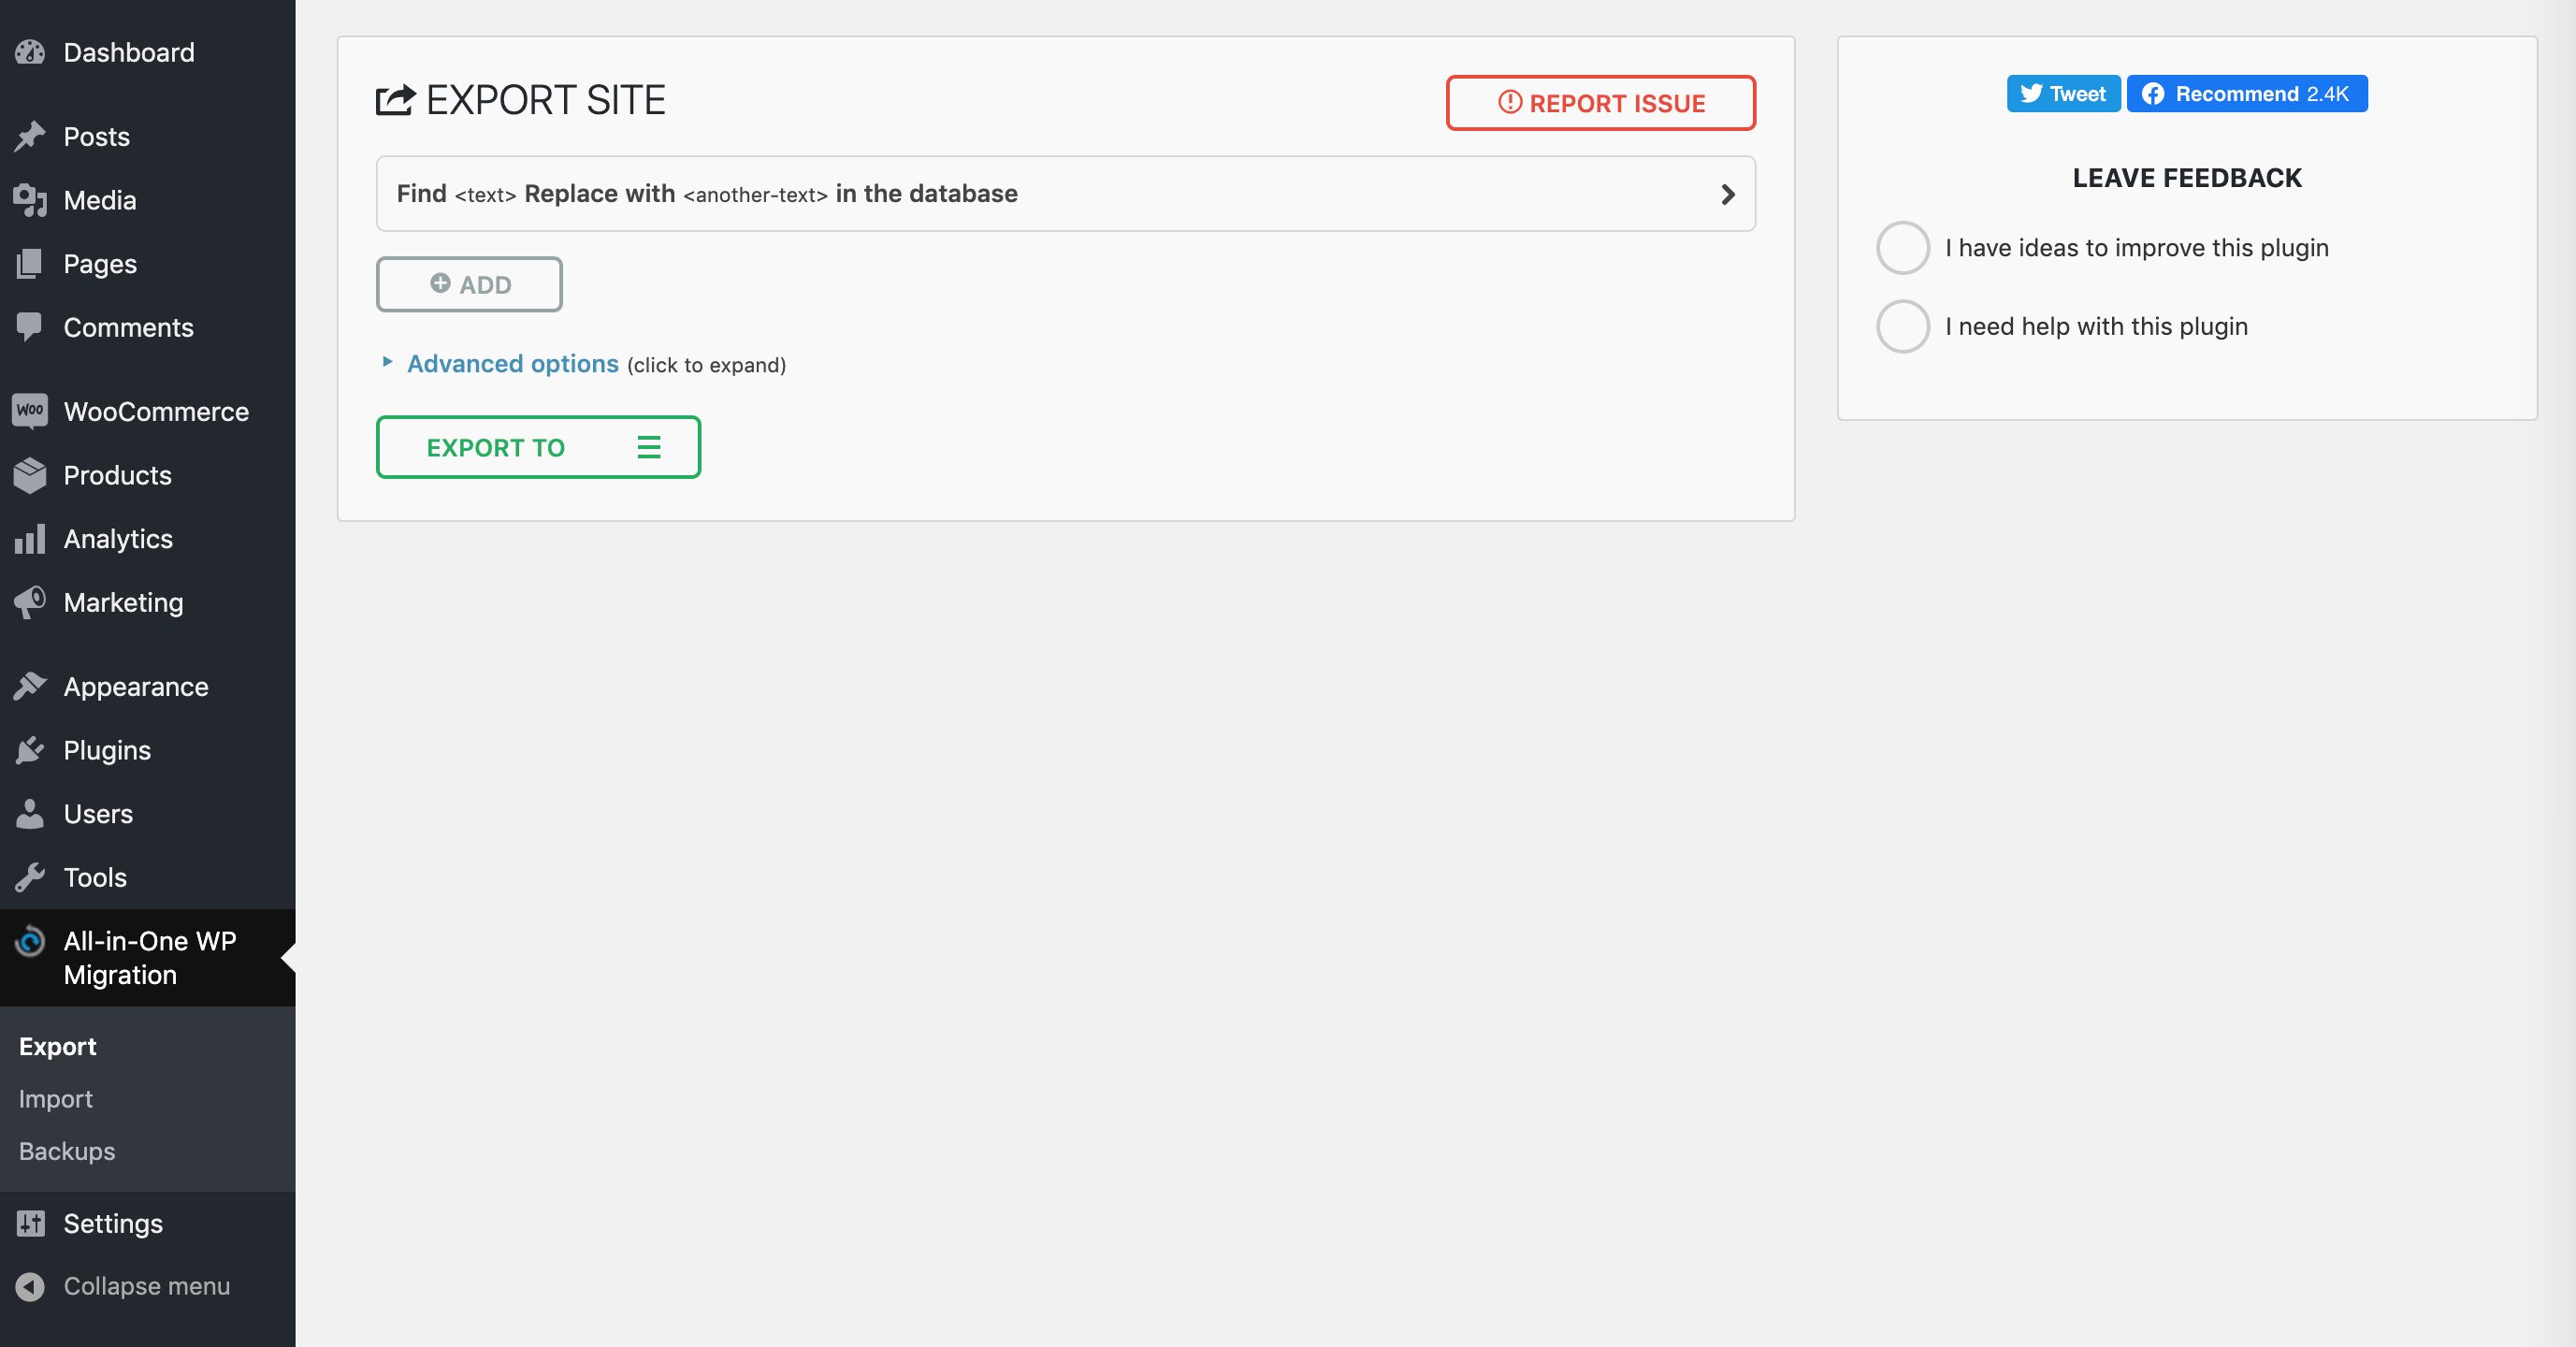
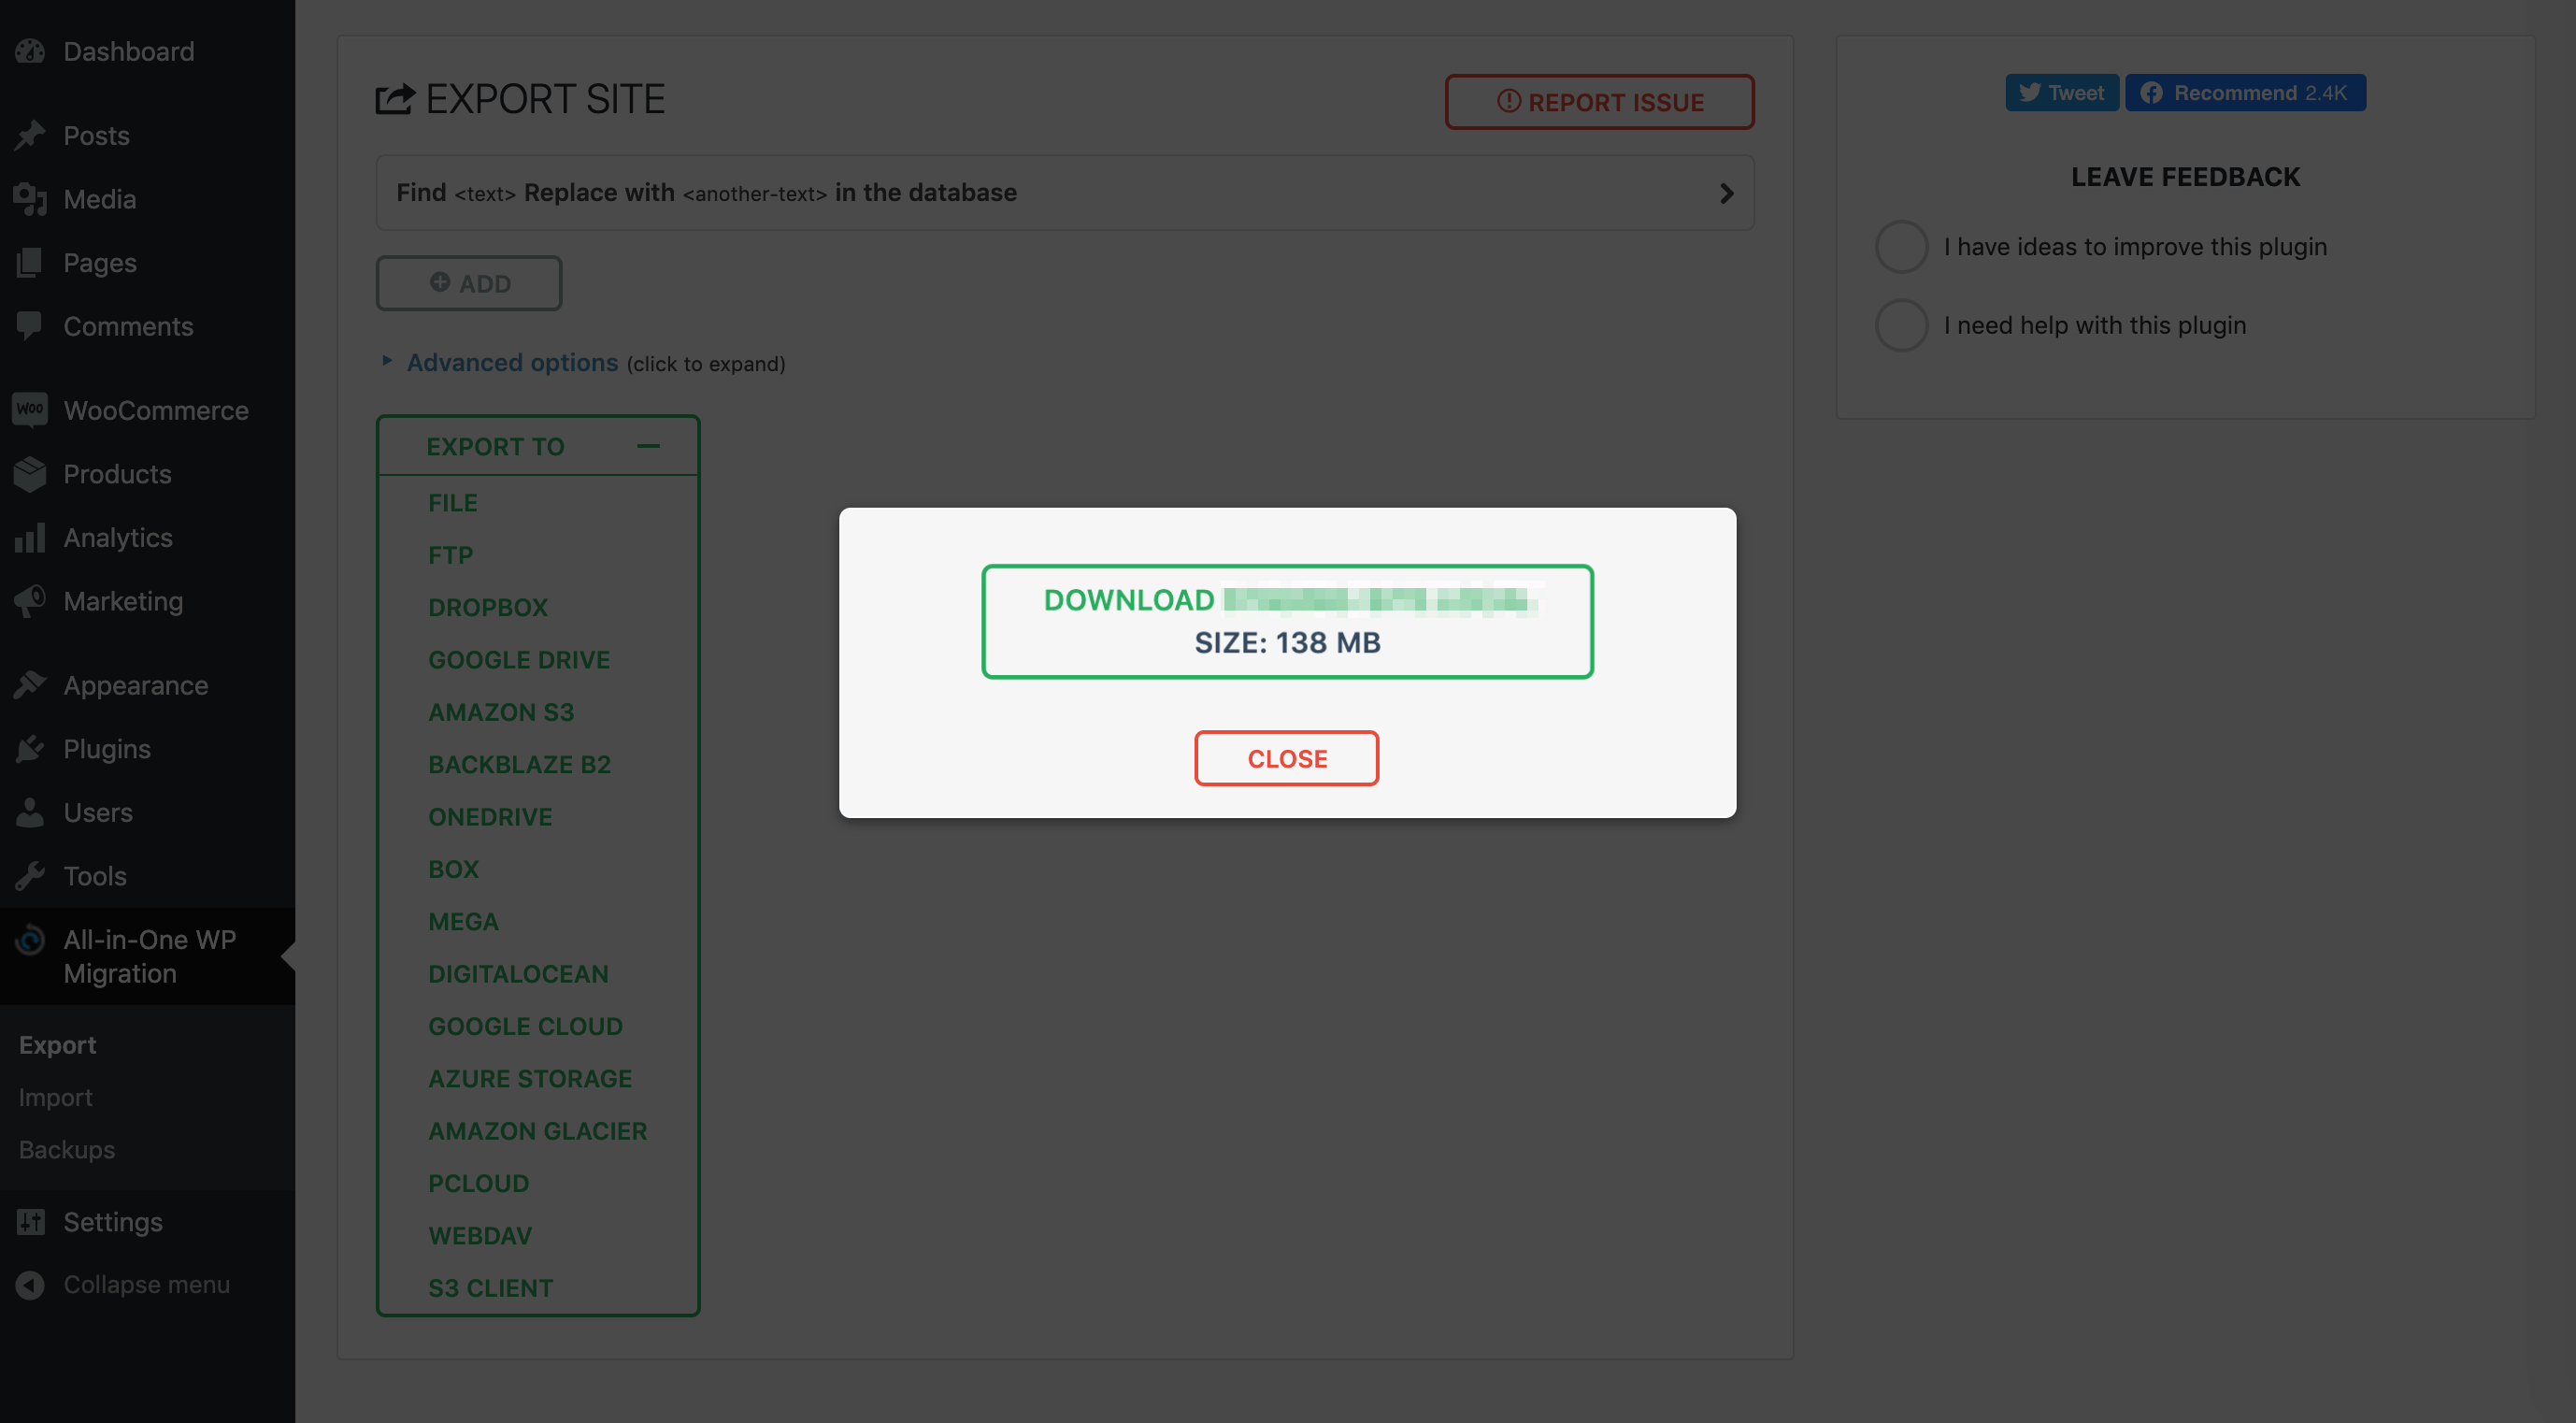
If you’re changing your domain name, you can use the find and replace feature to swap out your old domain for your new on in your site’s database and files. Then, click on Export to and choose File:

Once the plugin has compiled your site’s files and database, click on the download button:
Head over to your fresh WordPress installation on your new server and install and activate All-In-One WP Migration on that site. Then navigate to All-In-One WP Migration > Import:
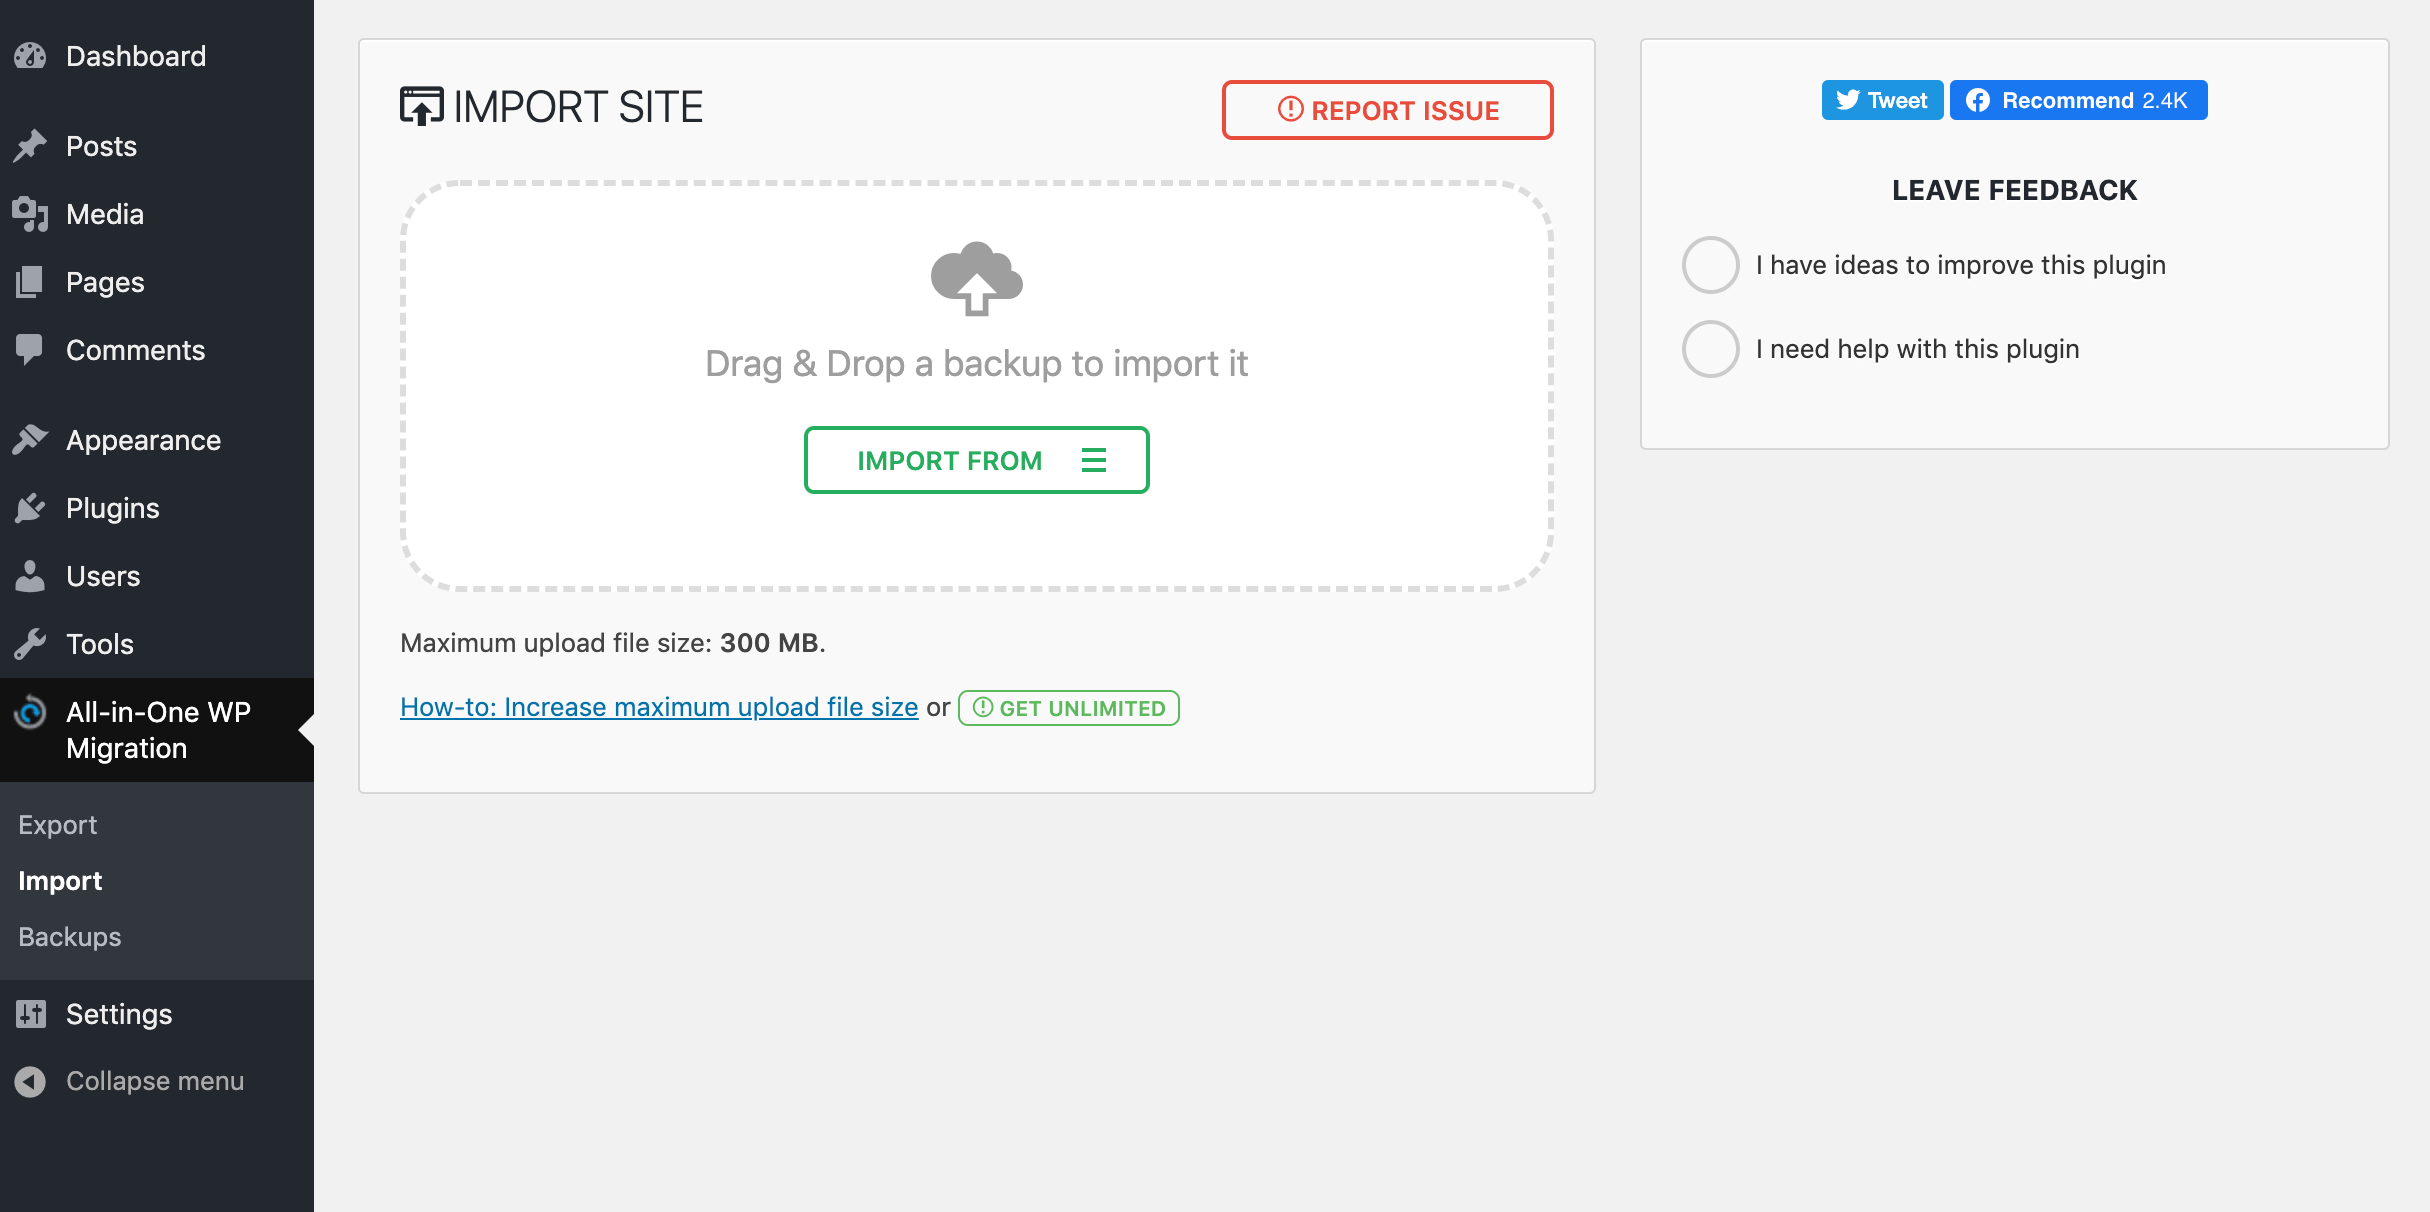
Select Import from > File, then choose the file you downloaded from your original wbesite. Complete the upload process and your site should be ready to go. Make sure to check for broken links, even if you used the find and replace feature.
3. Streamline migrations with ManageWP
If you are a ManageWP user, you can skip the plugins and take advantage of our cloning functionality. Note that premium backups are required to access this feature.
To do this, you need to add your old website to ManageWP. Then, navigate to Backups and select Clone Website from the Overview tab:
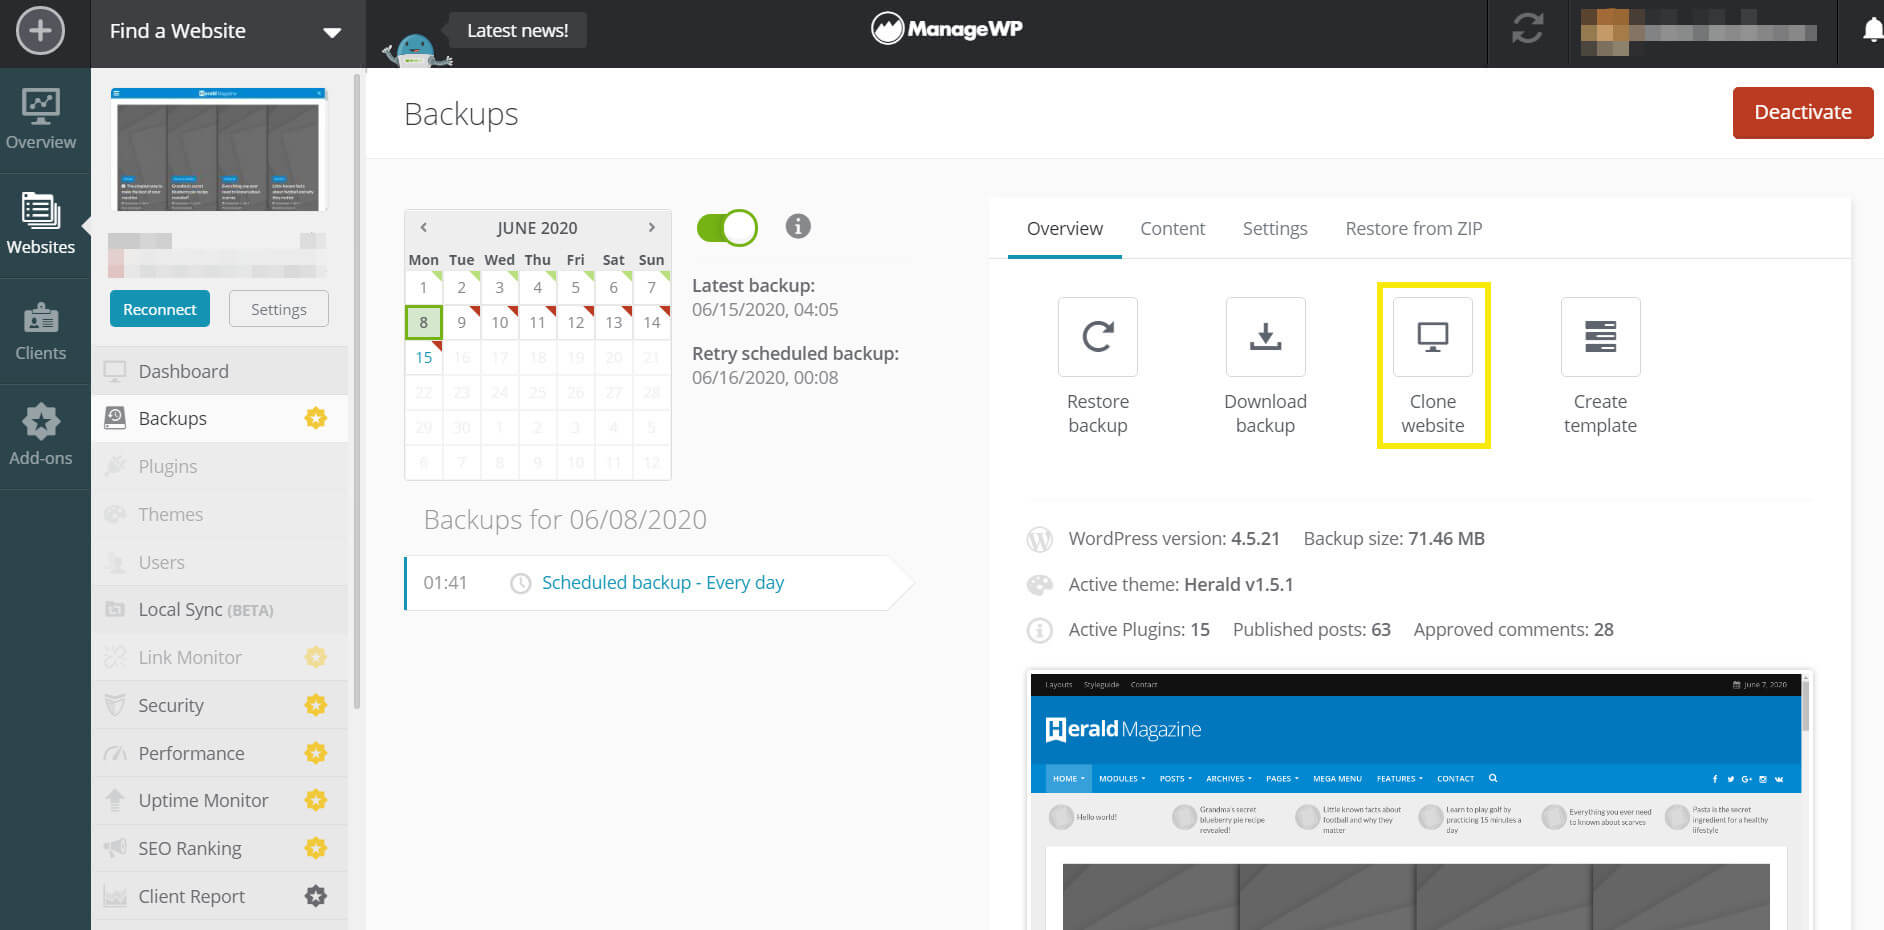
On the next page, select the destination type. Options include:
- Existing website in ManageWP: If you are migrating from a development site to a live site, or if you’re changing domain names and have already added the new address to ManageWP, you can use this option.
- Same domain on a new server: This option is for those migrating to new hosting providers.
- New website: Choose this option to migrate to a new domain or live site that is not listed in your MangeWP account.
The next step will vary depending on the destination type you select. For existing websites, you’ll need to choose one from your account. If you’re moving to a new host, you’ll need to provide a temporary URL or IP address. To migrate to a new website, you need to provide the destination domain:
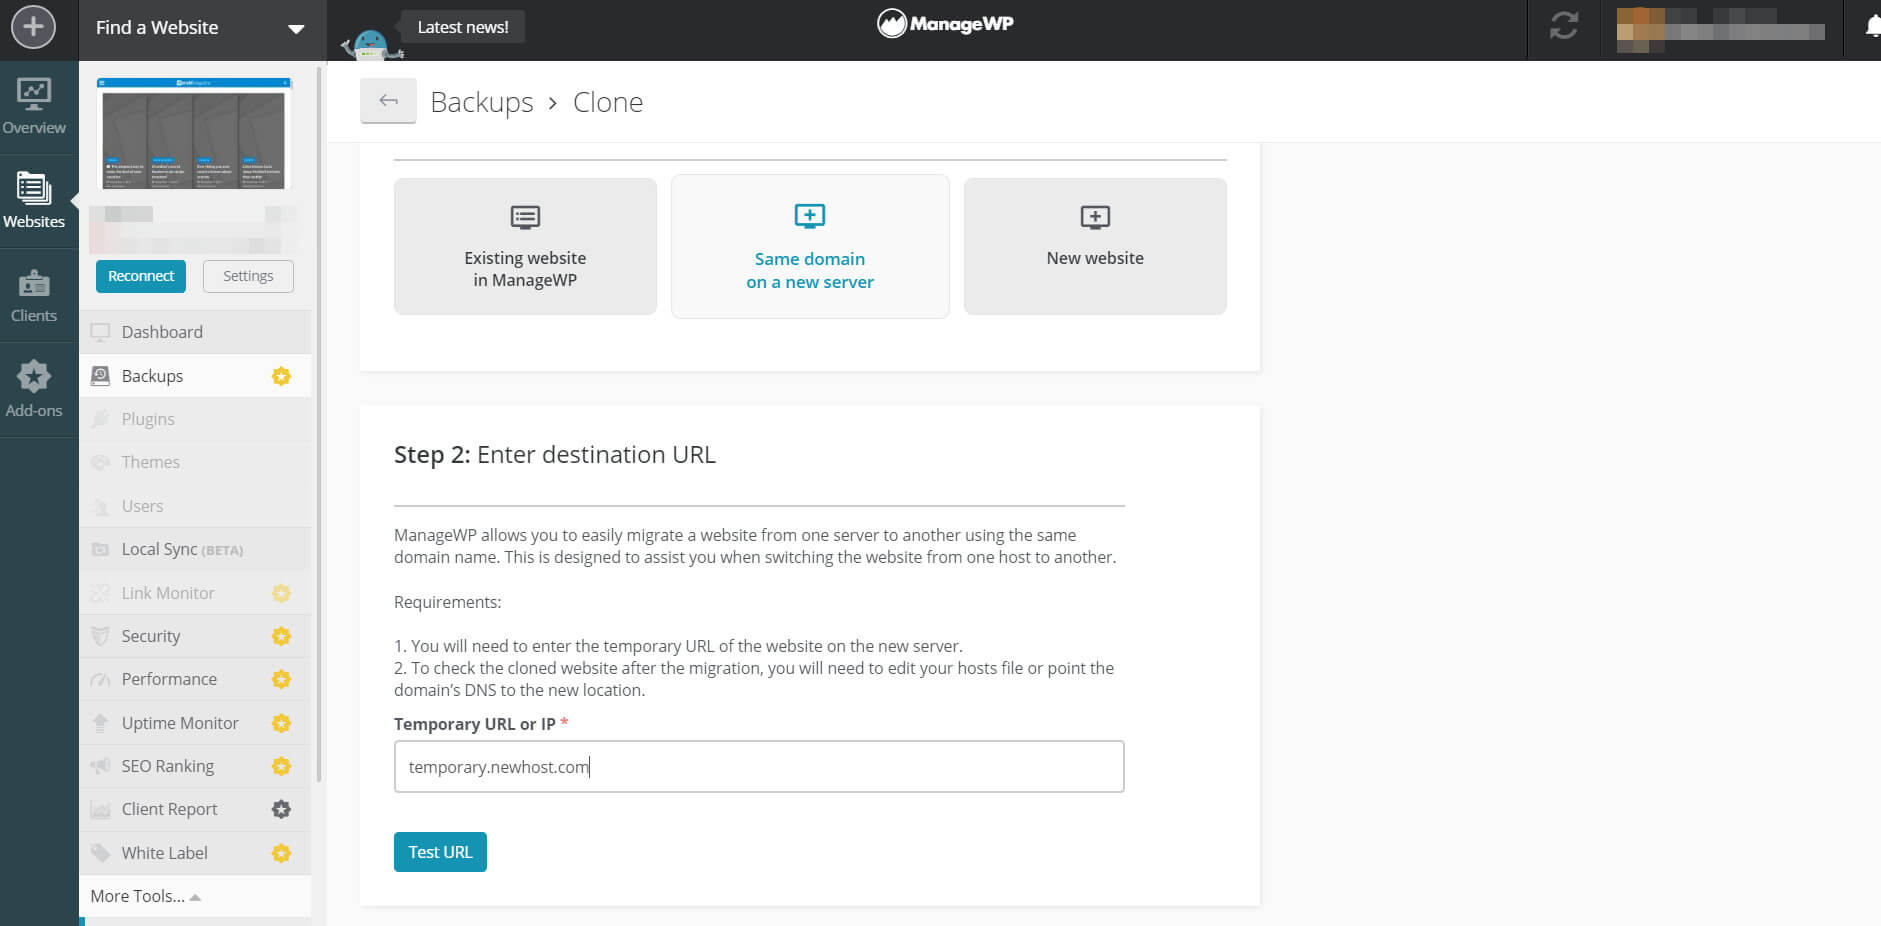
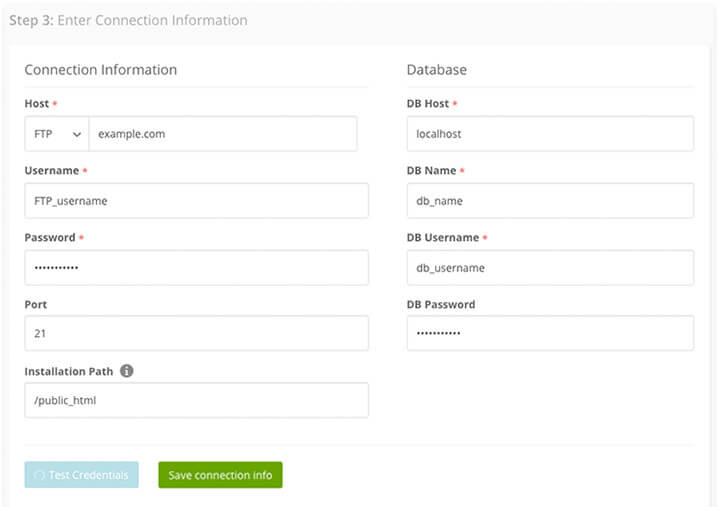
If you are moving hosting providers, ManageWP tests the destination URL to ensure it works. Once the test is complete, you’ll need to provide connection information, including your FTP and database credentials:
To create a new admin user, provide the necessary information on the Create New Admin form. Once you’re ready, click on Clone to start the migration process. You will need to change the DNS nameservers once it’s complete.
The steps are slightly different for the other destination types. Each has an easy-to-use wizard to ensure you complete the cloning process successfully.
Conclusion
Website migration can lead you to encounter a range of problems, from missing files to 404 errors. You can largely avoid these issues by using the right tools to move your website, such as a WordPress migration plugin or the ManageWP clone feature.
To migrate your website successfully, you can use the following methods:
- Avoid downtime by migrating your site using Duplicator.
- Migrate your WordPress site with a simple file upload using All-In-One WP Migration.
- Streamline website migration with the ManageWP clone feature.
Do you have any questions about migrating your website? Let us know in the comments section below!
Image credit: Pixabay.
Leave a Reply