
Cloning your WordPress site is a necessary task during several tasks related to managing a website. Unfortunately, it also typically requires a lot of delicate and time-consuming steps.
The good news is that there are several methods you can use to clone your site. Choosing the simplest and smoothest one for you can make a potentially nerve-wracking process much less stressful.
In this post, we’ll discuss the many reasons why you might need to create a clone of your WordPress site. Then we’ll look into three methods for carrying out this key website management task. Let’s get started!
Why you might want to clone your WordPress site
It’s important to note that a website clone is slightly different than just a regular copy of your site, such as a backup. A clone is fully functional and saved in a specific location, as opposed to a dormant, static backup.
This is why you need a clone – rather than a copy – of your site when migrating to a new hosting provider or switching your primary domain. It’s (of course) important to upload a working website to your new server.
However, a site clone can also be useful for development purposes. Clones make excellent staging sites, since you can test new features or updates and see exactly how they will impact your live website.
Being able to quickly create clones of your WordPress site can make all of these tasks much easier. You won’t have to fret about downtime when migrating your site or changing your domain name, and will also have a highly-accurate staging site to test any changes before they go live.
How to clone your WordPress site (3 methods)
Whether you need clones only occasionally for major shifts, or use them on a regular basis for development, you’ll want a way to smoothly and easily create them. This is where the three methods described below come in.
1. Manually clone your WordPress site
If for some reason you can’t use either of the below methods for cloning your WordPress site, it’s possible to do so manually. The first thing you’ll need to do is create a backup of your site, using which method is best for you. This will give you a way to restore your site if something goes wrong.
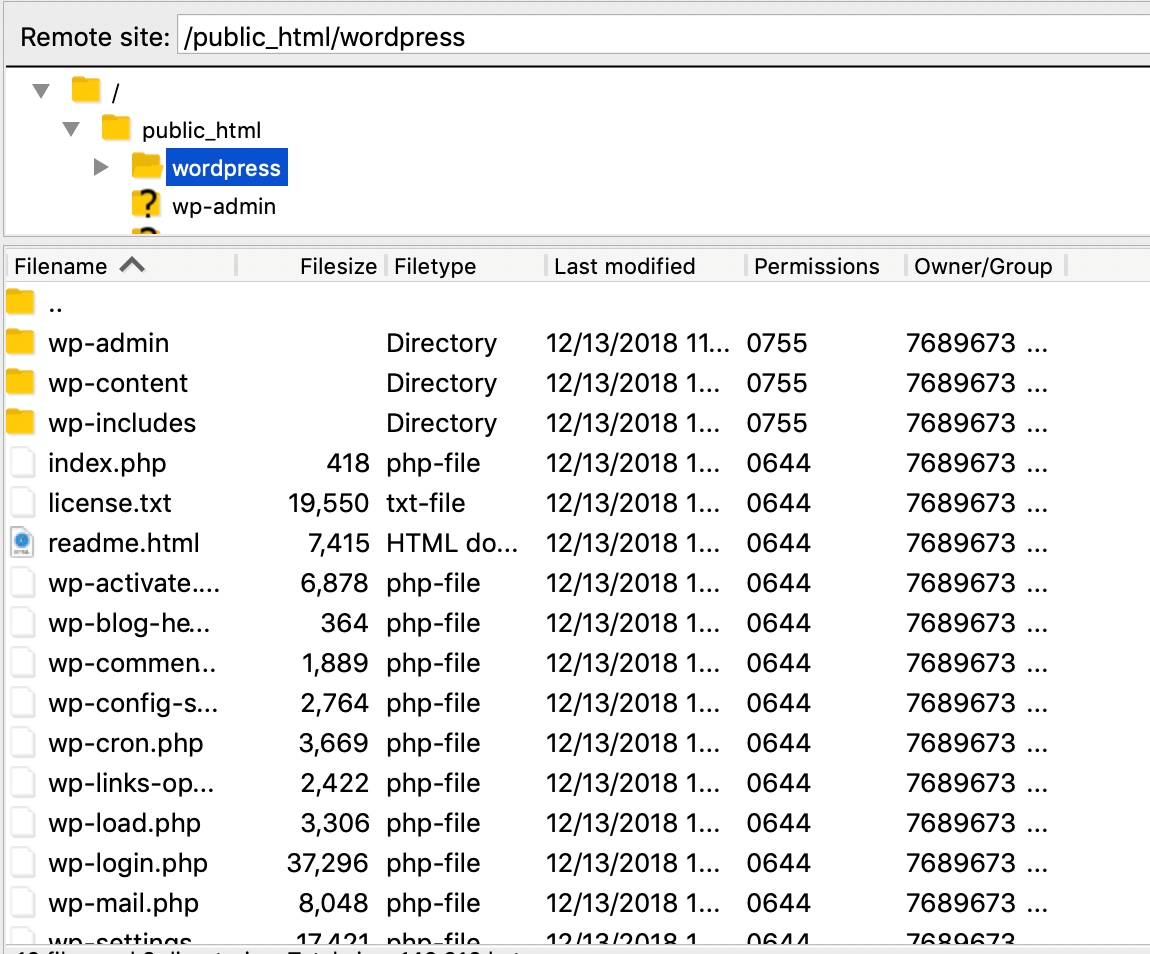
You’ll then need to download your entire site. To do this you’ll need to use File Transfer Protocol (FTP) and a suitable client such as FileZilla. Using it is slightly beyond the scope of this piece, but the WordPress Codex’s dedicated page is a great resource for this step.
Once you’ve connected to your server, find your WordPress files and move them to your hard drive, making sure to show hidden files before doing so to ensure nothing gets left behind:
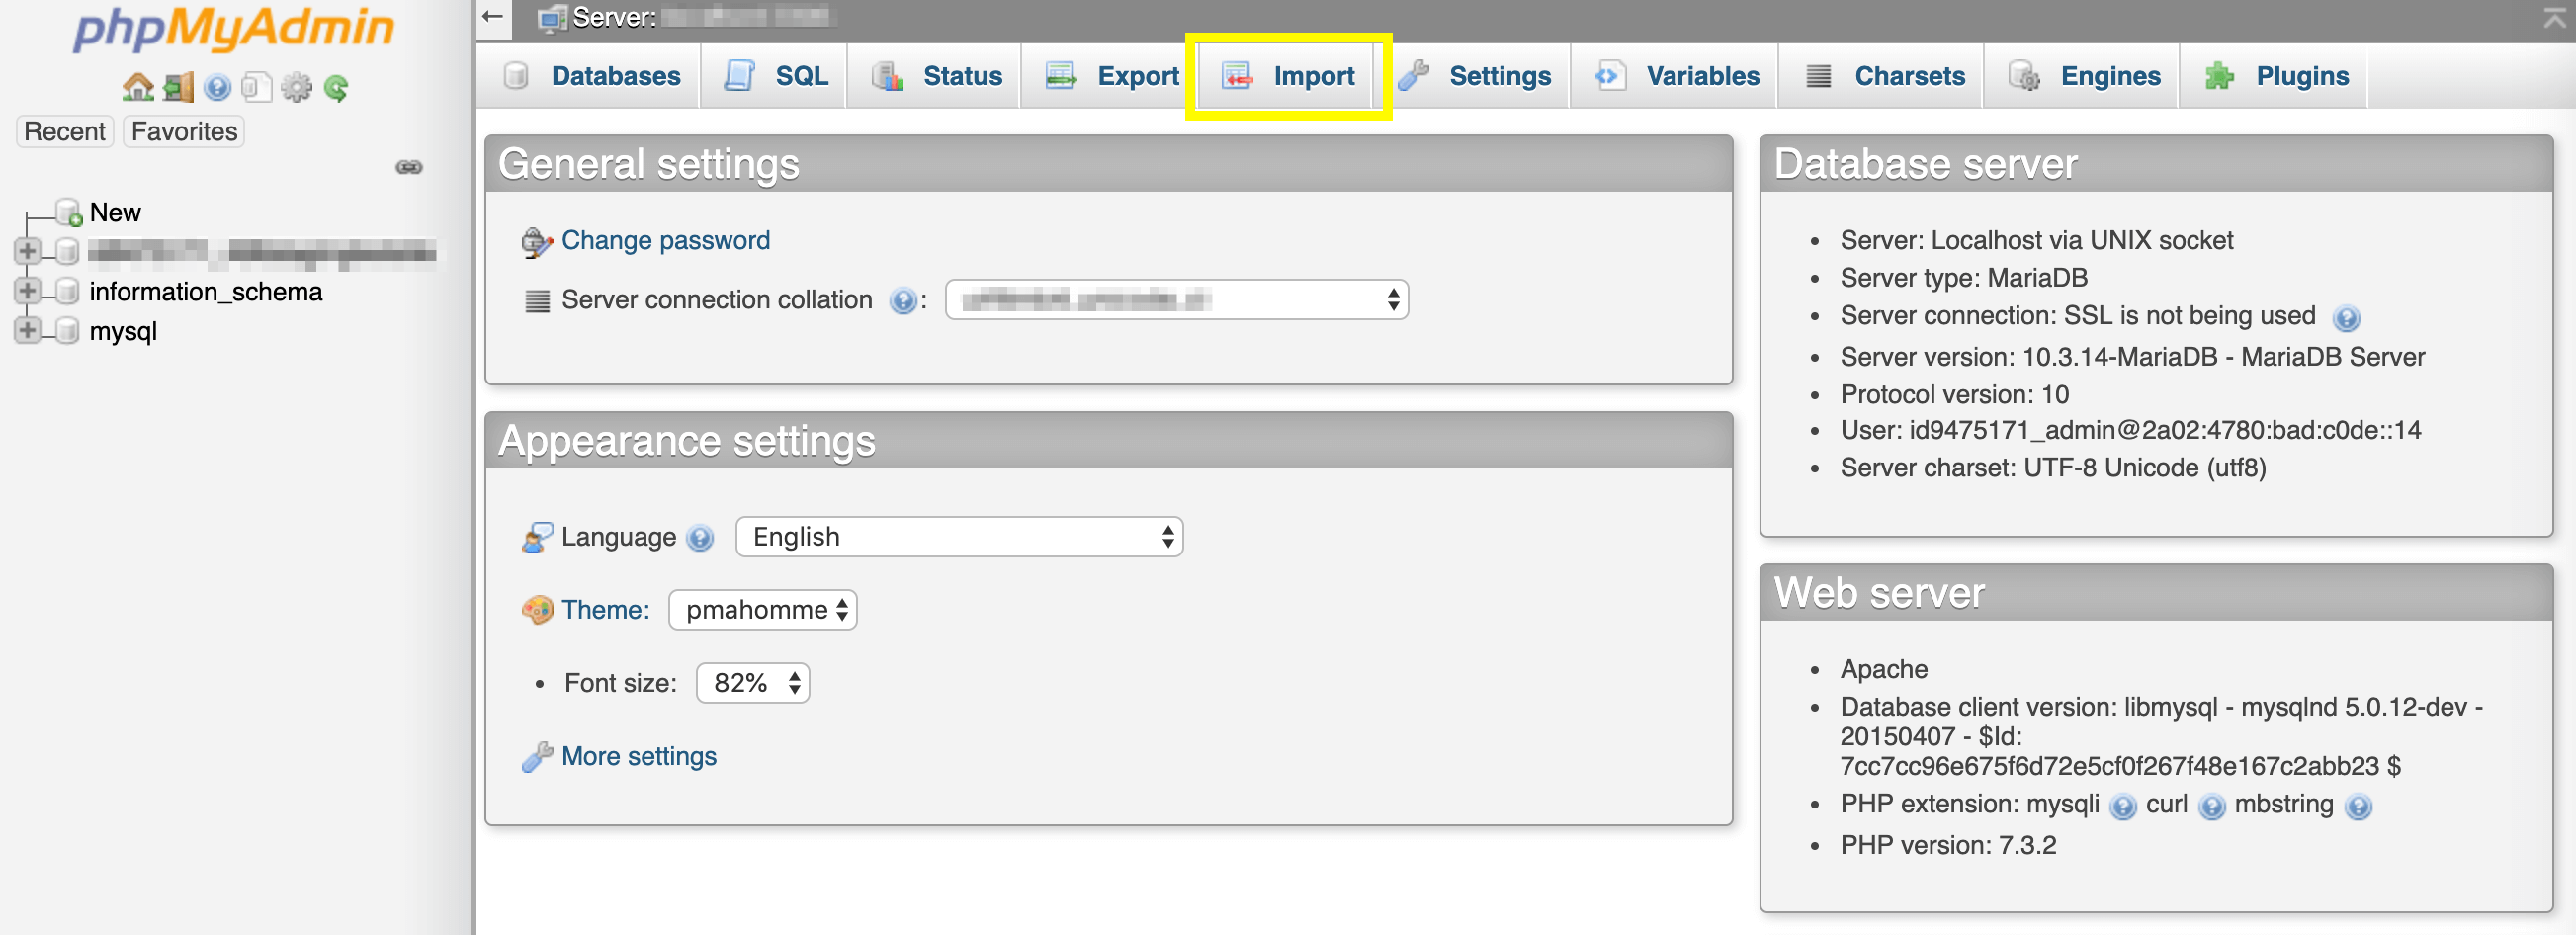
Next, you’ll need to access phpMyAdmin or another database maintenance tool via your hosting account to set up your clone site’s database. Create a new, empty database and make note of its name, username, and password.
Then you’ll be ready to set up your clone site’s database. In phpMyAdmin, click on the Import button and upload the SQL file for your current site’s database:
Once that’s done, edit the wp-config.php file you downloaded earlier to update the information for the new database. Save it, then use FTP again to connect to upload your WordPress files to your new server.
2. Use a plugin to clone your WordPress site
A popular method for creating WordPress website clones through the use of a plugin. Duplicator is a widely used and highly rated option:

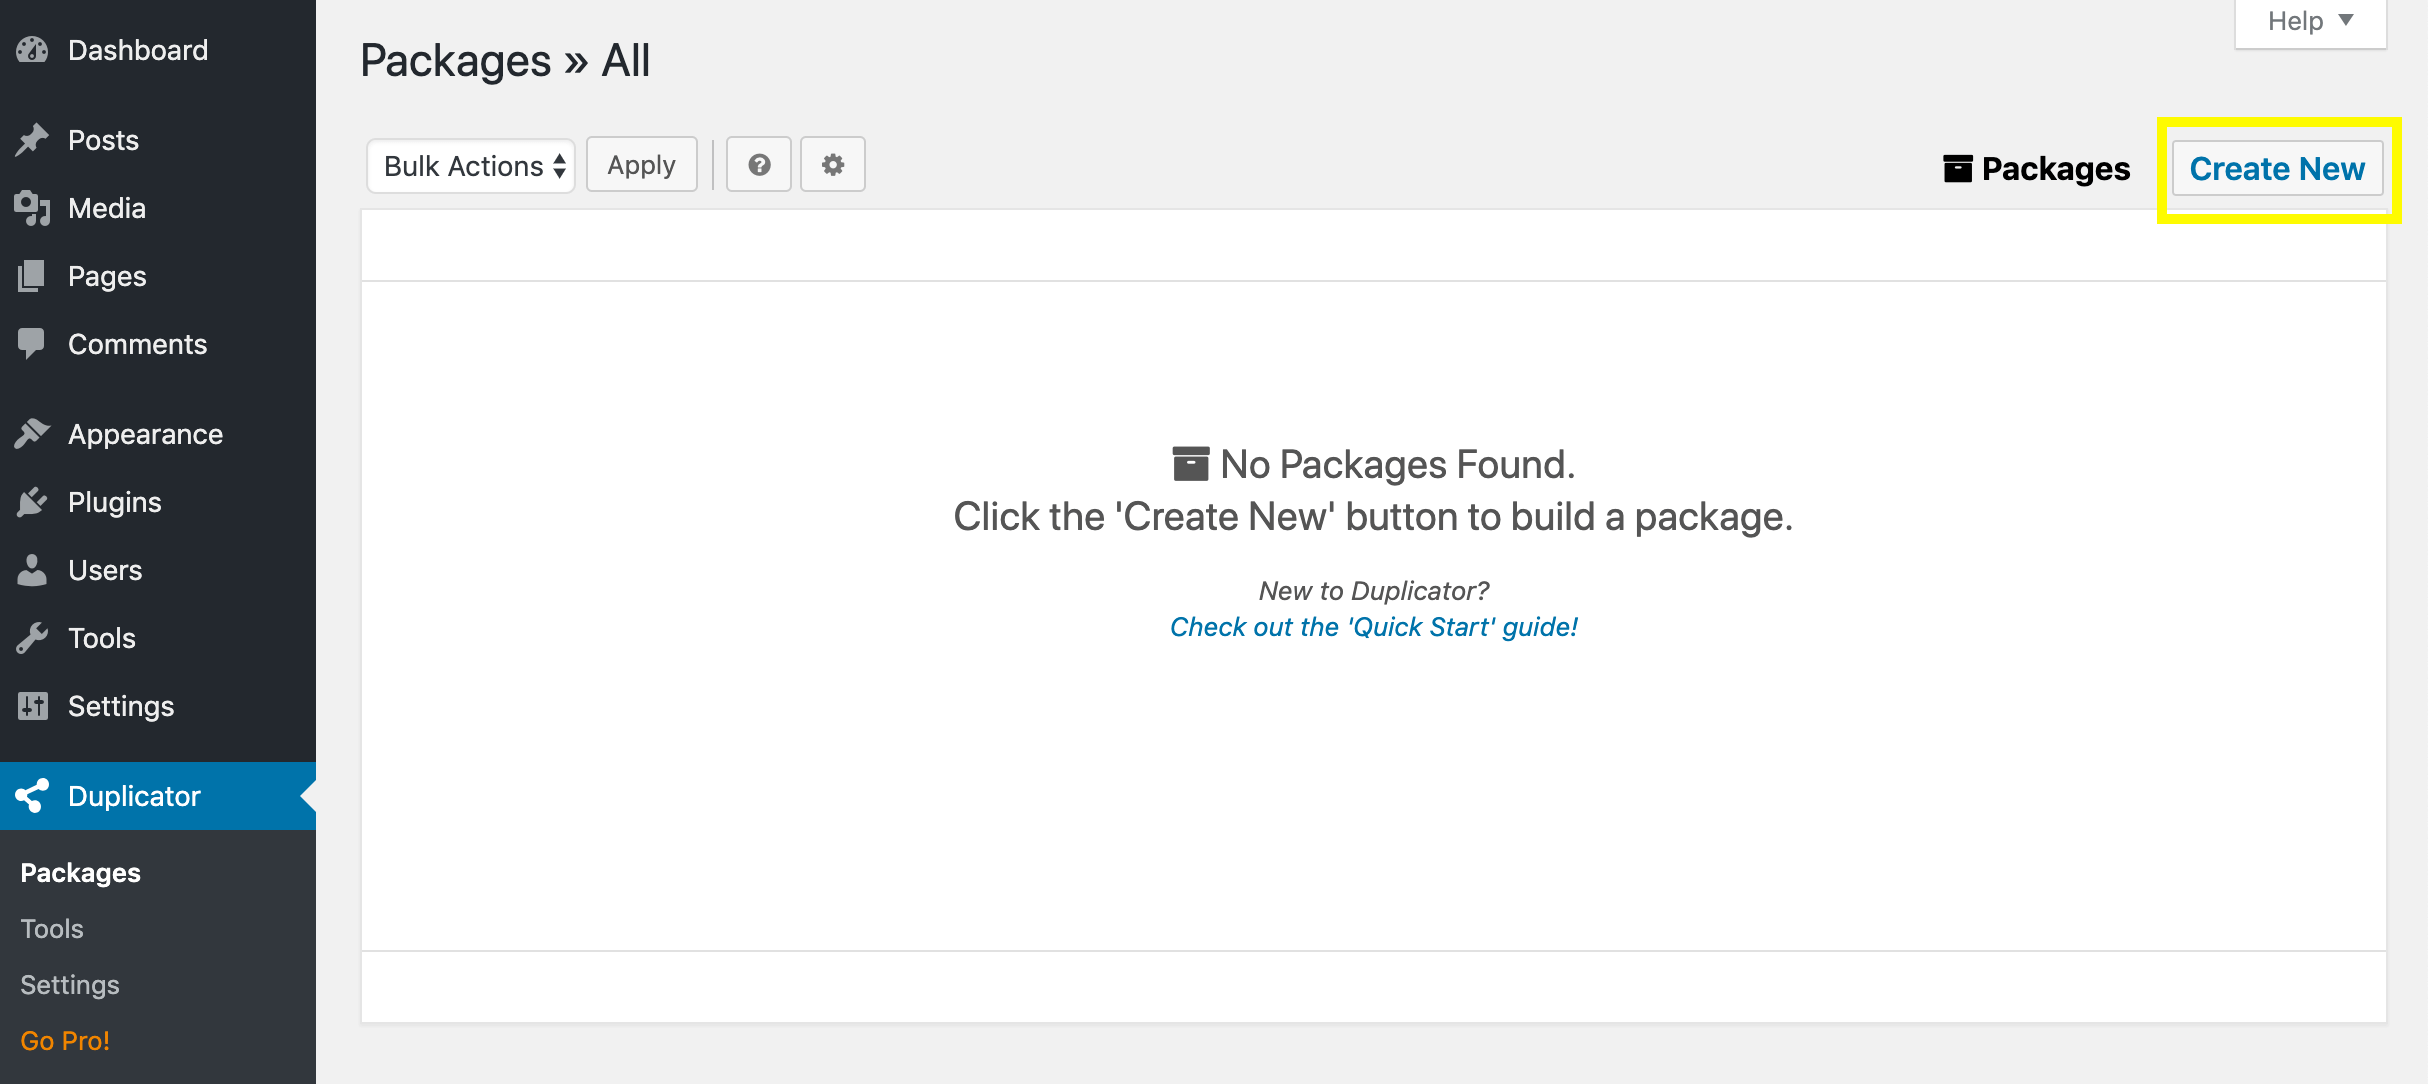
After you’ve installed and activated the plugin, you can create a clone by navigating to Duplicator > Packages in your admin dashboard. Then click on the Create New button:
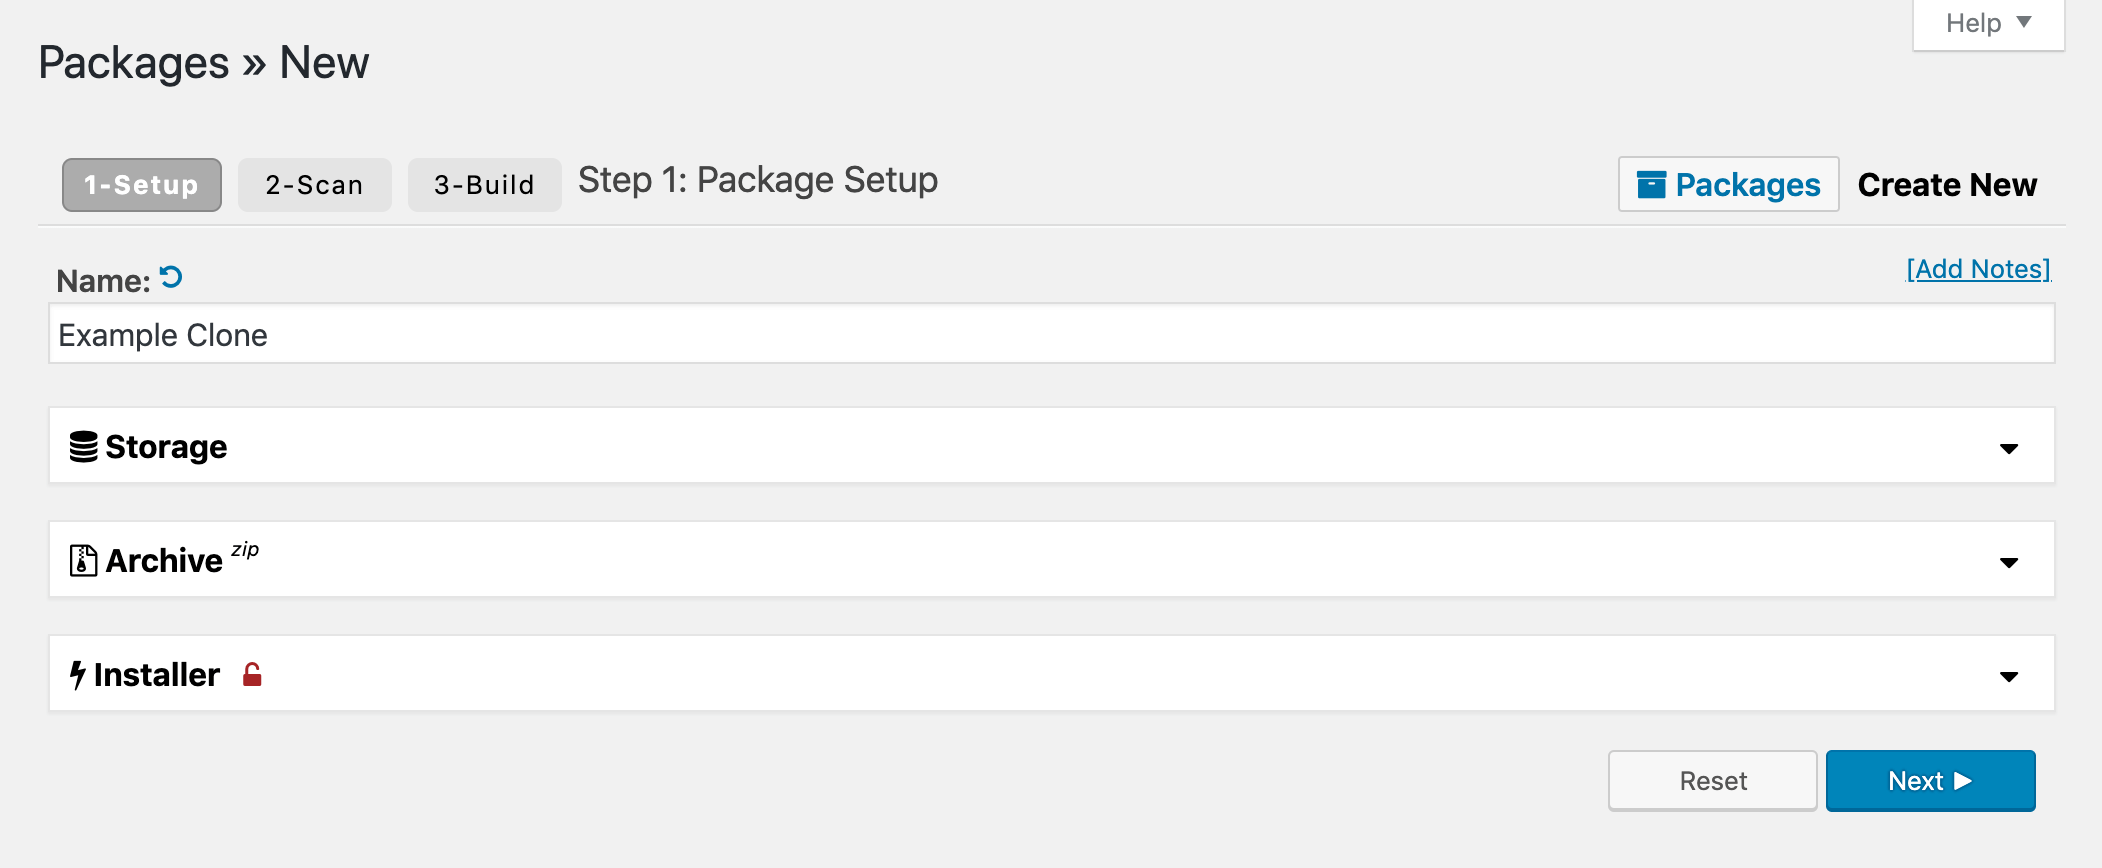
Next, Duplicator will prompt you to create a name for your clone and specify where to store it. You can also choose to clone only your database or to exclude certain files in the Archive settings:
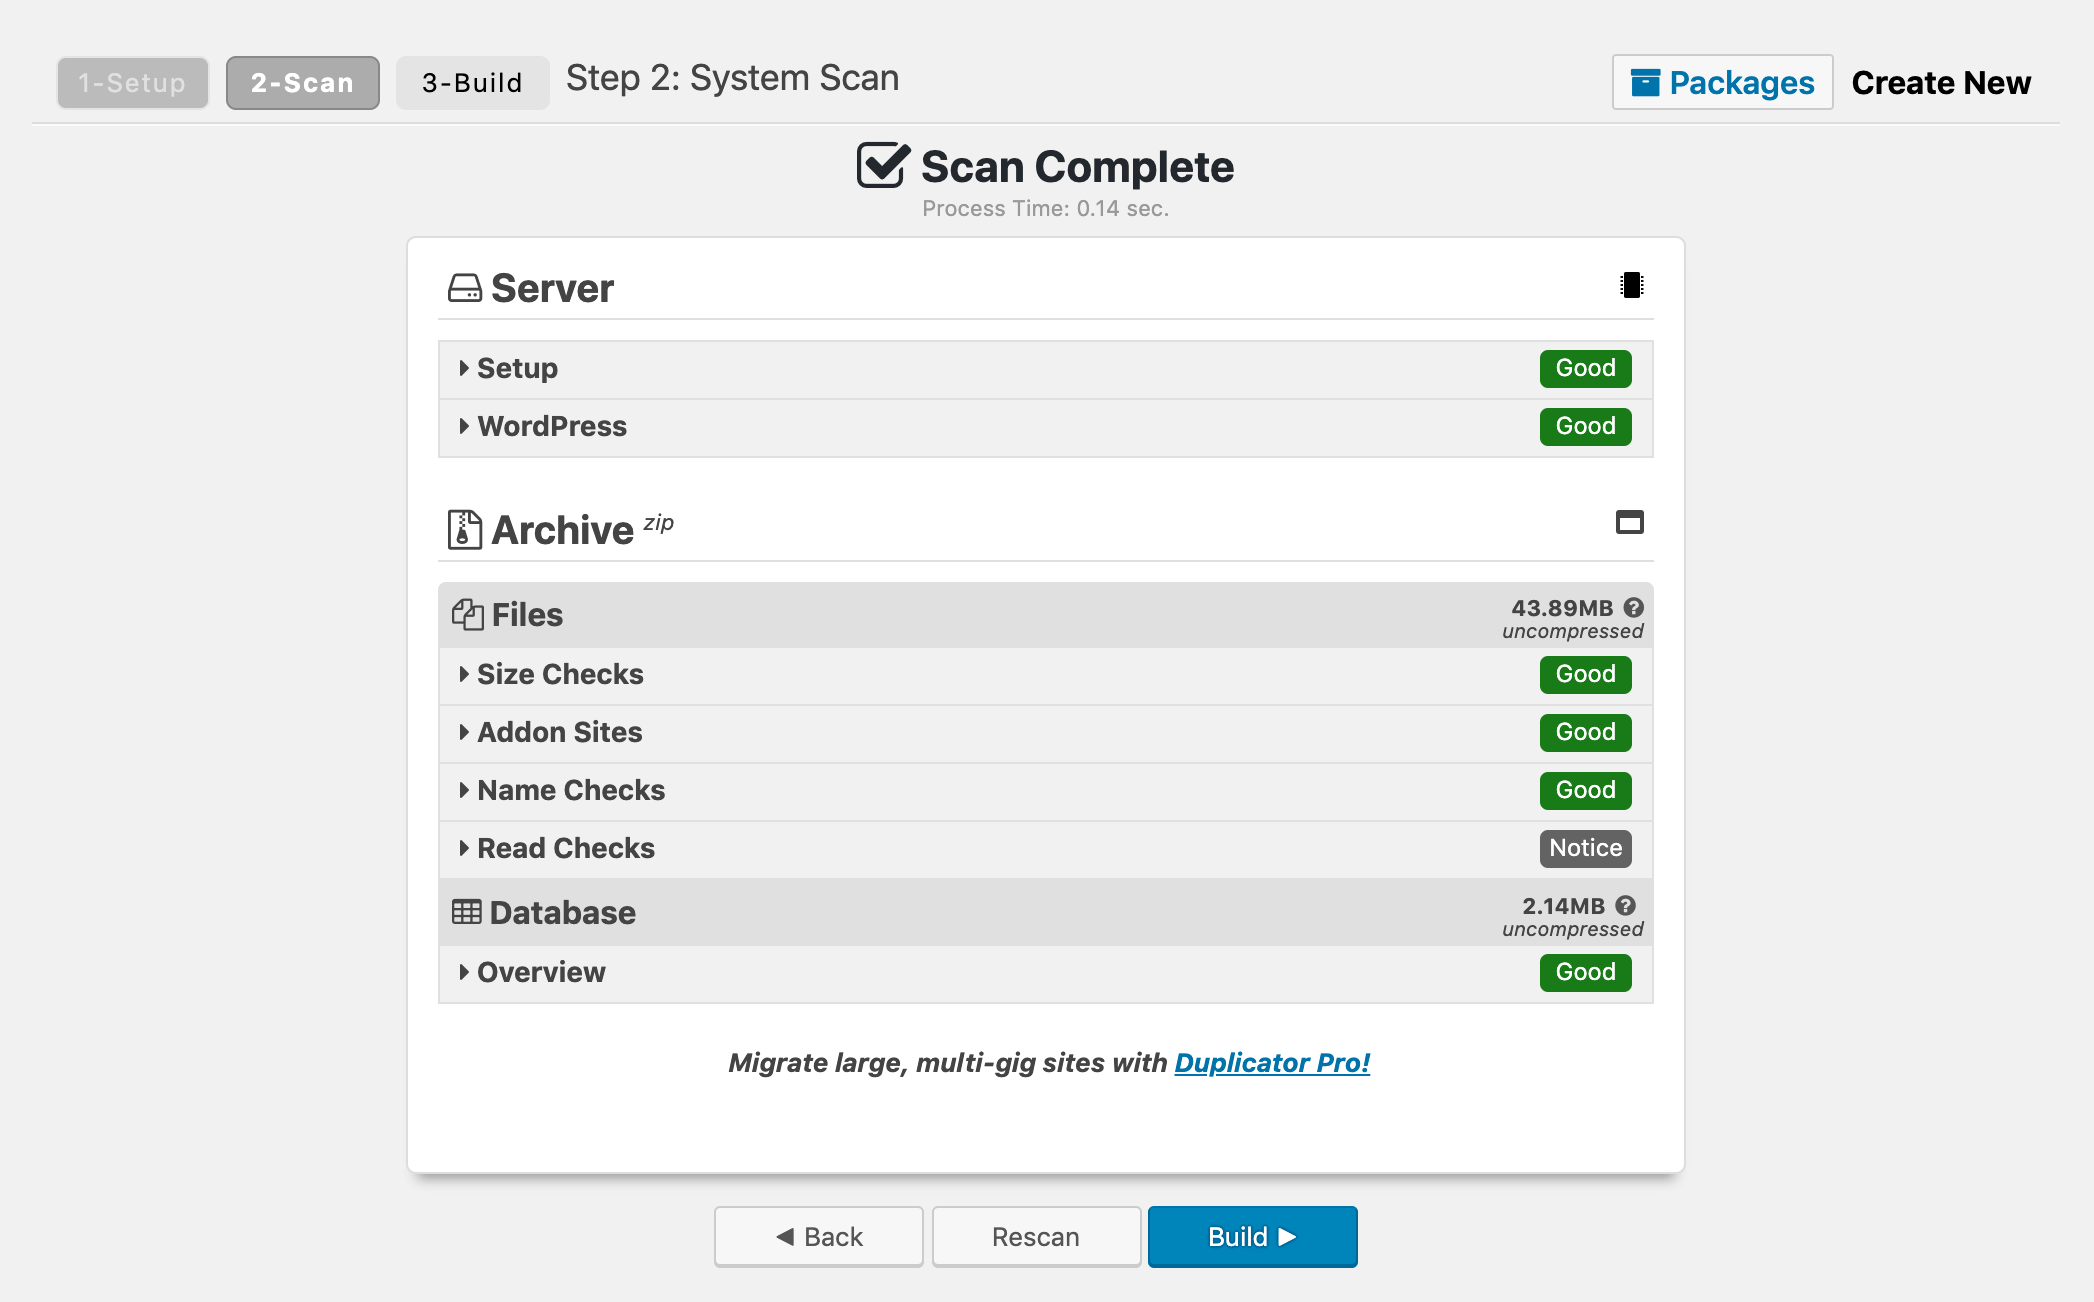
The next two steps may take some time, depending on how large your site is. Once you’ve finished the setup, Duplicator will scan your site. When it’s finished, click on the Build button:
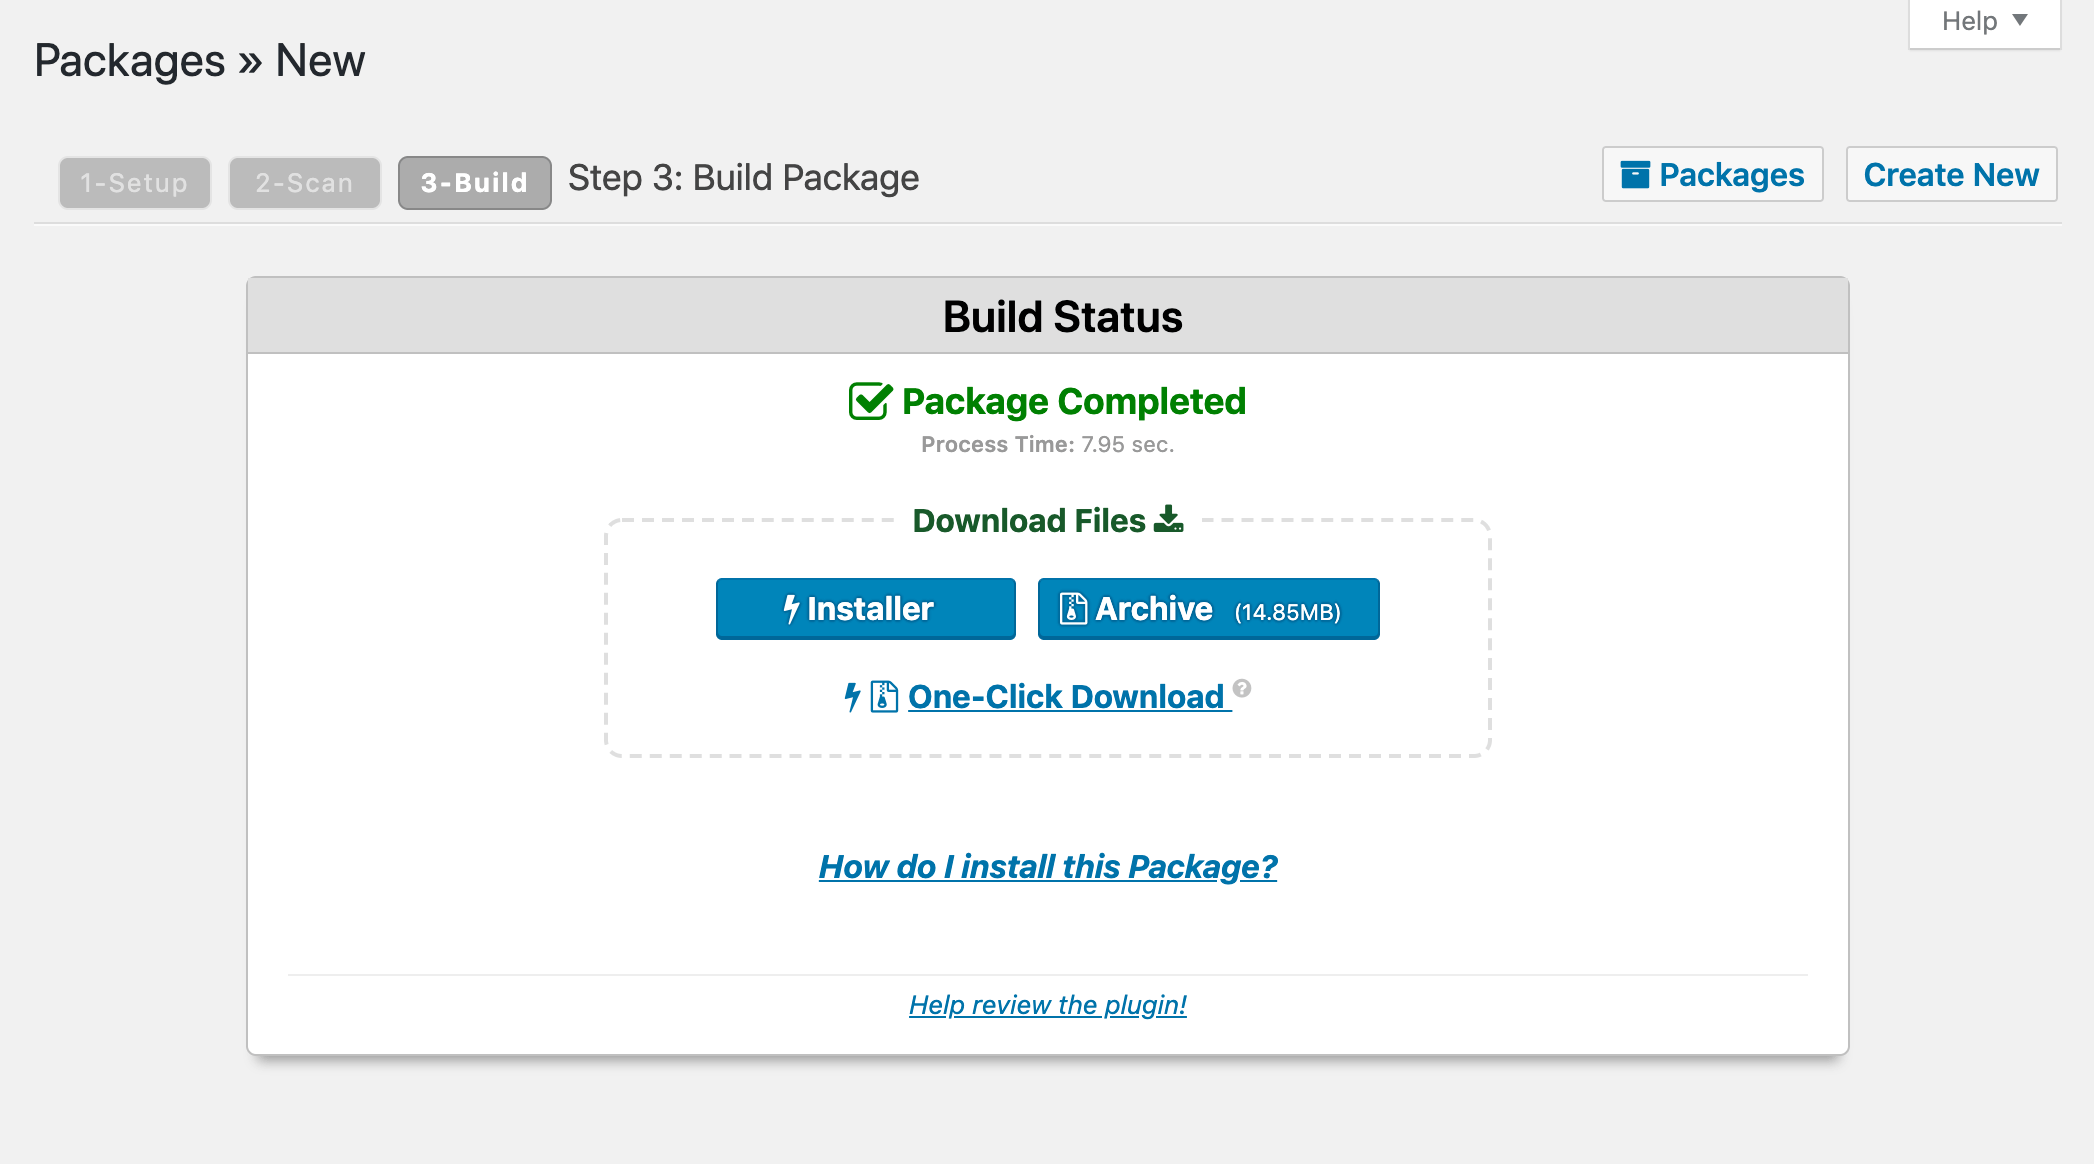
Duplicator will then create the clone. After it’s complete, you can download the .zip file containing your website’s clone, as well as the Duplicator installer, which will help you upload your clone to the server:
Once you have these files, you can upload them to your desired server, whether that’s a new host’s or a local one. Again, you’ll want to use FTP for this.
You may also need to create a new database for your clone, much like if you were installing WordPress manually. Once the database is ready, you can run the Duplicator installer to finish setting up your clone.
To do this, type your site’s domain into your browser, add /installer.php to the end, then fill out the required fields. Make sure you click all four of the buttons on the Final Steps page to ensure your permalinks are reset, the clone site is working, and the installer and archive files are deleted.
3. Clone your WordPress site with ManageWP
If you’re already a ManageWP user, you can easily clone your site without having to install an additional plugin. To get started, log in to your ManageWP account and navigate to the dashboard of the site you wish to clone.
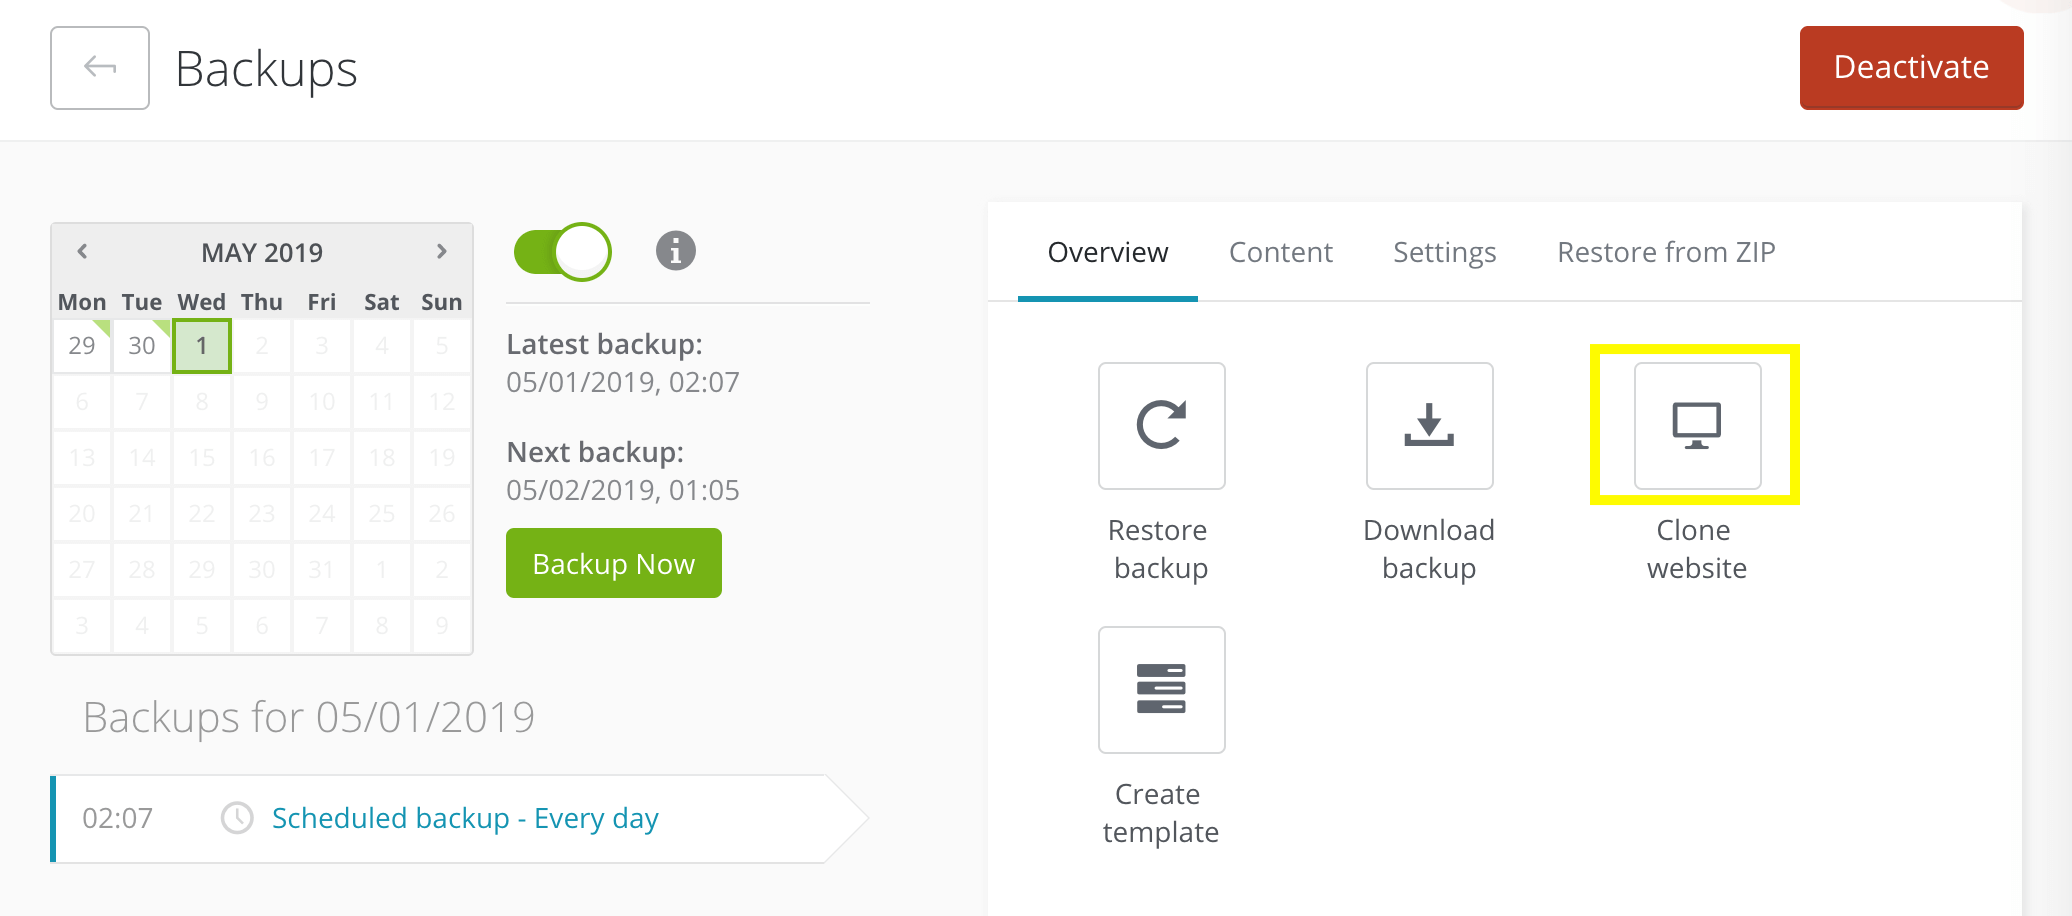
There, you should be able to find the Clone button by clicking on Backups in the left sidebar:
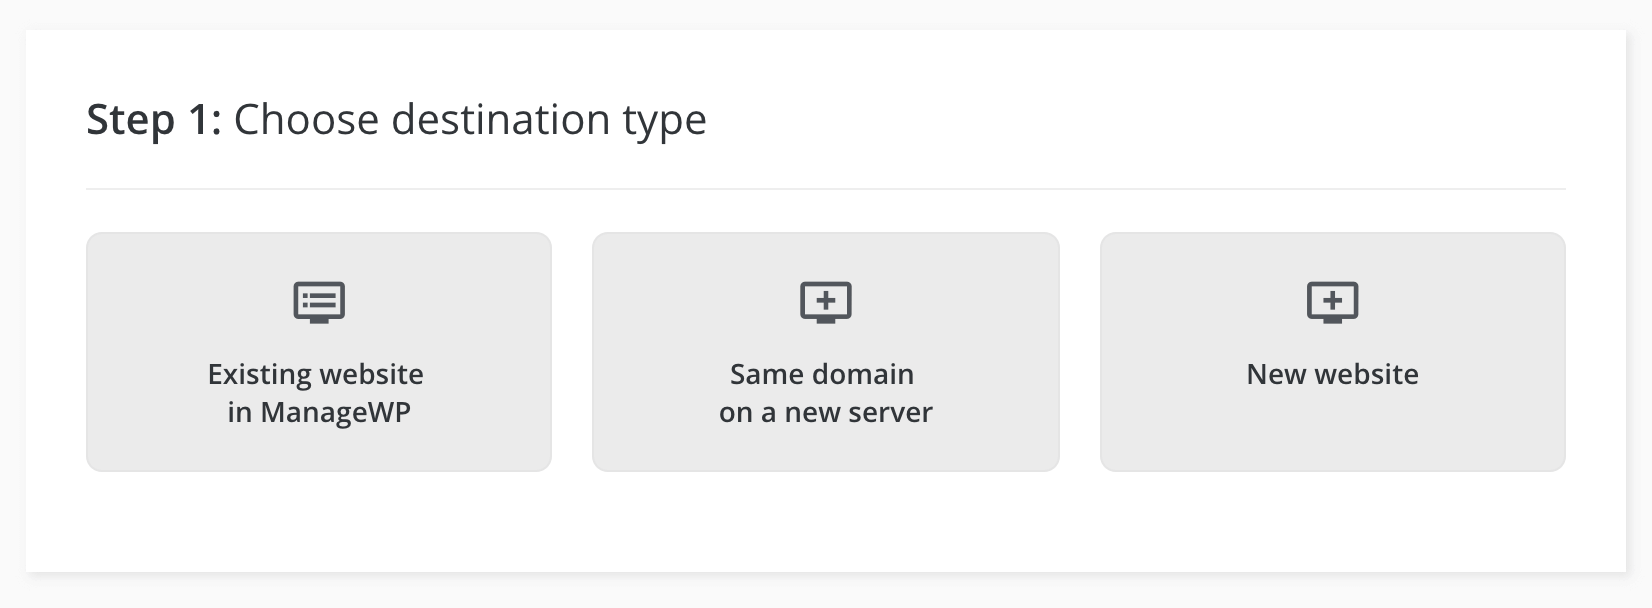
Once clicked, select the destination for your clone site. You can clone to another existing site on your ManageWP account, clone to a new server (e.g., if you’re migrating to a new host), or clone to a new website:
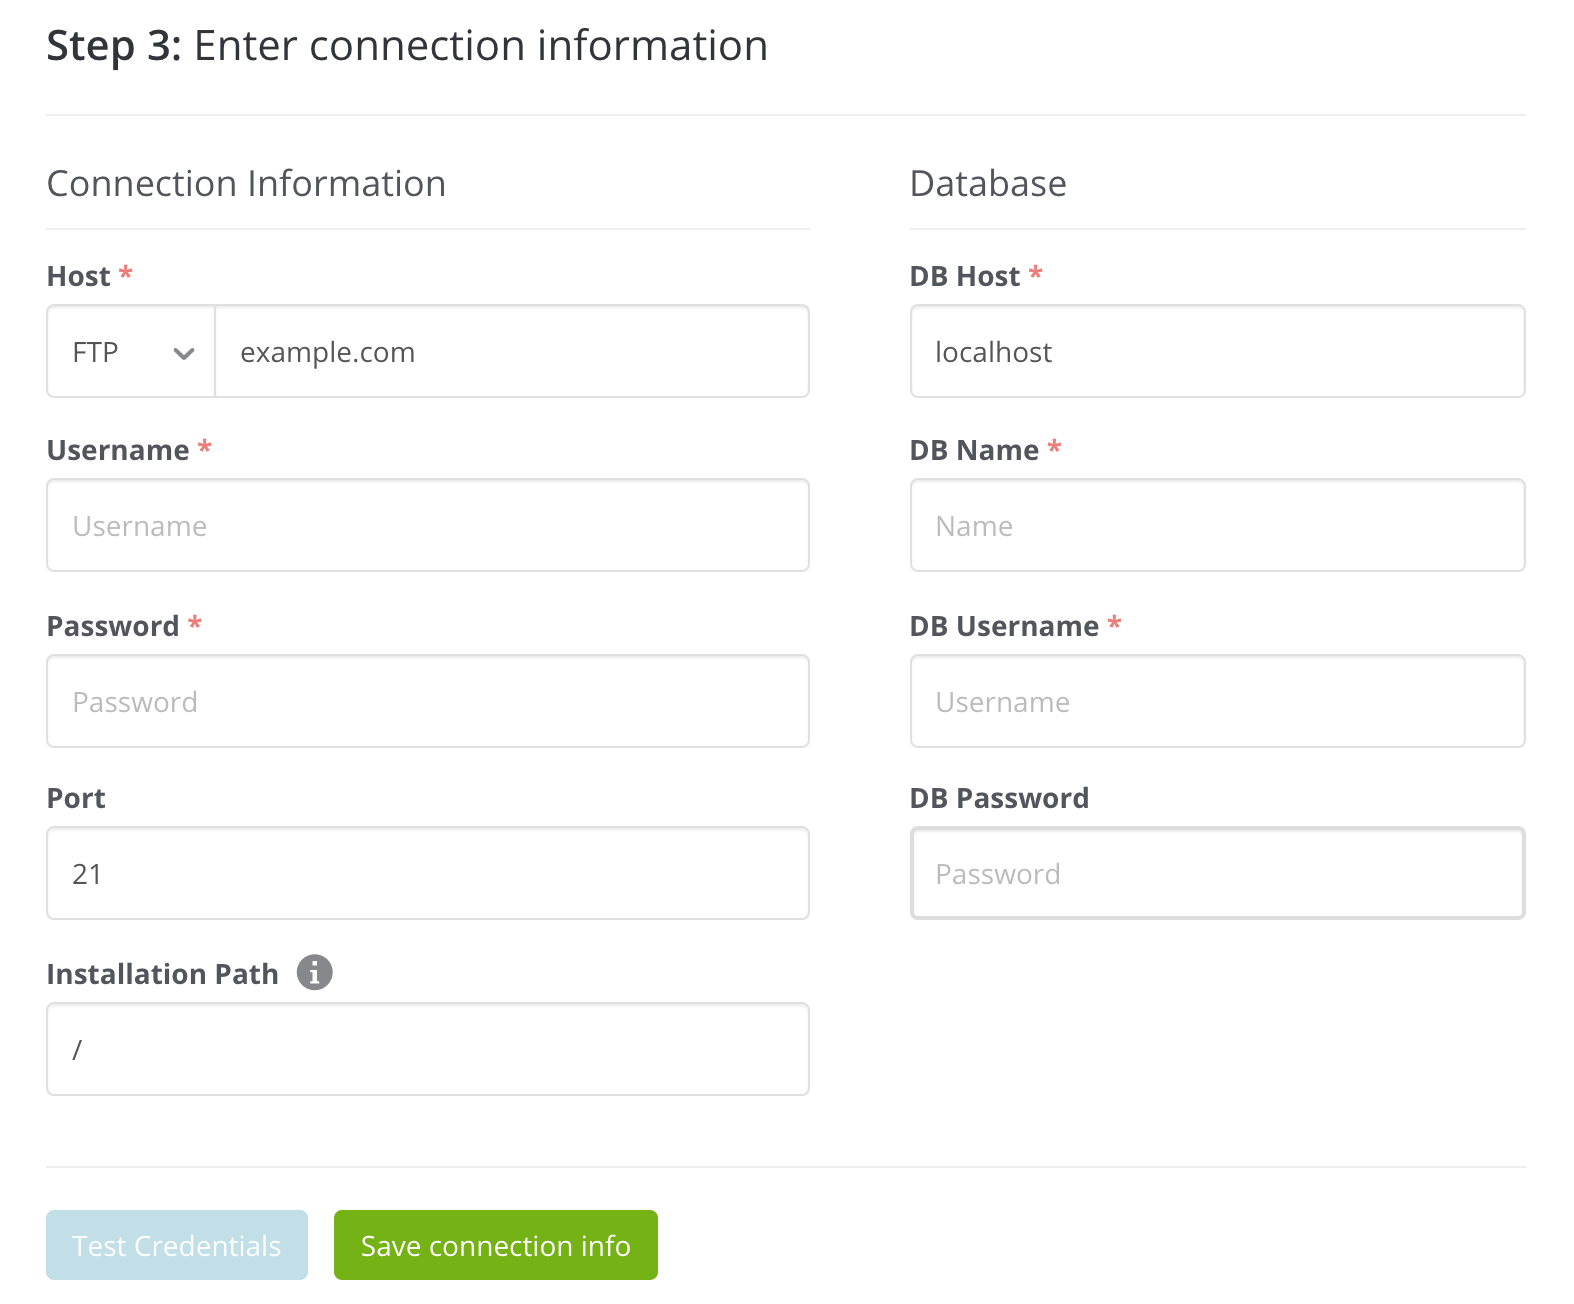
If you choose one of the latter two options, you’ll need to enter the destination URL, then enter the FTP and database information for the new clone site:
You can also choose to create a new admin account, change the database prefix, and hide the clone from search engines. When all your credentials and settings are in place, click on the Clone button.
Your clone site will then be ready to use, without the need for opening up an FTP client. If you’re cloning your site to an existing site on your ManageWP account, the process is even simpler. All you need to do is select the destination URL from a drop-down menu:
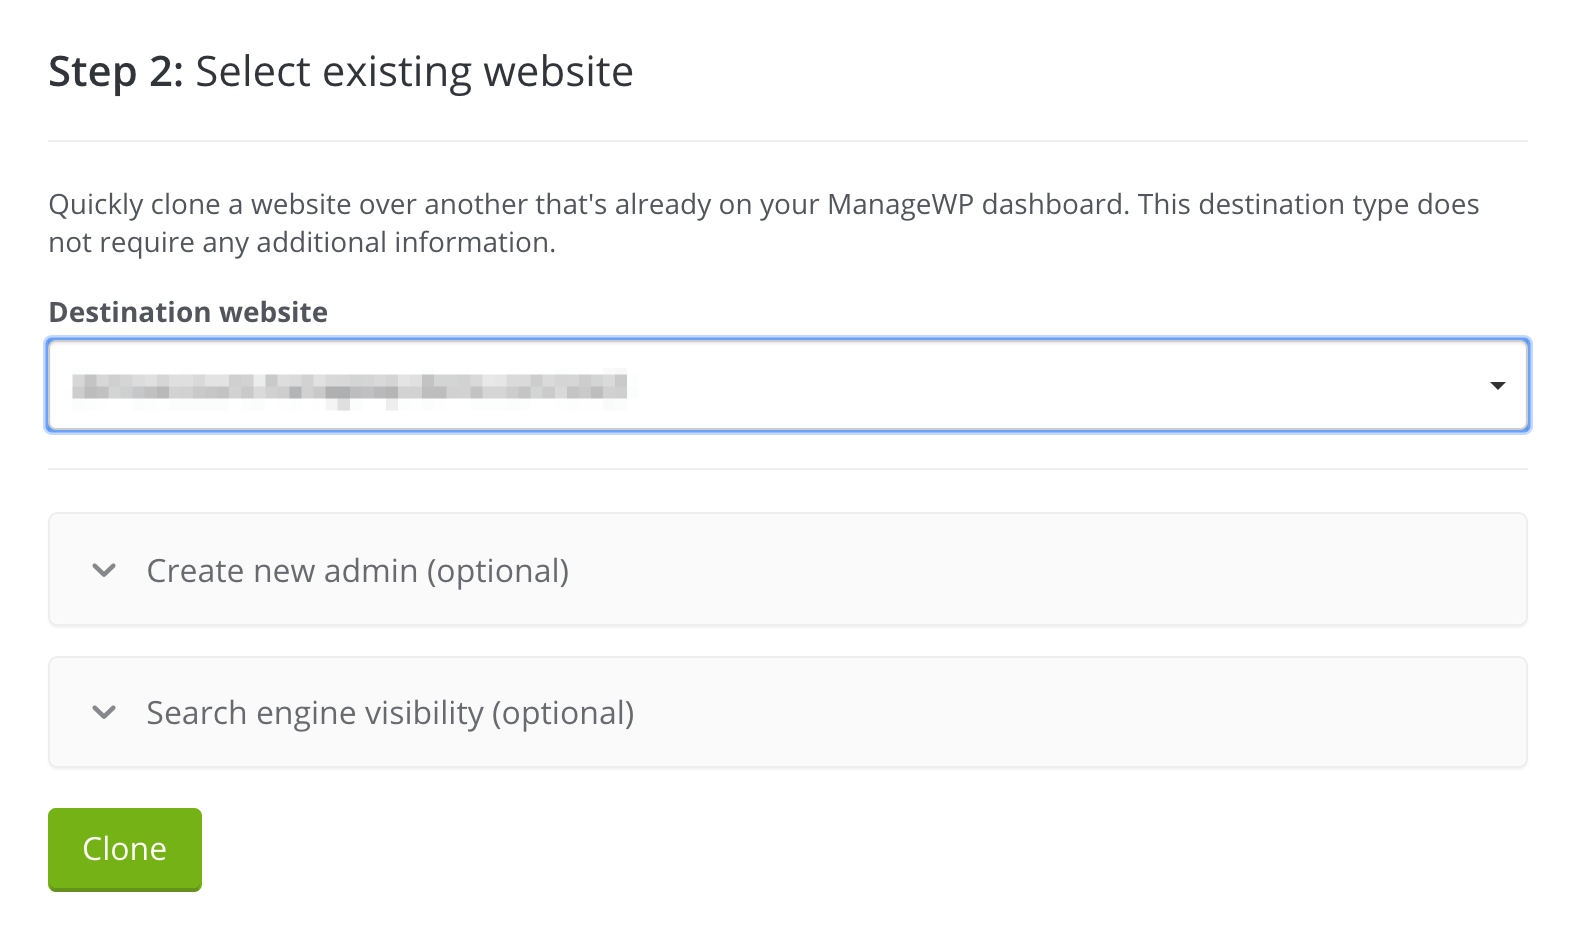
Click on the clone button, and your new clone site will be set up. As you can see, for current ManageWP users, this process is even simpler than using Duplicator. If you don’t have a ManageWP account, consider checking out our plans. The clone function is included in our free plan.
Conclusion
Knowing how to clone your WordPress site will help you tackle a variety of site management-related tasks. With several methods available for making a clone of your website, you can easily migrate to a new server, change your domain name, or set up a staging site.
This post provided a guide to creating a clone of your WordPress site using three different methods:
- Manually clone your WordPress site.
- Use a plugin to clone your WordPress site.
- Clone your WordPress site with ManageWP.
Do you have any questions about how to clone your website? Let us know in the comments section below!
Featured Image Credit: Pixabay.
Leave a Reply