Pingbacks can give you a heads-up when other people are talking about your posts. They can also provide a Search Engine Optimization (SEO) boost through valuable backlinks, and improve your site’s visitor experience. However, pingbacks can also help hackers launch Distributed Denial of Service (DDoS) attacks against your website.
Fortunately, if you decide that the risks far outweigh the benefits, it’s possible to disable pingbacks. By blocking the XML-RPC procedure that powers this controversial WordPress feature, you can protect your site against DDoS attacks and avoid downtime.
In this article, we’ll look at why pingbacks may be putting your site at risk, and how you can check whether XML-RPC is enabled for your particular WordPress website. We’ll then share three methods for disabling this potentially-dangerous functionality. Let’s get started!
An introduction to WordPress pingbacks
Pingbacks are notifications that appear in your website’s comments section. They indicate that another site has linked back to your content:
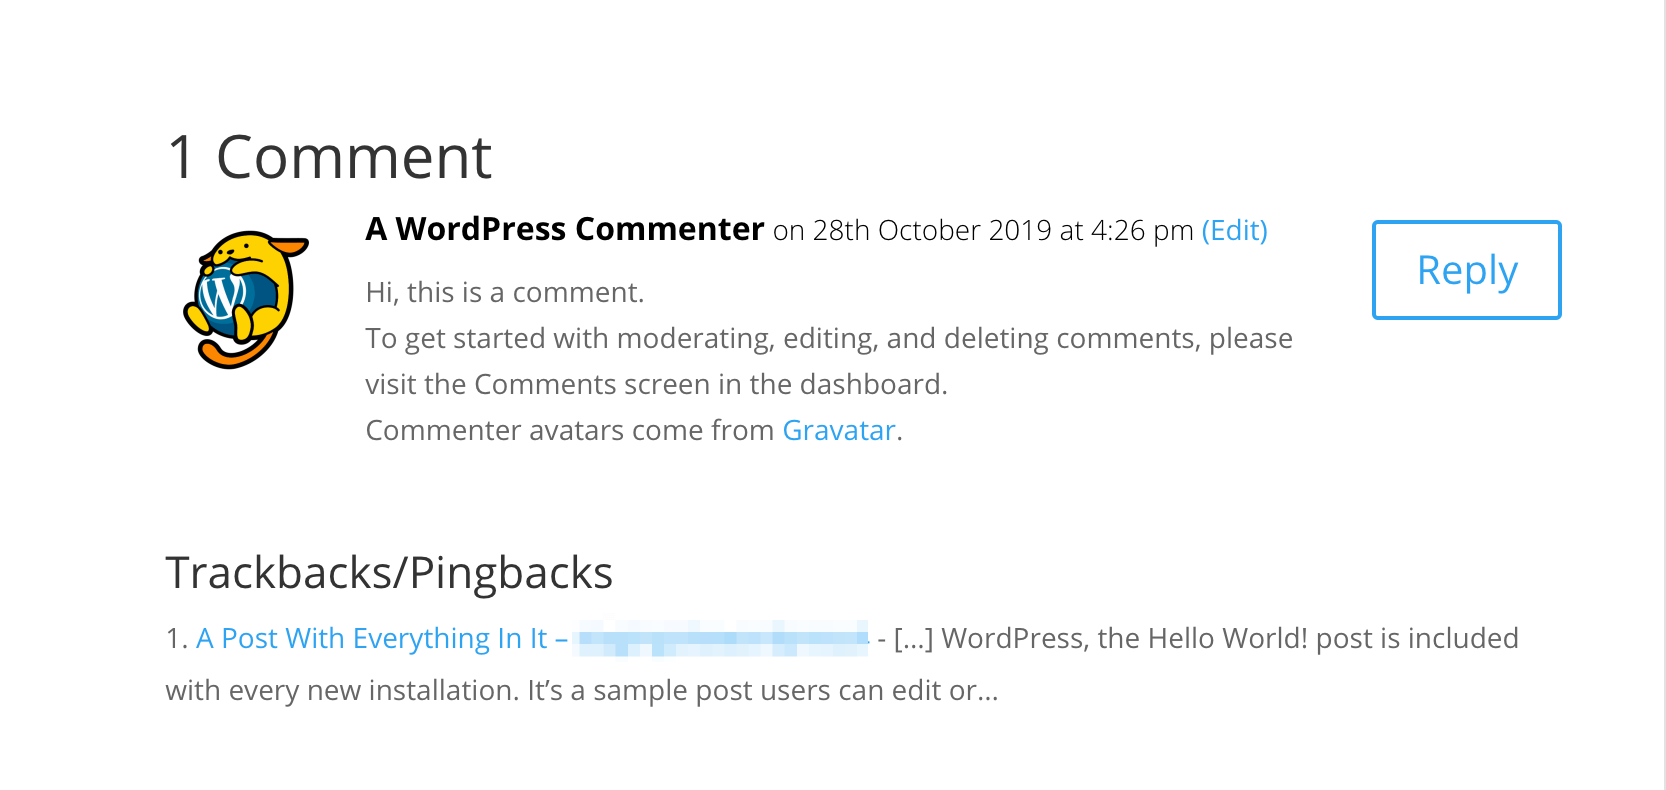
In WordPress, pingbacks are enabled by default. This helps you monitor inbound links. You can then respond to each pingback accordingly. For example, you might take this opportunity to engage with the source of the backlink in the comments section of one of their posts. This can help build your reputation as a friendly, approachable content creator.
Additionally, if another site mentions your content positively, you may want others to know about it. You can amplify their post by sharing it via your own social networks.
Sadly, there’s no guarantee that all mentions will be positive. However, you can often improve your public profile by responding to negative mentions, rather than simply ignoring them.
Pingbacks can also drive traffic to your website, as people follow these inbound links to your content. In addition, backlinks are a ranking factor for many search engines. If you manage to secure a large number of pingbacks, it may boost your rankings and organic traffic.
Unfortunately, pingbacks have a dark side. WordPress uses the XML-RPC interface to enable them, which hackers can, in turn, exploit to mount a Distributed Denial of Service (DDoS) attack against your website.
As part of this attack, a hacker uses XML-RPC to send lots of pingbacks to your site in a short period of time. This overloads your server and may knock your website offline. The results may include expensive downtime and lower conversion rates.
Hackers can also use pingbacks to reveal the public IP address of a protected WordPress installation and bypass any Domain Name System (DNS)-level security. Some malicious parties even use pingbacks to scan for vulnerable open ports. With all this in mind, you may want to consider disabling this feature for your WordPress website.
How to check XML-RPC on your site to see if pingbacks are enabled
Since WordPress 3.5, the XML-RPC interface has been enabled by default. However, there’s no guarantee this will remain the case in subsequent versions of WordPress. If you’re sharing your WordPress site with other collaborators, there’s also a chance they may have modified your XML-RPC settings without your knowledge.
Before disabling XML-RPC, it’s always worth verifying that this interface is enabled for your particular WordPress website. You can quickly and easily check its status using the XML-RPC Validator tool:
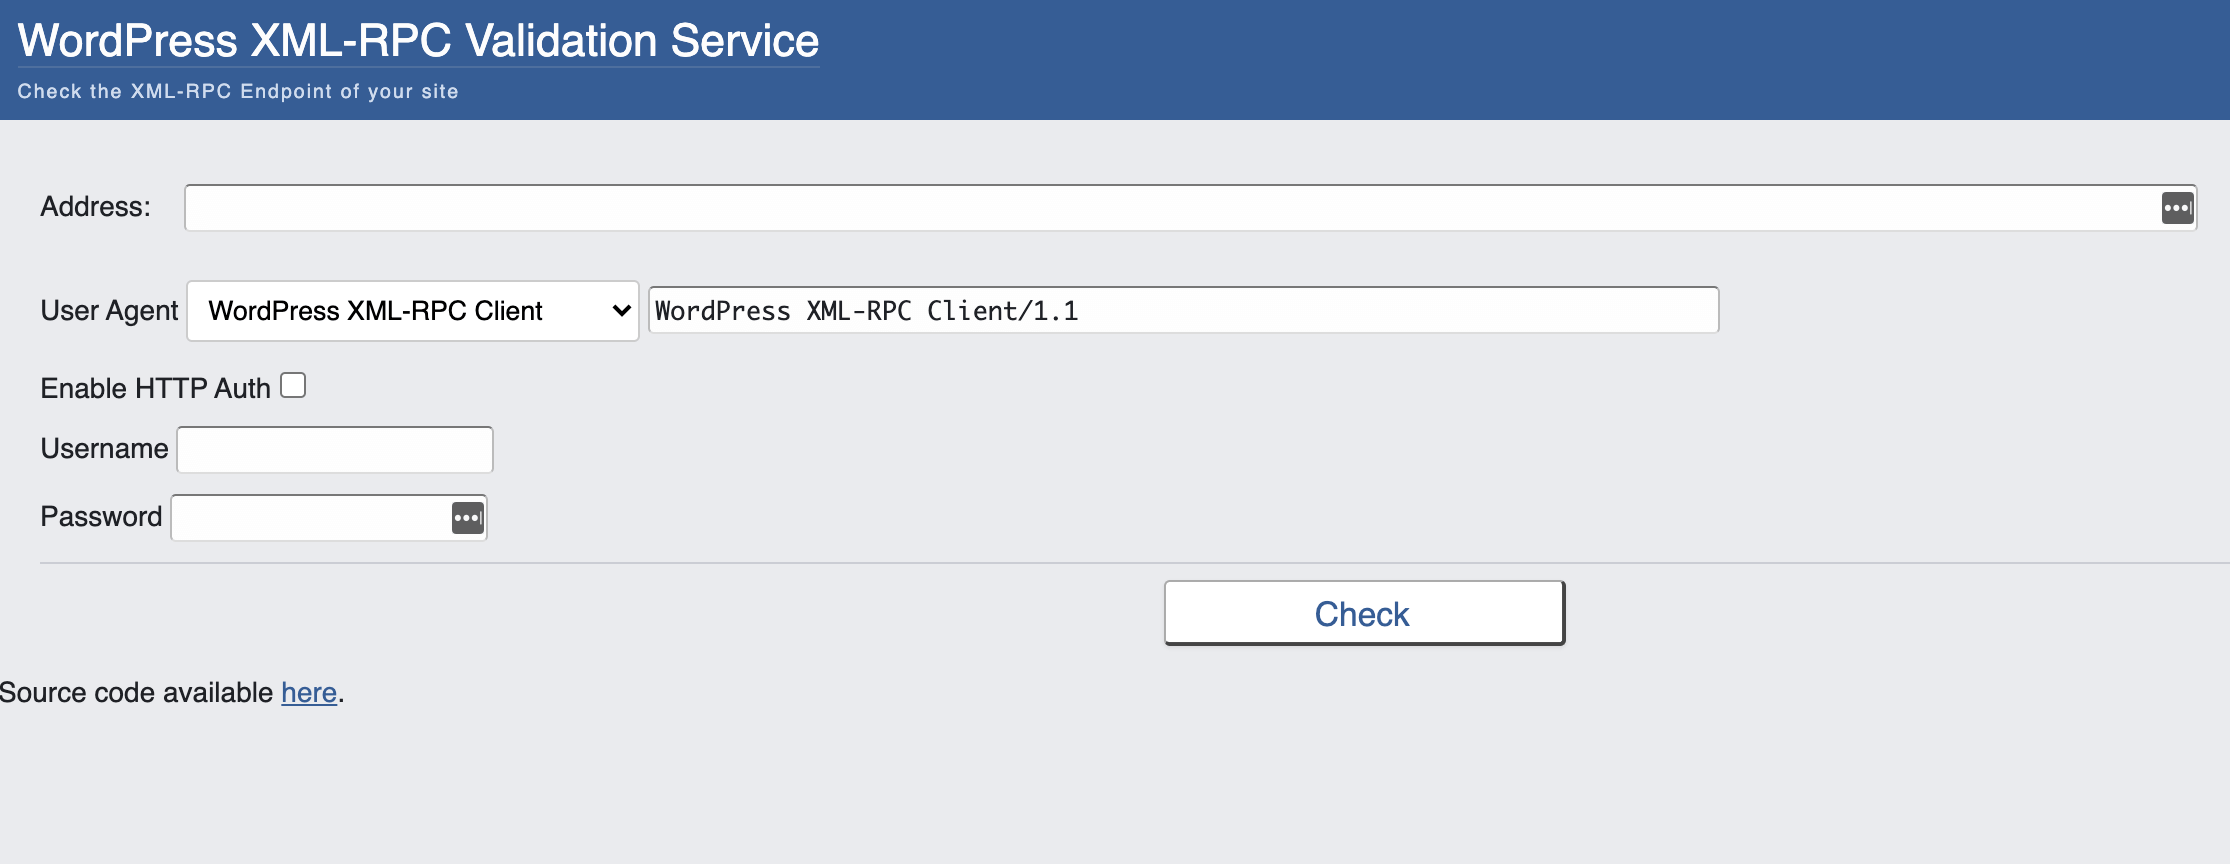
In the Address field, enter your website’s URL. Then click on Check. If the Validator tool displays an error message, it means that XML-RPC is disabled. If you encounter a success message, you may want to consider disabling pingbacks in order to protect your site against related attacks.
How to protect your site against WordPress’ pingback vulnerability (3 ways)
WordPress makes it easy to disable pingbacks on future posts. Just navigate to Settings > Discussion in your dashboard and deselect the relevant options:

You can also disable pingbacks for specific posts in the editor:
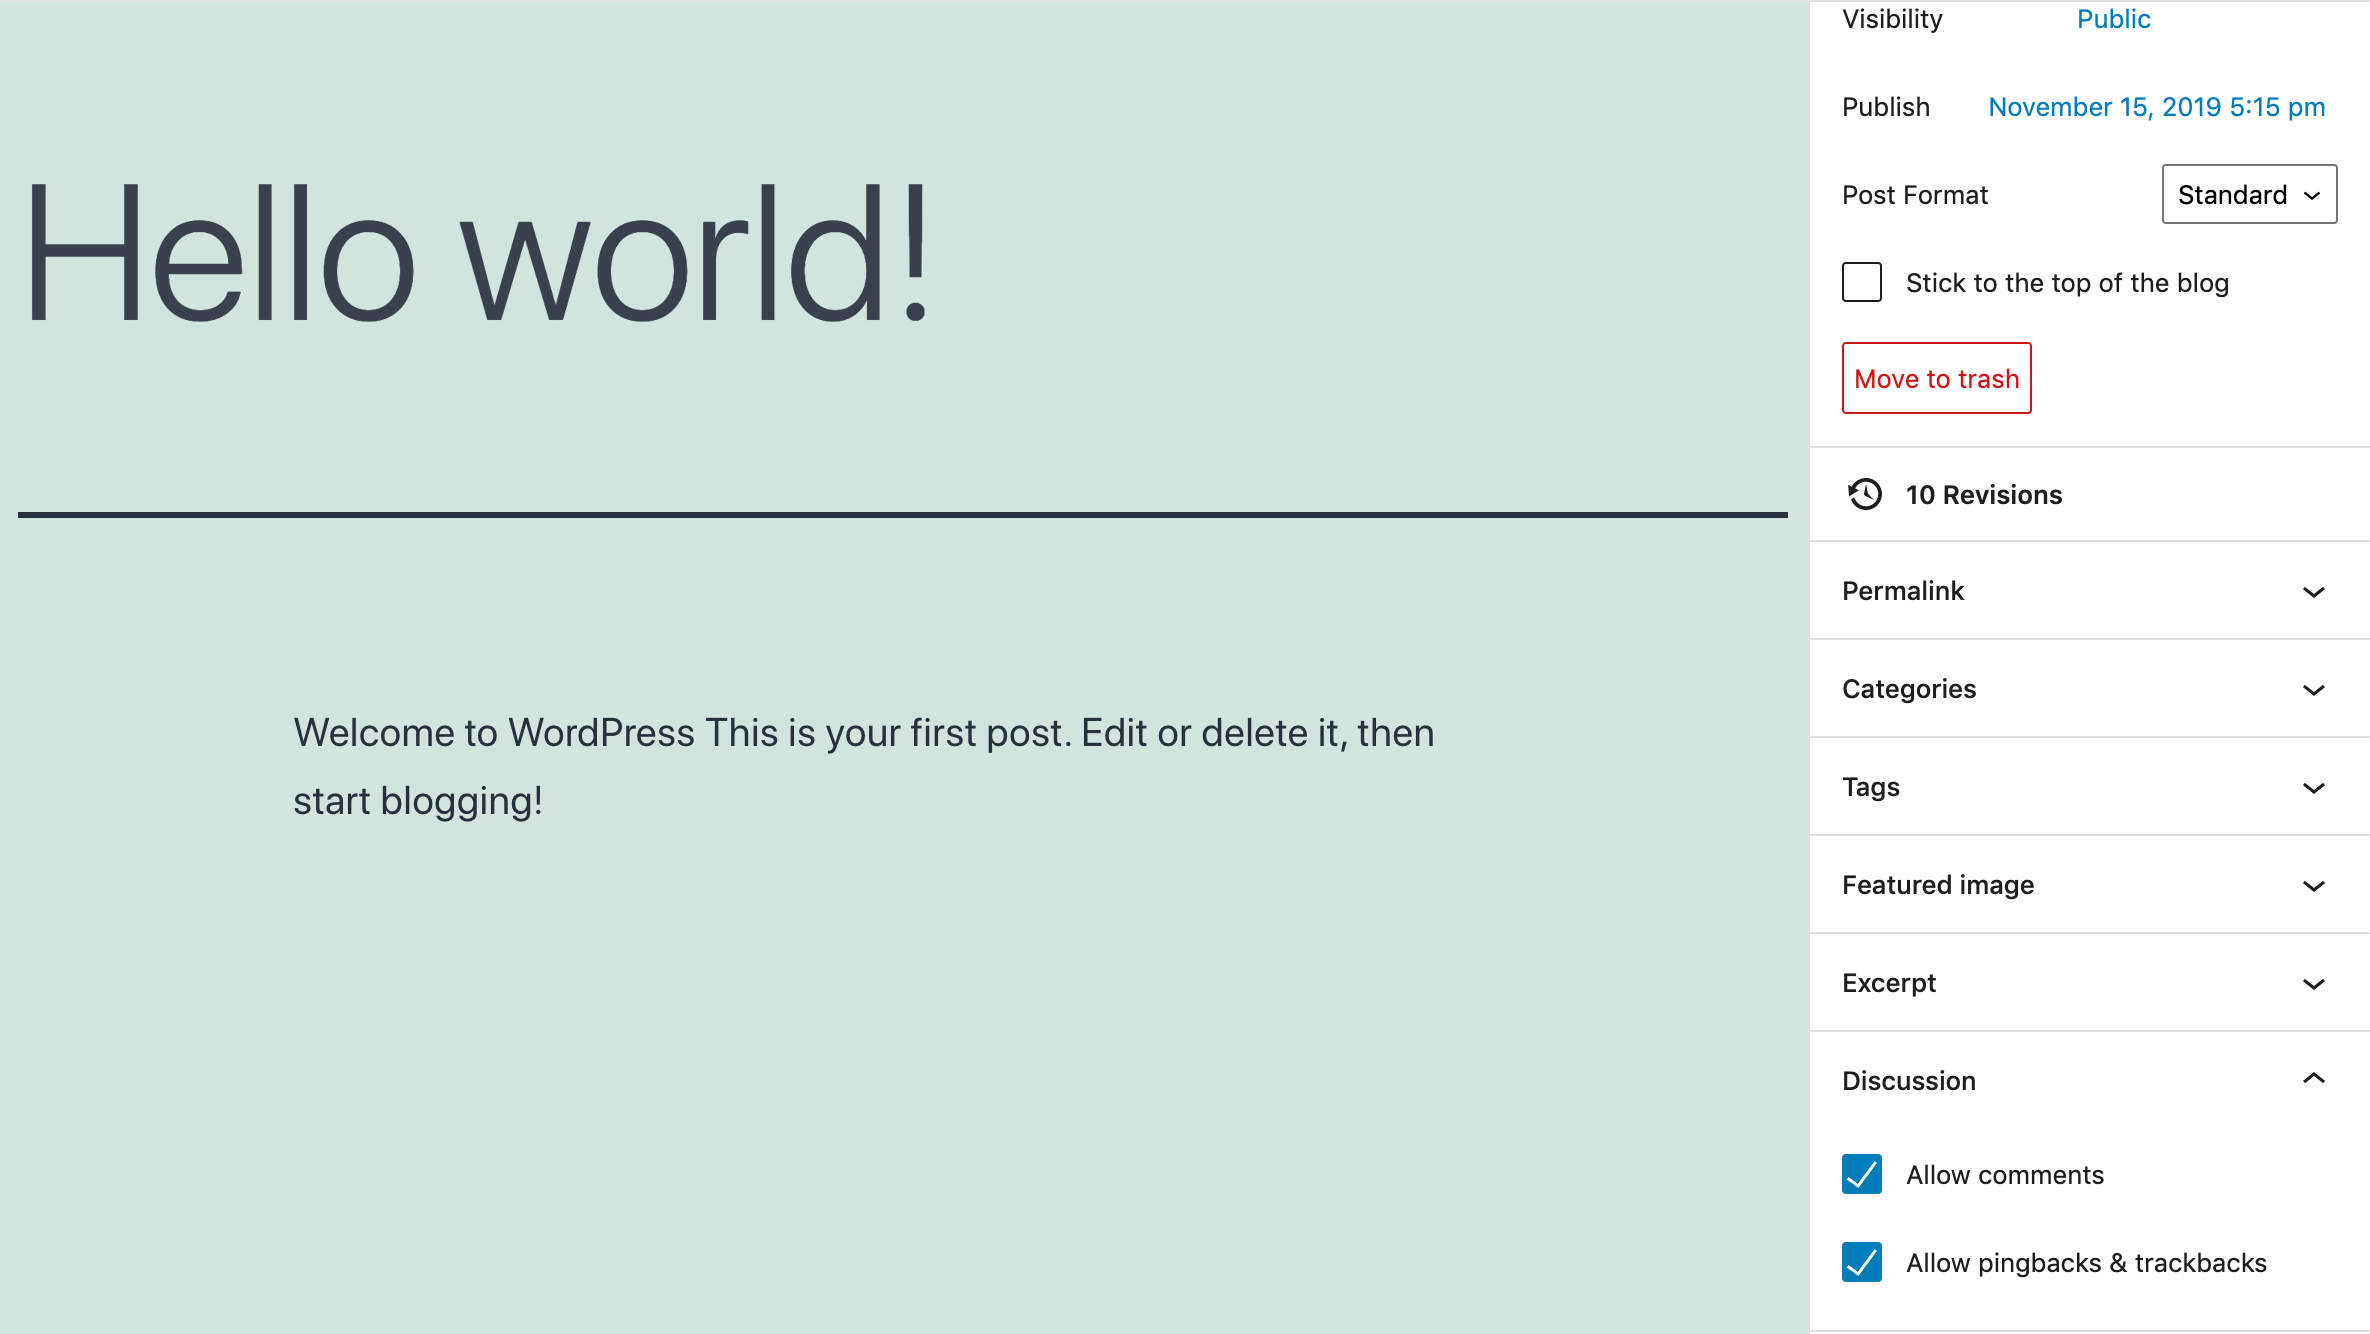
However, in order to fully disable pingbacks across your entire site, you’ll need to take some additional steps. There are a few different ways you can go about this depending on your goals and skill level.
Method 1: Disable XML-RPC manually
You can block all incoming XML-RPC requests before they’re passed to WordPress. This method does require you to edit .htaccess, which is a configuration file that tells your server how to handle various requests. If you’re not comfortable editing your site at the code level, we recommend trying one of the alternative methods below.
Before editing your .htaccess file, it’s a smart idea to create a full backup. Even simple errors such as typos can be disastrous when editing your site’s code. By creating a backup, you’ll have something to restore, just in case you encounter any issues.
You can access .htaccess using your preferred File Transfer Protocol (FTP) client. We’ll be using FileZilla, but the steps should be largely the same for other popular tools. Once your client is connected to your server, locate .htaccess in your site’s root folder:
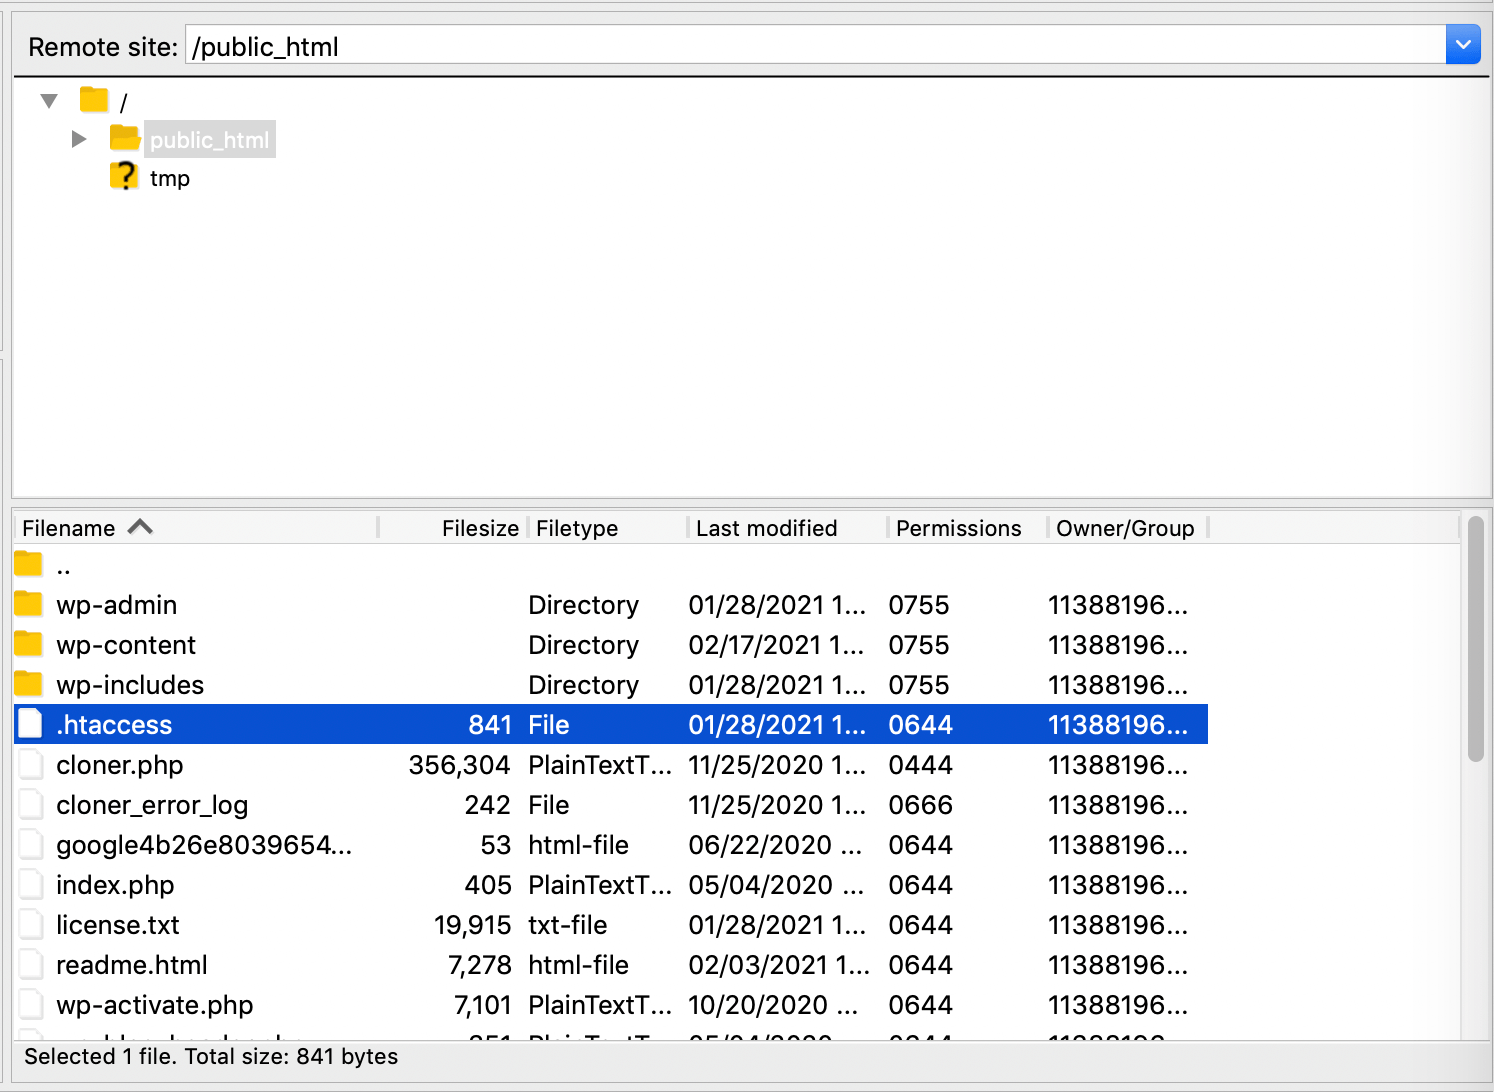
If the root folder doesn’t contain a .htaccess file, you may need to select your client’s Force showing hidden files option.
Next, open .htaccess in a text editor, such as Text Edit. Add the following:
<Files xmlrpc.php>
order deny,allow
deny from all
</Files>
Then save your changes. To verify that XML-RPC is now disabled, try running your web address through the XML-RPC Validator tool again. It should now display an error message.
Method 2: Turn off pingbacks with a code snippet
You can also turn the XML-RPC interface on and off using code snippets. Code snippets are a handy way to add a range of functionalities to your website without having to install multiple plugins. Minimizing the number of plugins on your site can make it easier to maintain and may also improve its overall security.
ManageWP users can add code snippets directly from their dashboards. After logging into your account, navigate to More Tools > Code Snippets:
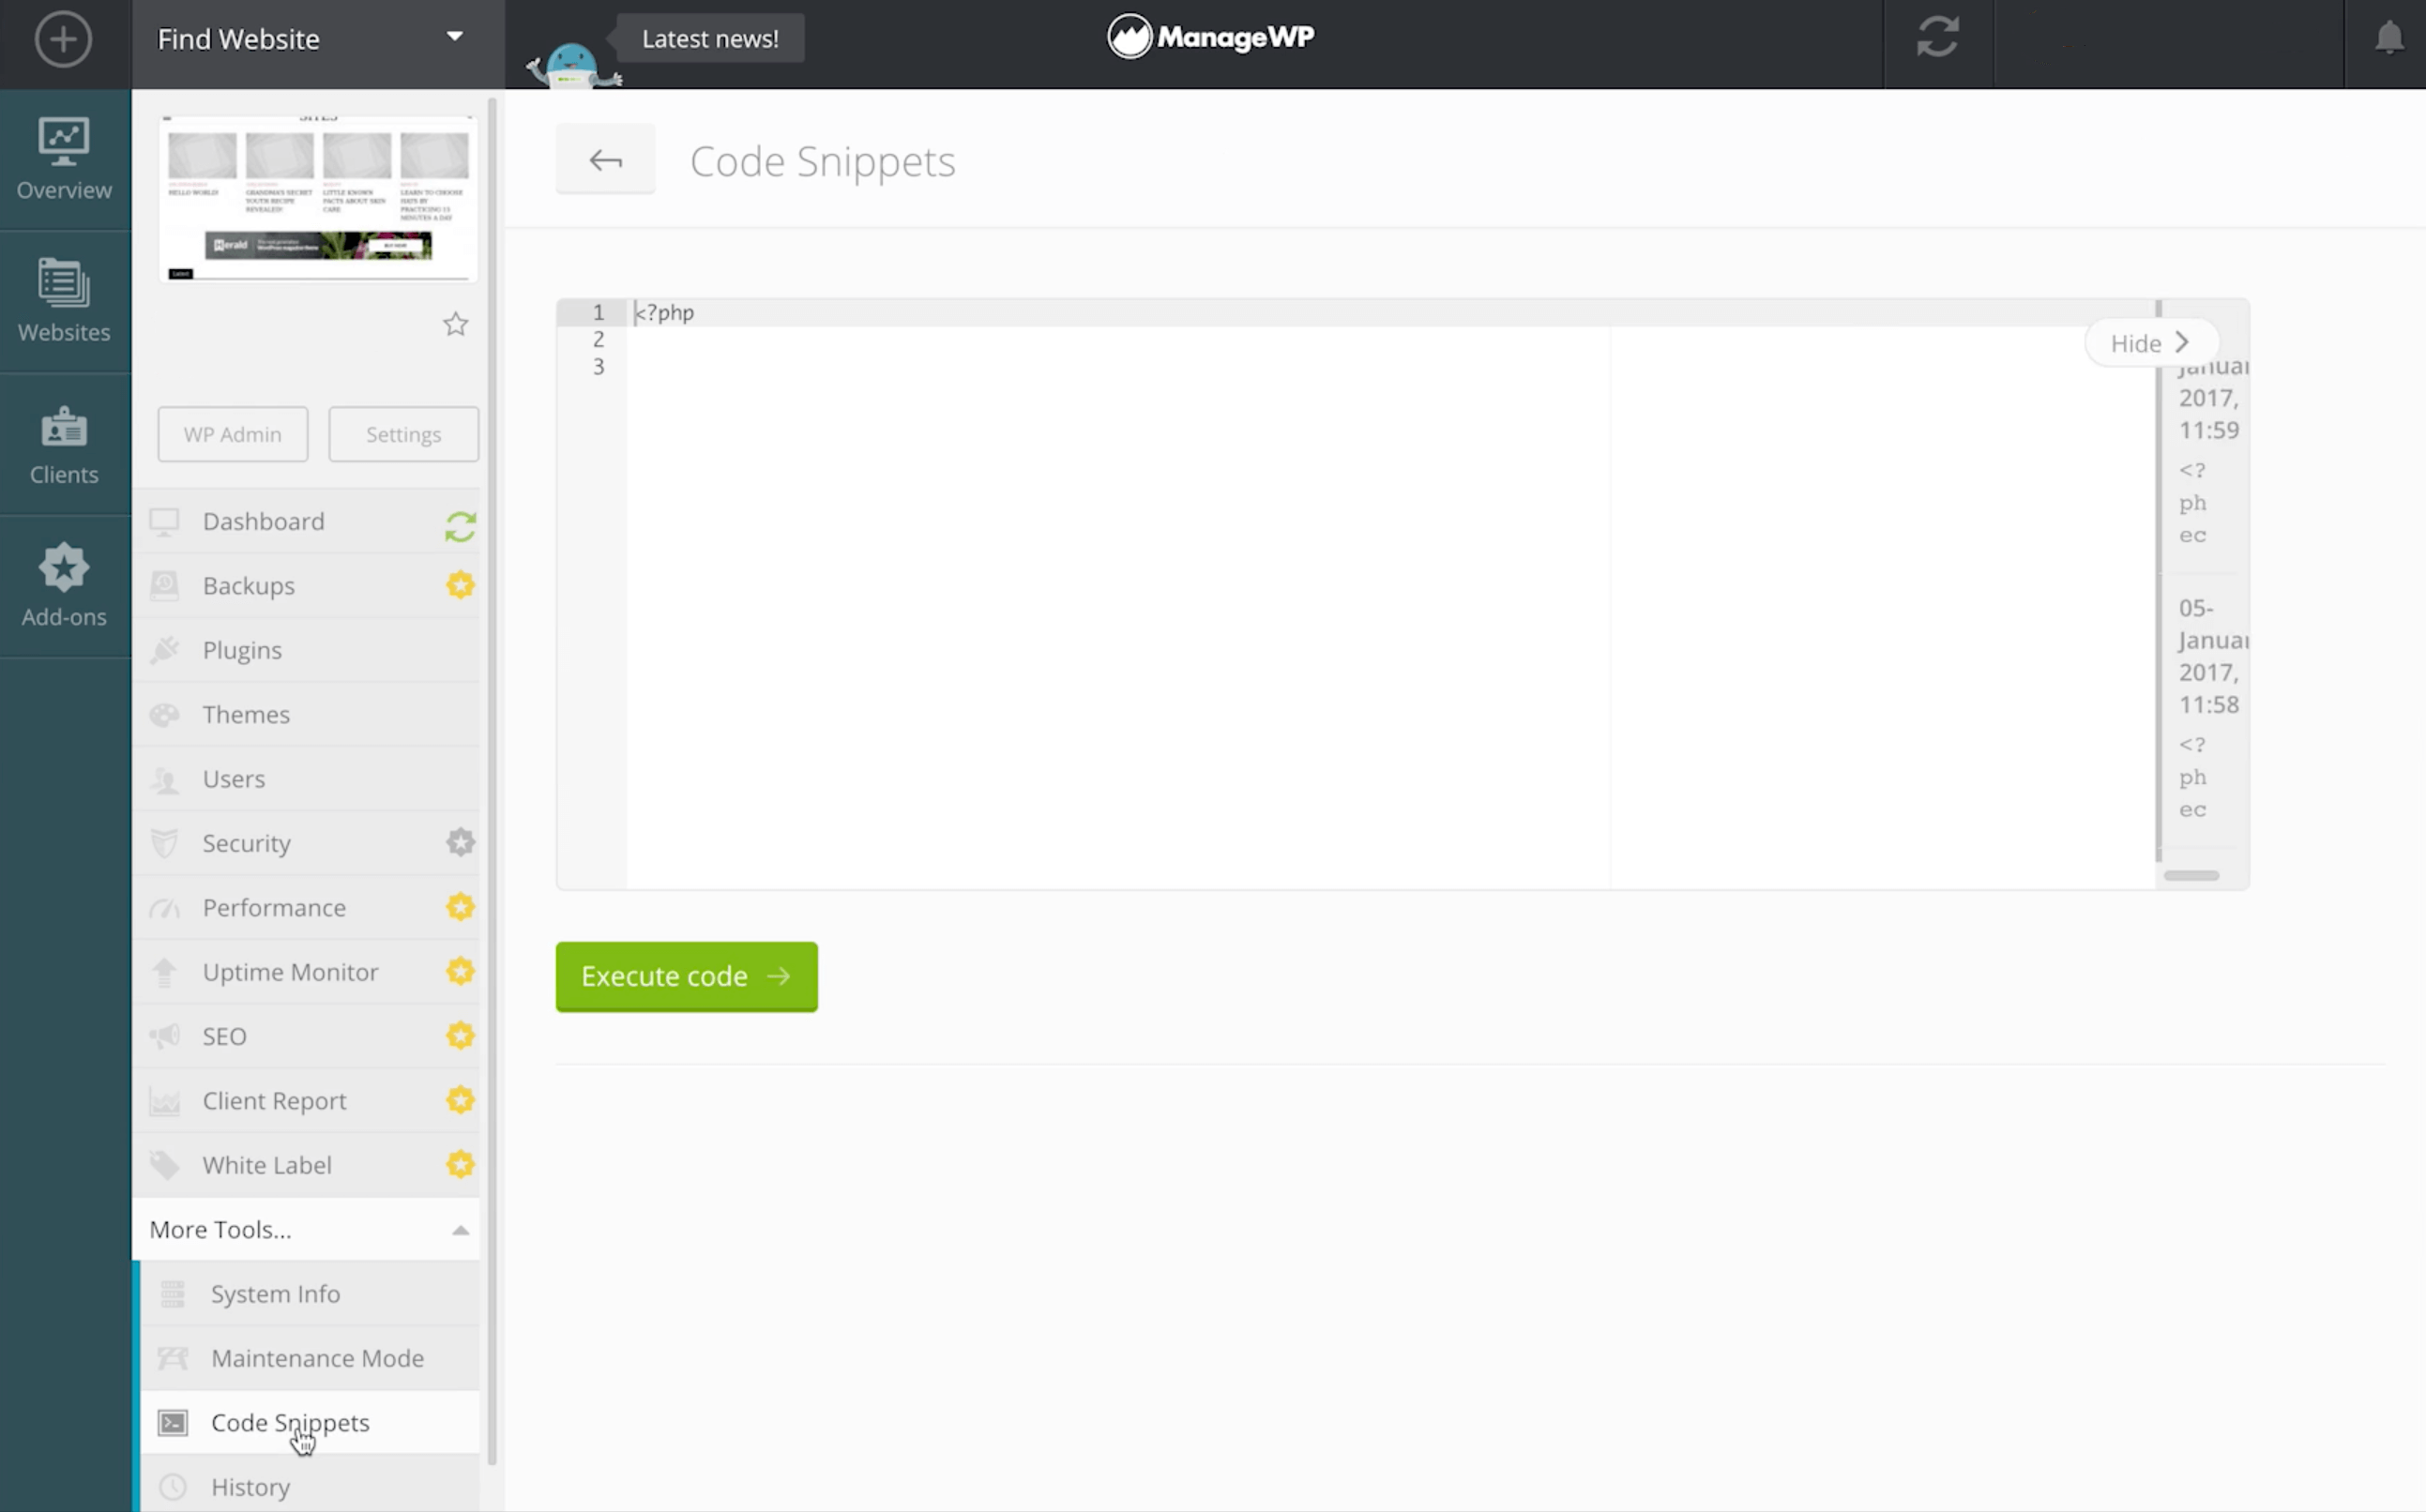
You can now paste the following code into ManageWP’s code snippet editor:
<?php
//Disable XML-RPC
add_filter('xmlrpc_enabled', '__return_true');
Alternatively, you can add this snippet to your site using the Code Snippets plugin. After activating it, navigate to Snippet > Add New:
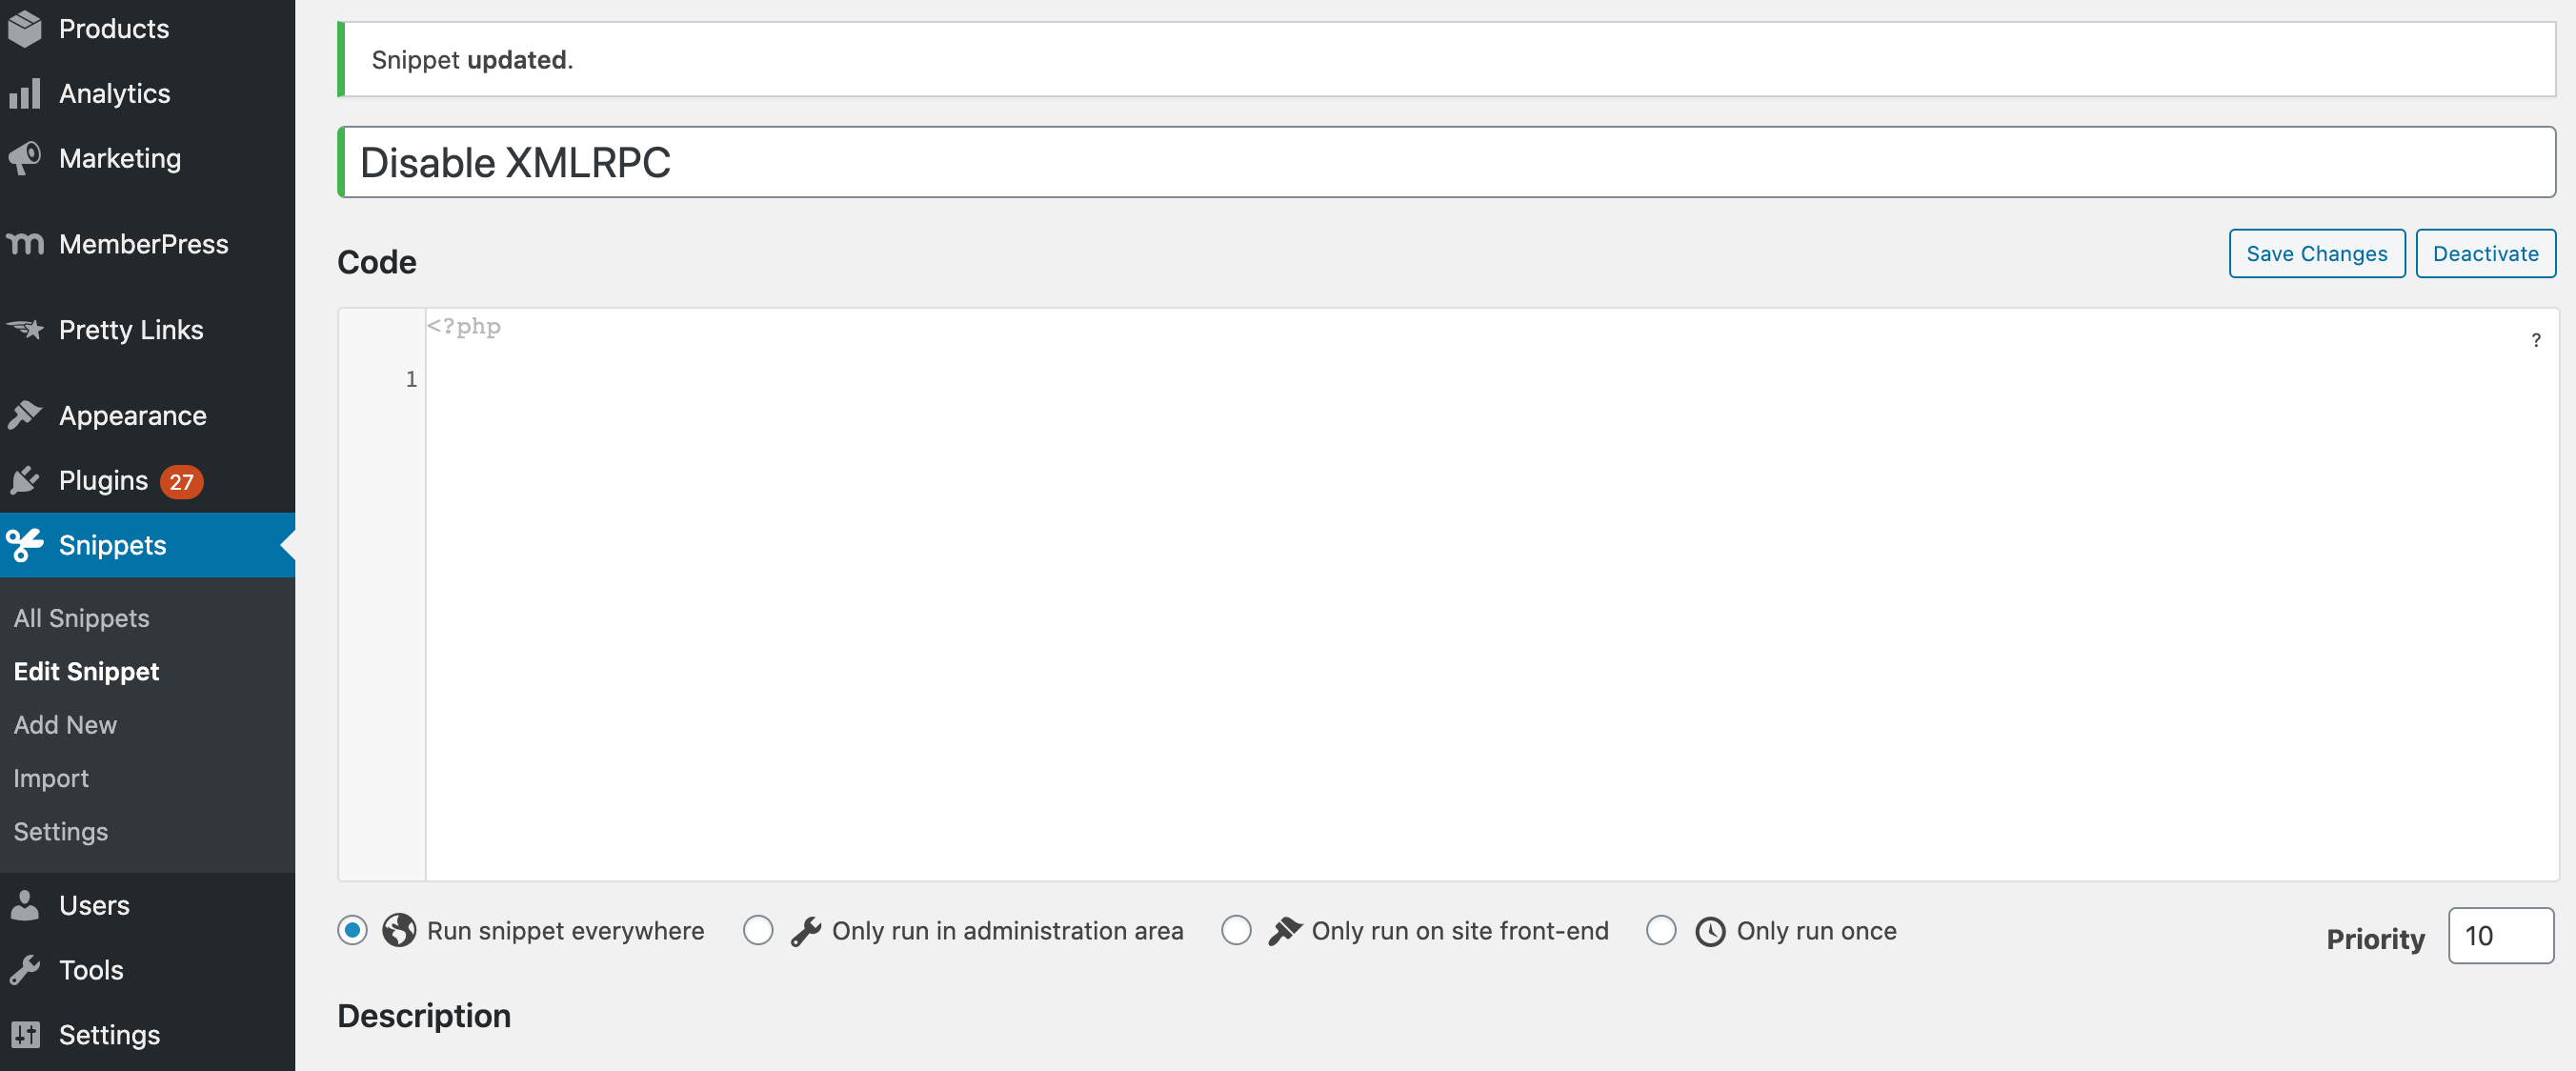
Then copy and paste the snippet above into the code editor. We also recommend adding a description that clearly explains what this snippet does, and why you’re adding it to your website. This can make your life easier if you ever need to revisit your code snippets. It also promotes transparency if you’re sharing your WordPress website with other people.
When you’re happy with your snippet, click on Activate and check that XML-RPC is disabled using the XML-RPC Validator.
Method 3: Use a plugin to disable XML-RPC
Finally, you can also disable the XML-RPC interface using a plugin. We’ll be using Disable XML-RPC-API.
After installing and activating it, Disable XML-RPC-API will turn off pingbacks without any further action required from you. You’ll receive a confirmation message on the Plugins screen:

If you decide that you want to turn XML-RPC back on, all you have to do is deactivate the plugin.
Conclusion
While there are some positives to pingbacks, they can also expose your site to dangerous Distributed Denial of Service (DDoS) attacks. A successful DDoS attack can result in downtime, lost traffic, and missed conversions including sales.
Faced with these consequences, you may decide to disable pingbacks. Let’s recap your options:
- Disable XML-RPC manually.
- Turn off XML-RPC with a code snippet.
- Use a plugin such as Disable XML-RPC-API.
Do you have any questions about protecting your site against WordPress’ pingback vulnerability? Ask away in the comments section below!
Featured Image credit: Unsplash.

Leave a Reply