Managing a successful website takes a lot of work. Some of the most important tasks are maintenance and security. They are necessary for keeping your site running optimally and protected from malicious actors. However, if you’re not utilizing a Web Application Firewall (WAF) in WordPress, you’re missing a key element in your upkeep toolbox.
A WAF is a powerful asset that can help you safeguard your website. It does a lot of the heavy lifting for you. Crucially, it streamlines a handful of security-related tasks to help save you time, energy, and money in the long run.
In this post, we’ll start by explaining what a WAF is and why it’s essential for your website security. Then, we’ll provide four steps to implement one in WordPress. Let’s jump in!
An introduction to Web Application Firewalls (WAFs) and why they’re important
WAFs are essential parts of WordPress security. If you’re unfamiliar with the term, a WAF is a program that can filter and monitor your website or application traffic. By doing this, it can help identify and prevent malicious agents from infiltrating and attacking your site.
Essentially, the WAF acts as a shield between the internet and your WordPress site. Instead of accessing your server directly, the WAF will require users (legitimate or otherwise) to pass through it first.
A WAF is important because it acts as a line of defense. It can help protect and prevent a wide range of attacks, such as:
- SQL injections
- Distributed Denial-of-Service (DDoS) attacks
- Cross-Site Scripting (XSS)
- File inclusion
- Cross-Site Forgery
- Man-in-the-Middle (MiTM) attacks
A WAF can’t defend against all types of attacks. It’s also not an all-in-one security solution. Instead, it is a critical component of a broader suite of website security tactics and tools.
4 steps for adding a WAF in WordPress
Now that we understand more about what WAFs are and why they’re important, it’s time to choose and use one. Below are four steps for selecting and adding a WAF in WordPress.
Step 1: Understand the different types of WAFs available
Before you decide which kind of WAF tool is right for you, it might be helpful to familiarize yourself with the available types. There are three main categories:
- Network-based (or hardware-based)
- Software-based
- Cloud-based
Network-based WAFs are usually installed in local area networks (LANs) and deployed through physical hardware. They are typically located close to the web and application servers, meaning they offer fast speed and performance.
However, network-based WAFs also tend to be on the pricier side. Consequently, they’re mainly only suitable for large businesses and organizations with high levels of daily traffic.
Software-based WAFs are located within Virtual Machines (VMs) rather than physical appliances. However, their components function similarly to network-based WAFs. They are incredibly flexible and can be deployed on both physical locations as well as in the cloud.
Software-based WAFs also tend to be more affordable. Therefore, they are popular choices among small and medium-sized businesses, especially those with cloud-based applications and hosting providers.
Cloud-based WAFs are run by service providers and offered as a Software-as-a-Service (SaaS). Everything is based entirely within the cloud and doesn’t require any physical hardware or VMs. They are the simplest and most affordable of the three WAF solutions since the providers handle all optimization and updates. This is why they are also suitable for most small and medium-sized businesses.
Step 2: Identify your specific needs from a WAF
In this article, we’re looking at WAFs in WordPress. Therefore, we’ll focus most of our attention on cloud-based WAFs, as these are most likely what you’ll want to use.
Assuming you want a cloud-based WAF, there are still many options for you to choose from. To help narrow your decision down, we recommend making a list of some of your requirements.
For example, these are some factors you might consider:
- How much are you willing to pay? Do you want a completely free tool, or are you ready to purchase a premium package with more advanced features?
- What level (if any) of control or customization do you want?
- Are there any other security or maintenance-related tasks that you want the tool to offer?
Considering these topics ahead of time can make comparing tools much easier. You’ll have a better idea of what you’re looking for and which solutions won’t meet your standards.
Step 3: Research and choose a WAF tool
Once you’re a bit more knowledgeable about WAFs, you’ll be better prepared to begin researching your options. To keep the process as simple as possible, we recommend focusing on WordPress plugins. Using add-ons will be the most straightforward and beginner-friendly option.
There is a plethora to choose from. Below, we’ll take a look at some of the most popular tools and tell you about each of them.
Sucuri

Sucuri is one of the most well-known and credible WordPress website security companies. The plugin offers a wide range of auditing and monitoring tools, including malware scanning, brute-force protection, and Domain name Server (DNS) level firewall.
When installed on your website, Sucuri scans all of your site traffic through its cloud proxy servers, then blocks any malicious requests. The only downside of this plugin is that the configuration can be confusing if you’re new to WAF. You’ll need to add a DNS A record then point it to Sucuri’s cloud proxy rather than your website.
This is a premium plugin. While a free version comes with many security-related tools, the WAF is only available with the premium option (starting at $199 per year).
Cloudflare

Cloudflare is a tool most often used for its Content Delivery Network (CDN). It’s an excellent option if you’re looking to speed up and optimize your site. As with Sucuri, Cloudflare offers a wide range of services and solutions, including DNS, SSL certificates, and DDoS mitigation.
Cloudflare is also a freemium tool. However, the WAF option is only available on paid plans, starting at $20 per month. So, it’s a little more expensive than Sucuri if you’re only interested in the WAF feature.
Wordfence

With over 4 million active installations, Wordfence is a reliable WAF plugin. It’s also one of the most popular security scanner tools.
This plugin comes with a built-in firewall application that can defend against everything from SQL injections to malware. Unlike Sucuri (a server-level firewall), this is an application-level firewall. Therefore, it blocks malicious traffic only after it reaches the server but before it can access your website.
Wordfence doesn’t come with some of the extra features we discussed, such as a CDN. However, its WAF feature is entirely free, and the plugin includes on-demand security scans. There are premium plans available with more advanced features, starting at $99 per year.
Step 4: Install and implement your WAF
Once you decide on a WAF plugin, the only thing left to do is install it on your site and get it set up. The process will depend mainly on the tool that you choose.
For example, if you choose a more complex and sophisticated WAF solution such as Sucuri, you’ll need to go through the process of adding a DNS A record to your domain. However, if you opt for a free plugin such as Wordfence, you’ll only have to install and activate the tool.
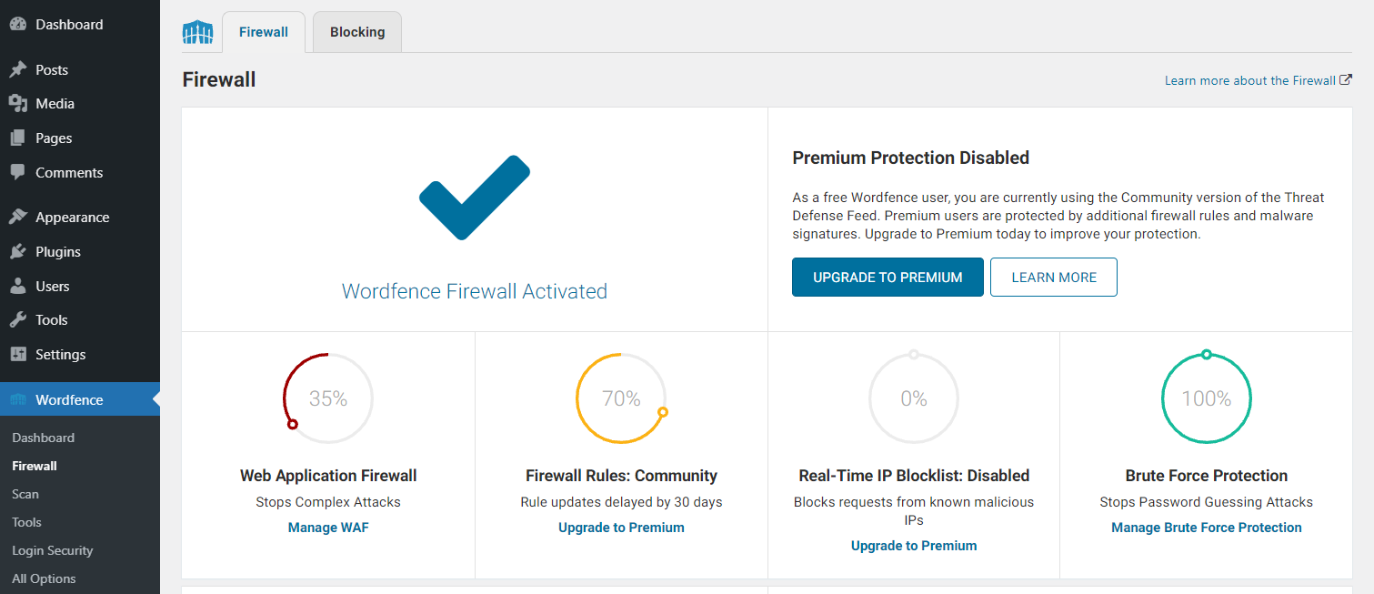
Then, the plugin will automatically start working on your site. You can locate it under Wordfence > Firewall:

We recommend checking with the tool’s support center or knowledge base for specific instructions. Also, if you need further guidance, you may want to contact your hosting provider.
Conclusion
If you want to be a successful website owner, you’ll need to implement strong security practices. Unfortunately, there isn’t a single solution to cover every area. However, there are some essential tools to include in your arsenal. One of those is a Web Application Firewall (WAF). This security software can help filter incoming traffic to your site and keep out malicious actors.
To recap, here is how to choose and add a WAF to your WordPress site:
- Familiarize yourself with the different types of WAFs available.
- Identify your specific needs.
- Research, compare, and select a WAF tool or plugin.
- Install and implement your WAF.
Do you have any questions about installing and using a Web Application Firewall (WAF)? Let us know in the comments section below!
Image Credit: Unsplash.

Leave a Reply