Today, websites face an increasing number of security threats. Mitigating these risks can feel overwhelming, especially when you know that no site is ever entirely safe. However, taking a lackluster approach to WordPress site security simply isn’t an option.
Fortunately, implementing the appropriate security and protection measures can help safeguard your sites from the ever-evolving threat of hackers and other attacks. Vulnerabilities can show up at any time and on any site, but if you take the right steps you’ll be able to avoid many dangers and quickly handle the rest.
In this post, we’ll discuss the importance of administering a secure WordPress site. Then we’ll walk you through five tips you can use for going about it effectively. Let’s get started!
The importance of securing your WordPress websites
When it comes to site maintenance and management, security should be at the top of your priority list. If a cybercriminal gains access to your database, not only could you lose all of your important website files – you could also compromise sensitive customer information.
Over the years, cyber security has gone through major transformations. Thanks to the constant flow of information online, news of massive data breaches travels very fast. People are becoming increasingly aware of web security risks (both to customers and businesses), and hackers are constantly introducing new methods of attack.
For example, Distributed Denial-of-Service (DDoS) and phishing attacks are on the rise. New methods such as cryptojacking are also becoming increasingly popular. Research has found that relying on antivirus software alone is no longer a sufficient method of safeguarding online systems; a variety of techniques are needed to get the job done.
Put simply, ‘hardening’ a WordPress site is about taking necessary measures to protect it and its users. The goal isn’t to create a 100%-secure system or eliminate risk entirely (since that’s impossible), but rather to reduce the risks as much as possible.
How to harden and protect your WordPress sites (5 tips)
There are many maintenance and monitoring tasks that can help you harden your WordPress websites. Let’s take a look at five tips you can use to harden and protect your WordPress sites.
1. Change your WordPress database prefix
All of your site’s critical information is stored in its database. So, naturally, that’s a prime target for hackers. Unfortunately, the default prefix for the WordPress database (wp_prefix) makes it easier for hackers to guess the table names it includes, which can lead to SQL injections.
That’s why it’s smart to change the database prefix when you install WordPress. Before you do this, we suggest backing up your website. After that, you can change the prefix in a few simple steps.
If you’re changing it during your installation of WordPress, you can do so by editing the wp-config.php file located in the site’s root directory. Instead of keeping the prefix as wp_, you can change it to something like wp_z9876543. The resulting line would look like this:
1 $table_prefix = 'wp_z9876543_';
The next step is to access phpMyAdmin from your cPanel, and change the database table names to the newly-defined prefix. Once you open the phpMyAdmin control panel, click on the SQL tab. This will open an SQL Query window:
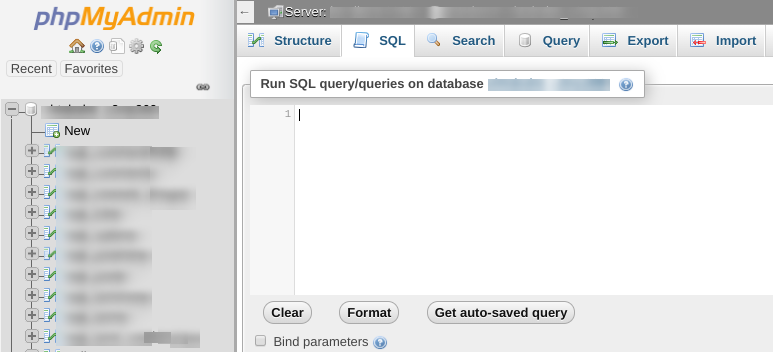
There should be 12 WordPress tables by default. Instead of changing them all manually, you can save time by running this query to automatically update them all at once:
RENAME table`wp_commentmeta`TO`test_commentmeta`;
RENAME table`wp_comments`TO`test_comments`;
RENAME table`wp_links`TO`test_links`;
RENAME table`wp_options`TO`test_options`;
RENAME table`wp_postmeta`TO`test_postmeta`;
RENAME table`wp_posts`TO`test_posts`;
RENAME table`wp_terms`TO`test_terms`;
RENAME table`wp_termmeta`TO`test_termmeta`;
RENAME table`wp_term_relationships`TO`test_term_relationships`;
RENAME table`wp_term_taxonomy`TO`test_term_taxonomy`;
RENAME table`wp_usermeta`TO`test_usermeta`;
RENAME table`wp_users`TO`test_users`;
When you’re done, save your changes. Keep in mind that you might need to update the options table and user meta data as well.
2. Update your default admin username and password
When you install WordPress, you’ll be given a default username and password. The default username for administrators has traditionally been “admin”. Although WordPress now asks you to create a custom name, many still choose “admin” because it’s simple and easy to remember. However, it’s also very easy for attackers to guess.
One option for changing your username is to create a new admin username and delete the default one. You can do this by adding a new user with the Administrator role in your WordPress dashboard:
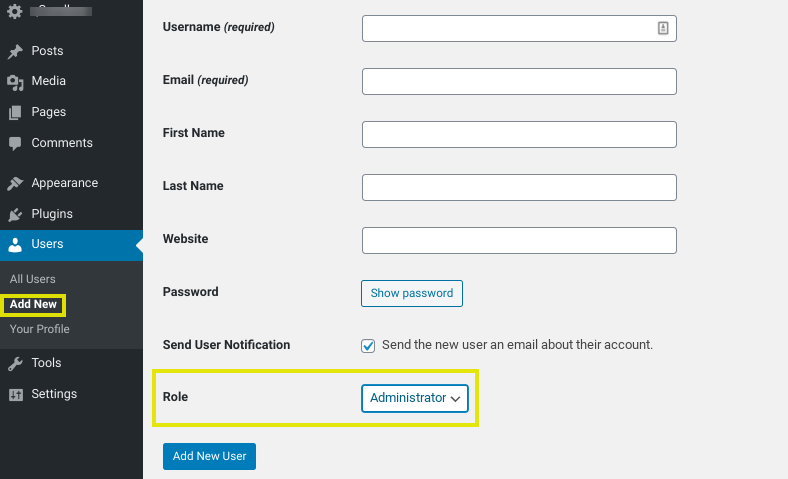
You’ll need to use a different email address than the one you used for the original administrator account. After adding the user, log out of your website and log back in with the new username you just created. Then go to Users and delete the old administrator account.
Another important step to harden your WordPress site is to use a strong password. To generate complex passwords, it’s helpful to use a password generator such as LastPass:
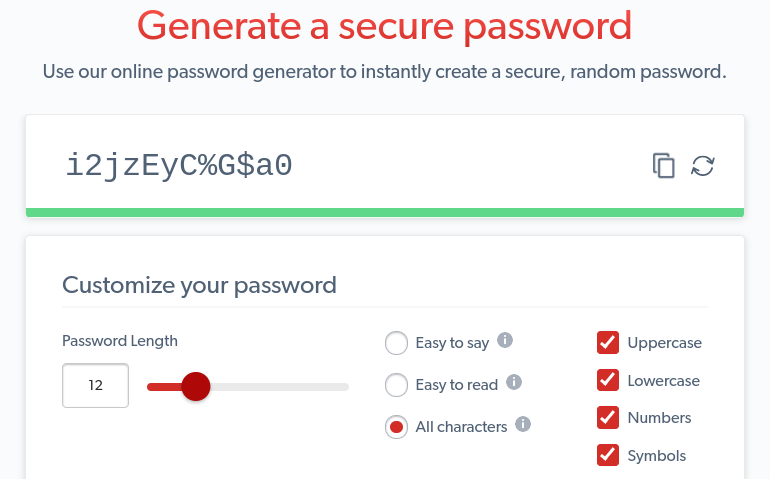
This is essential for any user who has access to the WordPress site. Therefore, you might consider making it mandatory for users to employ a tool like this when creating their account passwords.
3. Set up a Web Application Firewall (WAF)
A Web Application Firewall (WAF) can help lock down URL paths, in order to block cybercriminals from getting to your website. In a nutshell, WAFs track IP addresses and identify those that are associated with malicious activity.
There are two levels of firewalls: DNS and application. DNS-level firewalls will route site traffic through cloud proxy servers, which can help reduce server loads. Application firewalls analyze traffic after it reaches your server. However, it does so before most of the WordPress scripts are loaded.
There are many different WAFs of both types that you can use. A popular one that we suggest using is Sucuri:

Sucuri is a DNS-level firewall. It also includes malware cleanup and blacklist removal features. You can visit the developers’ website to learn more about how to use this WAF to harden your website.
4. Implement Two-Factor Authentication (2FA) and limit login attempts
Over the years, we’ve experienced the growing popularity of brute-force attacks among hackers. Put simply, this is a method cyber criminals use to gain entry into your site through a series of repetitive attempts to guess your password.
The two steps you can take to help prevent these types of attacks are enabling Two-Factor Authentication (2FA) and limiting login attempts. 2FA adds an additional layer of security to your website. Even if someone knows your username and password, they would also need access to your personal device in order to log in to your WordPress dashboard.
At ManageWP, we make it easy to integrate Google Authenticator with your mobile device for 2FA. You can install Google Authenticator on your mobile phone, and then connect the ManageWP dashboard to it in order to auto-generate a passcode.
Limiting login attempts is also a smart idea, because it will prevent hackers from using an unlimited number of attempts to guess your usernames and passwords. To do this, you can use a plugin such as WP Limit Login Attempts:
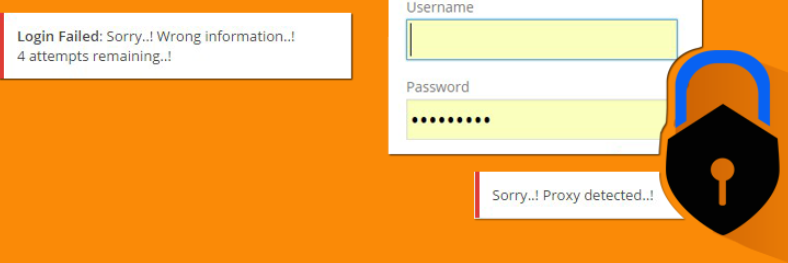
This plugin is free and easy to use. Once you install and activate it, you can go to the Settings page to choose the number of attempts to allow. You can also configure the CAPTCHA attempts as well.
5. Monitor your site and conduct malware scans regularly
There are many different types of malware attacks to be on the lookout for. Some of the most common forms include:
- Trojan horses
- Spyware
- Ransomware
- Viruses
Due to the overwhelming amount of malware attacks, it’s crucial to make conducting regular scans a part of your WordPress hardening strategy. To do this, and to make malware protection easier overall, we suggest using our ManageWP Security Check tool:
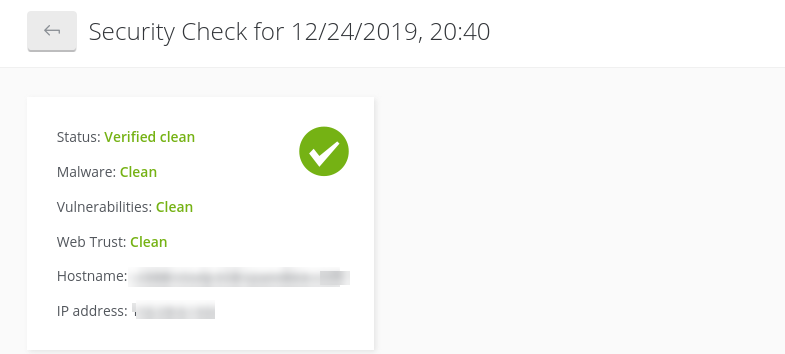
We use Sucuri for our security scanner, which as we mentioned before includes both malware and blacklist scanning. With our Security Check tool, you can easily monitor your sites to ensure that they are clean. If any files do become infected, you will be notified promptly and be able to take action in a timely manner.
This is also a great option if you manage multiple websites. In just one click, you can scan multiple sites at once. Plus, you have the option of choosing between free and premium versions of the tool.
When you sign up for a free ManageWP account, you will be able to perform security scans on all of your sites, and be notified if any malware is detected. By upgrading to the premium version, you can also schedule and run automated security checks, which can save you a lot of time.
Conclusion
You could have the most secure site on the planet, and still have a hacker exploit a vulnerability. However, that’s no reason to take safeguarding your sites any less seriously. If anything, it should motivate you to be extra thorough, in order to protect against as many threats as possible.
In this post, we covered six tips you can use for hardening and protecting your sites:
- Change your WordPress database prefix.
- Update the default admin username and password.
- Set up a WAF.
- Implement 2FA and limit login attempts.
- Run the latest versions of WordPress and PHP.
- Monitor your site and conduct malware scans regularly.
Do you have any questions about securing your WordPress sites? Let us know in the comments section below!
Image credit: Pexels.
Leave a Reply