Growing your development business is a serious challenge. Competition is fierce, and it can be hard to stand out from the crowd. If you don’t ‘wow’ your WordPress clients with your professionalism, they may turn elsewhere.
By making a few simple changes, you can take your development services to the next level. With the right strategies in place, you can hang on to the customers you already have, and gain new ones through testimonials and word-of-mouth marketing.
In this post, we’ll share seven easy ways to impress clients and stand out from your competition. Let’s get started!
Why it’s important to impress clients and appear professional
With WordPress powering 43.2% of the web, development for this platform is a competitive market. To succeed, you need to demonstrate why clients should trust you with their websites.
However, you shouldn’t focus solely on impressing new customers. It’s generally accepted that acquiring a new client is far more costly than retaining an existing one. If you don’t continuously strive to provide a high-quality experience, then you risk losing your clientele to competitors.
Things to focus on to wow potential and existing customers
- A personalized experience. You should be willing to go the extra mile in order to exceed client expectations. This may involve presenting clients with features they didn’t know they needed, or continuously striving to improve their overall WordPress experience.You’ll achieve this by knowing your client inside out to fully understand their needs, and determine goals, preferences, and pain points. Listen actively to their feedback and incorporate it into your solutions. And by doing so, you’ll be able to offer customized solutions that address their specific needs and challenges. This could involve suggesting features or functionalities they hadn’t considered but would greatly benefit from.
Furthermore, make sure to regularly stay updated on new trends, technologies, and best practices, and proactively implement them to improve your clients’ websites.
- A clear brand.By keeping your branding consistent across all touchpoints, including your website, communications, and deliverables you can provide a seamless customer experience. Even if you rely on third-party tools, techniques such as white labeling can create the impression of a full-service, entirely in-house team. This builds trust and credibility with clients and reinforces your professionalism.
On top of that, you can utilize white-labeling techniques (which we’ll explain in detail down below), to present your services as an integrated part of your clients’ brands. This creates a seamless customer experience and strengthens the perception of your expertise and capabilities.
- Unique value. You should offer clients something they can’t get elsewhere. This might include bespoke features like custom plugins, integrations or design elements that cater to their specific requirements. Or an exceptional level of customer service in the form of being responsive, proactive, and attentive to clients’ needs, and demonstrating genuine care and commitment to their success.
- A stress-free experience. Your customers may have varying degrees of WordPress expertise. A complicated dashboard can frustrate a client who doesn’t have in-depth knowledge of the platform. Design a user-friendly dashboard that caters to clients of all technical levels. Simplify the interface, provide clear instructions and guidance, and offer intuitive tools and features that make managing their WordPress site a breeze. As a bonus, offer customizable options that allow them to tailor the dashboard to their preferences and workflow. This empowers them to efficiently manage their website without feeling overwhelmed or frustrated.
By keeping these points in mind, you can attract new customers to your business. You can also turn your existing customers into loyal and enthusiastic brand advocates, who may even recommend your services to others.
7 easy ways to wow clients with your WordPress development
By impressing existing and potential customers, you can maximize your profits, garner valuable word-of-mouth marketing, and secure follow-up business. Here are seven easy ways to wow your WordPress development clients.
1. Create a Coming Soon page
Your client’s first contact with their future customers is important, think of it as their first impression of the target audience. For some, this means perfecting every part of their website before going public. Others may prefer to announce their intentions via a Coming Soon page:
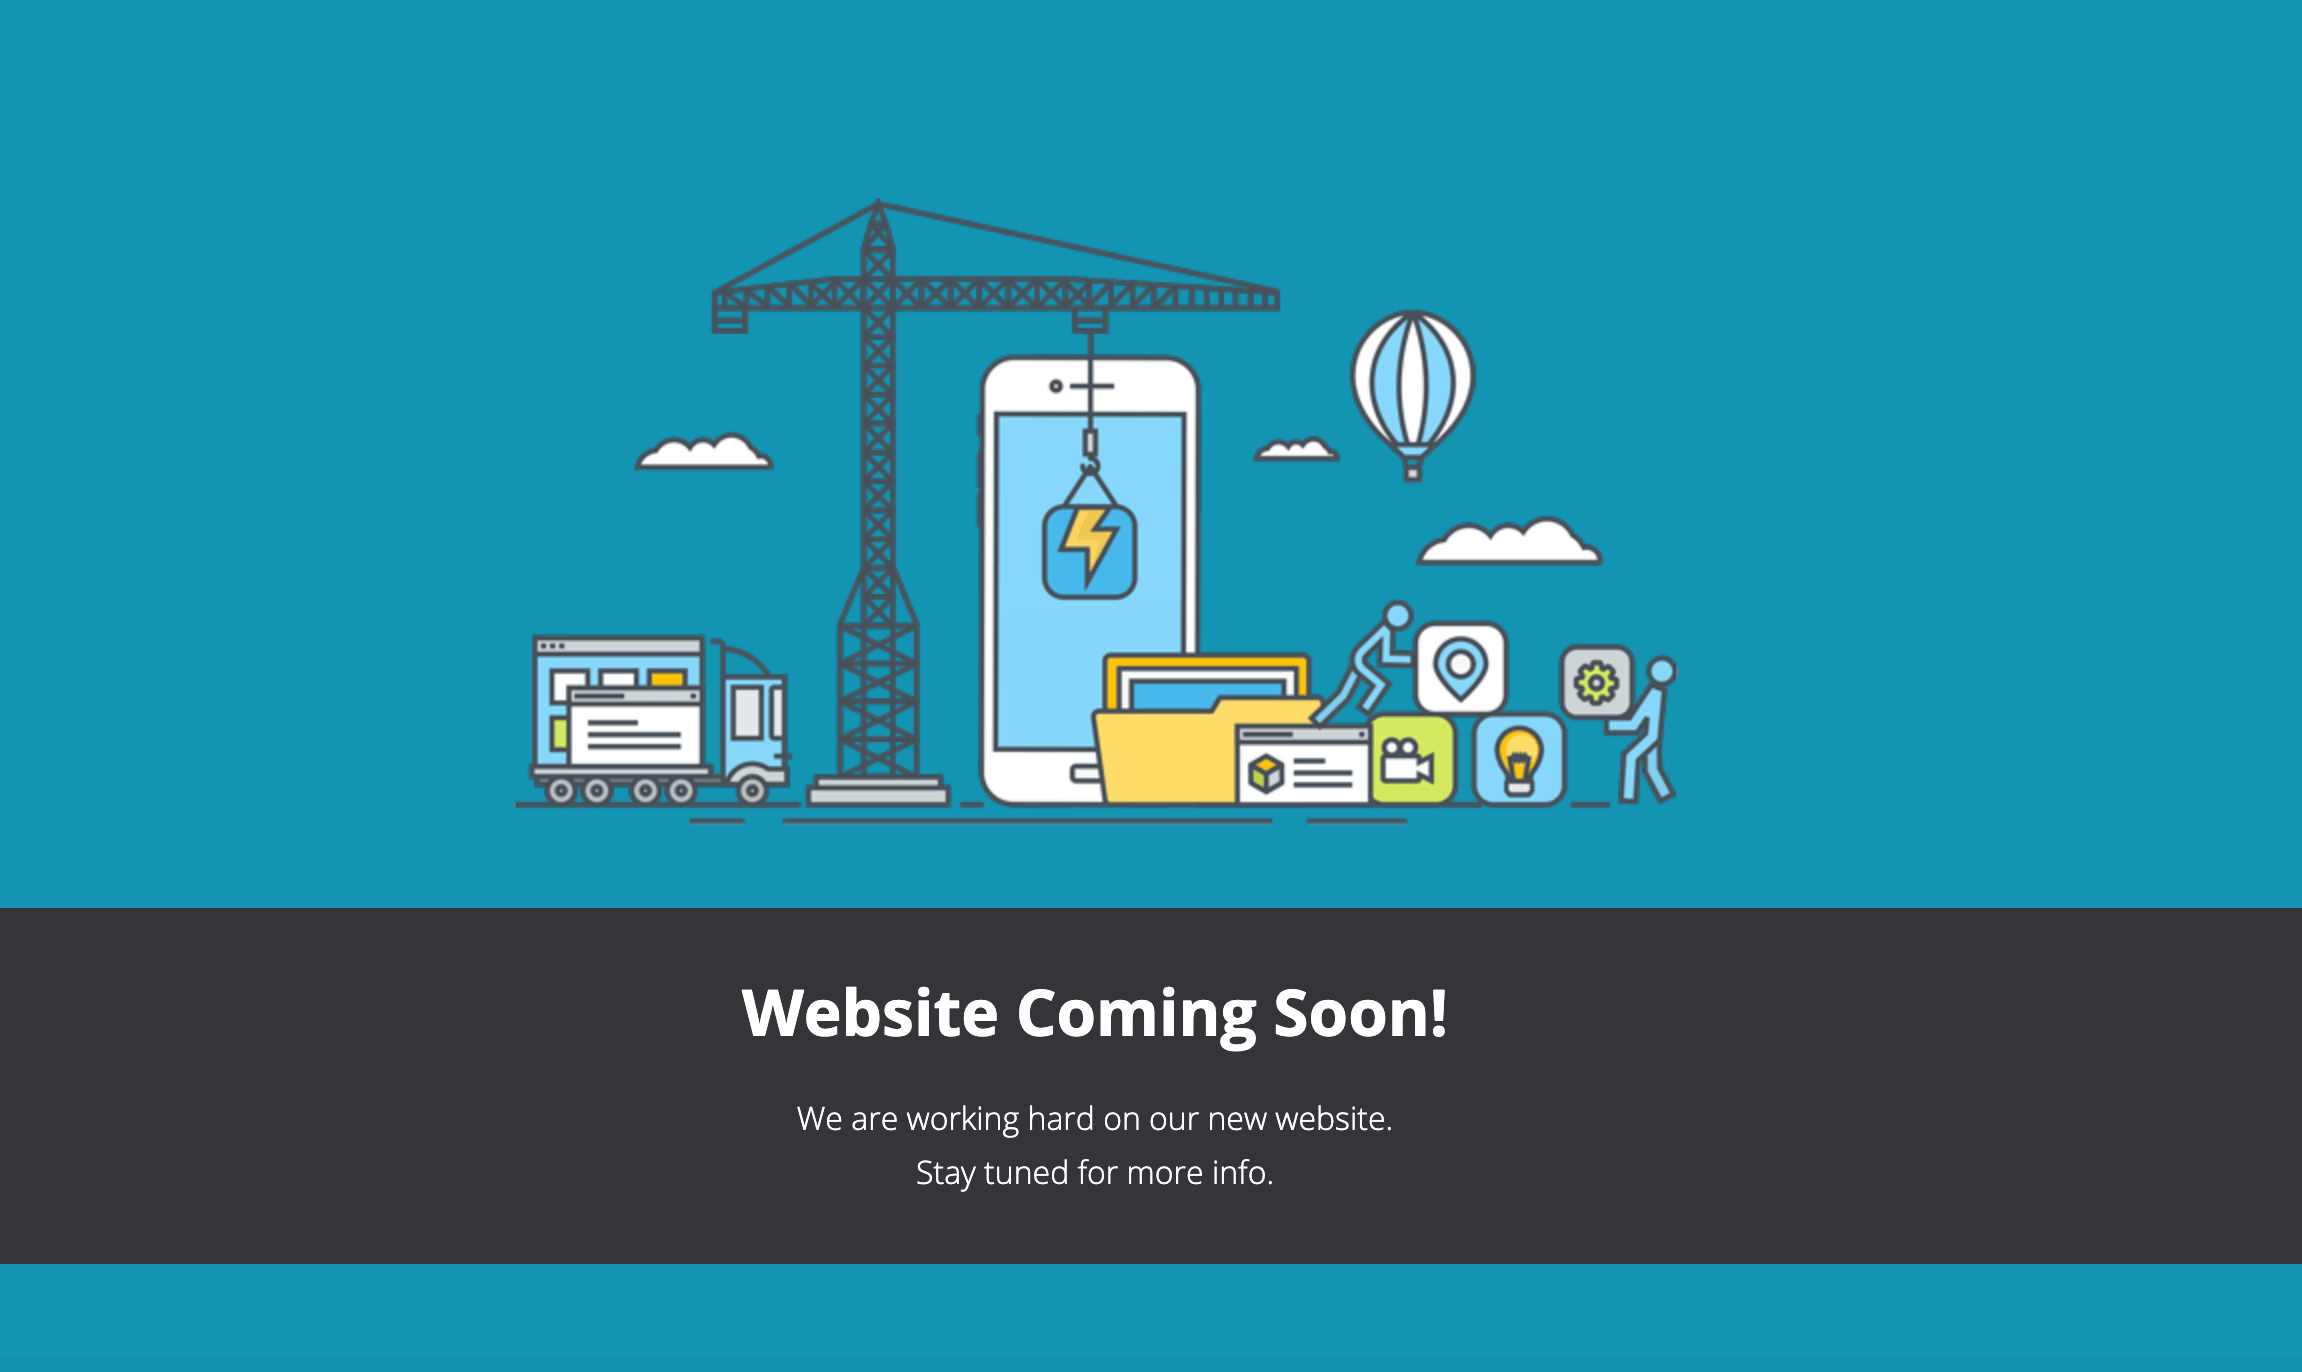
If your client wants to take the latter route, then you can quickly and easily create the requested page using a plugin such as Coming Soon. This will present your business as highly-responsive and always eager to accommodate your clients’ needs.
Alternatively, if you’re using ManageWP, then you can activate a professionally-designed Coming Soon page with the click of a button. In your Manage WP dashboard, navigate to Tools > Maintenance Mode. You can then select the template you want to use:
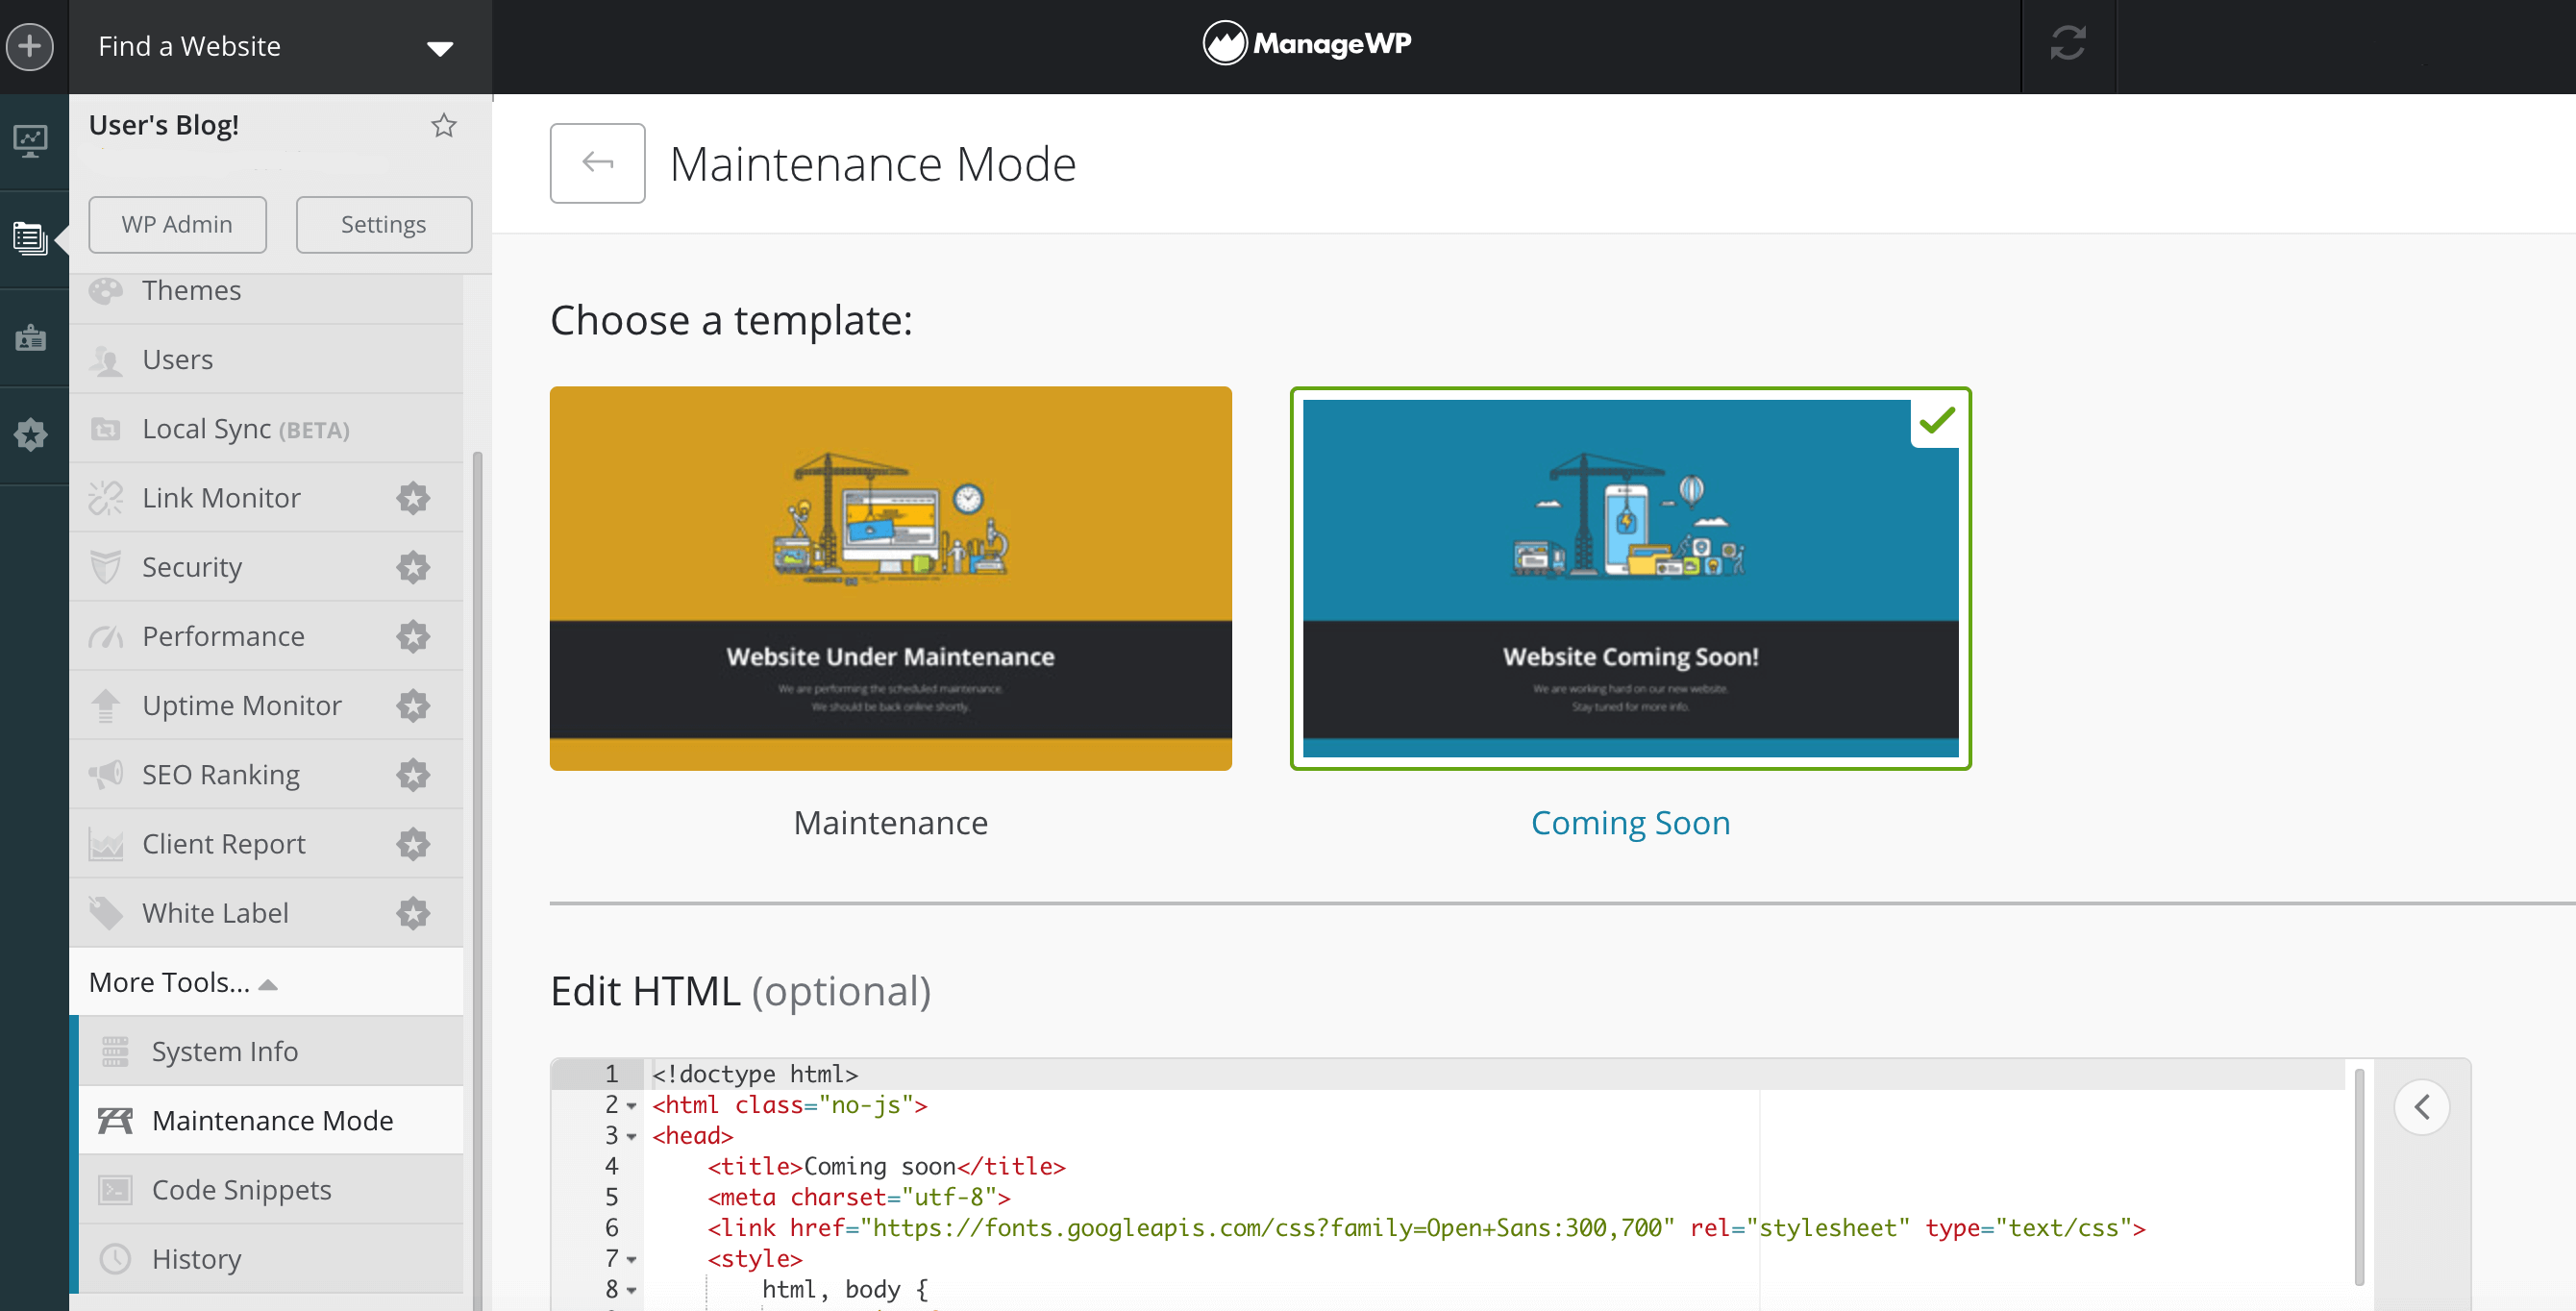
If you manage multiple websites, then you can remotely control all of your Coming Soon pages directly from your ManageWP dashboard. As soon as a client gives you the go-ahead, you can remove their Coming Soon page and launch their website without even having to log in to their site’s back end.
2. Customize the WordPress login screen
Out of the box, every WordPress website has the exact same login screen. This form may have everything your clients need to access their websites, but it won’t help them provide a consistent brand experience to their users. This is because a generic login screen doesn’t reflect your client’s brand identity:
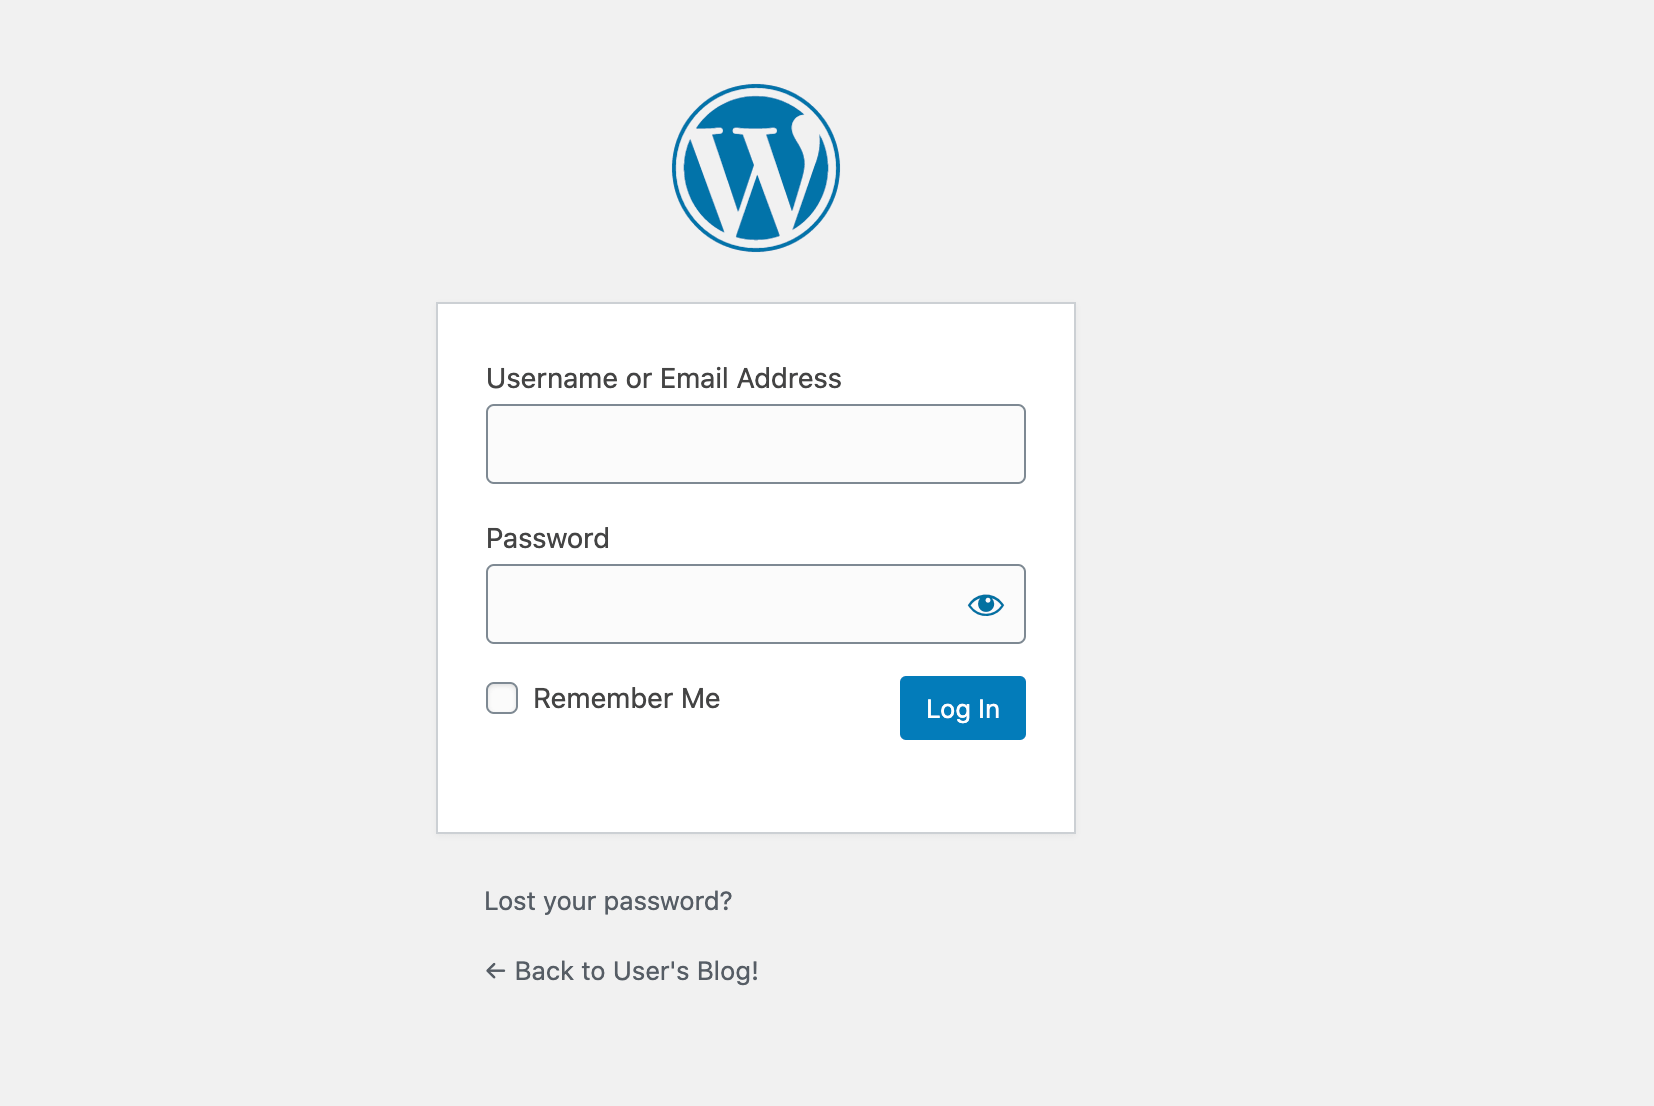
Customizing it adds a personal touch, enhances their brand image and reinforces brand consistency, improves user experience. On top of that, this presents you as a skilled WordPress professional. You can customize this screen using a plugin such as Custom Login Page Customizer or Custom Login Page Customizer by Colorlib.
3. Delete unnecessary widgets from the dashboard
By default, the WordPress dashboard contains multiple widgets. For less tech-savvy users, this can be a confusing introduction to the platform. Even clients who are familiar with it likely won’t appreciate a screen that’s cluttered with unnecessary information and features:
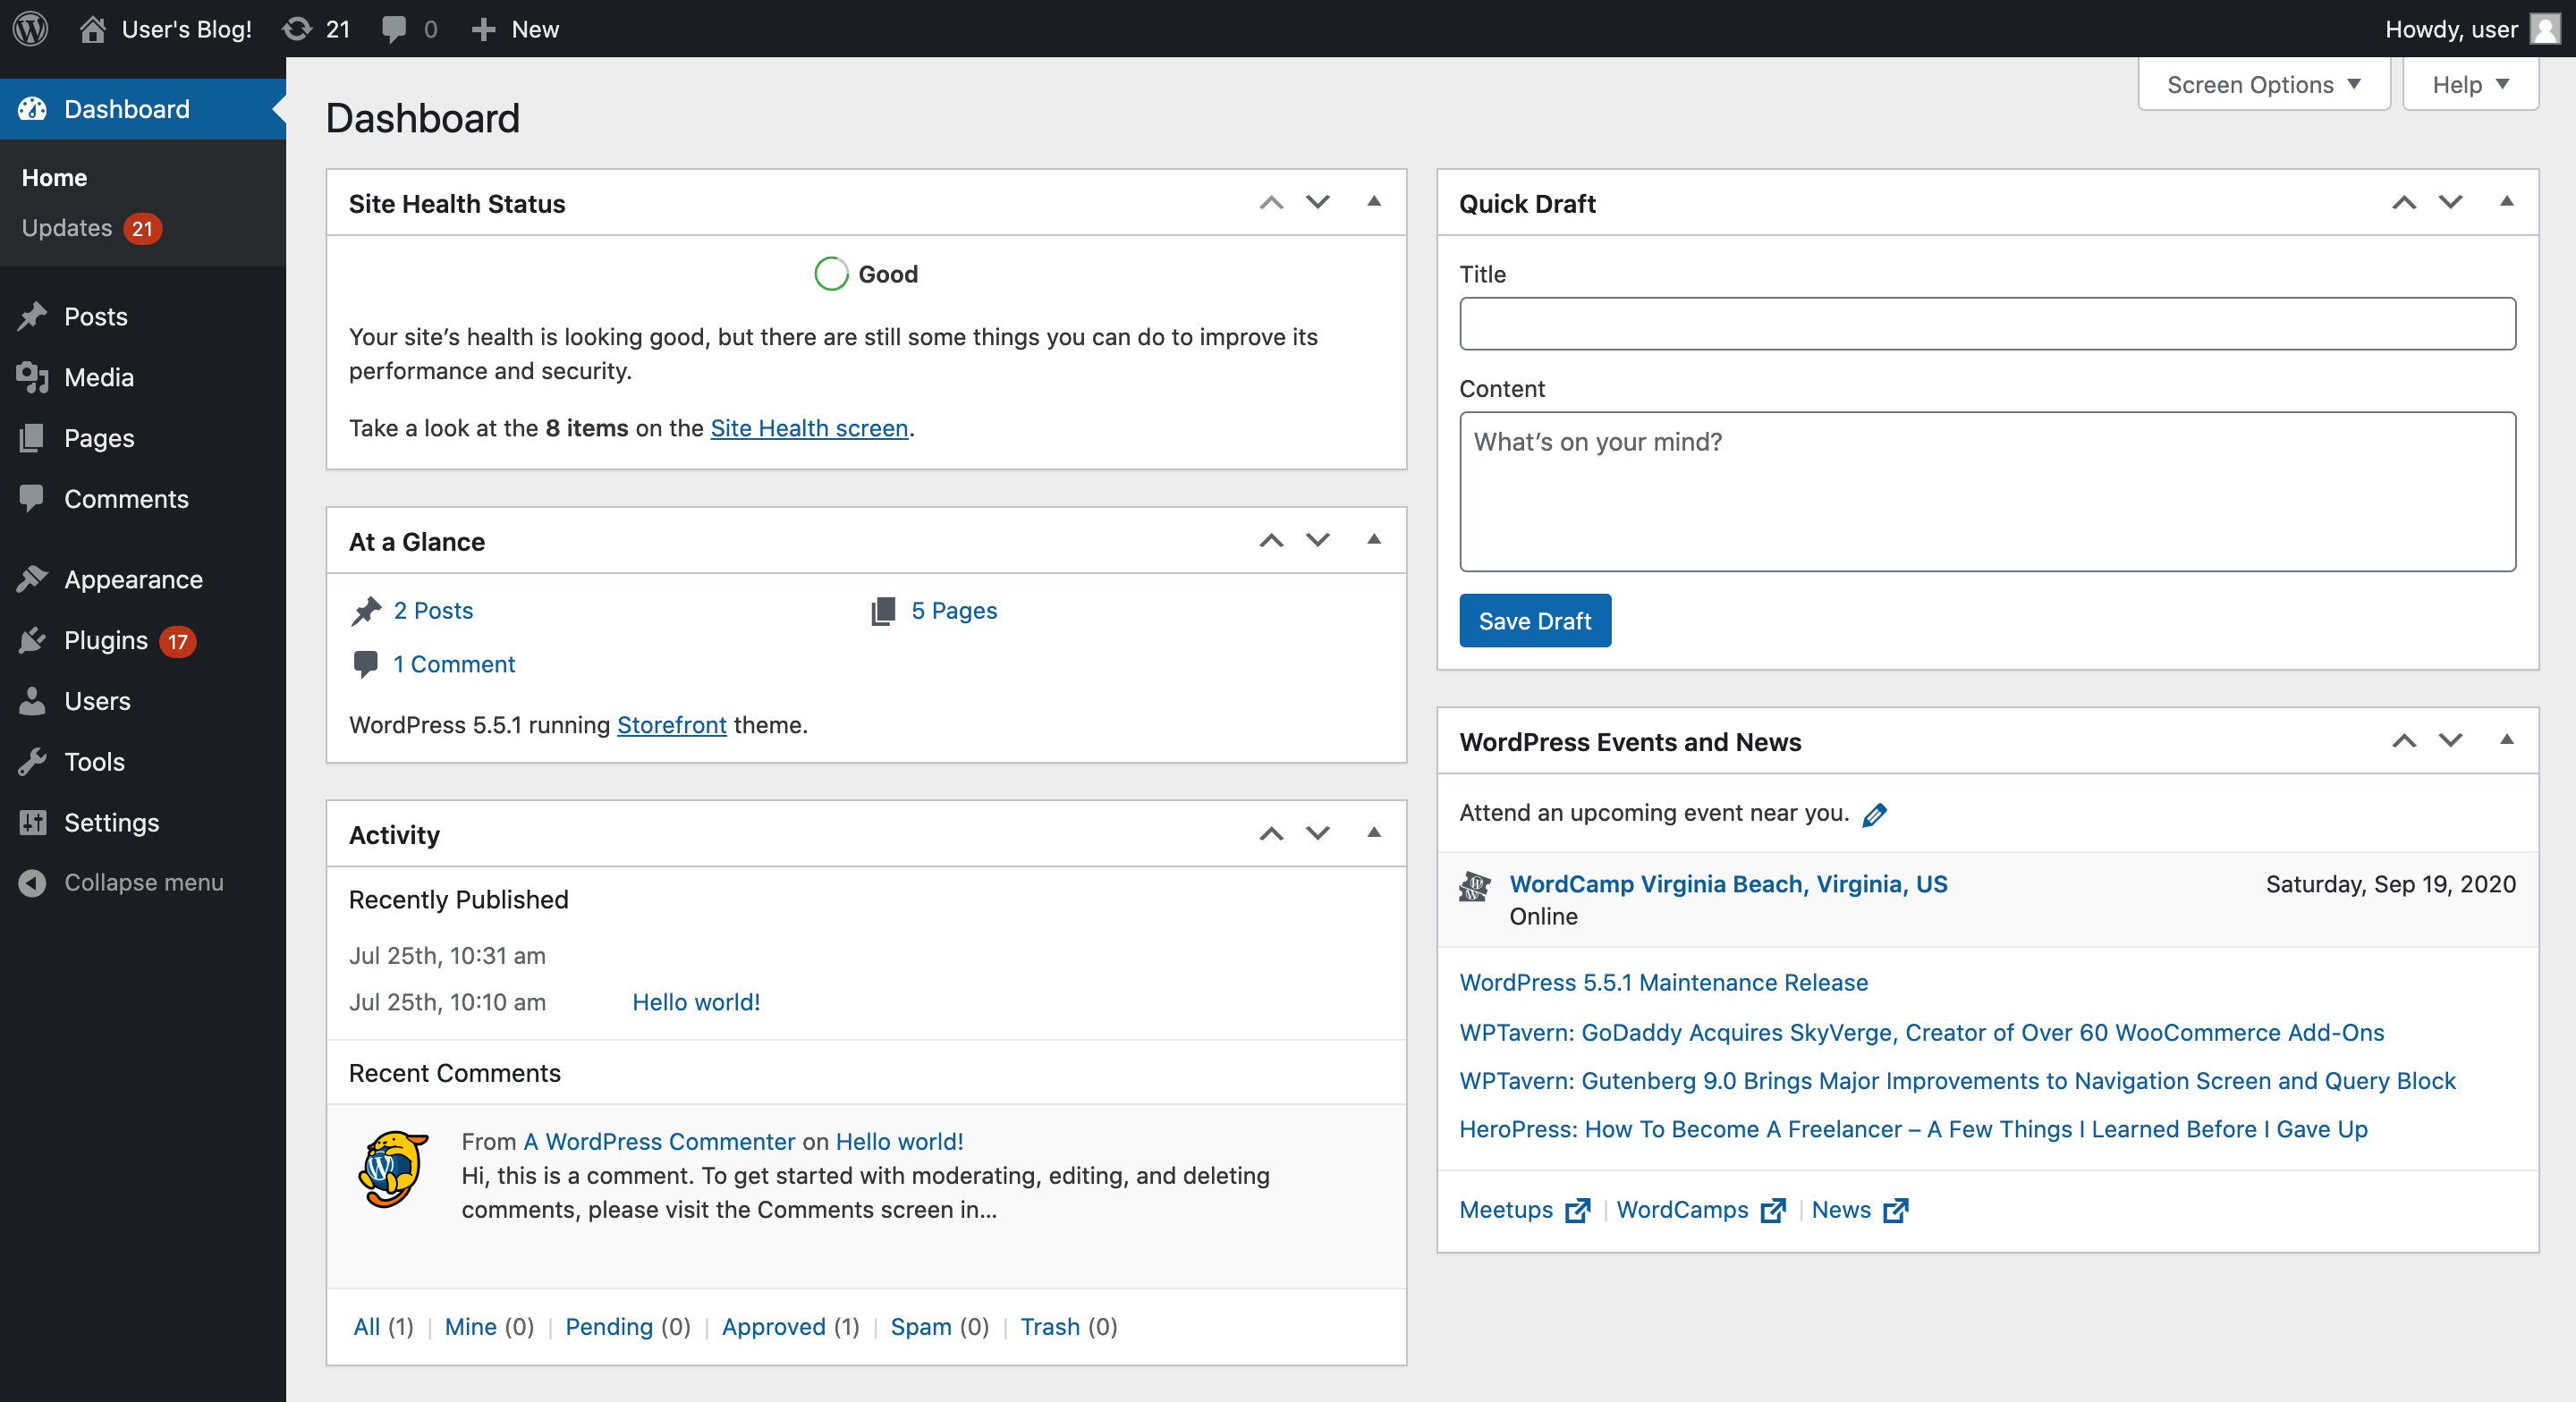
By removing excess widgets, you can populate the dashboard with only the information your client actually needs. Alternatively, you can leave the dashboard blank and enable them to add their own features or stick with a clean interface.
To remove the default widgets, you’ll need to edit the site’s theme files. Before proceeding, we recommend creating a backup so you have something to restore in case anything goes wrong.
Then, navigate to Appearance > Theme Editor in your client’s WordPress dashboard. On the right side of the screen, select the functions.php file:
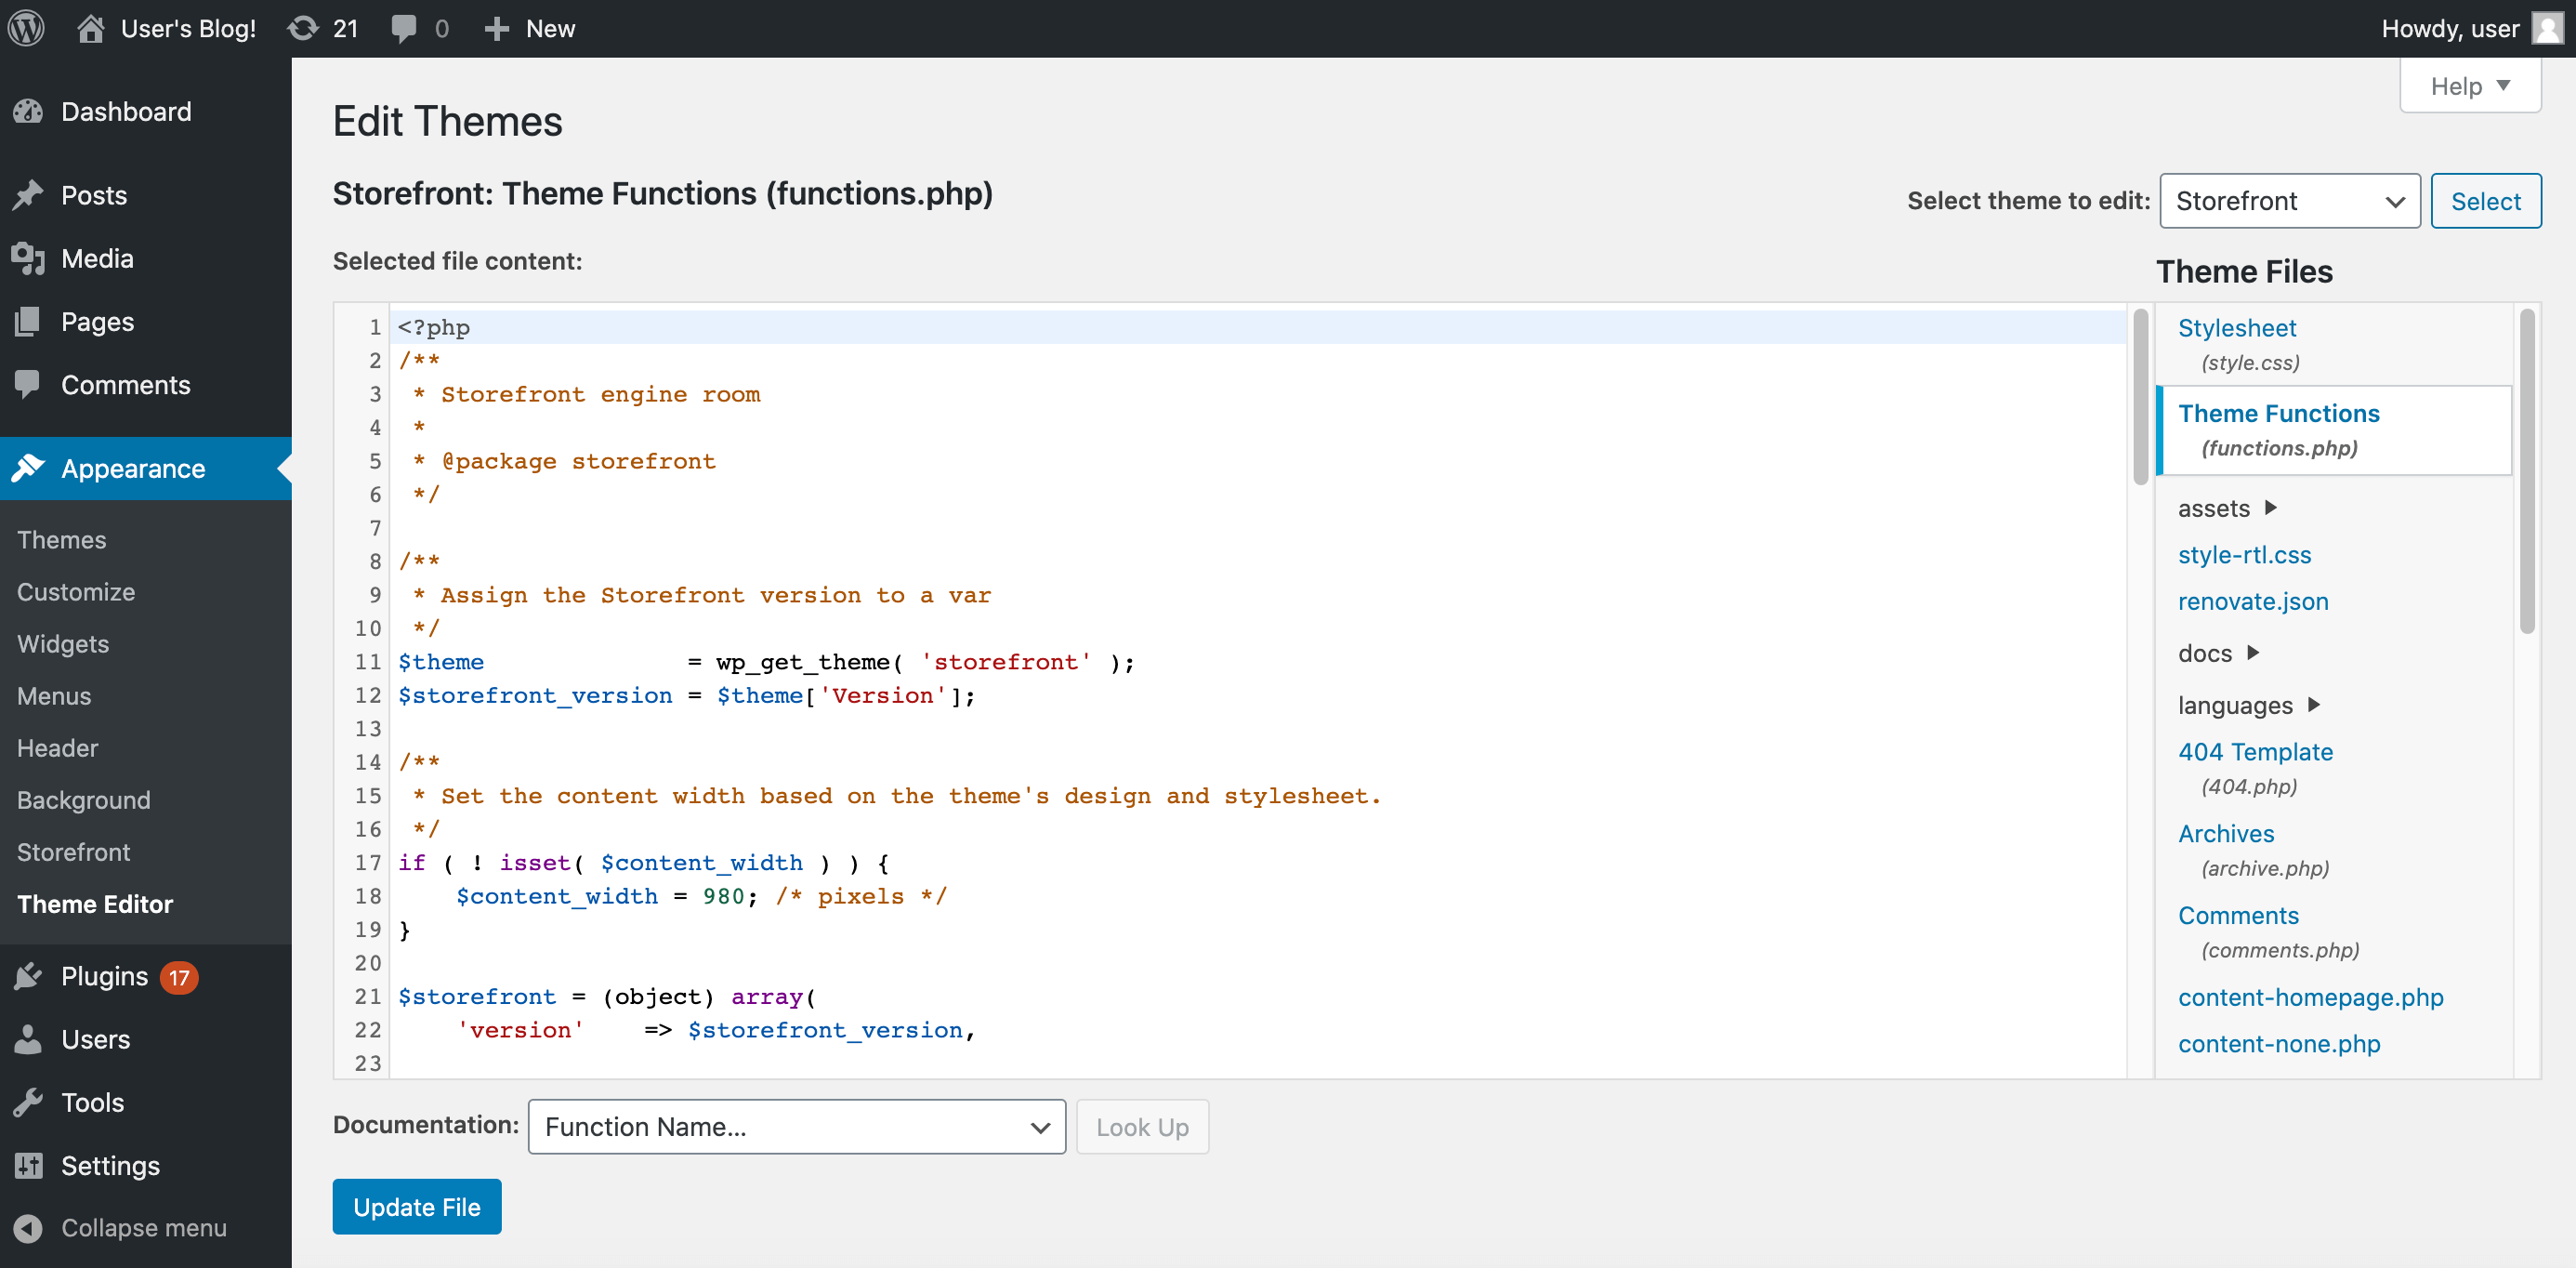
At the bottom of this file, add the following snippet:
function remove_dashboard_widgets() {
global $wp_meta_boxes;

unset($wp_meta_boxes['dashboard']['side']['core']['dashboard_quick_press']);
unset($wp_meta_boxes['dashboard']['normal']['core']['dashboard_incoming_links']);
unset($wp_meta_boxes['dashboard']['normal']['core']['dashboard_right_now']);
unset($wp_meta_boxes['dashboard']['normal']['core']['dashboard_plugins']);
unset($wp_meta_boxes['dashboard']['normal']['core']['dashboard_recent_drafts']);
unset($wp_meta_boxes['dashboard']['normal']['core']['dashboard_recent_comments']);
unset($wp_meta_boxes['dashboard']['side']['core']['dashboard_primary']);
unset($wp_meta_boxes['dashboard']['side']['core']['dashboard_secondary']);
unset($wp_meta_boxes['dashboard']['normal']['core']['dashboard_activity']);
unset( $wp_meta_boxes['dashboard']['normal']['core']['dashboard_site_health'] );

}

add_action('wp_dashboard_setup', 'remove_dashboard_widgets' );
Then click on the Update File button. If you navigate to the dashboard, the default widgets should now be hidden.
You may need to adapt this snippet to hide widgets provided by plugins or the client’s theme. Also, keep in mind that that this code will be overwritten during theme updates unless you use a child theme.
4. Code your own custom dashboard widgets
Once you’ve removed the default widgets, you can fill this space with custom widgets. You can tailor them to contain exactly the information and features each client needs.
You can create custom widgets using a plugin such as the Dashboard Widgets Suite. Alternatively, you can code them yourself. Again, we recommend creating a backup and activating a child theme if you’re going to edit site files.
To do so, return to the Theme Editor and open the functions.php file. You can use the following code as an outline:
/**
* Add a custom widget to the WordPress dashboard.
*/
function wp_add_dashboard_widgets() {
wp_add_dashboard_widget(
'wp_dashboard_widget', // Widget URL
'This is a custom widget', // Widget title
'wp_dashboard_widget_function' // The display function
);
}
add_action( 'wp_dashboard_setup', 'wp_add_dashboard_widgets' );

/**
* Create the dashboard widget function.
*/
function wp_dashboard_widget_function() {
echo "I'm a custom dashboard widget";
}
You should replace the widget URL, widget title, and display function sections with your own code. Once you’re happy with it, click on Save Changes. Your custom widget will appear in the WordPress dashboard:
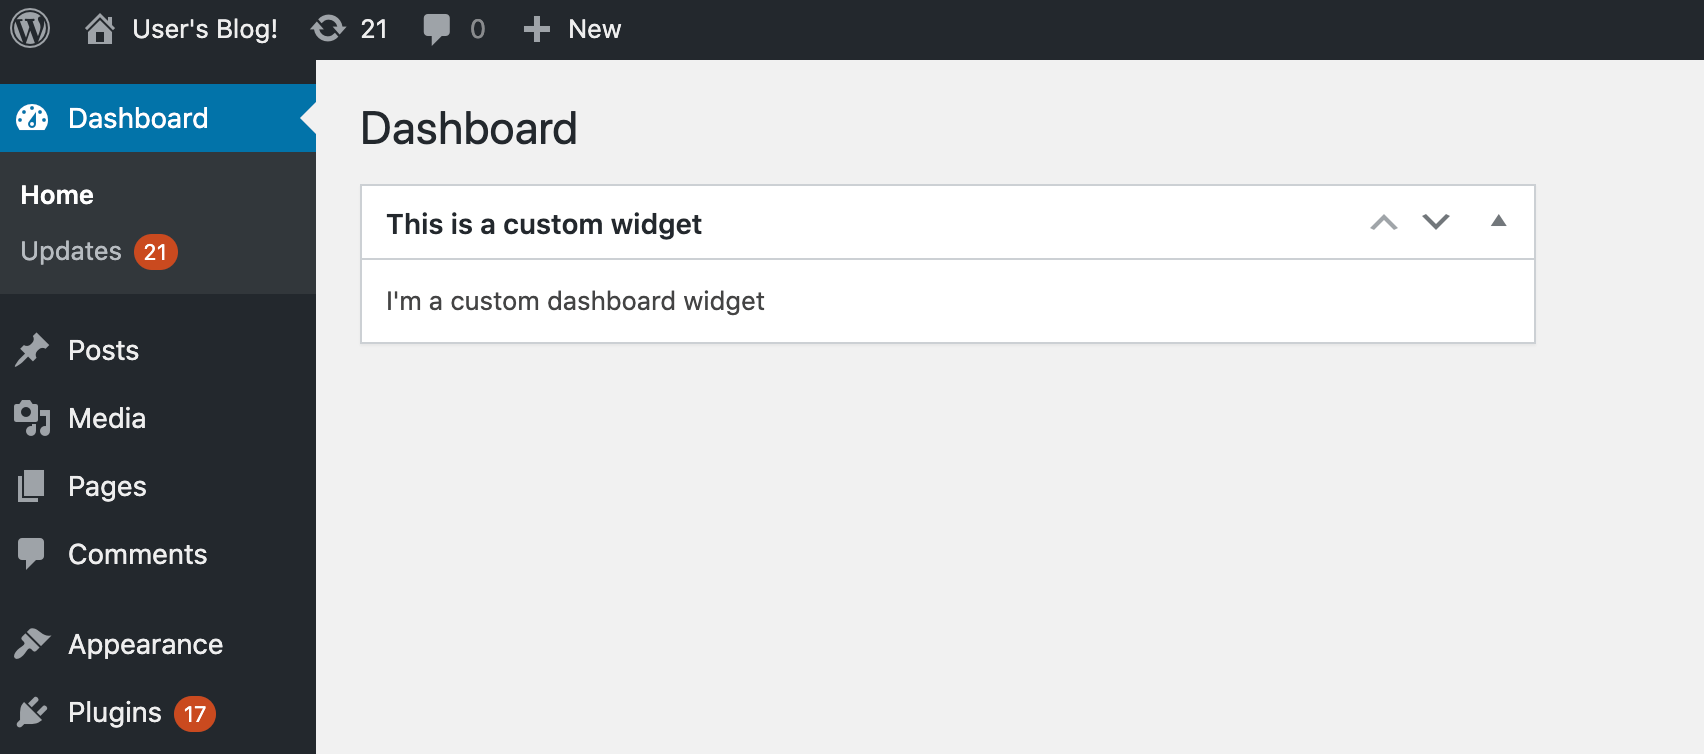
You can repeat these steps to add more widgets. This can improve the site’s overall UX while providing clients with unique and personalized service.
5. White label all third-party plugins, tools, and services
By incorporating third-party tools, plugins, and services, you can free up time to spend on providing the best possible experience for your clients. However, clients may be confused or unhappy with other branding visible throughout their sites’ back ends.
If you use third-party solutions, you can still provide a seamless experience by white labeling them. Many WordPress plugins and tools offer this functionality, including ManageWP.
To white label our plugin, open your ManageWP dashboard and click on your username at the top of the screen. Then click on White Label.
Here, enter a new plugin name, description, author name, and author URL. As you make changes, the WordPress Preview will update to reflect them:
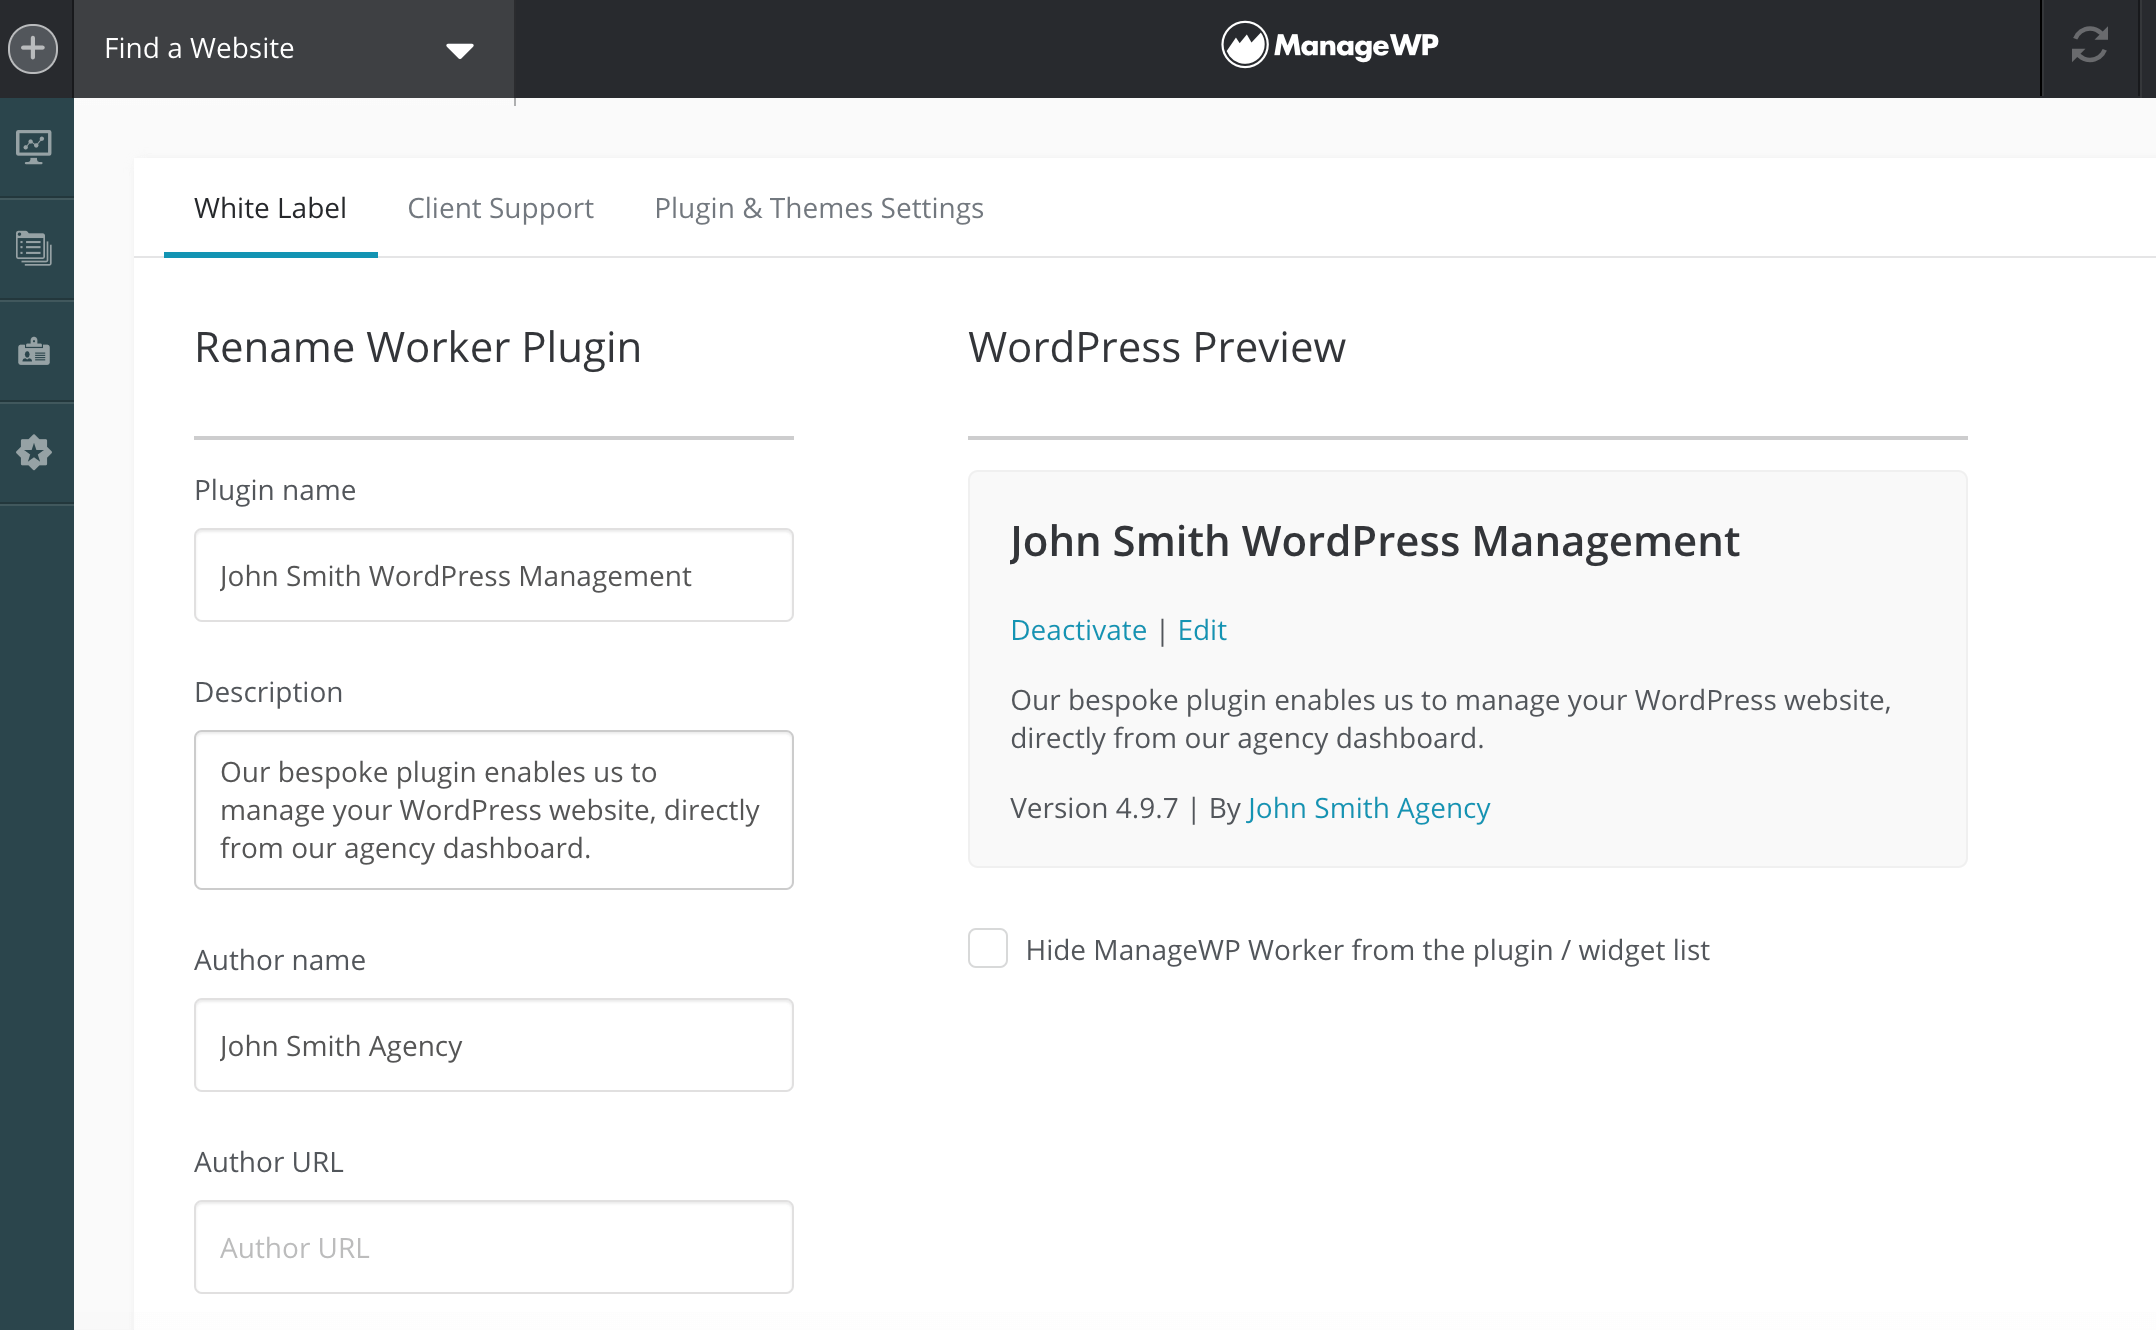
When you’re happy with the information you’ve entered, click on Save Changes. The ManageWP plugin will now appear in clients’ dashboards with your unique branding.
6. Provide easy access to professional support
Your clients will appreciate the ability to contact you with questions or support requests. Instead of requiring them to write an email or pick up the phone, you can add support forms to their WordPress dashboards.
To do so, open ManageWP’s White Label settings and click on the Client support tab:
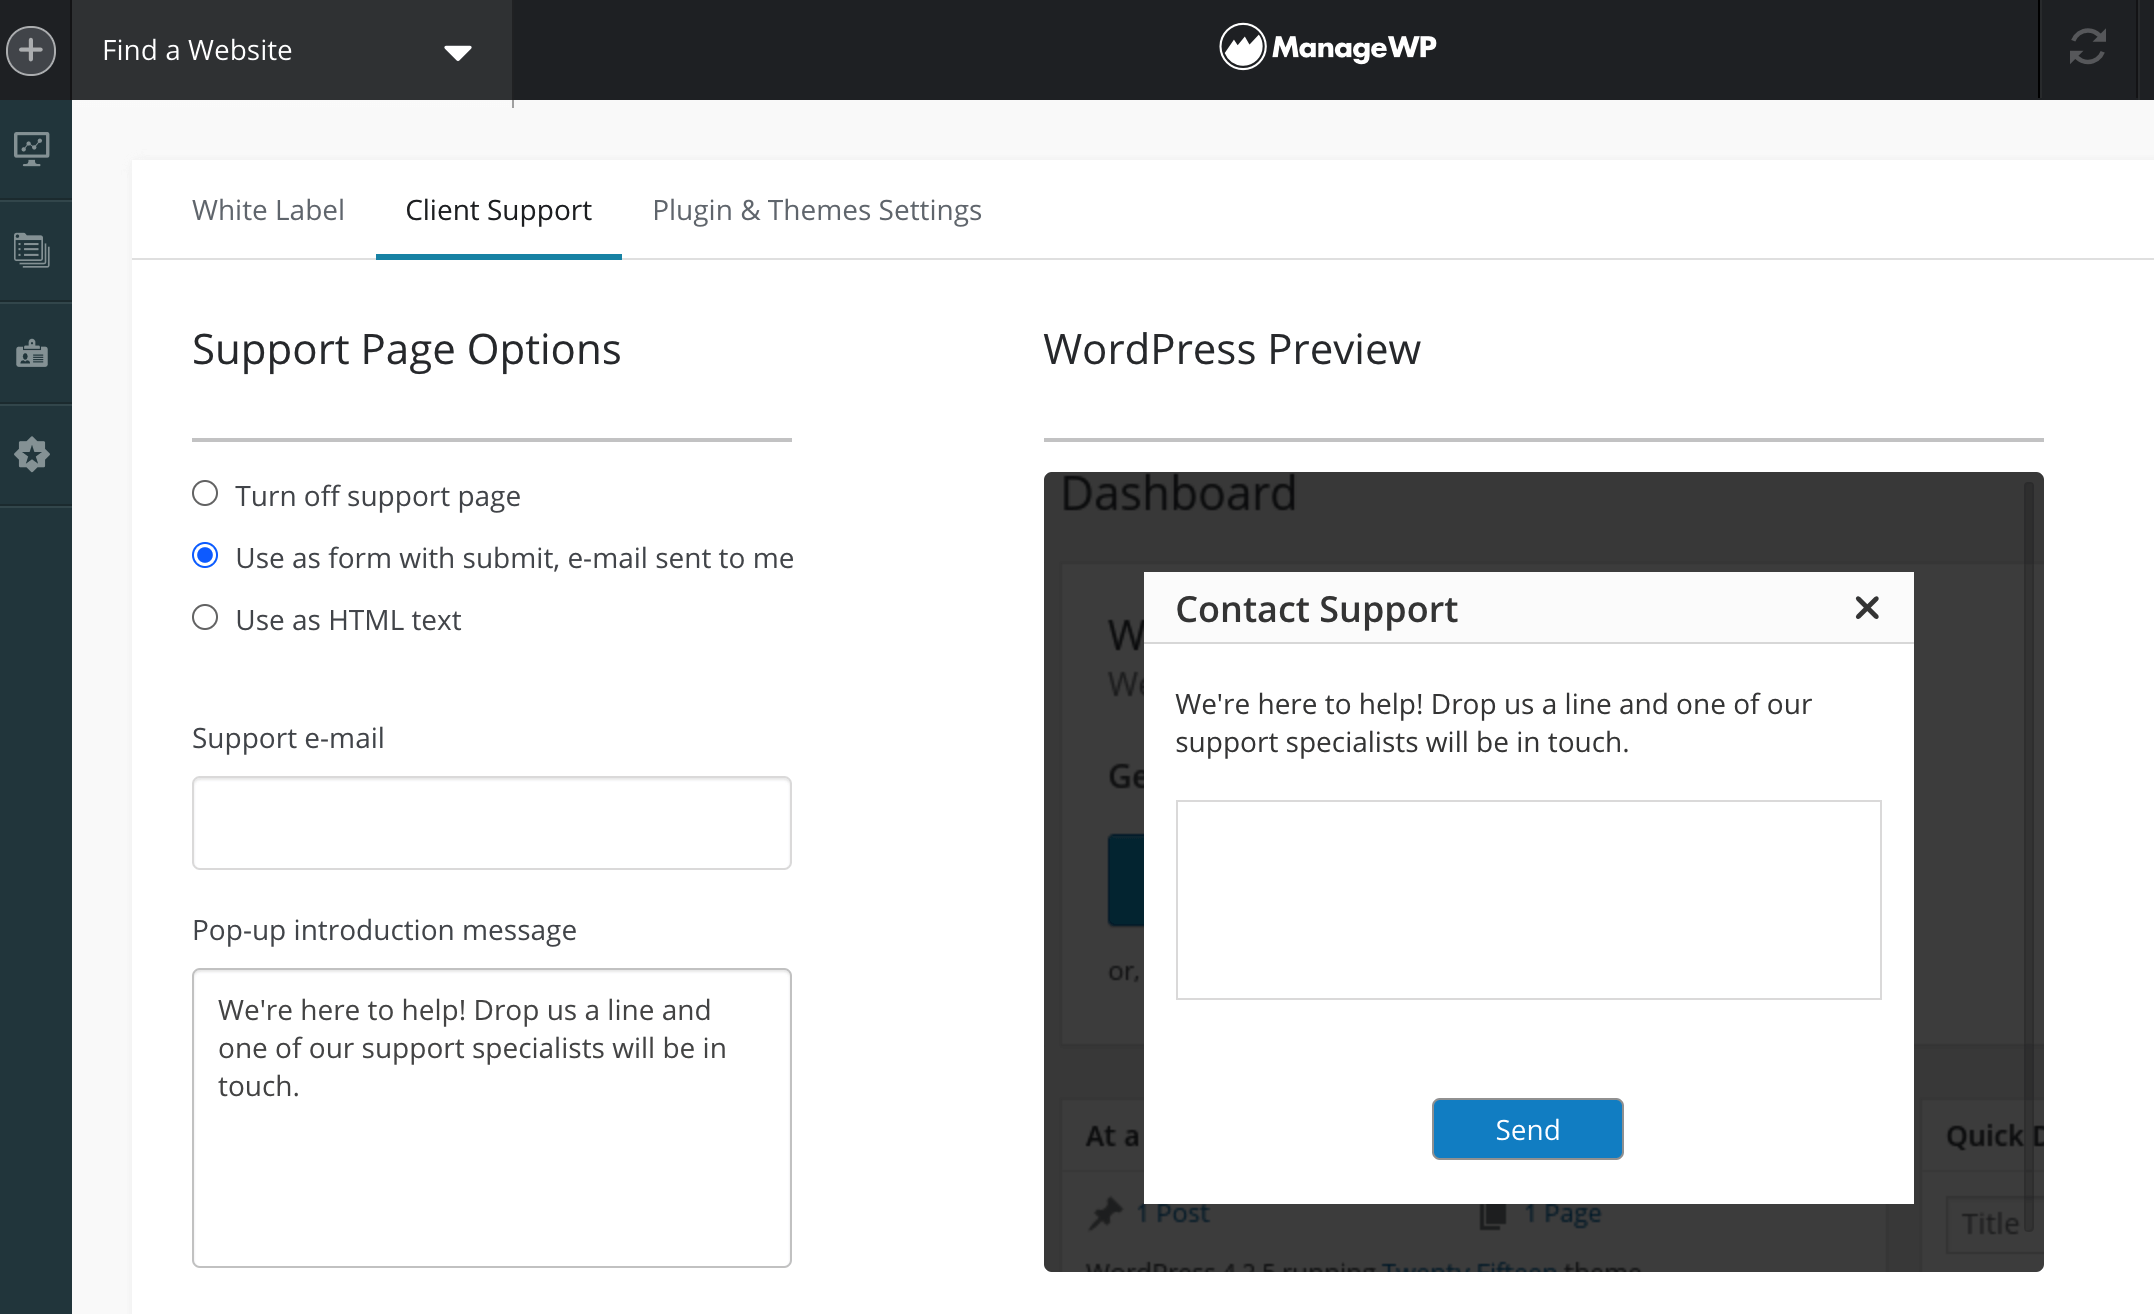
Follow the instructions to build your form. Your clients will then be able to contact you directly via a Support tab in their WordPress dashboards.
7. Prove your value with client reports
Some clients may wonder if they’re investing too much in their websites. You can prove you’re worth every cent by creating professional, data-driven reports. These should contain breakdowns of the tasks you’ve completed and the results you’ve achieved.
You can use ManageWP to generate reports that include information such as the total number of updates, security checks, and backups executed, plus performance statistics including the site’s PageSpeed Grade and YSlow Grade:
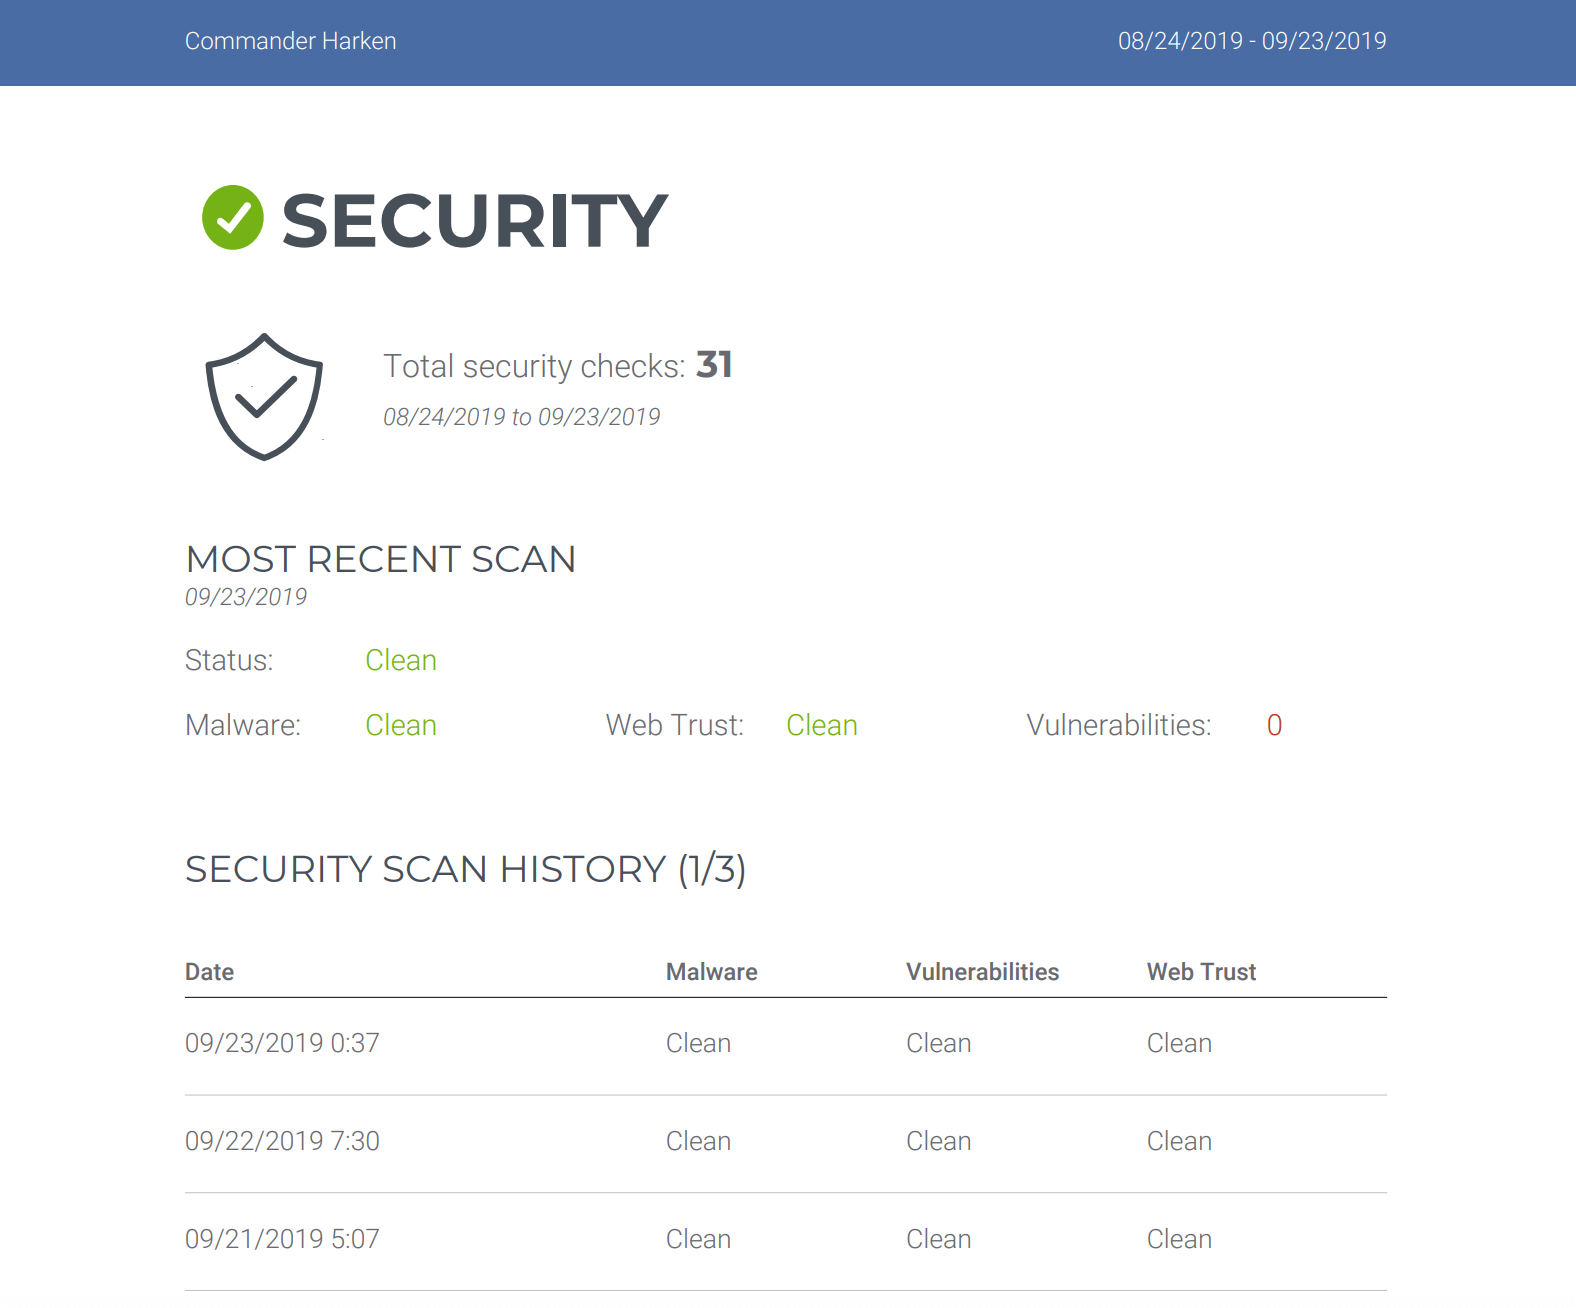
These reports are fully customizable, so you can add your own logo and messaging to reflect your branding. You can also generate reports as PDFs, or automatically schedule them to be sent from your email address.
Conclusion
WordPress development is a tough market. If you don’t impress your clients with your professionalism, then you risk losing them to your competitors and may struggle to attract new business.
To keep your clients happy and impressed, while growing your business, here’s a summary of what needs to be done:
Custom Dashboard Widgets:
- Why it Matters: The WordPress dashboard is often the first thing clients see when they log in. By replacing default widgets with custom ones, you’ll showcase your brand, highlight important information, and provide value-added features tailored to your clients’ needs.
- Benefits: Enhances the client’s experience, reinforces your brand identity, and demonstrates attention to detail and customization.
White Labeling Third-Party Tools:
- The Importance of White Labeling: When using third-party tools or services (like ManageWP), white labeling allows you to rebrand them with your own logo and branding elements, giving the impression of an in-house solution.
- Advantages: Enhances professionalism, builds trust, and reinforces your expertise in providing comprehensive solutions tailored to clients’ needs.
Regular Client Reports:
- Demonstrating Value: Sending regular client reports detailing key performance indicators, project progress, and completed tasks helps clients understand the value you provide and the impact of your work on their business.
- Benefits: Increases transparency, fosters trust, and reinforces your commitment to achieving clients’ goals and objectives.
While all this requires continuous effort in order to impress clients and differentiate yourself from competitors, we promise you it’s all worth it. Do you have any questions about growing your WordPress development business? Let us know in the comments section below, we’re here to support you every step of the way!
Featured image credit: Pexels.

Leave a Reply